Best Selling Products
How to create a red stamp in Photoshop
Creating a red stamp in Photoshop is one of the most commonly used methods today. By combining many tools in Photoshop together, you can create your own extremely simple red marks. Join Sadesign to learn how to create a very simple red stamp in Photoshop through the sharing below.
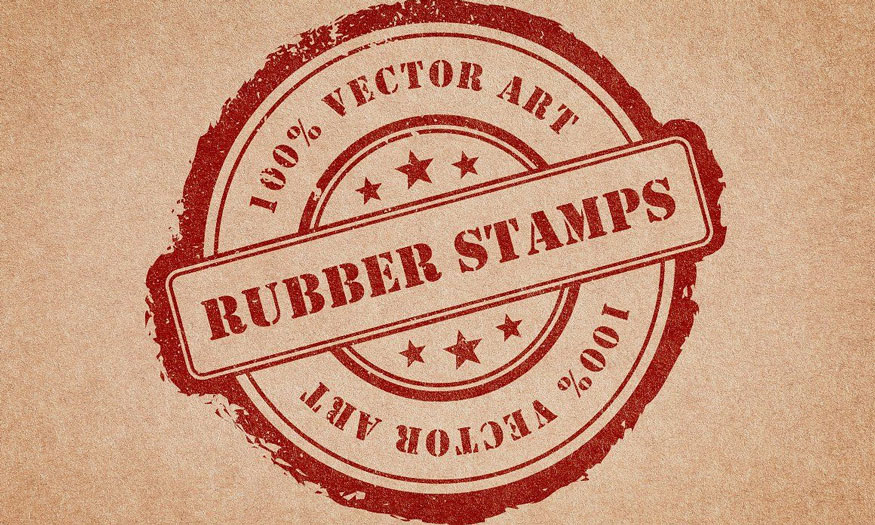
Creating a red stamp in Photoshop is one of the most commonly used methods today. By combining many tools in Photoshop together, you can create your own extremely simple red marks. Join Sadesign to learn how to create a very simple red stamp in Photoshop through the sharing below.
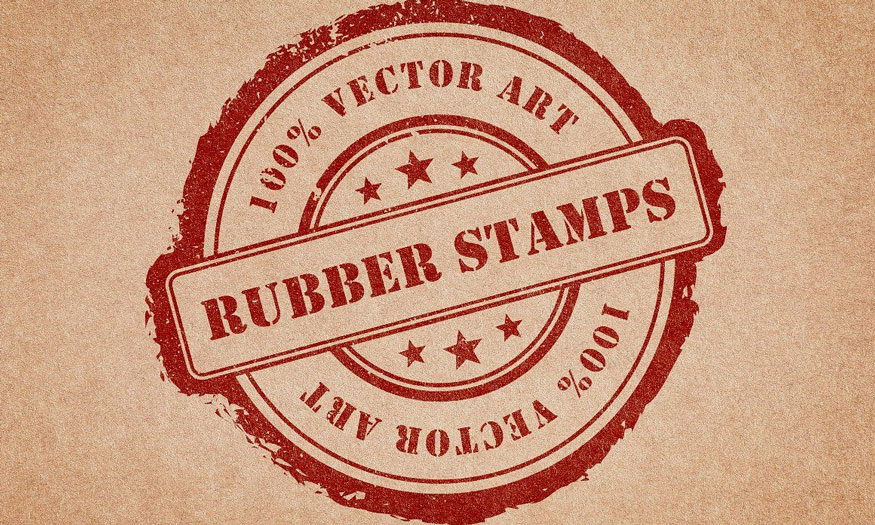
1. How to create a simple red stamp with Photoshop
You can absolutely create your own red seal for work purposes or for fun activities just with Photoshop. Let's refer to the simple steps to create a red stamp with Photoshop right below.
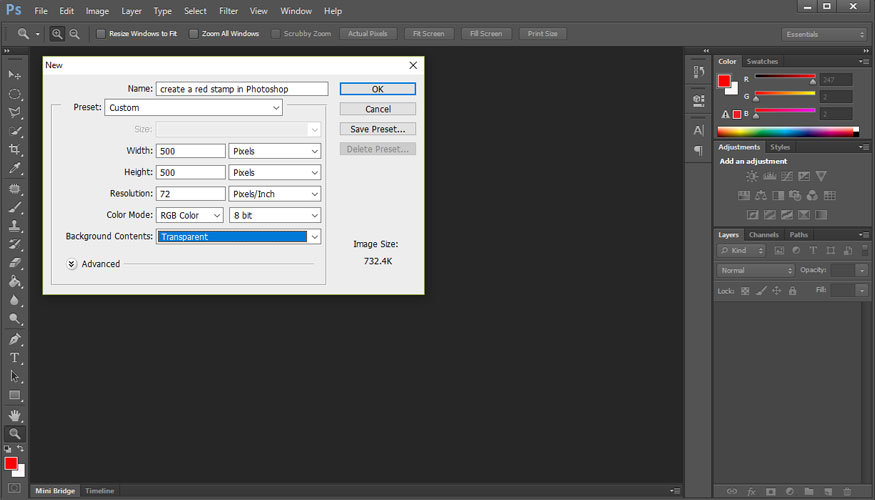
Step 1: To create a red stamp in Photoshop, the first thing we need to do is create a new working file. On the menu bar, select File => New... or press the keyboard shortcut Ctrl + N and enter the file size and background as white or transparent background as desired.
Here I choose the file size width: 250 pixels, height: 250 pixels and transparent background.
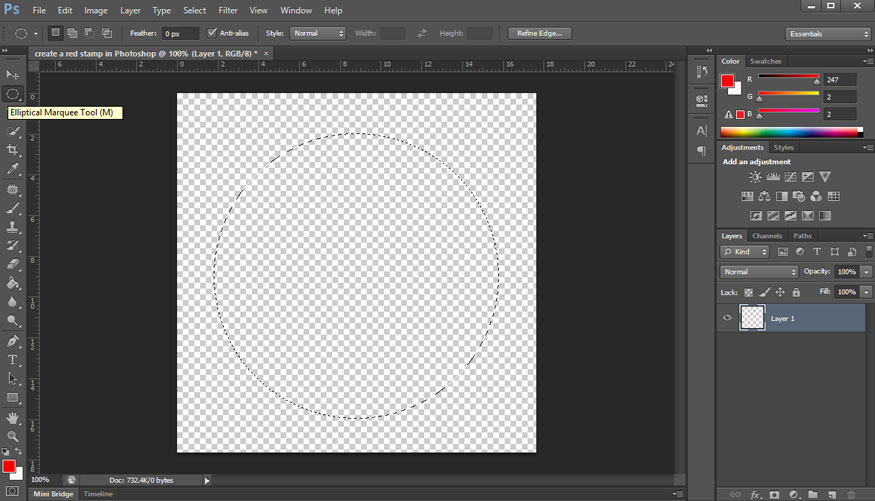
Step 2: On the toolbar, select the Elliptical Marquee Tool (M) and draw a circle. Note, you need to hold down the Shift key when drawing to get a circle, avoiding it turning into an ellipse.
Step 3: Right-click right above the arc, then select Stroke.
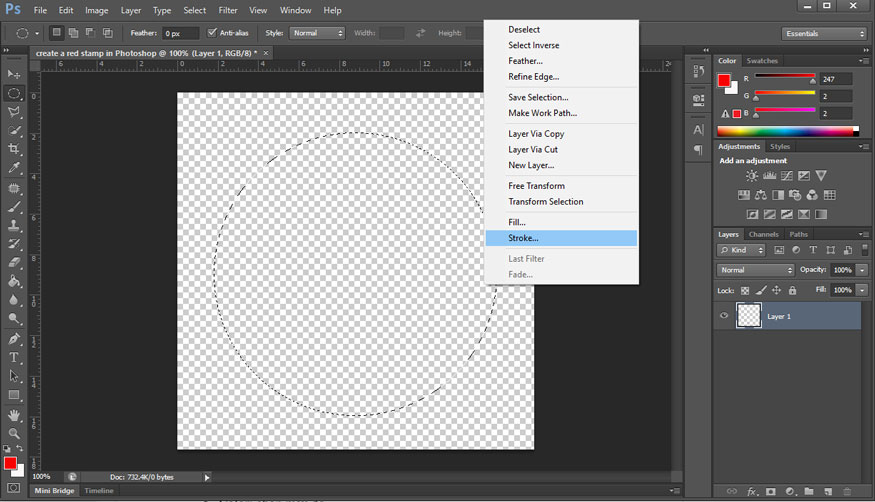
In the Stroke window that appears, choose:
● Width: 5px (large or small stroke as desired)
● Color: choose red
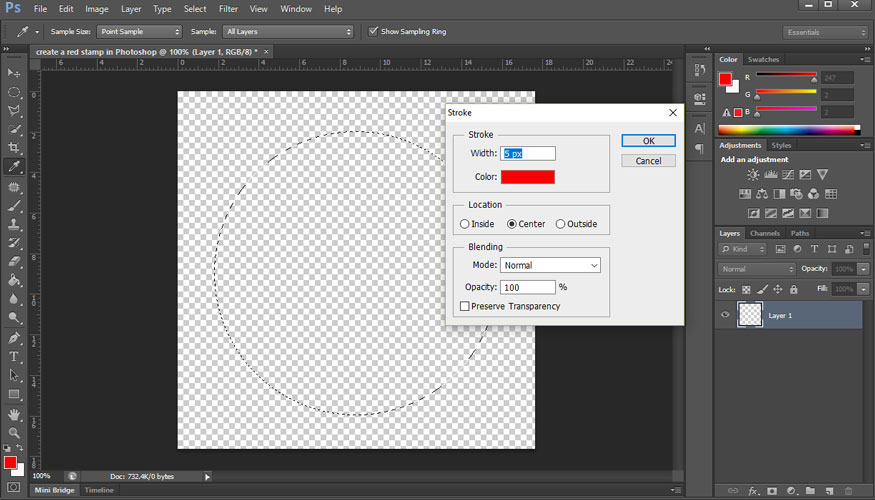
Then press OK => press Ctrl + D to deselect the selection.
Step 4: Now we need to create another circle a little smaller than the circle we just created. Right-click on layer 1 => select Duplicate layer => click OK and you will have a copy of Layer 1.
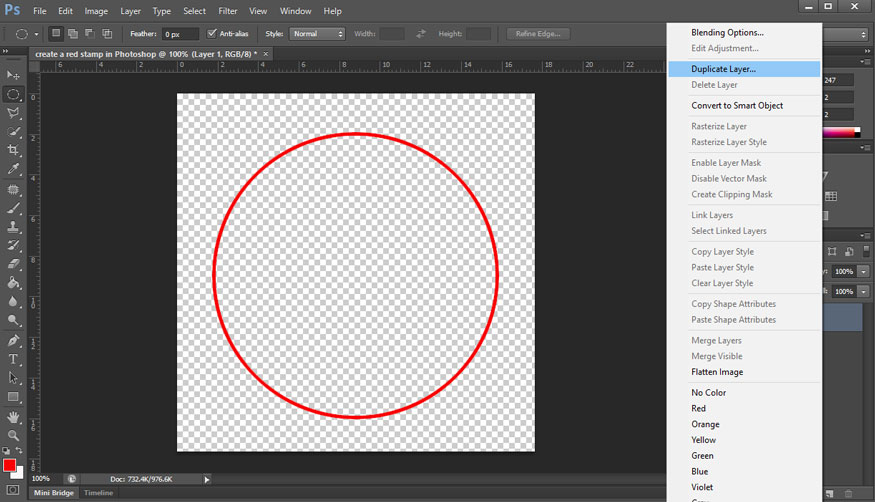
Step 5: On the newly copied layer, press the key combination Ctrl + T, then press the key combination Shift + Alt and then combine with the mouse to adjust this circle to a smaller size.
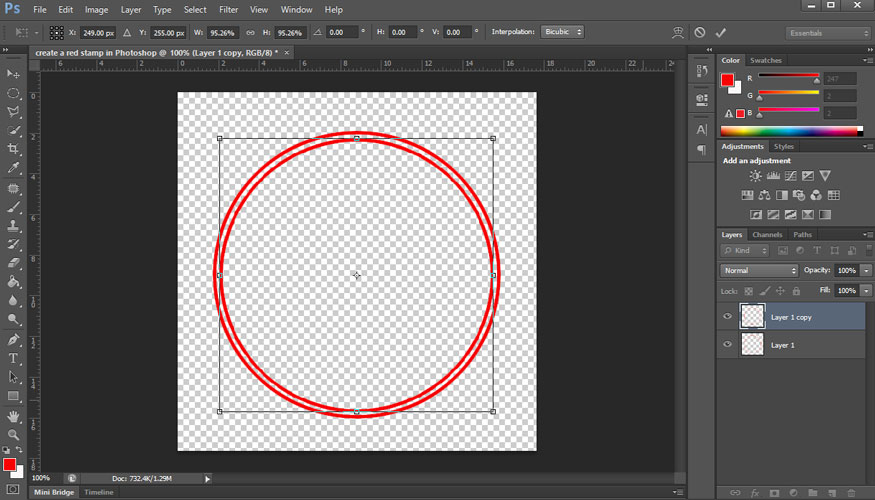
Step 6: Similar to steps 4 and 5, you create a Layer 1 copy 2 in the innermost layer.
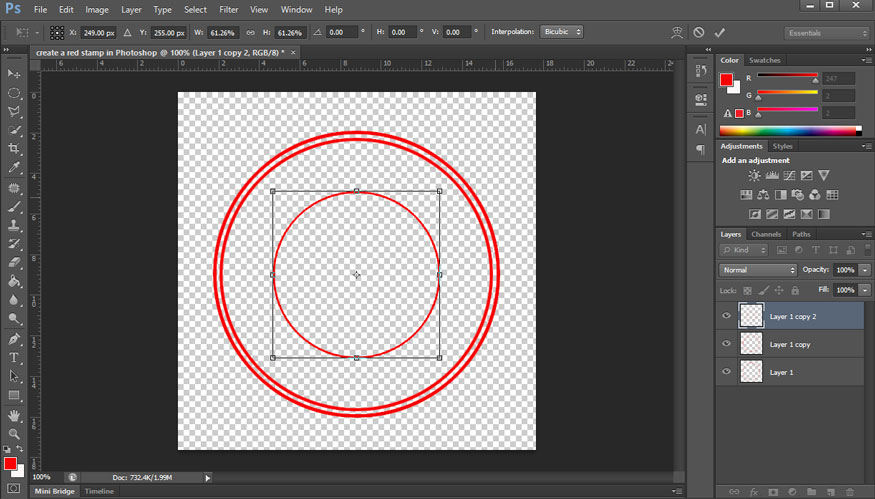
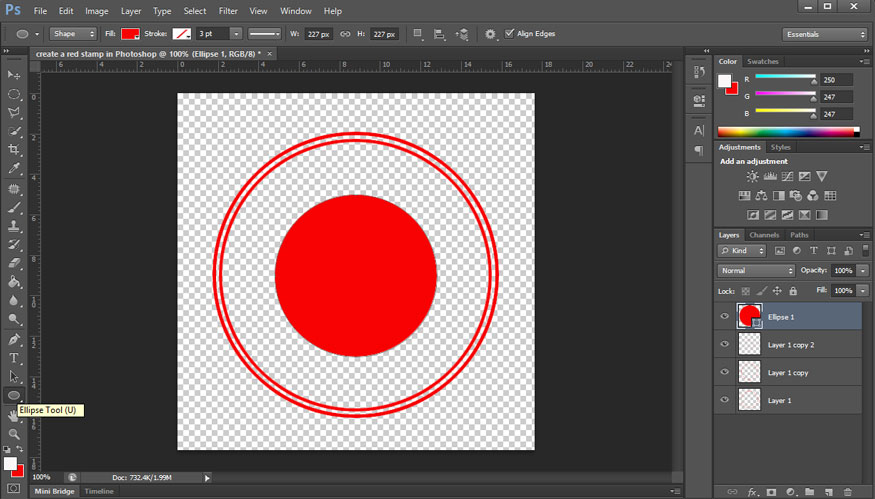
Step 7: Next we will proceed to create text surrounding the innermost circle. Press the key combination Shift+Ctrl+N to create a new layer. On the toolbar, use the Ellipse Tool to draw a circle a little larger than the inner circle.
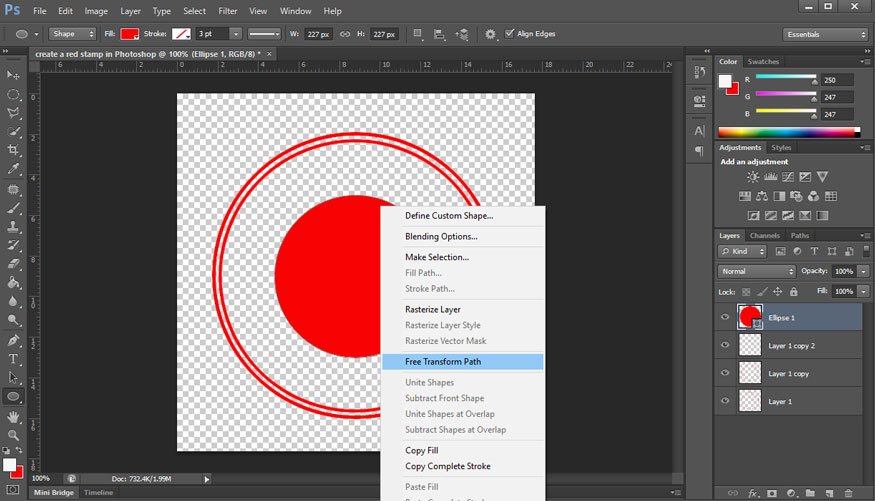
Right-click right on the circle you just created and select Free transform path.
Now use the text tool, write the text you need around the small circle. After finishing writing, right-click and select Delete to delete the red circle inside. Write more text inside the circle to create a stamp.
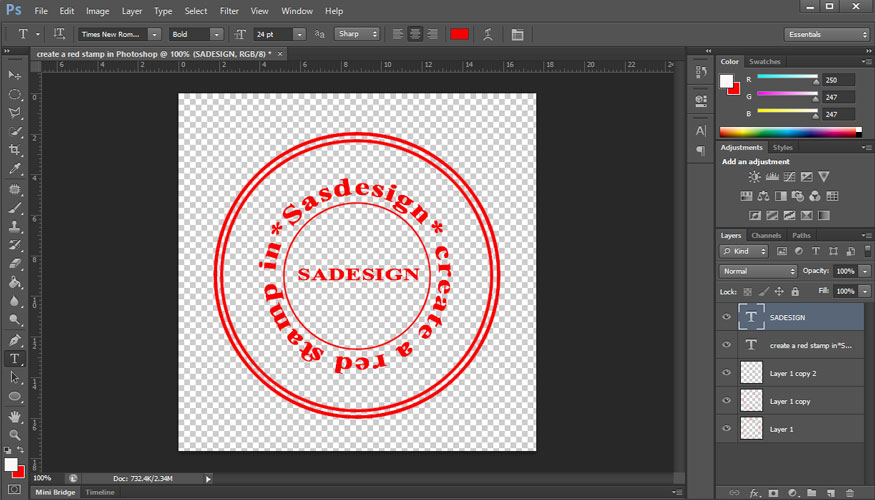
At this point, you can now use this stamp to stamp. However, to make this red stamp look real, you need to take a few more steps.
Step 8: Create another white background layer, then select all the layers and press Ctrl + E to combine them into a single layer.
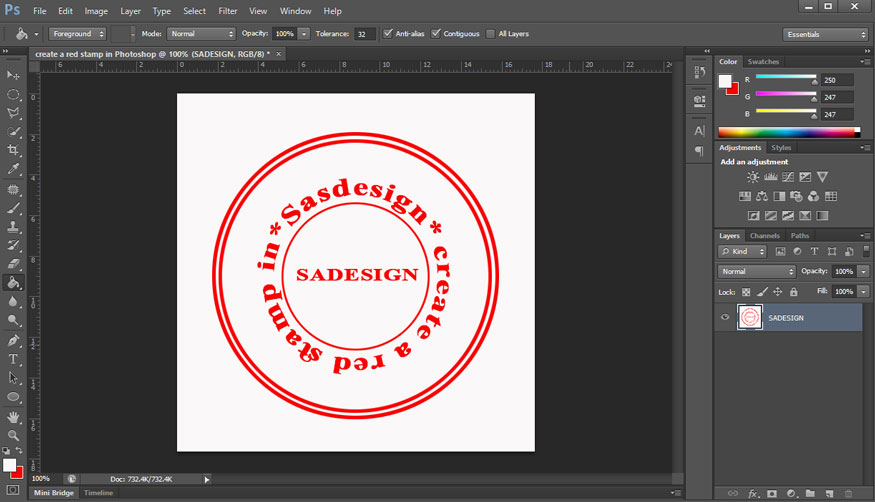
Step 9: On the toolbar, use the Rectangle Tool (U) to create a new black layer above the current layer.

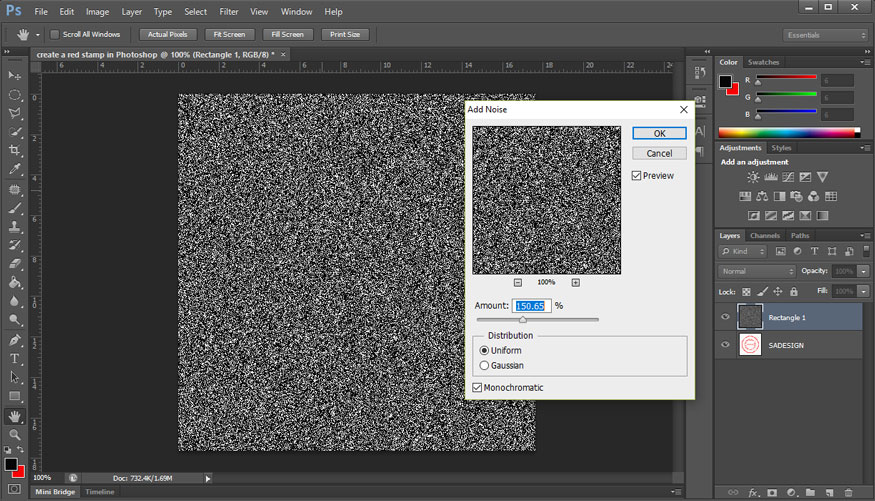
On the menu bar, select Filter => Noise => Add Noise.
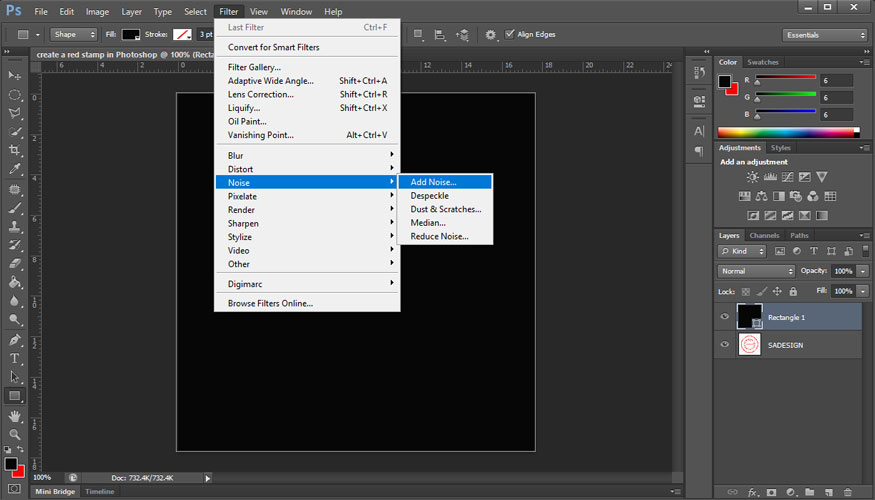
Adjust the parameters in the dialog box as shown below:
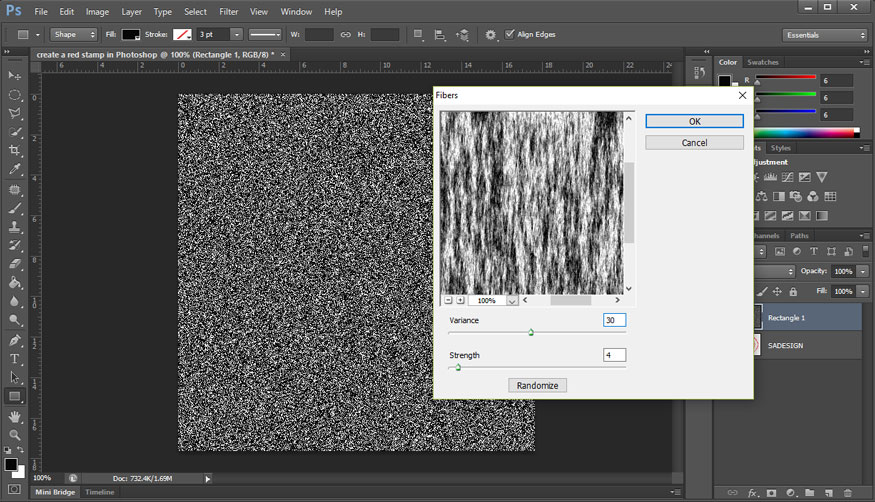
On the menu bar, continue to select the Filter tool => Render => Fibers.
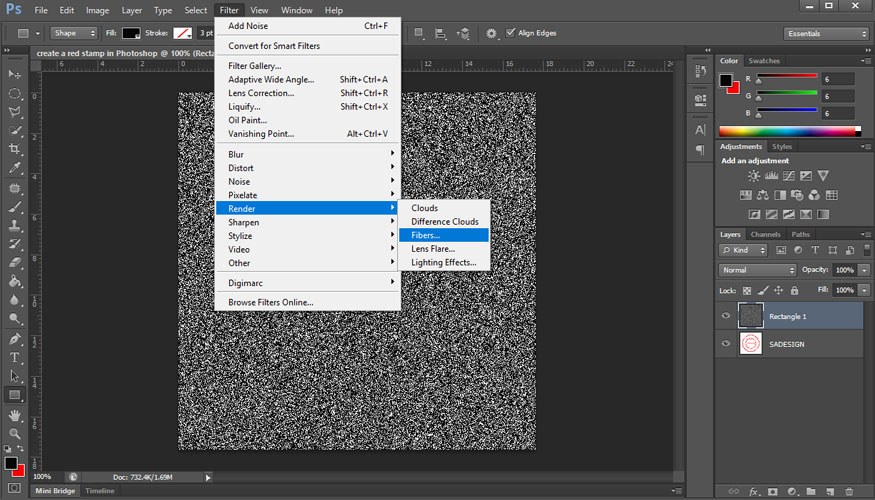
Fill in the parameters as shown below:
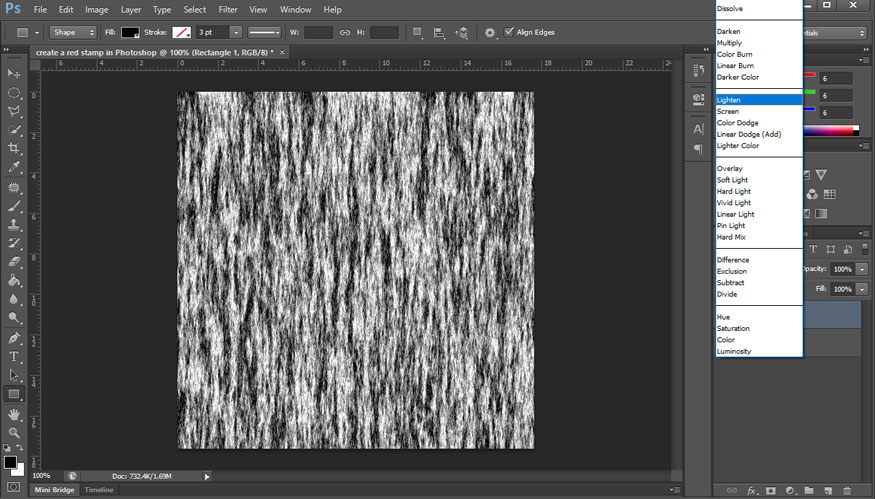
Step 10: Now you will set the Blending mode for the last layer to Lighten.
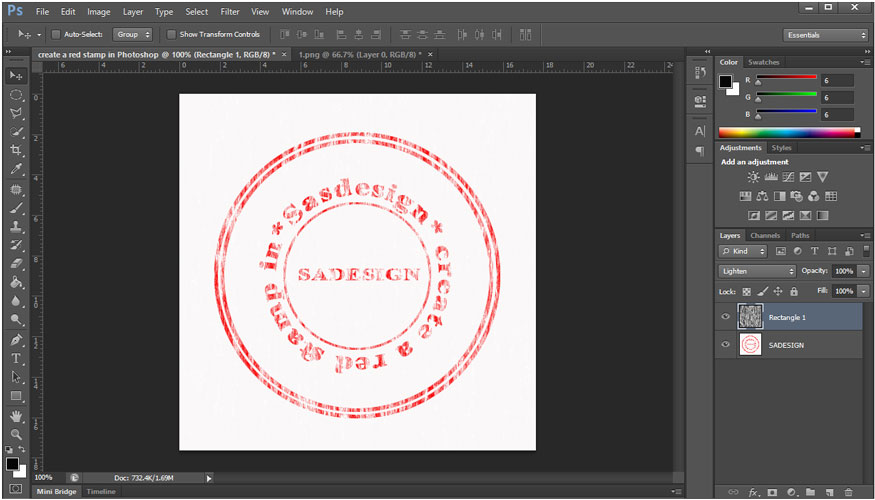
And this is the final stamp.
2. Conclusion
Above are detailed instructions on how to create a red stamp in Photoshop. In fact, creating a stamp in Photoshop is not complicated at all, very simple. Hopefully the above sharing from Sadesign can help you create impressive stamps for yourself.


