Best Selling Products

Adobe Premiere Pro Account
99 USD

Upgrade Duolingo Super
29 USD

Upgrade genuine Capture One account
120 USD

Windows 10 & 11 Pro Key
36 USD

Genuine Cheap Canva Pro
39 USD

ChatGPT Plus Account (GPT-4)
16 USD

Upgrade Genuine Office 365
49 USD

Autodesk All App Account Copyright
120 USD

Adobe Photoshop Copyright - Full App
120 USD

Freepik Premium Account
59 USD

MidJourney Account
29 USD

Capcut Pro 1 Year
39 USD

Genuine Adobe Illustrator account
99 USD

Copyright Adobe Lightroom Account
59 USD

Plugin Retouch4me
69 USD
How to create shadows in Photoshop using 3D Extrusion
Nội dung
- 1. Why should you cast shadows on objects?
- 2. How to create shadows in Photoshop using 3D Extrusion
- 2.1. Duplicate the main object
- 2.2. At the duplicated layer, convert it into 3D Extrusion.
- 2.3. Pairing the 3D perspective with the perspective of the scence.
- 2.4. Adjusting Extrusion Depth
- 2.5. Merge the 3D model with the Pixel layer
- 2.6. Adjusting Infinite Light
- 2.7. Adjusting the softness of the Shadow
- 2.8. Render shadows
- 2.9. Rasterize the 3D Layer
- 2.10. Adjust the shadow to match the scene
- 2.11. Shadow mask
- 2.12. Shading
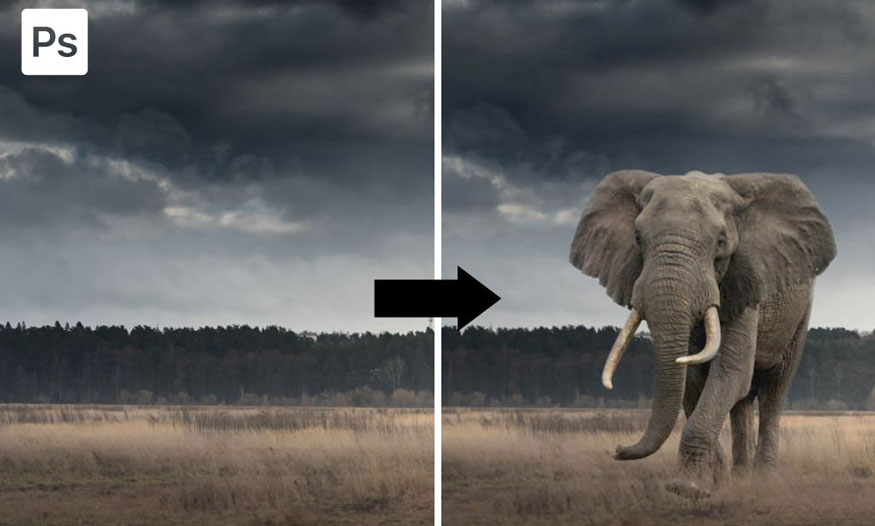
Creating shadows in Photoshop using 3D Extrusion is a technique that many people apply because the shadows cast are guaranteed to be natural and realistic. Thanks to that, the image created has more depth. If you are interested in this technique, let's learn with Sadesign through the sharing in the following article!
Creating shadows in Photoshop using 3D Extrusion is a technique that many people apply because the shadows cast are guaranteed to be natural and realistic. Thanks to that, the image created has more depth. If you are interested in this technique, let's learn with Sadesign through the sharing in the following article!
.jpg)
1. Why should you cast shadows on objects?
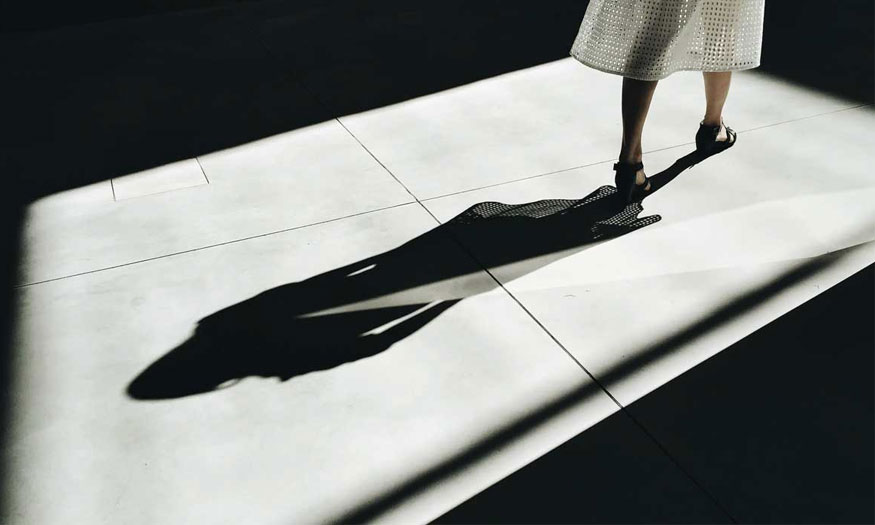
Shading the subject is an important technique that helps create depth in the photo, helping the subjects of the subject to be linked together. Thanks to that, it makes them more realistic as if they already existed in the photo. Creating shadows requires special attention to get the shape and perspective to suit the shadow. Shading techniques in Photoshop all involve layer transformation. The editor needs to adjust the pixels to create the right shape and perspective.
Deforming layers is quite difficult, especially for complex objects or difficult-to-handle corners.
.jpg)
2. How to create shadows in Photoshop using 3D Extrusion
2.1. Duplicate the main object
The first step you need to do is duplicate the object's object. In the example we will make below, the object is a horse, so we will duplicate this layer by pressing Ctrl J (Mac: Command J).
.jpg)
2.2. At the duplicated layer, convert it into 3D Extrusion.
To create realistic, natural shadows with Photoshop, select the 3D feature, then convert the duplicate layer into a 3D Object by: Go to 3D => New 3D Extrusion from Selected Layer.
.jpg)
Note: If your 3D menu turns into gray, it means your computer does not meet the requirements for Photoshop 3D.
To create a 3D object, we insert a 2D shape into the Z axis. Next we will extrude the horse.
.jpg)
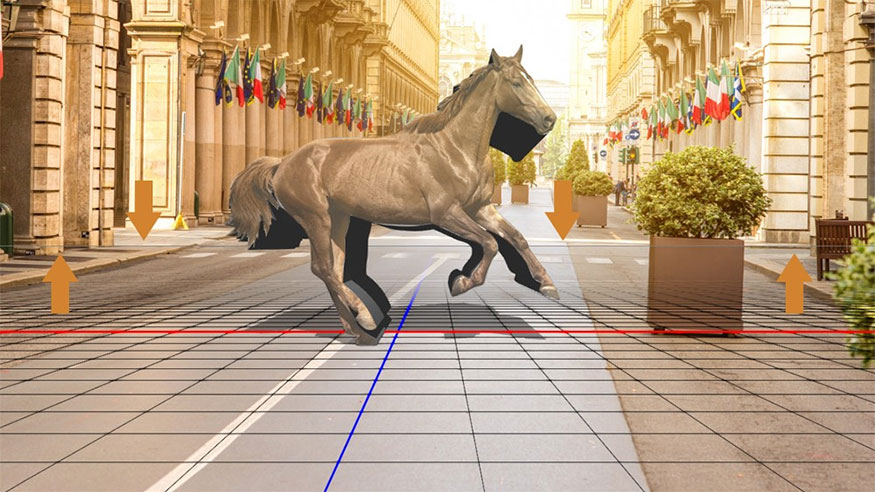
The flat ground is a web we that can see under the 3D object that can capture the shadow of the scene. To create realistic shadows in Photoshop you need to match the object to the 3D model plane and the ground.
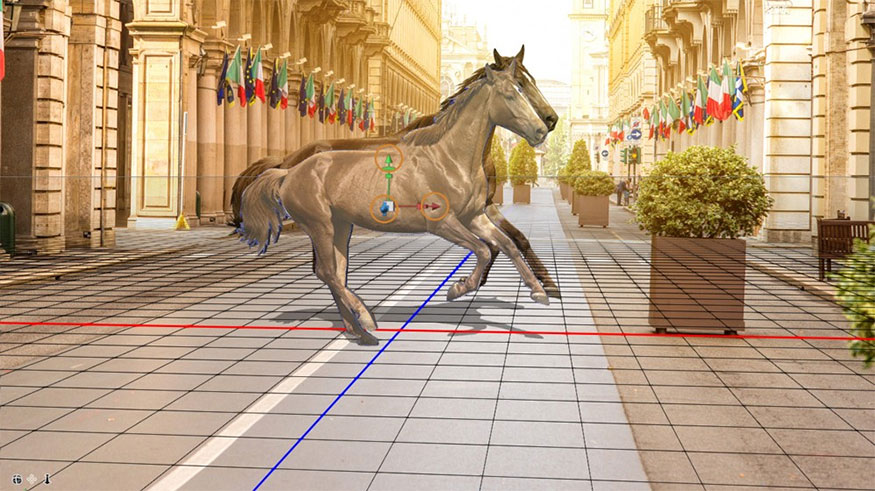
2.3. Pairing the 3D perspective with the perspective of the scence.
Attention should be paid to ensuring that the perspective implementation is combined harmoniously to make the results as realistic as possible. It's best to take care to match the horizon lines of the background with the foreground. To find the horizon, follow the parallel converging lines, where they meet is the horizon.
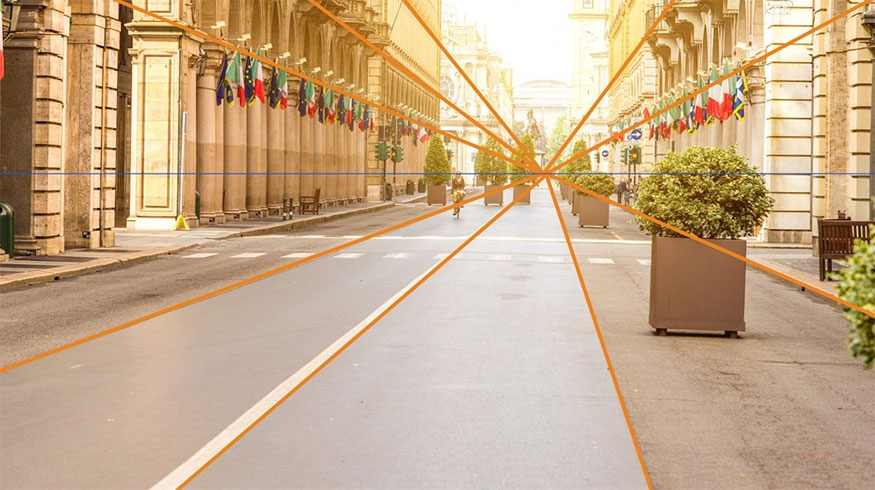
The horizon line in 3D will be displayed as gray across the picture as shown below:
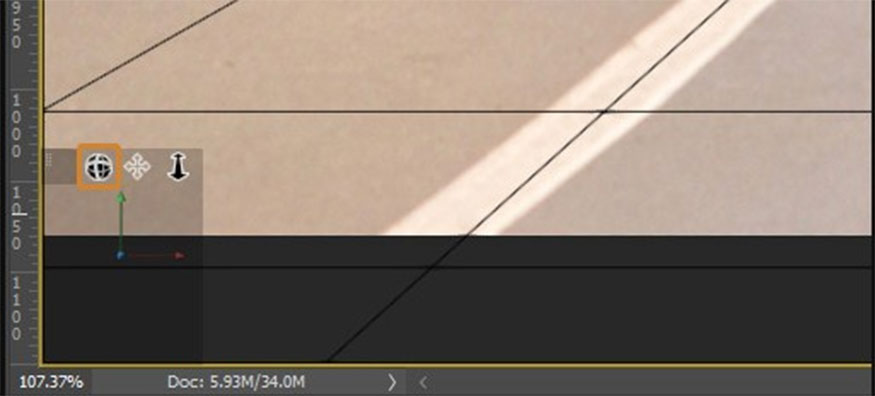
Looking at the bottom left you will see 3 camera icons, click and drag on the Orbit 3D Camera icon. Rotate the 3D scenes until they match the background horizon.
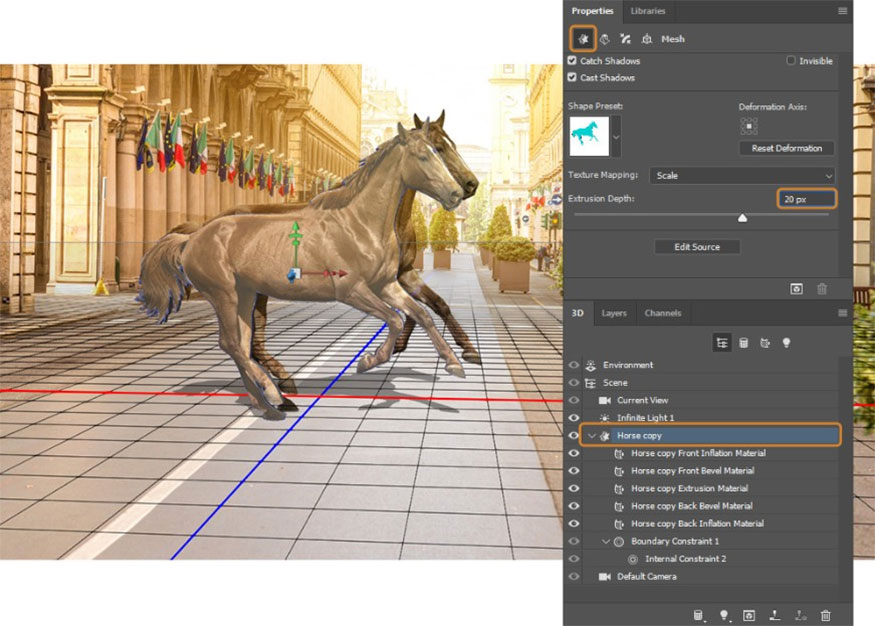
2.4. Adjusting Extrusion Depth
The default Extrusion depth in the 3D model can be a bit thick so if necessary you can reduce it by adjusting with the Extrusion Depth slider.
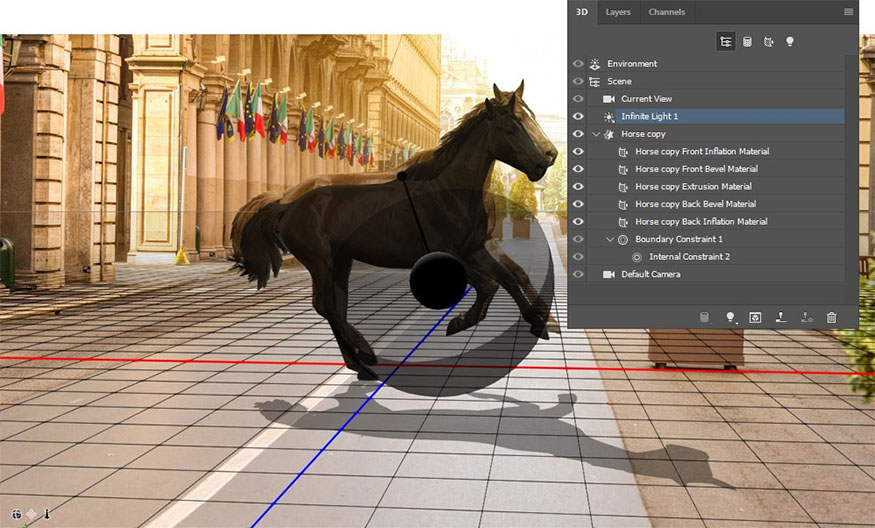
2.5. Merge the 3D model with the Pixel layer
When the perspective matches, reposition the 3D model ensures it matched the pixel layer. Select the 3D object, then click Move to move the 3D model.
The most important areas are where the shadow reaches the main object on the plane.
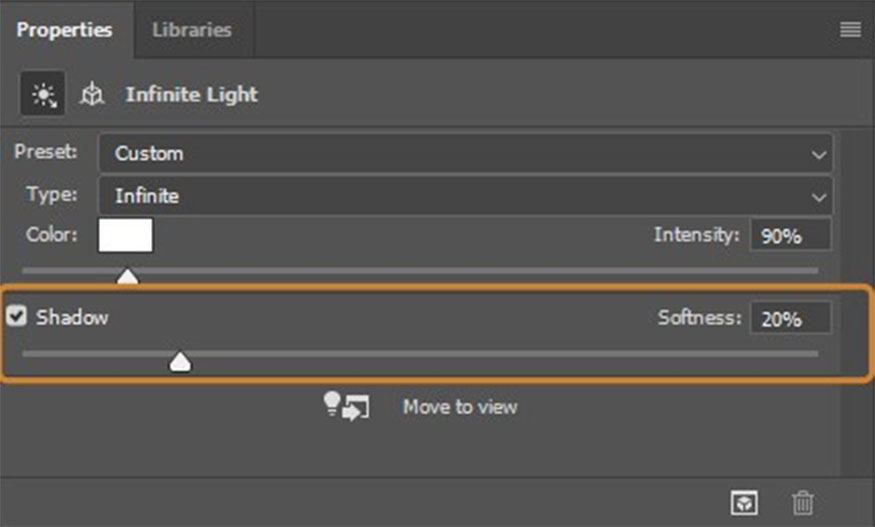
2.6. Adjusting Infinite Light
In Photoshop 3D you can completely control the light emitted as well as the shadow on the ground plane with Infinite Light. From the 3D Panel, click Infinite Light, then use the overlay to adjust the direction of light.
When we do click and drag on the overlay, it will cause the shadow to move. You should match the shadows on the photo to make the result more realistic.
2.7. Adjusting the softness of the Shadow
To adjust the softness of the shadow, adjust the Softness slider right in the Properties Panel.
2.8. Render shadows
When working with 3D, you render the scene to calculate shape, perspective, and shadow appearance.
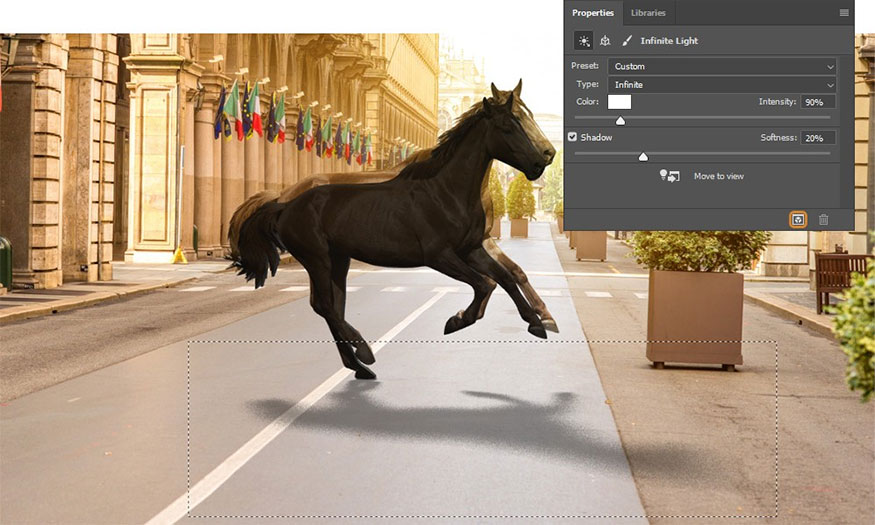
To display the shadow and see the final image, use the Marquee tool to select the shadow. Then press Render in the Properties Panel.
Rendering a 3D scene will take some time, depending on the complexity of the scene and the speed of the computer.
Note: If you want to use or cancel rendering, press Esc right on the keyboard.
2.9. Rasterize the 3D Layer
Once the shadows are finished displaying, rasterize them by right-clicking on the layer and selecting Rasterize 3D.
2.10. Adjust the shadow to match the scene
From the layers panel, move the shadow layer just below the horse layer, then rename them as “Shadow”.
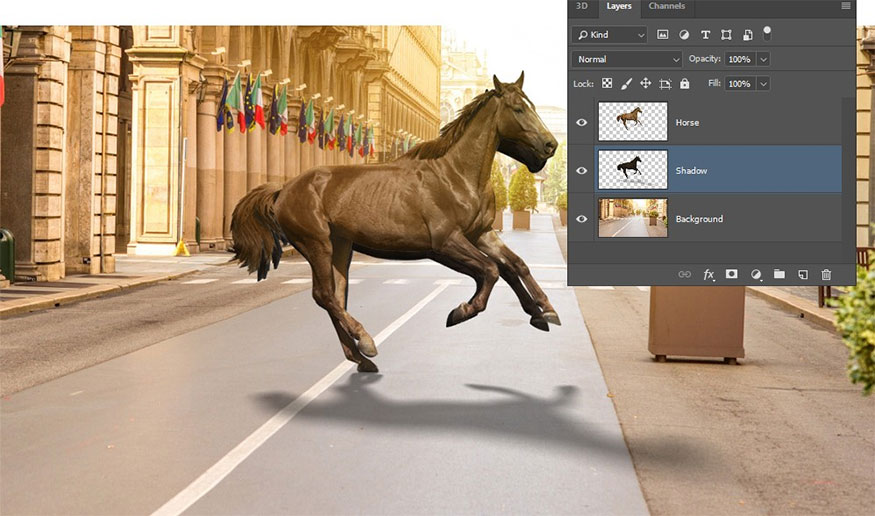
If you want to reposition the shadow, press V to select Move tool => drag the shadow to place them accordingly.
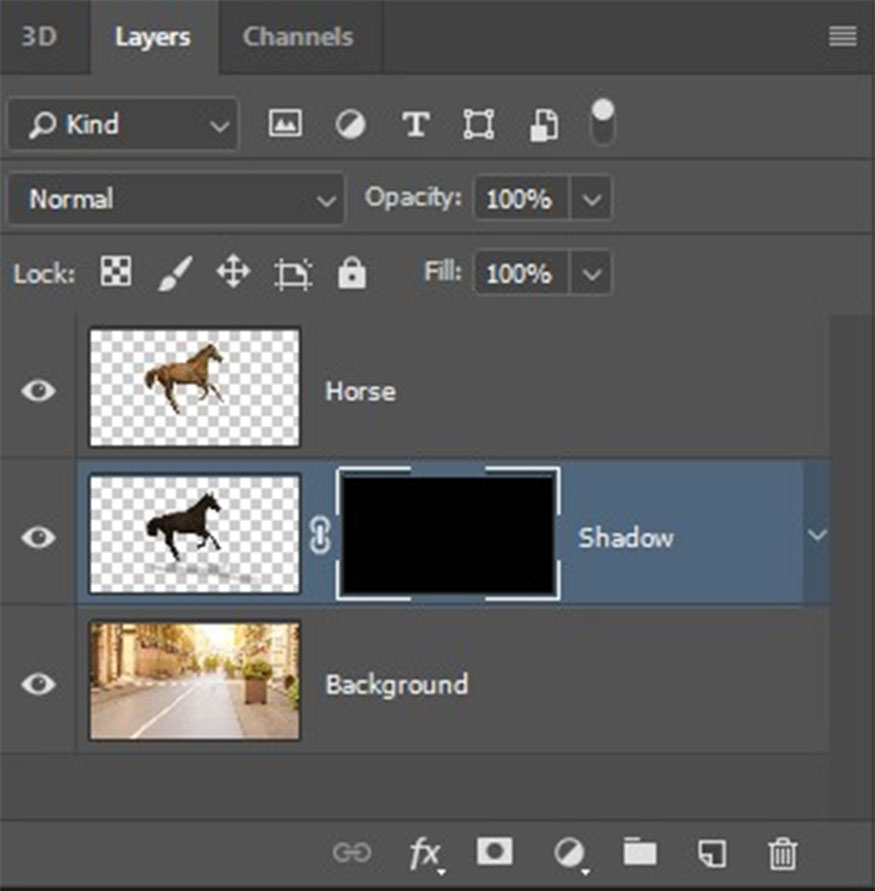
2.11. Shadow mask
When the shadow is in the right position, press and hold the Alt key => click Layer Mask to create a black mask instead of a white mask. The black layer mask helps hide any pixels in this layer.
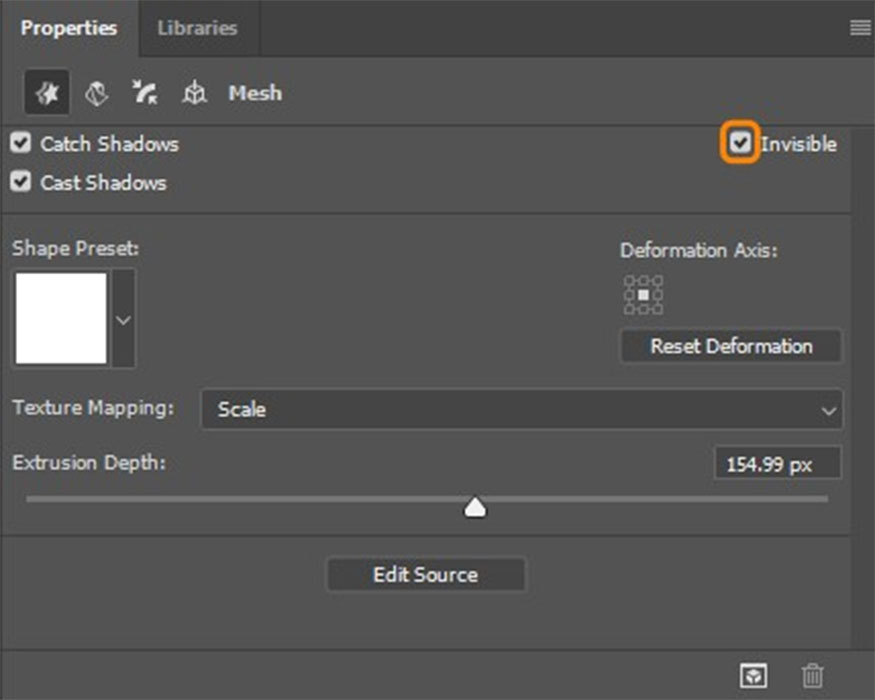
2.12. Shading
To apply shadow, select the White Brush tool on the Layer Mask to help show the shadow. To render a shadow without a 3D Object, click the “Invisible” search box in the Properties Panel. This option hides the 3D object but still ensures the shadow remains on the ground.
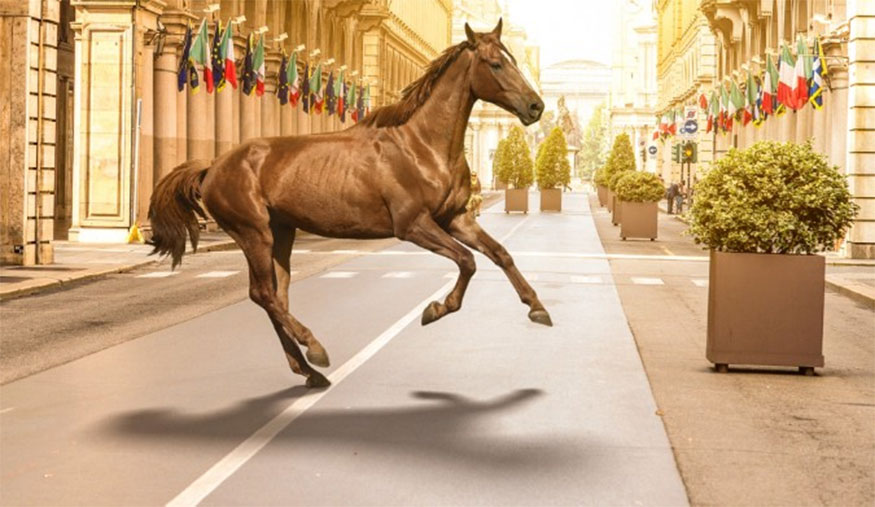
This is the result:
Creating shadows in Photoshop using 3D Extrusion is very useful, making objects more realistic. Hopefully the instructions that Sadesign brings above will help you successfully apply the technique to your images!


VIP Products


Best Selling Products
Adobe Premiere Pro Account
99 USD
Upgrade Duolingo Super
29 USD
Upgrade genuine Capture One account
120 USD
Windows 10 & 11 Pro Key
36 USD
Genuine Cheap Canva Pro
39 USD
ChatGPT Plus Account (GPT-4)
16 USD
Upgrade Genuine Office 365
49 USD
Autodesk All App Account Copyright
120 USD
Adobe Photoshop Copyright - Full App
120 USD
Freepik Premium Account
59 USD
MidJourney Account
29 USD
Capcut Pro 1 Year
39 USD
Genuine Adobe Illustrator account
99 USD
Copyright Adobe Lightroom Account
59 USD
Plugin Retouch4me
69 USD