Best Selling Products
How to creat a paper cut effect in Photoshop
The paper cut effect in Photoshop is used by many people. It helps to make designs more vivid. With the combination of many cleverly integrated layers and shadow effects, you feel like a sheet of paper is cut deeply into many layers. To achieve this effect, let's learn the detailed steps with Sadesign through the shares below.
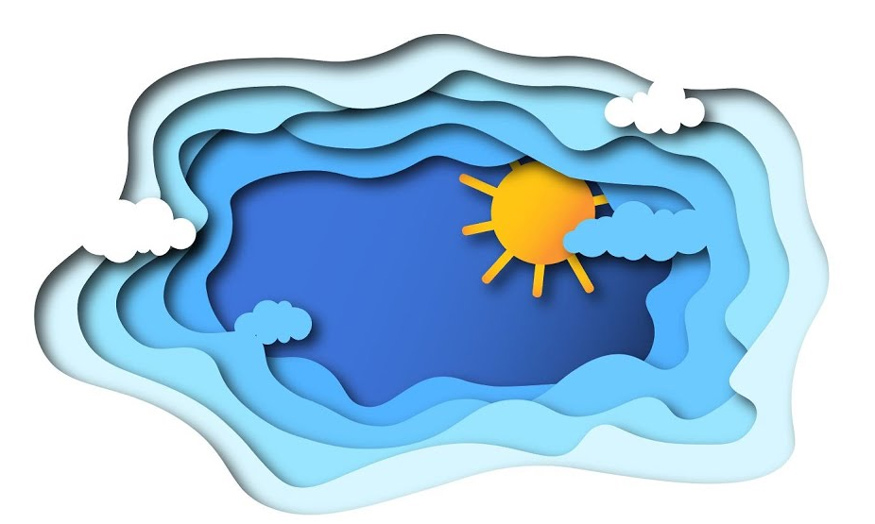
The paper cut effect in Photoshop is used by many people. It helps to make designs more vivid. With the combination of many cleverly integrated layers and shadow effects, you feel like a sheet of paper is cut deeply into many layers. To achieve this effect, let's learn the detailed steps with Sadesign through the shares below.
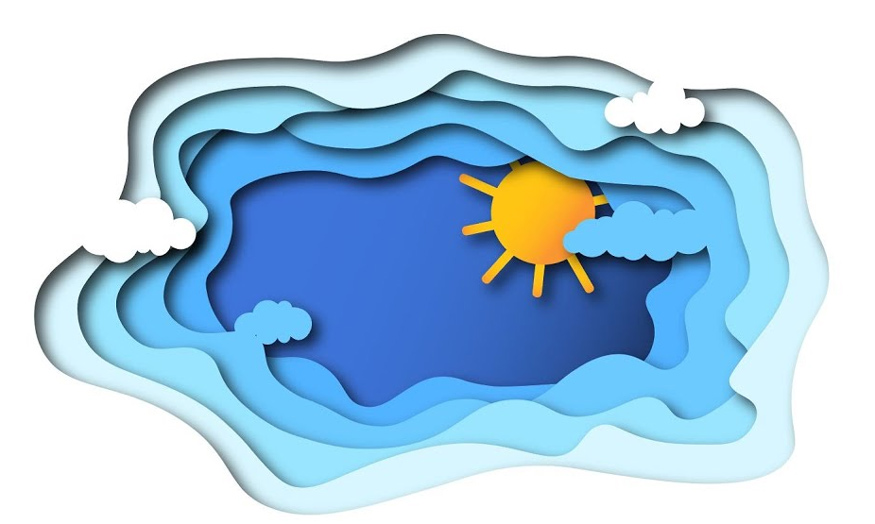
How to create a paper cut effect in Photoshop
The paper cut effect in Photoshop has the ability to create depth, giving the viewer the feeling that the paper is cut into many layers. With this effect, we will combine many overlapping layers, along with shadow effects and a variety of colors and shades to create depth. Please refer to the specific steps below.
Step 1: The first step is to create a working file to perform the paper cut effect in Photoshop on it.
To create a file, on the menu bar, select New... => proceed to set the appropriate parameters as required => click OK.
Or you can use the keyboard shortcut Ctrl+O to fill in the parameters, then click OK.
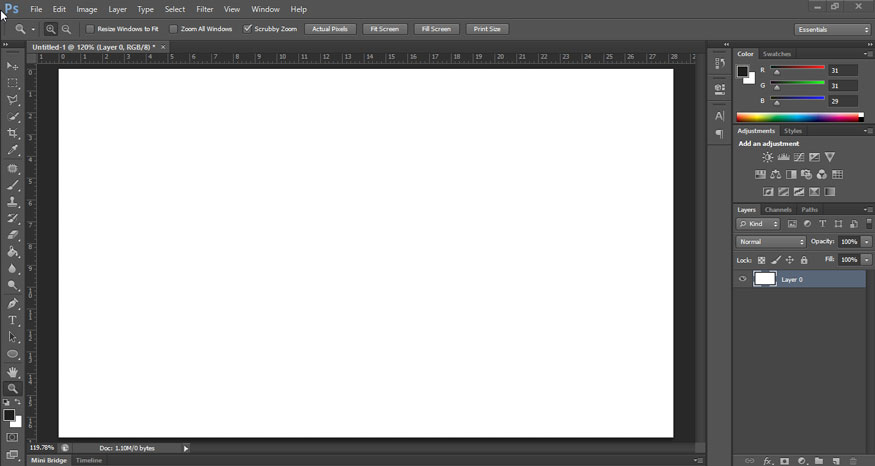
Step 2: To create the paper cut effect in Photoshop, we will use the Pen Tool to create the shape. On the toolbar, select Pen Tool or press the shortcut P. In Pen Tool mode, select Shape.
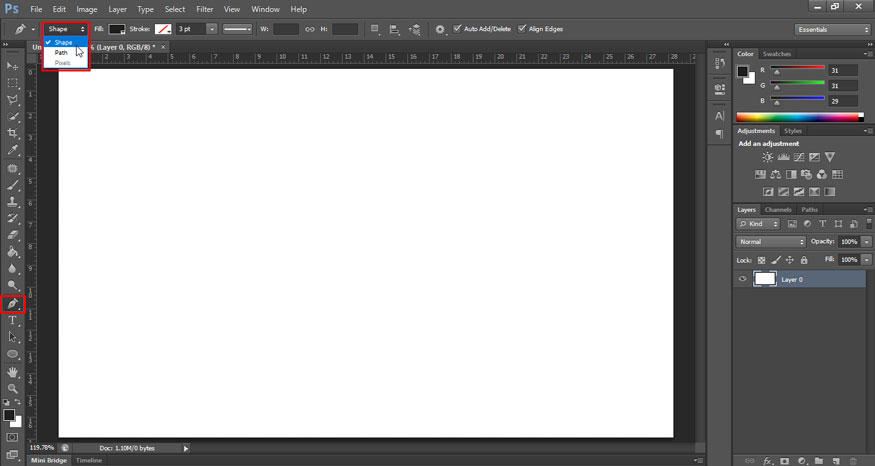
Now we will use the mouse to dot anchor points, then adjust to get the desired shape. You can put an anchor point in the middle of the line you just created and then hold down the Ctrl button to adjust the anchor point to get the best shape. Note, the first and last anchor points must be connected to form the shape.
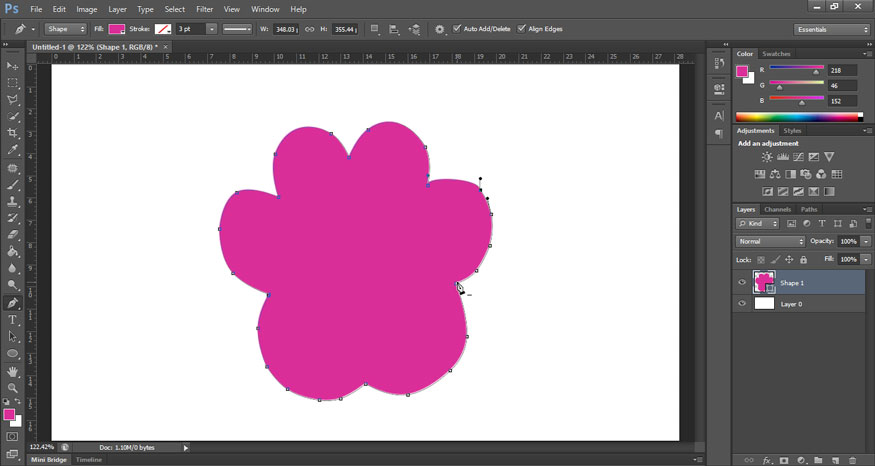
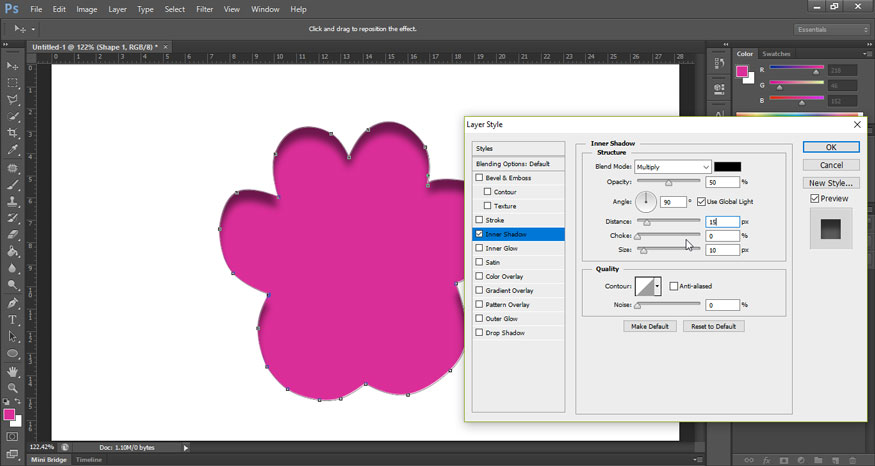
Step 3: After you have the desired drawing, right-click and select Blending Mode.
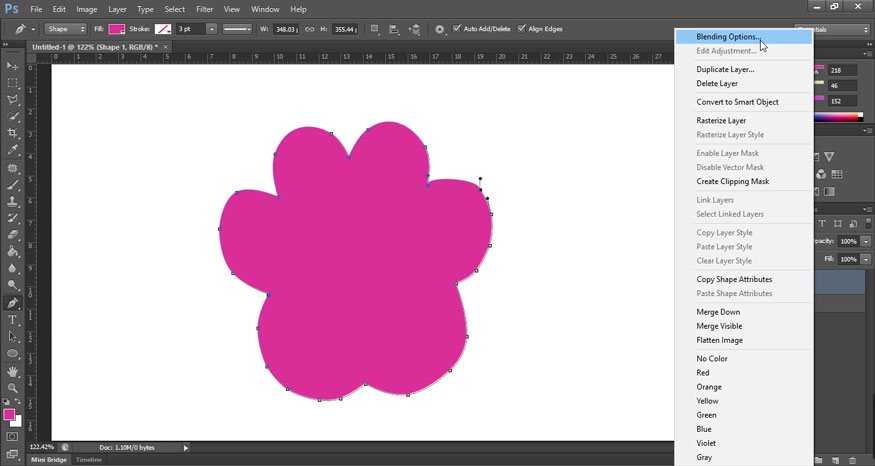
In the Blending Mode window, select Inner Shadow and then adjust the parameters accordingly.
Step 4: Next, press Ctrl + J to duplicate the layer containing the image you just drew. Then press Ctrl+T, then press Shift+Alt and drag to shrink the image a bit.
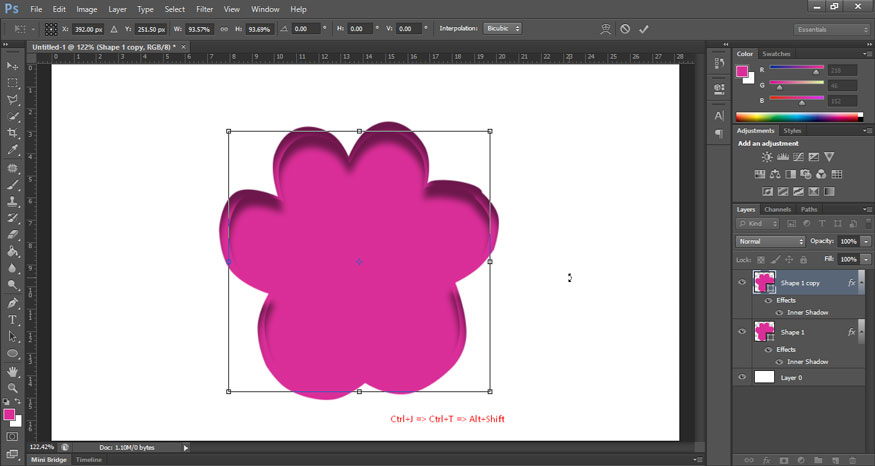
Repeat step 4 many times (here I did it 9 times) to create multiple layers on top of each other, getting a cutting effect.
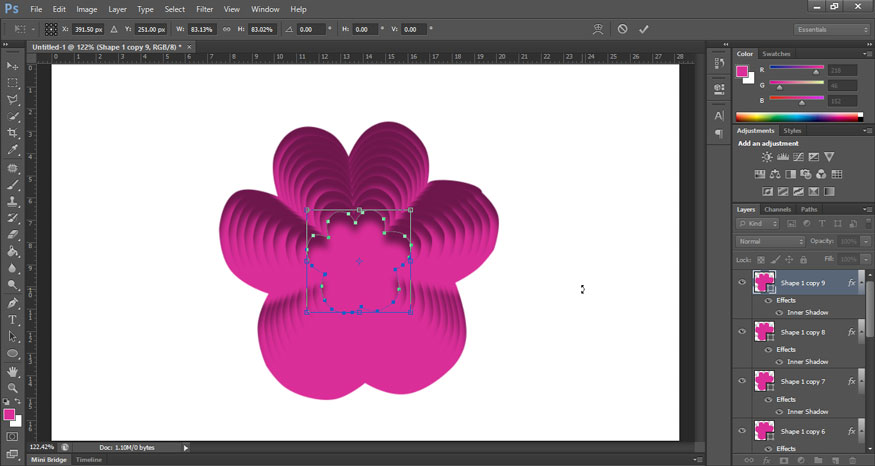
Step 5: After we have many different layers, we will now color each layer to create depth. On the toolbar, select the Paint Bucket Tool, then Set foreground color to the appropriate color. The color you want to fill the layers will be above.
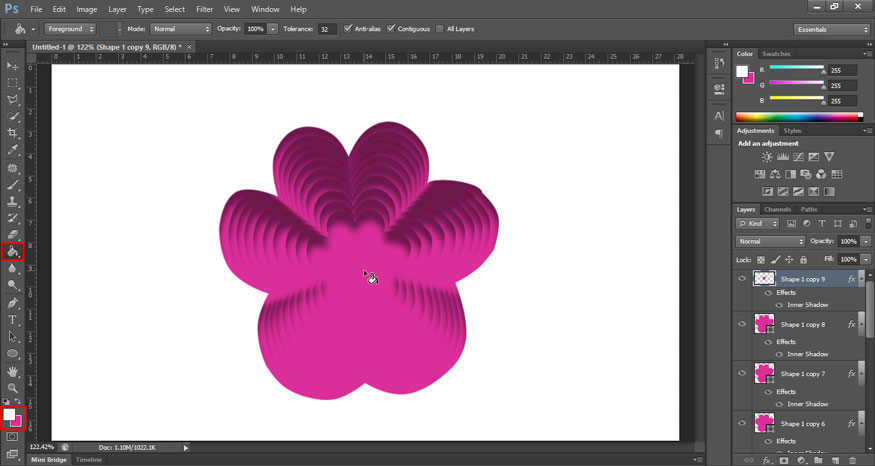
Note that the innermost layer should match the background color to create the clearest paper cutting effect in Photoshop.
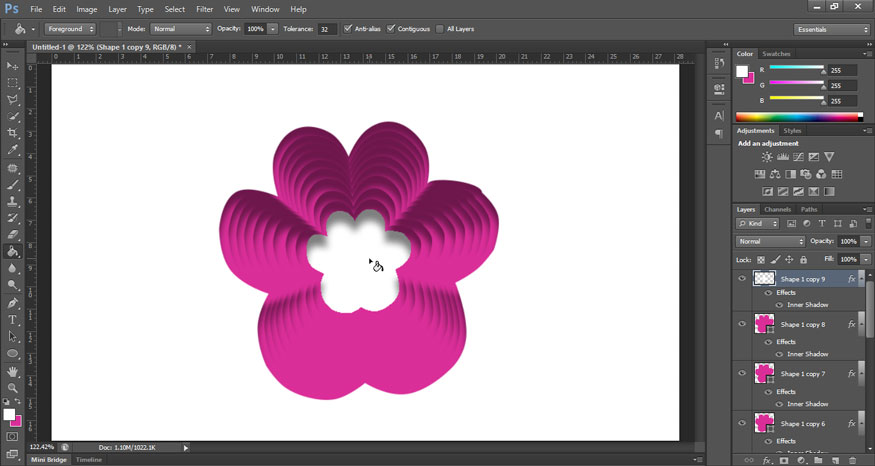
We should leave each layer its own color to create distinct layers. When pouring color into the layer, a dialog box will appear, we click OK.
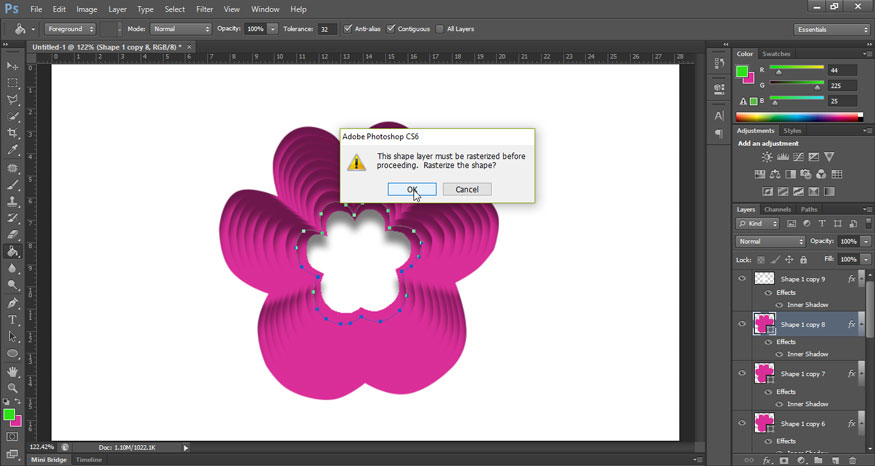
Then press fill color on that layer.
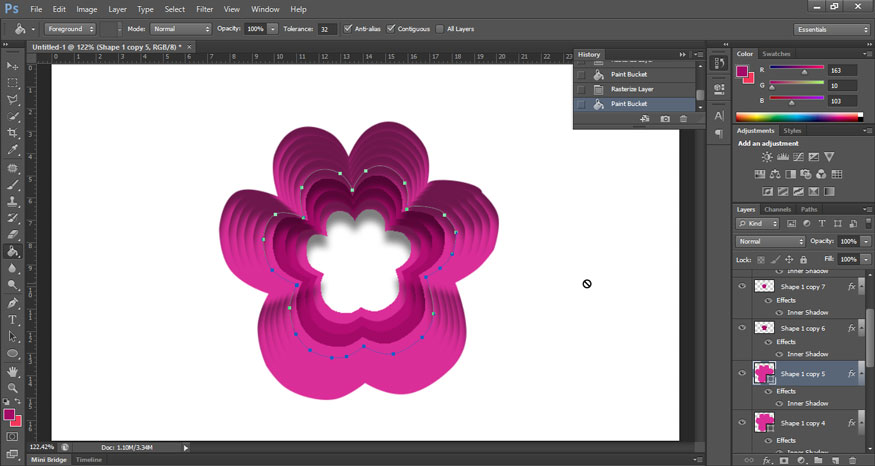
Step 6: We proceed to color all the layers. Then the results obtained will be:
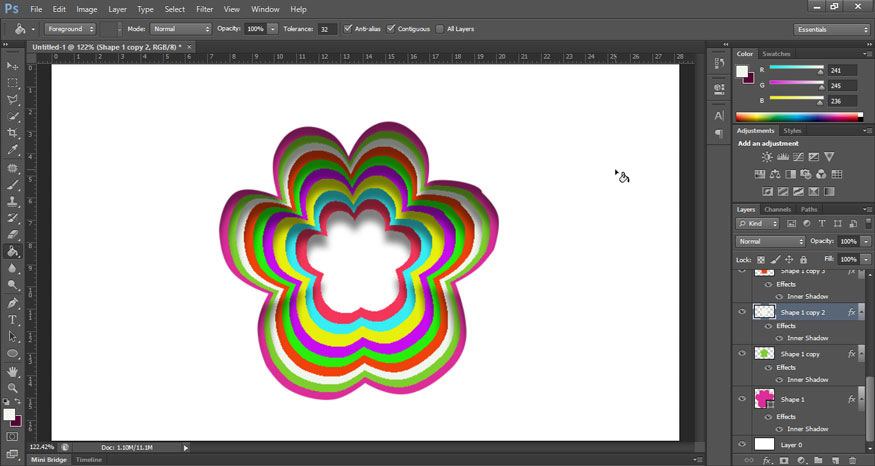
Step 7: Finally, let's select all the layers by clicking on the first layer, then hold down the shift key and select the last layer. Now that all the layers have been selected, press the keyboard shortcut Ctrl+E to merge them into a single layer.
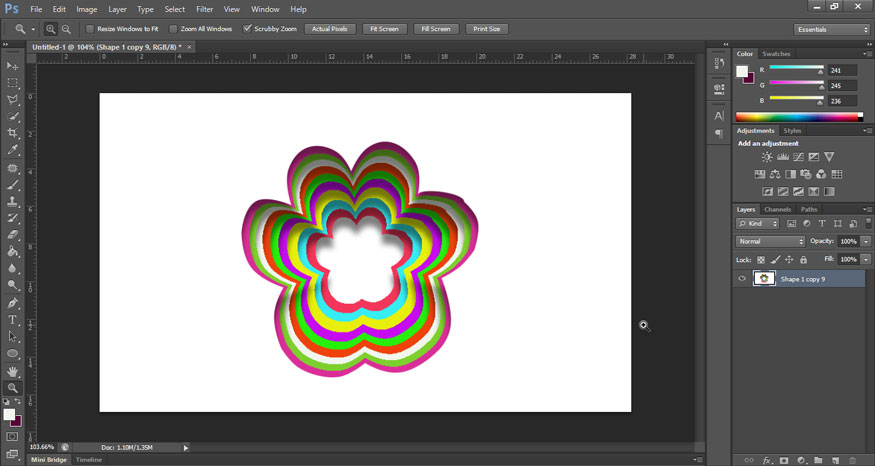
So you've created the paper cut effect in Photoshop. It's very simple, right? Now the resulting photo seems to have depth cut down with many different layers.
Above is how to perform the paper cut effect in Photoshop with the most detailed steps. Hopefully Sadesign's sharing above can help you create beautiful, impressive paper cut effect designs. Try it now.


