Best Selling Products

Freepik Premium Account
59 USD

Genuine Adobe Illustrator account
99 USD

Genuine Cheap Canva Pro
39 USD

Upgrade Genuine Office 365
49 USD

Upgrade genuine Capture One account
120 USD

ChatGPT Plus Account (GPT-4)
16 USD

Adobe Premiere Pro Account
99 USD

Autodesk All App Account Copyright
120 USD

Upgrade Duolingo Super
29 USD

Adobe Photoshop Copyright - Full App
120 USD

Windows 10 & 11 Pro Key
36 USD

MidJourney Account
29 USD

Capcut Pro 1 Year
39 USD

Plugin Retouch4me
69 USD

Copyright Adobe Lightroom Account
59 USD
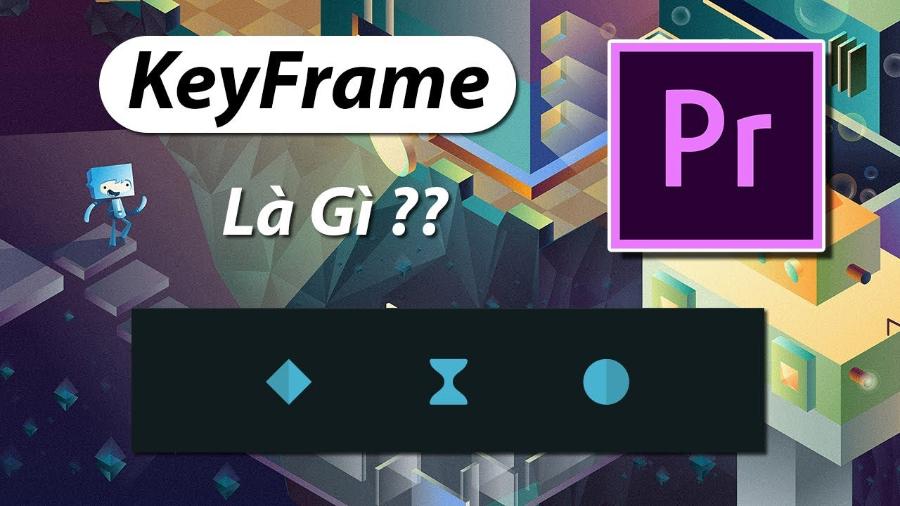
What is a Keyframe? Common Types of Keyframes and Their Importance in Video Production
Nội dung
- 1. What is a keyframe?
- 2. The Importance of Keyframes in Video Production
- 2.1. Create Smooth and Continuous Motion
- 2.2. Detailed Control of Video Elements
- 2.3. Enhance Creativity and Flexibility
- 3. Types of keyframes used in After Effects
- 3.1. Linear Keyframes
- 3.2. Auto Bezier
- 3.3. Continuous Bezier
- 3.4. Bezier Keyframe - Keyframe cong
- 3.5. Hold Keyframe - Hold Keyframe
- 5. How to Use Keyframes Effectively in Video Production
- 5.1. Choosing the Right Software
- 5.2. Plan Your Edits Before Creating Keyframes
- 5.3. Using Keyframes to Create Special Effects
- 6. Conclusion
Keyframes play a vital role in video production, helping to create smooth movements and dynamic images. Learn more about keyframes and how to use them in your video production process.
Keyframe is not only a tool to create smooth motion but also a decisive factor in the overall quality of a video product. Understanding and using keyframe properly helps videos become vivid, attractive and bring emotional viewer experiences. In the following article, Sadesign will help you learn about the concept of keyframe, their role in video production and how to apply keyframe effectively.
1. What is a keyframe?
A keyframe, also known as a “key frame,” is a key point in a sequence of frames in a video production process, especially in animation and motion graphics. Keyframes define major changes in the motion, color, shape, and many other elements of a video. During editing, keyframes help editors determine exactly where and when a change or movement should occur.
.jpg)
When working with video editing software, keyframes are often created to define important points in a scene. For example, if you want an object to move from point A to point B in a video, you would set keyframes at points A and B. The software will automatically create frames between those two keyframes to create smooth, continuous motion.
This concept can be applied to many different elements of video production, from moving objects, changing colors, to adjusting audio, lighting, and many other elements in the video.
2. The Importance of Keyframes in Video Production
Keyframes are not only a technical tool but also an important creative element in video production. They provide absolute control over moving elements, making videos come alive and engaging for viewers. Here are some reasons why keyframes are so important in video production.
.jpg)
2.1. Create Smooth and Continuous Motion
One of the most important uses of keyframes in video production is to create smooth motion. Instead of having a stiff, staccato motion, keyframes allow editors to adjust the position of objects at specific points in time. The software automatically “draws” the motion between keyframes, making the motion feel seamless and natural.
For example, when you use keyframes to adjust the movement of an object in a video, the system calculates intermediate frames, making the object move from point A to point B smoothly, instead of in rough jumps.
2.2. Detailed Control of Video Elements
Keyframes allow editors to control every detail in the video, from position, size, brightness, color, to special effects. This makes the editing process more precise, thereby creating a perfect video product, meeting all the strict requirements of the customer or project.
With keyframes, you can create complex effects without having to interfere too much with each frame, which saves time and effort when working on long-form or technically demanding projects.
2.3. Enhance Creativity and Flexibility
Keyframes are also an extremely useful tool for expressing creativity in video production. Editors can use keyframes to create special motion effects, making the video more prominent and attractive. You can apply effects such as zoom, rotate, or create complex movements while ensuring smoothness and harmony in the video.
Additionally, keyframes also provide flexibility when editing. You can easily change the timing, speed, or direction of movements, which helps optimize the video to your specific needs without having to start from scratch.
3. Types of keyframes used in After Effects
In After Effects software, keyframes are an important tool for creating movement and change in objects or effects. Each type of keyframe will have its own unique characteristics, thereby affecting the way it works and creates different effects. Understanding the types of keyframes will help graphic and video designers make the most of After Effects' capabilities, creating smooth and subtle movements. Below are the most common types of keyframes in After Effects
.jpg)
3.1. Linear Keyframes
Linear Keyframes are one of the most basic types of keyframes you will encounter when working with After Effects. These keyframes are characterized by a steady motion and no change in speed between keyframes. When Linear Keyframes are applied, you will see the object move from one position to another continuously, at a constant speed.
This can be very useful when you need to create smooth movements without sudden changes in speed. However, in many cases, Linear Keyframes can feel unnatural, because real-life human or object movements often have changes in speed.
Features of Linear Keyframes
Uniform Motion: Keyframes are connected to each other via straight lines, creating a uniform motion.
No Velocity Change: Linear Keyframes do not change the speed of movement between keyframe points.
Use in simple situations: Often used for simple movements, such as drag and drop effects or basic animations.
However, using Linear Keyframes too much can make the movements stiff and unnatural, which sometimes takes away the smoothness of the effect. Therefore, many people choose to combine Linear Keyframes with other types of keyframes to create softer and more natural movements.
3.2. Auto Bezier
Auto Bezier is the keyframe type that After Effects automatically uses when you create a new keyframe without editing any properties. This type of keyframe has a smooth velocity change between points, which helps create movements that are not as rigid as Linear Keyframes.
When you use Auto Bezier, After Effects automatically creates control points and curves, making the movement between keyframes smoother and more natural. Auto Bezier is especially useful for complex motion effects, helping objects move smoothly without sudden changes in speed.
Features of Auto Bezier
Smooth Motion: Movement between keyframes has a natural smoothness thanks to control points.
Auto-adjust: When you create a new keyframe, After Effects automatically switches to Auto Bezier mode without having to do any manual editing.
Suitable for complex effects: Auto Bezier is ideal for smooth movements, such as the movement of objects in 3D space or smooth movements in animation.
One of the biggest advantages of Auto Bezier is its automation, which saves users time when creating motion effects. However, if you want more precise control over motion and speed, you can still switch to editing control points or use other types of keyframes.
3.3. Continuous Bezier
Continuous Bezier is a more powerful type of keyframe that gives the user complete control over the speed and curve of the movement. When using Continuous Bezier, you can freely adjust the handles to create perfect curves for the movement between keyframes.
The highlight of Continuous Bezier is the ability to maintain smoothness and continuity throughout the motion, while allowing the user to adjust motion characteristics such as speed changes more precisely than Auto Bezier.
Characteristics of Continuous Bezier
Free adjustment: Users can change control points to create smooth and precise motion curves.
Continuity: Continuous Bezier helps maintain smooth motion between keyframes without interruption.
Use in complex effects: This type of keyframe is ideal when you need to control complex and detailed motion, such as when designing realistic motion effects or when creating precise movements in 3D space.
Using Continuous Bezier, you can create extremely smooth and natural movements, but adjusting the control points requires a certain amount of experience and skill. However, once you master the technique, you will be able to create very impressive and professional effects.
3.4. Bezier Keyframe - Keyframe cong
Learn about Bezier Keyframe
Bezier Keyframes are one of the most flexible and powerful keyframe types in After Effects. They allow you to move an object along a curved path instead of moving in a straight line. Bezier Keyframes use tangent controls so you can customize the gradient of the movement, creating a smoother, more natural effect.
How to Use Bezier Keyframe
When working with Bezier Keyframes, you will find that each keyframe can be adjusted by changing its tangents. This gives you more control over the movement, allowing you to create smooth transitions. To apply Bezier Keyframes, simply right-click on the keyframe and select "Keyframe Interpolation", then select "Bezier". Once changed, you can drag the tangents to adjust the curvature and smoothness of the movement.
One of the biggest benefits of Bezier Keyframes is the ability to create non-uniform motion, meaning the object can move quickly in some parts and slowly in others, adding flexibility to video editing projects.
Benefits of Bezier Keyframe
Create smooth motion : Bezier Keyframes help you control object motion more smoothly and naturally than other keyframes.
Detailed Motion Adjustment : You can customize the motion trajectory in detail, which is very useful in creating special effects.
Add professionalism to your videos : When you use Bezier Keyframes properly, you can create top-notch motion effects that make your videos look more professional.
Bezier Keyframe Application Example
For example, when you animate an object moving from left to right in a shot, you can use Bezier Keyframes to make the object move faster at the beginning and slower at the end. This creates a more natural motion, as if the object is being pulled by gravity.
3.5. Hold Keyframe - Hold Keyframe
About Hold Keyframe
Hold Keyframe is a type of keyframe that allows you to create abrupt stops in animation, with no change between keyframes. When using Hold Keyframe, the value of the object's property will remain the same until the next keyframe occurs. This type of keyframe is useful when you want the object or effect to stop for a period of time before continuing the animation.
How to Use Hold Keyframe
To create a Hold Keyframe, simply select the keyframe you want to keep the value and right-click, then select "Toggle Hold Keyframe". When Hold Keyframe is applied, the object's properties will not change until a new keyframe changes the value. This is great for when you need to create a jerky effect or suddenly stop an object for a short time.
Benefits of Hold Keyframe
Create a sudden stop effect : Hold Keyframe helps you stop sudden movements and create the necessary interruption in a scene.
Clear motion control : This type of keyframe is useful when you want an object to stay in one state for a certain period of time, without having to constantly change or adjust.
Easy to apply : Hold Keyframes are easily applied to any property in After Effects, saving you time and creating effects quickly.
Hold Keyframe Application Example
A good example of when to use Hold Keyframes is in effects like strobes or jerky animations. You can place a Hold Keyframe at a point where the object needs to hold a value, then move to the next keyframe to change the value or continue the animation.
Each type of keyframe has its own advantages and applications. Bezier Keyframes are ideal when you want to create smooth, natural motion with fine adjustments. Meanwhile, Hold Keyframes are great for stopping motion abruptly and creating a clear break between clips.
If your project requires fluid motion, Bezier Keyframe is the way to go. However, if you want to create a stop or jerk effect, Hold Keyframe is the tool that will help you get the job done quickly and accurately.
5. How to Use Keyframes Effectively in Video Production
.jpg)
5.1. Choosing the Right Software
To use keyframes effectively, you first need to choose the right video editing software. Popular software such as Adobe Premiere Pro, Final Cut Pro, After Effects, or DaVinci Resolve all provide powerful tools for working with keyframes. Each software will have different features and interfaces, but the basic principles of using keyframes are similar.
5.2. Plan Your Edits Before Creating Keyframes
Before you start creating keyframes, you need to have a clear plan for your editing process. Identify the key points you want to change, such as position, size, or effects, and create a detailed map of the keyframe creation process. This will help you avoid having to make multiple changes and save time.
5.3. Using Keyframes to Create Special Effects
In addition to using keyframes to create smooth motion, you can also apply keyframes to create special effects. Effects such as fade in, fade out, or color changes can be easily controlled via keyframes, providing smooth and subtle changes in your video.
6. Conclusion
Keyframes play an indispensable role in the video production process, from creating smooth motion to adjusting visual elements, sounds, and effects. Understanding and using keyframes properly not only helps optimize video quality but also brings unlimited creativity to video producers. Always master the principles of using keyframes to create impressive video products, attract viewers and enhance the visual experience.


VIP Products


Best Selling Products
Freepik Premium Account
59 USD
Genuine Adobe Illustrator account
99 USD
Genuine Cheap Canva Pro
39 USD
Upgrade Genuine Office 365
49 USD
Upgrade genuine Capture One account
120 USD
ChatGPT Plus Account (GPT-4)
16 USD
Adobe Premiere Pro Account
99 USD
Autodesk All App Account Copyright
120 USD
Upgrade Duolingo Super
29 USD
Adobe Photoshop Copyright - Full App
120 USD
Windows 10 & 11 Pro Key
36 USD
MidJourney Account
29 USD
Capcut Pro 1 Year
39 USD
Plugin Retouch4me
69 USD
Copyright Adobe Lightroom Account
59 USD