Best Selling Products
What is Bokeh? Learn in detail how to take bokeh photos for beginners
Nội dung
One of the photography terms is Bokeh, a technique for creating attractive photos. However, for those who are new to photography, this is a rather new and confusing term. So, what is Bokeh? Here's how to get beautiful Bokeh photos for beginners.
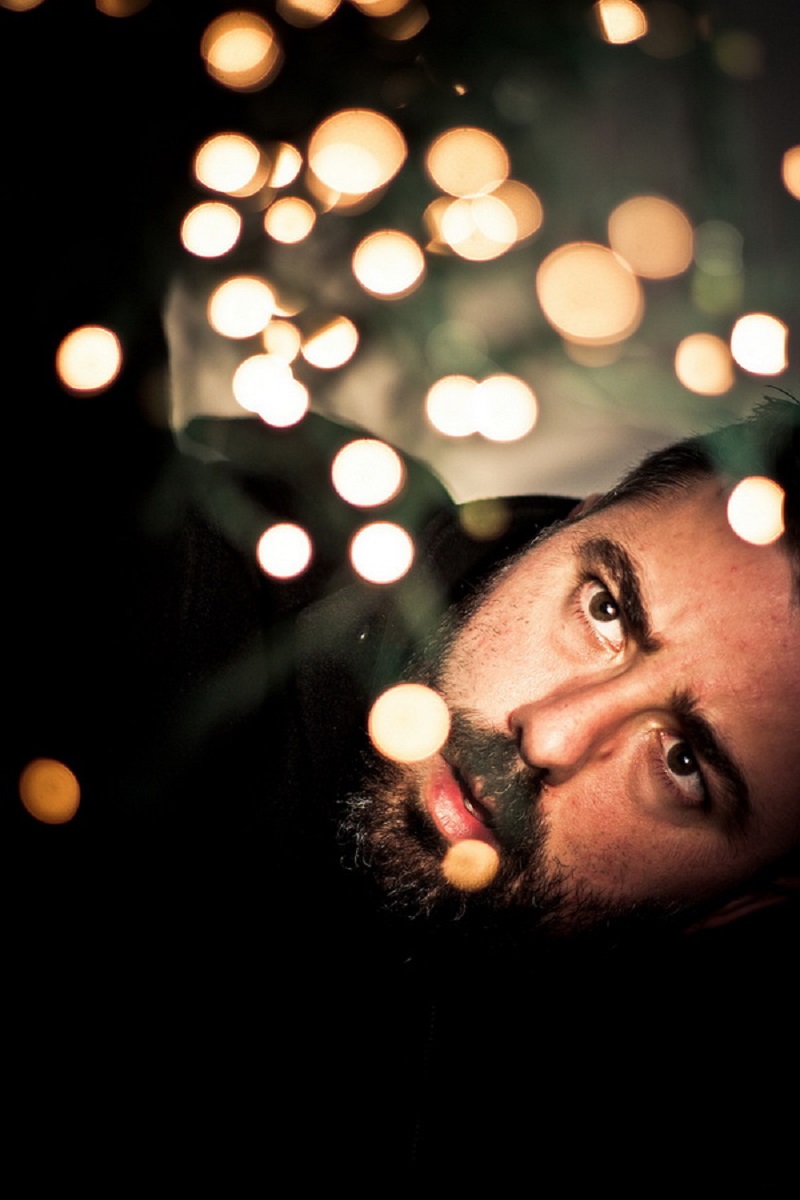
The Concept of Bokeh
The name Bokeh originated in Japan, used to describe the phenomenon, or “feeling” of blurring (Out of focus) in a photo. This is one of the popular and familiar photography techniques for photographers. It is also known as Boke. Bokeh here is not understood in the usual sense as the distance of the out-of-focus object. It is figuratively translated as the quality and image of the part outside the focus area.
.jpg)
To make it easier to understand, Bokeh can be understood as the image quality of the out-of-focus parts or the entire blurred area of a photo. This depends on the lens, not the shooting technique. The blur here we can still see, it is not the blur in front or behind the subject. The blur we often see results from shallow depth of field, or the background blurring. Bokeh is a technique used to capture soft lights used for decoration or distant parts. The photo will have a soft and blurry background. This technique consists of 2 main parts:
.jpg)
Focus Transition: this is the main part of Bokeh. The transition from sharp to out of focus, smooth or harsh. This part will help shape the style of the photo, whether it is gentle, soft, and pleasing to the eye or not.
Out-of-focus highlight: the part of the bright spots that are out of focus in the image. This part will mainly be the shape and flare. The shape is determined by the number of aperture blades and the arrangement of the aperture blades in the lens. (round, octagonal, hexagonal…) Flare is the size and color of the bright spots that are out of focus in the image.
Types of Bokeh Photos
Bokeh is divided into many different styles. The most popular types of Bokeh photos today are mainly:
Transition Bokeh
In this type of photo, changing the depth of field affects the transition: the escape from sharpness. To create the bokeh effect, the photo needs to give the viewer the feeling of not knowing which points are not sharp. Or the photographer needs to know when the continuous transition will create the bokeh effect.
.jpg)
Often, people simply think of Bokeh as a photo with a blurred area that is hard to identify. If you are a beginner in photography, you should be aware of when to start using this effect.
Rear Bokeh
With this second type of photo, it is often used to take portraits. A photo with a blurred background but sparkling colors will create a surprising effect. This is an effect that has a great effect on portrait photos.
Front Bokeh
With front Bokeh photos, the subject in the photo will become much more eye-catching. Many people often mistakenly think that: using bokeh from the front is distracting and not enjoyable. It does not create a good effect and the driver's view of the subject is limited like with bokeh from behind. However, if you process it well, your photo will become much more sparkling.
.jpg)
Bokeh light beam
This is the last type of Bokeh photo mentioned in the article. In this type of photo, the parts such as blurred circles or light streaks from electric lights, and round lights. Or small spots of light shining from the surface of the background in the foreground or background.
Tips to get a beautiful Bokeh photo
For beginners, to get beautiful photos using Bokeh, you need to note the following tips:
Use large aperture
This depends on the lens, not your camera. For good Bokeh photos, set your aperture to its “lowest” or maximum aperture. You can also set your aperture by setting your camera to “Aperture Priority” and setting the “f” to the lowest number your lens allows. This will give you a shallow depth of field, making the subject area appear less sharp than the background.
Reduce the distance between the subject and the camera
In fact, the closer you get to your subject, the more blurred the background becomes. It's like bringing a finger from a distance closer to your eye: the closer you bring it, the more your eye focuses on the finger and the more blurred the background becomes.
.jpg)
Camera lenses work the same way. The closer the camera is to the subject, the more the lens focuses on the subject and the depth of field is at its smallest.
Increase the distance between the subject and the background
Shooting a subject too close to the background will not produce the best bokeh effect. Good bokeh requires placing the subject far away from the background. Depth of field is not a boundary that can be accurately judged in photography. It only varies from sharp to blurred.
Use a long focal length
If you don't want to change the distance between the camera and the subject, increase the focal length of the lens. Increasing the focal length of the lens will reduce the depth of field. So if you have a zoom lens, use the longest focal length possible to separate the subject from the background. For example, a 70-300mm zoom lens, when shooting at 300mm, will separate the subject the most from the background. However, when shooting at 70mm, there will be more sharp objects in the background.
.jpg)
Use fast lenses
The best tip that SaDesign can give you is to use a lens with a large maximum aperture. Simply because the aperture will affect the depth of field. If you use a Nikon camera, you can choose lenses such as Nikon 50mm f / 1.4, Nikon 85mm f / 1.4 or Nikon 70-200mm f / 2.8. These are all lenses with large maximum apertures and are optically optimized for portrait photography. In addition, you can also use cheaper Nikon lenses such as Nikon 50mm f / 1.8 and Nikon 85mm f / 1.8 for example. Hopefully, the above sharing of SaDesign will be helpful for those who love photography. The Bokeh effect will help you have more beautiful and eye-catching photos. For any questions, please contact us immediately with the information
Sadesign Co., Ltd. provides the world's No. 1 warehouse of cheap copyrighted software with quality: Panel Retouch, Adobe Photoshop Full App, Premiere, Illustrator, CorelDraw, Chat GPT, Capcut Pro, Canva Pro, Windows Copyright Key, Office 365 , Spotify, Duolingo, Udemy, Zoom Pro...
Contact information
SADESIGN software Company Limited


