Best Selling Products

Freepik Premium Account
59 USD

Adobe Premiere Pro Account
99 USD

Upgrade Genuine Office 365
49 USD

Copyright Adobe Lightroom Account
59 USD

Upgrade Duolingo Super
29 USD

Adobe Photoshop Copyright - Full App
120 USD

ChatGPT Plus Account (GPT-4)
16 USD

Capcut Pro 1 Year
39 USD

Plugin Retouch4me
69 USD

Genuine Cheap Canva Pro
39 USD

Genuine Adobe Illustrator account
99 USD

Upgrade genuine Capture One account
120 USD

Autodesk All App Account Copyright
120 USD

MidJourney Account
29 USD

Windows 10 & 11 Pro Key
36 USD
What is Premiere Pro? How to Adjust Video Brightness in Premiere Extremely Simple
Nội dung
- 1. What is Premiere Pro?
- 2. How to Brighten Video in Premiere Pro
- 2.1. Using Lumetri Color
- 2.2. Apply Curves to Adjust Lighting
- 2.3. Apply Effects to Enhance Lighting
- 3. Important Notes When Adjusting Video Brightness in Premiere Pro
- 3.1. Ensure Proper Contrast
- 3.2. Do Not Over-Brighten
- 3.3. Testing on Different Screens
- 3.4. Keep It Natural
- 4. Conclusion
Learn what Premiere Pro is and how to easily and effectively brighten videos in Premiere Pro. This detailed tutorial will help you optimize video quality with powerful lighting tools in this leading video editing software.
Adobe Premiere Pro is one of the most professional video editing software available today. If you are looking to edit your videos and optimize the lighting, this article will provide you with extremely effective video lighting techniques in Premiere Pro . Whether you are a beginner or an industry expert, these methods will make your videos look more professional than ever.
1. What is Premiere Pro?
Adobe Premiere Pro is a powerful video editing software widely used by filmmakers, YouTubers, and professional video editors. With the ability to integrate many advanced tools, Premiere Pro supports users to create high-quality video products. From basic editing to complex editing techniques, this software provides everything you need to edit videos perfectly.
.jpg)
Premiere Pro software helps you work with high-quality videos without any limitations. With an easy-to-use interface, powerful features, and high compatibility with video file formats, Premiere Pro is the top choice of video editing professionals.
Outstanding Features Of Premiere Pro
Multi-layer video editing : You can edit videos from multiple sources in a single project.
Video effects : Premiere Pro offers a wide range of special effects to help you enhance your footage, adjust lighting, color, and other elements.
Integration with other software : With Adobe Premiere Pro, you can easily integrate with other software in the Adobe suite such as After Effects, Photoshop and Audition.
Collaborative projects : You can work in groups on projects with the ability to share files and editing resources.
With these great features, Premiere Pro has become indispensable software in professional video editing work.
2. How to Brighten Video in Premiere Pro
Video lighting is one of the important steps to highlight the content of a video. In Adobe Premiere Pro, you can use many different tools to adjust the lighting to suit your needs. Below are simple but effective methods to adjust video lighting in Premiere Pro.
.jpg)
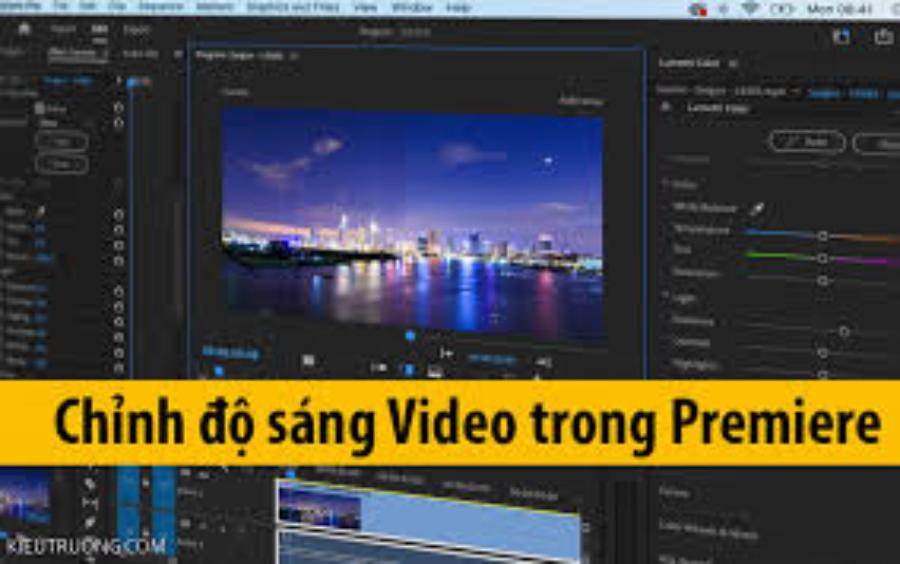
2.1. Using Lumetri Color
One of the most powerful tools in Premiere Pro for video lighting is Lumetri Color. This is a tool developed by Adobe specifically for editing color and light in videos. You can change the brightness, contrast, and color of each scene in detail.
Exposure Adjustment
Exposure is an important factor that helps you adjust the brightness of your entire video. In the Lumetri Color section, you can adjust the Exposure bar to brighten or darken your video. If your video is too dark or too bright, adjusting Exposure will help improve the overall lighting without losing important details in the scene.
Adjust Contrast and Highlights
When editing lighting, adjusting contrast and highlights is a must. Increasing or decreasing contrast will help highlight the dark and light parts of your video, creating more definition. If your footage is lacking in highlights or details in bright areas are lost, adjusting highlights will help brighten these areas without affecting the rest of the video.
Using Shadows and Blacks
In addition to adjusting the light in the bright parts, you also need to pay attention to the dark areas in the video. By editing Shadows and Blacks, you can brighten the dark areas without losing image quality.
2.2. Apply Curves to Adjust Lighting
In Premiere Pro, Curves is a powerful tool that helps you fine-tune your lighting with more detail and precision. By adjusting Curves, you can control your lighting at different levels, from shadows to highlights, and create special lighting effects.
Understanding Curves
Curves is a graph that shows the changes in light and color in a video. The horizontal axis of the Curve represents light and dark values (from black to white), while the vertical axis represents the brightness of areas of the image. You can drag points on the curve to change the brightness of specific areas of the video.
Using RGB Curves to Adjust Lighting
The Curves tool in Premiere Pro allows you to adjust lighting not just with a single curve, but with three separate curves for the RGB (Red, Green, Blue) color channels. Adjusting these color channels allows you to make more detailed changes to the color and lighting of your video.
Red Curve : Adjust the red hue in the video.
Green Curve : Adjusts the green hue.
Blue Curve : Adjusts the blue hue.
By changing these channels, you can create interesting lighting effects or highlight a certain color in your scene.
Using Curves to Enhance Detail and Contrast
In addition to adjusting overall lighting, Curves also helps you enhance the detail and contrast in your video. Changing the curvature of the curve enhances the brightness and contrast of areas in your video, creating a more striking effect. You can easily drag the points on the curve to brighten dark areas or darken bright areas.
Fine-tune Lighting for Each Area
If you want to get more specific with your video lighting, you can apply changes to just a specific area of the frame. Adjusting a portion of the light will give your video depth and life.
For example, if you want to brighten a character's face in a video without changing the lighting of the entire scene, simply adjusting the RGB channel of this region is enough.
2.3. Apply Effects to Enhance Lighting
In addition to using HSL Secondary, Premiere Pro also provides a series of effects that can help enhance the lighting in your video simply and effectively.
.jpg)
Commonly Used Brightness Effects
Brightness and Contrast : This is one of the most basic effects to adjust the brightness of the video. Simply drag the Brightness bar to increase or decrease the overall brightness of the video. Additionally, you can also adjust Contrast to create a distinct contrast between light and dark areas.
Gamma Correction : Gamma is an important factor that affects the brightness and contrast of a video. By using the Gamma Correction effect, you can adjust the gamma of your video to optimize brightness without losing detail in the dark areas.
Levels : The Levels effect allows you to adjust the red, green, and blue channels separately. Adjusting these color channels can help you create bright highlights or re-adjust colors for more balance.
Shadow/Highlight : If your video is too dark or too bright, you can use the Shadow/Highlight effect to enhance those areas. Shadow brightens dark areas, while Highlight reduces the brightness of areas that are too bright.
Tips When Using Effects
Edit gently : When using effects, you should adjust slowly and check the video after each change. Too many effects can destroy the natural light and make the video look disharmonious.
Combine multiple effects : For best results, you can combine effects like Brightness and Contrast with Gamma Correction or Levels to optimize video lighting.
Through effects in Premiere Pro, you can create dramatic changes in lighting, making your videos more impressive.
3. Important Notes When Adjusting Video Brightness in Premiere Pro
Video lighting is one of the important steps in the video editing process, however, there are some notes that need to be paid attention to so as not to affect the video quality.
.jpg)
3.1. Ensure Proper Contrast
When you're brightening a video in Premiere Pro, you need to pay attention to contrast. A video with too much contrast will create an unnatural effect, while a video with too little contrast can appear washed out. This directly affects the viewer's perception. Therefore, it's important to strike a balance between bright and dark areas.
3.2. Do Not Over-Brighten
One of the most common mistakes when editing video is over-exposing the light. This can lead to overexposure, which can blow out details in bright areas and make your video look unnatural. Make light adjustments slowly and check the results after each change.
3.3. Testing on Different Screens
Every monitor displays color and brightness differently, so before you finalize your edit, you should test your video on a variety of monitors to make sure the lighting and colors look the way you want them to.
3.4. Keep It Natural
A good video should retain the natural look of the light and atmosphere in it. Avoid drastic changes that will make the video lose its authenticity. You should make subtle adjustments to create the effect of light and dark without losing the overall balance of the scene.
4. Conclusion
Premiere Pro is a powerful video editing software that provides users with flexible and advanced tools to effectively edit video lighting. The video lighting techniques we have introduced above will help you easily improve the lighting quality of your videos, thereby creating professional and engaging video products. Whether you are a beginner or an expert in the industry, getting acquainted with and using these tools will be an important first step in improving your video editing skills. Try these methods right away using the licensed Premiere Pro software at Sadesign, you will feel the difference in the videos you design.


VIP Products


Best Selling Products
Freepik Premium Account
59 USD
Adobe Premiere Pro Account
99 USD
Upgrade Genuine Office 365
49 USD
Copyright Adobe Lightroom Account
59 USD
Upgrade Duolingo Super
29 USD
Adobe Photoshop Copyright - Full App
120 USD
ChatGPT Plus Account (GPT-4)
16 USD
Capcut Pro 1 Year
39 USD
Plugin Retouch4me
69 USD
Genuine Cheap Canva Pro
39 USD
Genuine Adobe Illustrator account
99 USD
Upgrade genuine Capture One account
120 USD
Autodesk All App Account Copyright
120 USD
MidJourney Account
29 USD
Windows 10 & 11 Pro Key
36 USD