Best Selling Products
What is Stroke in Illustrator? Instructions for creating Stroke from A to Z
Nội dung
In the field of graphic design, Adobe Illustrator is a prominent tool that helps designers express their creative ideas. One of the important but less noticed features is Stroke – this tool allows to create sharp and impressive borders. Stroke is an important part that helps enhance the aesthetics and depth of design works.

1. What is Stroke in Illustrator?
Stroke in Adobe Illustrator, commonly known as Stroke AI, is the concept of an outline around a specific object. In other words, Stroke is a colored line that surrounds the bounding area of the Fill color.
More than just creating outlines or highlighting color differences, Strokes can act as their own separate object, possessing all the properties of a Vector object. This gives design flexibility, allowing users to customize elements like thickness, color, and style.
Stroke is often associated with the concept of Path in Illustrator, but it is important to note that Stroke is not a Path. Instead, it is made up of many different attributes, not simply a boundary line like Path. This gives designers more options in creating creative and unique works.
.png)
2. Stroke function in Illustrator
Stroke is one of the most important features in Adobe Illustrator, providing the ability to customize and express your design ideas. There are many commands and panels that help users manage outlines effectively. To get the most out of Stroke, let's learn its main functions right below.
2.1 Border color
To start, you need to create a path using basic drawing tools like Rectangle Tool or Pen Tool. Once you have a path, filling it with Stroke color is simple. On the toolbar, you can select Stroke box mode. Press X key or click on double arrow to bring up Stroke box, from there you can easily choose the color for the border.
There are two ways to color the outline. The first is to double-click the Stroke box to open the color palette, from which you can choose a color or switch to gradient mode to create a gradient effect. The second is to use the control bar, where you can choose a color from the available options.
2.2 Managing border properties
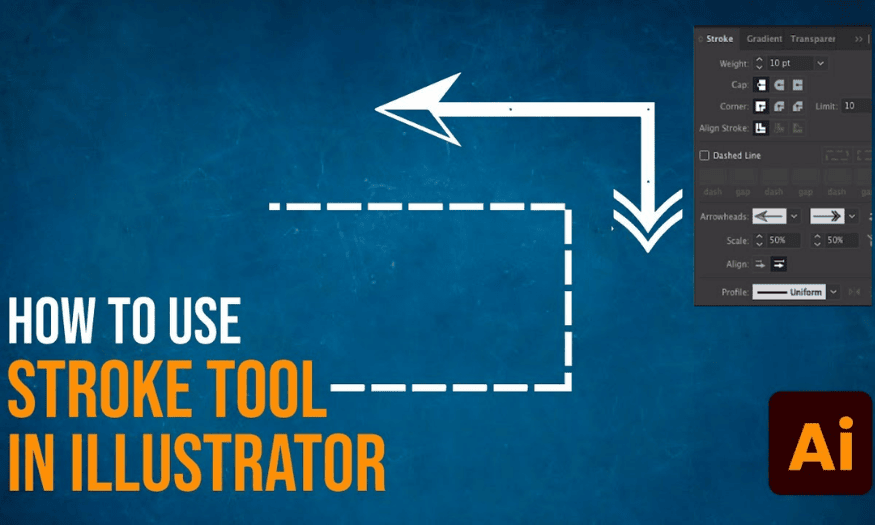
The Stroke panel is the main tool for managing Stroke properties. You can open this panel by clicking the yellow "Stroke" on the control bar or from Menu > Stroke (Ctrl+F10). In the Stroke panel, there are three main areas you need to pay attention to:
Stroke Display: This area allows you to adjust how the outline appears relative to the path. You can manage the Weight, Cap format, and the position of the Stroke relative to the path.
Stroke Type: Here, you can choose between solid and dashed lines. You can also adjust the length and spacing of the dashes, creating unique effects for your design.
Stroke Type: You can choose from different stroke shapes, from arrows to special shapes. This feature is useful when you want to create more complex designs.
2.3 Convert Stroke to Object
One of the cool features of Illustrator is the ability to turn a Stroke into a standalone vector object. This allows you to edit the Stroke as a separate object, including the Fill and the Stroke. To do this, simply use the Expand or Expand Appearance command from the Object menu.
Furthermore, you can also apply Stroke properties to text objects similar to vector objects, opening up more creative opportunities in design.
.png)
3. How to create a simple Stroke
Among the many features of Illustrator, creating strokes for objects is one of the basic yet important steps. Let's explore the step-by-step process to create sharp and sophisticated borders that will take your designs to the next level!
Step 1: Open Adobe Illustrator and create a new document
First, you need to open Adobe Illustrator on your computer. Then, create a new document by selecting File > New . You can customize the size and format according to your design needs.
Step 2: Draw the object that needs a stroke
Next, use the drawing tools in Illustrator to create the object you want. You can choose from tools like the Rectangle Tool , Ellipse Tool , or Pen Tool to draw a rectangle, circle, or any shape you like.
Rectangle Tool : Press the M key and drag to create a rectangle.
Ellipse Tool : Press the L key and drag to create a circle or ellipse.
Pen Tool : Press the P key to freely draw the shape you want.
Step 3: Select the object and open the Stroke panel
Once you have created the object, select it with the Selection Tool (V key). Then, open the Stroke panel by going to Window > Stroke . The Stroke panel will give you many options for adjusting the outline of the object.
Step 4: Customize stroke
In the Stroke panel, you'll see a variety of options for customizing the outline of your object:
Weight : Adjust the thickness of the stroke. You can enter a numeric value or drag the slider to change it.
Dashed Line : If you want to create a dashed border, check this box and enter values for the length of the line and the distance between them.
Cap : This option allows you to choose the ending style of the stroke (round, butt, or projecting).
Corner : Customize the angle of the stroke, can choose smooth or sharp.
Step 5: Change stroke color
To change the color of the stroke, you can click the color box next to the Stroke option in the control panel. Select the color you want from the color palette or enter the hex color code if you already have a specific color code.
Step 6: Save and export the document
Once you've finished creating and customizing your object's stroke, be sure to save your document. You can choose File > Save to save it as an AI file, or choose File > Export to export it to a different format like PNG, JPG, or PDF.
.png)
4. Stroke tips that everyone should know
When working with Strokes in Adobe Illustrator, there are a few helpful tips to keep in mind to optimize your designs:
Split Stroke into separate object: A Stroke is not just a part of an object; it can be split and edited independently. This allows you to change the properties of the Stroke without affecting the main object.
Customize Gradient Shape: You can fill a Stroke even if it is made from an open path. This gives you more flexibility in creating unique color effects, allowing for continuous or intermittent gradients.
Stroke Position Management: Stroke allows you to adjust its position relative to the path. You can set the Stroke position to be inside, outside, or in the center of the path, creating interesting visual effects.
Explore different Stroke styles: Experiment with stroke styles like solid, dashed, or special shapes. This will add more creativity to your design.
Use the Stroke panel: Take advantage of the Stroke panel to easily adjust properties like thickness, round corners, and style. This gives you more control over how your Stroke appears.
Combine with other effects: Don't hesitate to combine Stroke with other effects like shadow or glow to add depth and pop to your design.
.png)
5. Conclusion
Stroke in Adobe Illustrator is more than just an outline – it’s a tool that helps you express your ideas and creativity. With the flexibility to customize thickness, color, and style, Stroke has the ability to create unique and outstanding designs. Once you master how to use Stroke, you’ll open up a new world of graphic design where creativity knows no bounds. Experiment, explore, and make Stroke an indispensable part of your design toolkit!


