Best Selling Products

Upgrade genuine Capture One account
120 USD

Upgrade Duolingo Super
29 USD

Upgrade Genuine Office 365
49 USD

Capcut Pro 1 Year
39 USD

MidJourney Account
29 USD

Adobe Photoshop Copyright - Full App
120 USD

Adobe Premiere Pro Account
99 USD

Autodesk All App Account Copyright
120 USD

Genuine Cheap Canva Pro
39 USD

Genuine Adobe Illustrator account
99 USD

Copyright Adobe Lightroom Account
59 USD

Windows 10 & 11 Pro Key
36 USD

Plugin Retouch4me
69 USD

ChatGPT Plus Account (GPT-4)
16 USD

Freepik Premium Account
59 USD
10 Basic Photoshop Skills for Beginners
Nội dung
- 2. Exploring Adjustment Layers
- 3. Leveraging automatic correction features
- 4. Enhancing images with Levels and Curves
- 5. “Cleaning up” images quickly with Spot Healing Brush
- 6. Removing objects with Healing Brush or Content-Aware Fill
- 7. Creating impressive black-and-white photos in Photoshop
- 8. Cropping images with proper composition and ratio
- 9. Adding borders to complete your artwork
- 10. Saving images in the right format to avoid losing your work
- 11. Conclusion
Are you trying to learn Adobe Photoshop but feel overwhelmed by too many tools and don’t know where to start? Don’t worry, Appvip has compiled the 10 most essential basic Photoshop skills specifically for beginners, helping you build a solid foundation right from the first steps.
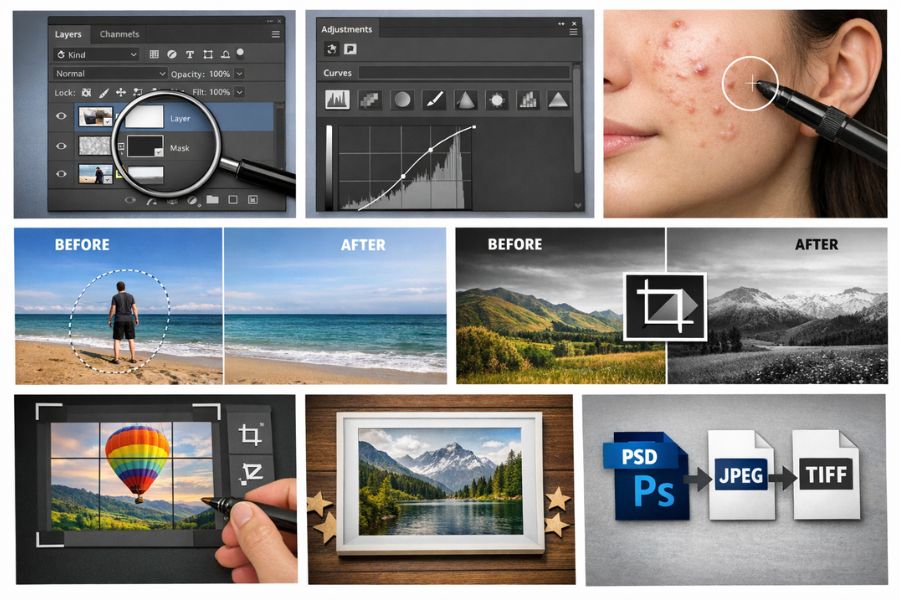
1. Non-destructive editing in Photoshop
Non-destructive editing is a crucial principle when working with Photoshop, especially for beginners. Instead of directly modifying the original image, you should work through layers, layer masks, or adjustment layers to preserve the original data. This approach allows you to easily edit again, toggle effects on or off, or revert to a previous state without degrading image quality.
In Photoshop, each layer functions as a separate content layer stacked on top of others. You can add colors, effects, adjust brightness, or composite elements on individual layers without affecting the original image beneath. As a result, the design process becomes more flexible, more professional, and minimizes the risk of damaging the file after multiple edits.
Some notes when working with layers
Spot Healing Brush: When using the Spot Healing Brush or tools like Magic Wand and Blur, you should create a new empty layer first. Then, on the top options bar, enable Sample All Layers. This allows Photoshop to take data from underlying layers but record the result on the new layer.
Healing Brush and Clone Stamp: To make these tools work non-destructively, create a new layer, then in the options bar choose Sample: Current & Below. Edits will be applied to the empty layer instead of directly on the original image.
Dodge and Burn: These tools are commonly used to brighten or darken specific areas, creating depth and local contrast. To use them professionally, go to Layer > New > Layer, set Mode: Overlay, and check Fill with Overlay-neutral color. Then perform Dodge and Burn on this layer to ensure the original image remains unaffected.
.jpg)
2. Exploring Adjustment Layers
Adjustment Layers are extremely important tools that allow you to change brightness, contrast, colors, or tones without directly affecting the original file. Instead of editing destructively, all changes are placed on a separate layer. You can even stack multiple adjustment layers to control color and lighting more flexibly and professionally.
To use them, click the Adjustment Layers icon in the Layers panel, then choose adjustments such as Brightness/Contrast, Levels, Curves, or Hue/Saturation. The Properties panel will immediately appear, allowing you to fine-tune parameters via sliders. Each change is previewed in real time, making it easy to compare and adjust until you achieve the desired effect.
The biggest strength of Adjustment Layers is the ability to edit at any time. Simply double-click the layer to reopen the control panel and adjust settings. You can also reduce Opacity to soften the effect, toggle visibility to compare before and after, or delete it entirely if no longer needed. This is the foundation of non-destructive editing that beginners should adopt early.
.jpg)
3. Leveraging automatic correction features
Photoshop integrates many automatic tools that improve images with just one click. In the Image menu, you will find options like Auto Tone, Auto Contrast, and Auto Color these tools quickly balance overall lighting, contrast, and color. After applying them, you can still go to Edit > Fade to reduce the effect intensity if it feels too strong.
Beyond that, many advanced adjustment tools also include an Auto button for smart correction. For example, when creating a Levels Adjustment Layer, you can press Auto to let Photoshop analyze and optimize the tonal range. This is a great starting point before refining details manually with sliders.
To better control the effect, don’t forget to use the Opacity slider in the Layers panel. Reducing Opacity softens automatic adjustments, keeping the image more natural and balanced. Combining Auto and manual adjustments helps beginners quickly develop a professional color grading mindset.
4. Enhancing images with Levels and Curves
When opening an image in Photoshop, many photos may look “flat,” lacking depth and emphasis. The main reason is insufficient contrast. By properly adjusting highlights and shadows, the image can become clearer, more vivid, and more professional.
Beginners often use Brightness/Contrast because it’s simple, but for better control, you should learn Levels or Curves. Levels adjust tonal range through the Histogram, allowing you to define shadows, midtones, and highlights. Meanwhile, Curves offer more flexible fine-tuning, especially when precise color and lighting adjustments are needed.
To quickly open Levels, press Ctrl + L (Windows) or Cmd + L (Mac). However, a more professional approach is to create an Adjustment Layer > Levels for non-destructive editing. This allows you to revisit adjustments anytime and combine with Opacity or Layer Mask for flexible control.
What is Histogram?
Histogram is a graph representing the entire tonal range of an image. The horizontal axis (X-axis) represents brightness, starting from pure black on the left, transitioning through shades of gray, and ending with white on the right. The vertical axis (Y-axis) shows the number of pixels at each brightness level. By reading the Histogram, you can assess an image’s exposure in seconds.
How to detect underexposed or overexposed images: If most pixels cluster on the left, the image is likely underexposed (too dark). If they cluster on the right, the image may be overexposed (too bright). If pixels concentrate in the middle, the image lacks contrast and appears dull.
Principle of tonal balance: A well-contrasted image usually spans evenly from dark to light, meaning the Histogram covers the full range from black to white. To achieve this, drag the adjustment sliders below the graph so they meet the edges of the pixel distribution. This increases contrast naturally without losing important details.
Meaning of adjustment sliders: The left slider controls shadows, the right adjusts highlights, and the middle affects midtones. Moving the shadow slider inward deepens dark areas; adjusting highlights makes bright areas clearer. To brighten the image without blowing highlights, slightly move the midtone slider left for balanced brightness.
5. “Cleaning up” images quickly with Spot Healing Brush
No matter how carefully you compose your shot, unwanted details like dust, skin blemishes, or stray objects may still appear. These elements can reduce the visual quality of your image. Fortunately, Photoshop provides tools to fix them in seconds.
Spot Healing Brush is ideal for removing small imperfections naturally. You can select it from the toolbar or press J for quick access. Before using it, adjust the brush size to match or slightly exceed the area you want to fix for best results.
Make sure Content-Aware is enabled in the top Options bar. This feature allows Photoshop to analyze surrounding areas and intelligently fill in the removed part. Simply click or lightly brush over the area, and the imperfection will disappear almost instantly.
.jpg)
6. Removing objects with Healing Brush or Content-Aware Fill
Spot Healing Brush Tool: Suitable for removing small details on simple backgrounds. It automatically analyzes surrounding areas and fills using Content-Aware. Just select a brush, adjust size, and click or paint over the area. Effective for acne, dust, and minor blemishes.
Healing Brush Tool: Lets you manually select a sample area by holding Alt, then paint over the target area. It blends texture with surrounding lighting, ideal for skin retouching or complex backgrounds.
Patch Tool: Used for larger areas. Select the object, drag to a similar texture area to replace it. Photoshop blends colors for a natural transition.
Clone Stamp Tool: Copies both color and texture from a sample area to another. Hold Alt to set the source point, then paint over the target. Suitable for precise edits and background control.
7. Creating impressive black-and-white photos in Photoshop
Using Black & White Adjustment Layer: The simplest and most effective way to convert color images to black and white is by using an Adjustment Layer. In the Layers panel, click the Adjustment Layers icon and select Black & White. Photoshop instantly converts the image without affecting the original file. This non-destructive method allows future adjustments without quality loss.
Using Presets for quick effects: After conversion, try built-in presets in the Properties panel. These simulate classic film filters, enhancing depth and contrast. Presets are great starting points for beginners before fine-tuning details.
Fine-tuning with color sliders: Each slider represents a color from the original image. Lower values darken that color; higher values brighten it. For example, reducing Blue and Cyan darkens the sky, making clouds stand out more. Controlling each color adds depth and emotion.
Using Tint for style: Enable Tint to overlay a subtle color tone. Default is often sepia (vintage feel), but you can choose any color. This helps create unique styles, from nostalgic to cinematic to modern.
.jpg)
8. Cropping images with proper composition and ratio
Using Crop Tool: Cropping is not just removing unwanted parts it improves composition and focuses attention. Select Crop Tool and drag handles to adjust the frame.
Setting ratio: Use the Ratio option in the Options bar. Choose Original Ratio, Square, or input custom dimensions. This ensures correct display across platforms.
Non-destructive crop: Uncheck Delete Cropped Pixels to keep hidden areas. You can re-edit anytime without losing data.
Straightening horizon: Use Straighten tool and draw along a horizon line. Photoshop auto-adjusts alignment. Keep non-destructive mode for flexibility.
9. Adding borders to complete your artwork
Adding borders is a small step that makes a big difference. It enhances professionalism and completeness.
Go to Image > Canvas Size, choose Canvas Extension Color, then increase Width and Height. The added area becomes the border.
For balance, borders typically should be about 2–3% of image width, but adjust based on style.
10. Saving images in the right format to avoid losing your work
Choosing the right file format is as important as editing. Formats like JPEG, PNG, or TIFF do not support layers, so Photoshop flattens them.
To preserve layers, masks, and effects, save in PSD format Photoshop’s native format. It allows full re-editing anytime.
For sharing or printing, export copies as JPEG (lightweight) or TIFF (high quality). Best practice is to keep a PSD master file and export versions for specific uses.
See more: buy Adobe license
.jpg)
11. Conclusion
Mastering these 10 basic Photoshop skills not only helps you edit better images but also builds a structured and professional design mindset from the start. When you understand layers, lighting, colors, and editing tools, you will save time, reduce errors, and become more confident creatively. Appvip believes that with consistent practice of these foundational skills, you can go much further in mastering Photoshop and developing your creative potential.


VIP Products


Best Selling Products
Upgrade genuine Capture One account
120 USD
Upgrade Duolingo Super
29 USD
Upgrade Genuine Office 365
49 USD
Capcut Pro 1 Year
39 USD
MidJourney Account
29 USD
Adobe Photoshop Copyright - Full App
120 USD
Adobe Premiere Pro Account
99 USD
Autodesk All App Account Copyright
120 USD
Genuine Cheap Canva Pro
39 USD
Genuine Adobe Illustrator account
99 USD
Copyright Adobe Lightroom Account
59 USD
Windows 10 & 11 Pro Key
36 USD
Plugin Retouch4me
69 USD
ChatGPT Plus Account (GPT-4)
16 USD
Freepik Premium Account
59 USD