Best Selling Products
5 Simple Steps to Adjust Video Brightness in Premiere
Nội dung
- 1. What is Three-Way Color Corrector?
- 2. Ingredients of Three-Way Color Corrector
- 3. How to use the three-dimensional color correction effect
- 4. Beautiful Effects In Premiere
- 4.1. Transitions
- 4.2. Lighting Effects
- 4.3. Color Effects
- 4.4. Layer Effects
- 4.5. Text Effects
- 5. How to Use Beautiful Effects in Adobe Premiere
- Conclude
Learn how to adjust video brightness in Premiere simply and effectively with 5 basic steps in the following article. Click to find out now!
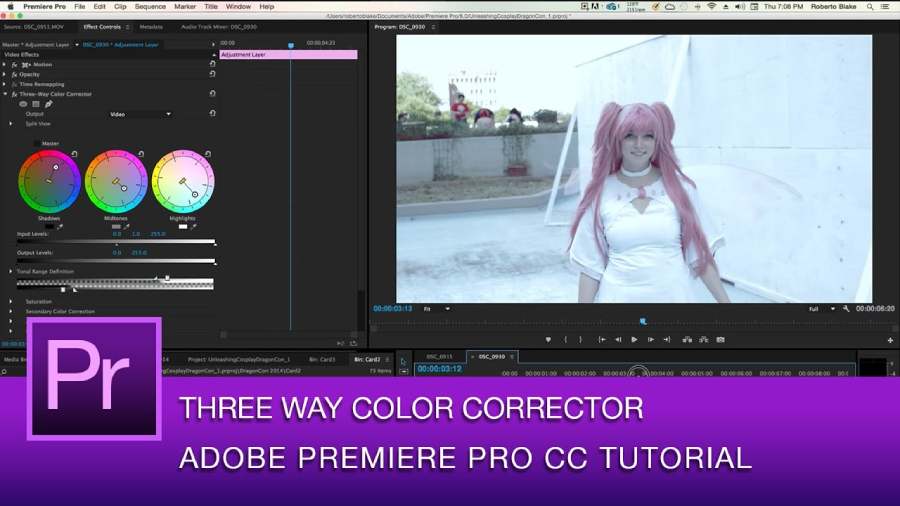
Videos shot in poor lighting conditions can have a big impact on image quality and viewer perception. Especially for professional video projects, adjusting brightness is extremely important. Adobe Premiere Pro provides many powerful tools for you to edit videos effectively. The following article SADESIGN will guide you through 5 extremely simple steps to adjust video brightness in Premiere, helping to improve image quality and create impressive footage.
1. What is Three-Way Color Corrector?
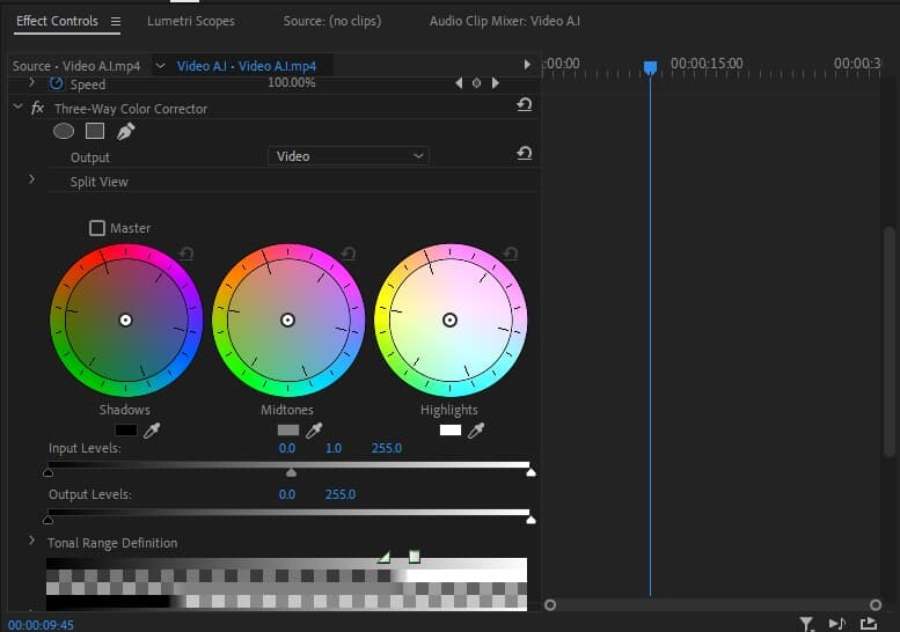
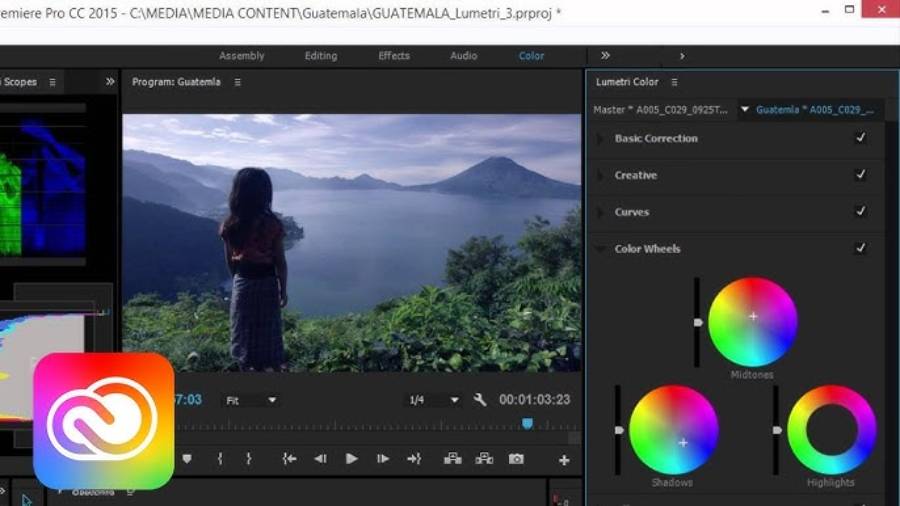
Three-Way Color Corrector is a powerful color correction tool available in Adobe Premiere Pro. Designed to help users adjust elements such as video brightness, color, and contrast, the tool provides three main color channels: Shadows, Midtones, and Highlights. This allows users to control color and brightness in a more detailed and subtle way.
When editing videos, adjusting these elements correctly will help your videos become clearer and sharper, while creating the perfect light balance for each scene. Not only that, using the Three-Way Color Corrector effect also helps you restore natural colors, especially for underexposed or unevenly lit scenes.
2. Ingredients of Three-Way Color Corrector
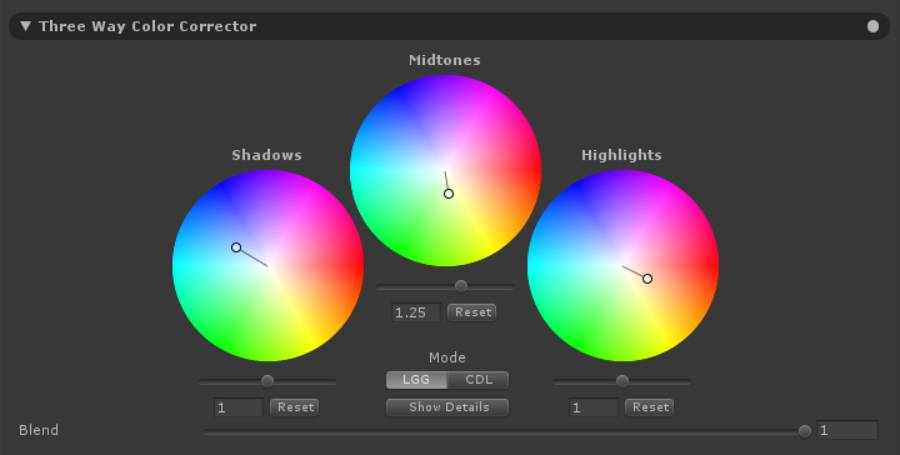
- Shadows: These are the areas of color in the dark parts of your video where light is limited. Adjusting shadows helps you brighten dark areas without losing detail in brighter areas.
- Midtones: These are the neutral colored parts of the video, where most of the image detail is contained. Adjusting the midtones helps soften colors and sharpen the video.
- Highlights: These are the brightest areas of your video. Adjusting highlights helps bring out bright details without overexposing or losing contrast.
With these three color correction tools, users can create a balanced and beautiful video without complicated techniques. Especially when your video is dark or underexposed, Three-Way Color Corrector is an indispensable tool to improve video quality.
@old
3. How to use the three-dimensional color correction effect
Brightening dark footage isn't as simple as increasing the overall brightness of your video. You need to understand the color and lighting elements in your video to make the right adjustments. Here are five easy steps to brighten a video in Premiere with the Three-Way Color Corrector tool.
Step 1: Open the project and select the video you want to edit
First, you need to open Adobe Premiere Pro and import the video you want to edit into the timeline. Make sure the video is completely trimmed, because the light and dark editing will be more effective when you only focus on the finished footage.
Step 2: Add the Three-Way Color Corrector effect to your video
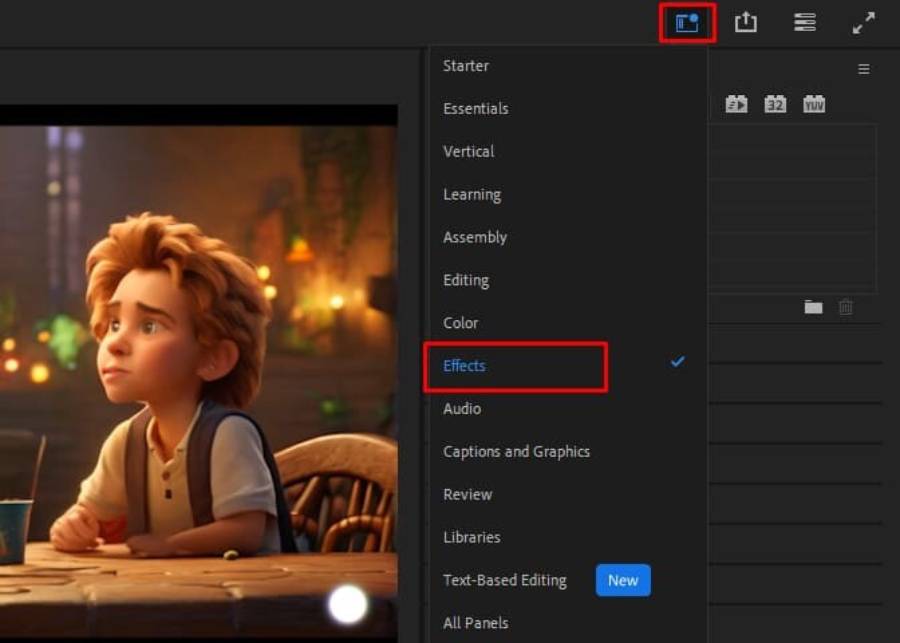
Once you've selected the video you want to edit, find the Three-Way Color Corrector tool in Premiere's effects panel. To do this, open the Effects tab on the right, then look for the tool under Color Correction. Drag and drop the effect onto the video in your timeline.
Once you've added the tool to your video, a new panel will appear in the Effect Controls section, where you can adjust the Three-Way Color Corrector's parameters.
Step 3: Adjust Shadows to Brighten Dark Areas
The next step is to adjust Shadows to improve the brightness of dark areas in the video. In the Three-Way Color Corrector panel, you will see a slider for Shadows. Move this slider to the right to brighten the shadow areas without losing highlight details.
Be careful not to overdo it, as this can easily cause loss of detail in the darker parts of your video. Adjust slowly and watch the changes for best results.
Step 4: Adjust Midtones to Balance the Light
Next, you need to adjust the Midtones, as this is the area that contains most of the video detail. To brighten the midtones without losing contrast, simply tweak the Midtones slider slightly. This will help improve the overall brightness of the video without making it too bright or lacking in detail.
When editing midtones, you may also see some parts of the video appear to have a color shift. If this happens, you can use other tools to further refine the color to make the video more natural.
Step 5: Adjust Highlights to increase the brightness of bright parts
Finally, to brighten the bright areas of the video, you need to edit Highlights. Increasing the brightness of the bright points will make the video more vivid and create contrast between dark and bright areas, making the scene clearer and sharper.
However, be careful when editing highlights because if you overdo it, the highlights will be blown out and lose detail. Therefore, you should only edit moderately and monitor the results after each change.
Step 6: Review and Export
Once you have adjusted the three main color channels (Shadows, Midtones, and Highlights), review the video to make sure that the brightness and color of the video have achieved the desired results. You can review the video in real time to check the changes and make sure everything is perfect.
If you're happy with the results, export your video and save your project. Make sure to export your video in high quality to preserve the brightness and color you've adjusted.
4. Beautiful Effects In Premiere
Effects in Premiere can be divided into many different categories, from motion effects, transitions to special effects such as lighting, color, and even sound effects. Here are some popular and impressive effects that you can use during video editing.
@old
4.1. Transitions
Transitions are one of the basic but extremely important effects in the video editing process. They help to connect different video clips smoothly and naturally. Adobe Premiere offers a wide variety of transition options, each of which can create a different feel for your video.
Cross Dissolve
Cross Dissolve is one of the most popular transition effects in Premiere. It helps create a smooth transition between two shots, giving a gentle and pleasant feeling to the viewer. This effect is often used in videos that need to be soft and easily create emotions.
Wipe
Wipe is a dynamic transition effect that allows you to “sweep” from one scene to another in multiple directions, such as from left to right, from top to bottom, or diagonally. Wipe is suitable for videos that require dynamism and drama.
Slide
The Slide effect creates a transition that's like pulling one shot off the screen and bringing the next in. With Slide, you can choose from a variety of directions to create interesting movement in your video.
4.2. Lighting Effects
Lighting is an essential element in creating the atmosphere and mood of your video. Adobe Premiere offers a variety of lighting effects to help you highlight elements in your video, from creating strong lighting to soft, subtle highlights.
Lens Flare
Lens Flare is a very popular lighting effect in action movies or outdoor videos. This effect creates a strong light, making the viewer feel like they are looking through a camera lens that is being illuminated by light.
Light Rays
Light Rays create the effect of light passing through objects or in space, creating a mystical and magical feel. This is an ideal effect for videos that want to give a mystical or mythical feel.
4.3. Color Effects
Color in video is not only an aesthetic element but also plays an important role in conveying emotions and messages. Color effects in Adobe Premiere help you easily edit the color tone of your video, creating beautiful and professional effects.
Color Grading
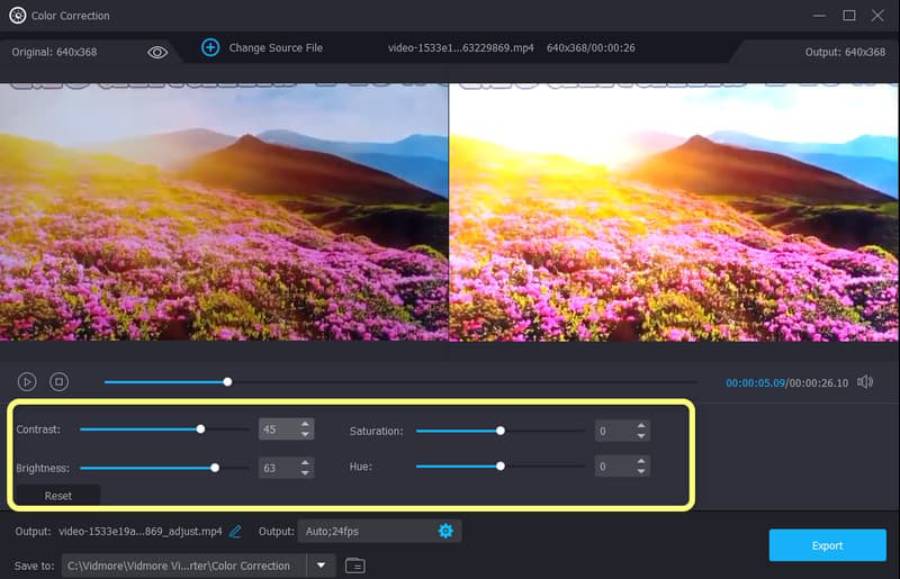
Color Grading is the process of changing the overall color of a video. You can use tools like the Lumetri Color Panel to edit the brightness, contrast, and saturation of the colors in your video. Color Grading not only makes your video more visually appealing, but it can also change the mood and emotion your video conveys.
Vignette
Vignette is an effect that darkens the edges of a video, helping to focus attention on the center or main subject. This is a very effective technique to create emphasis and give depth to the video.
4.4. Layer Effects
Layering effects in Premiere help you create layers of animation, making your videos more dynamic and creative. These effects are great for highlighting individual objects or creating interesting movements in your videos.
Track Matte Key
Track Matte Key allows you to use another layer (matte) to adjust the way the image layers on the video are displayed. You can create special effects such as text or images that stand out from the video background, increase contrast and create a more interesting video.
Motion Blur
Motion Blur is a popular layering effect in fast-moving videos, such as sports videos or action scenes. This effect creates a blur when objects move quickly, helping to create a smoother, more natural feel of motion.
4.5. Text Effects
In some videos, adding text and letters to the screen is indispensable. Adobe Premiere offers a variety of text effects, helping you create impressive intros, titles, or captions.
3D Text
With 3D Text, you can create embossed text effects that make your text not just a part of the video but a prominent element that attracts the viewer's attention. You can customize the lighting, shadows, and curvature of the text to create unique effects.
Typewriter Effect
Typewriter Effect creates a text effect that appears letter by letter as if it were being typed on a keyboard. This is a fun effect, great for videos that need to build attention slowly or want to emphasize an important message.
Effects in Adobe Premiere are a powerful tool to help you enhance the quality of your videos. Whether you are making a video for YouTube, a short film, or a commercial project, using effects properly will help your product stand out and be more impressive.
5. How to Use Beautiful Effects in Adobe Premiere
Using effects in Adobe Premiere is more than just dragging and dropping them onto the timeline. To create a truly impressive video product, you need to know how to combine effects together properly. Here are some suggestions on how to use beautiful effects in Premiere:
- Choose the right effects for each scene: Each video will have a unique atmosphere, so you need to choose effects that match the mood you want to convey.
- Adjust the intensity of the effect: Don't let the effect overwhelm the entire video. Make sure the effect doesn't take away from the naturalness and authenticity of the scene.
- Combine multiple effects together: You can combine transitions, colors, and lighting effects to create a complete space that is both beautiful and suitable for the story the video wants to tell.
@old
Conclude
With 5 simple steps from selecting videos, adding effects to adjusting each color channel, you will be able to improve the quality of your videos quickly and easily. Whether you are a beginner or a professional filmmaker, brightening dark scenes will help you improve the image quality of the final product. Practice the above steps and make the most of Premiere Pro's color correction tool that SADESIGN has shared to create the most impressive videos.


