Best Selling Products

Upgrade genuine Capture One account
120 USD

Capcut Pro 1 Year
39 USD

Plugin Retouch4me
69 USD

Autodesk All App Account Copyright
120 USD

Genuine Adobe Illustrator account
99 USD

Genuine Cheap Canva Pro
39 USD

Adobe Photoshop Copyright - Full App
120 USD

Windows 10 & 11 Pro Key
36 USD

ChatGPT Plus Account (GPT-4)
16 USD

MidJourney Account
29 USD

Upgrade Genuine Office 365
49 USD

Upgrade Duolingo Super
29 USD

Copyright Adobe Lightroom Account
59 USD

Adobe Premiere Pro Account
99 USD

Freepik Premium Account
59 USD
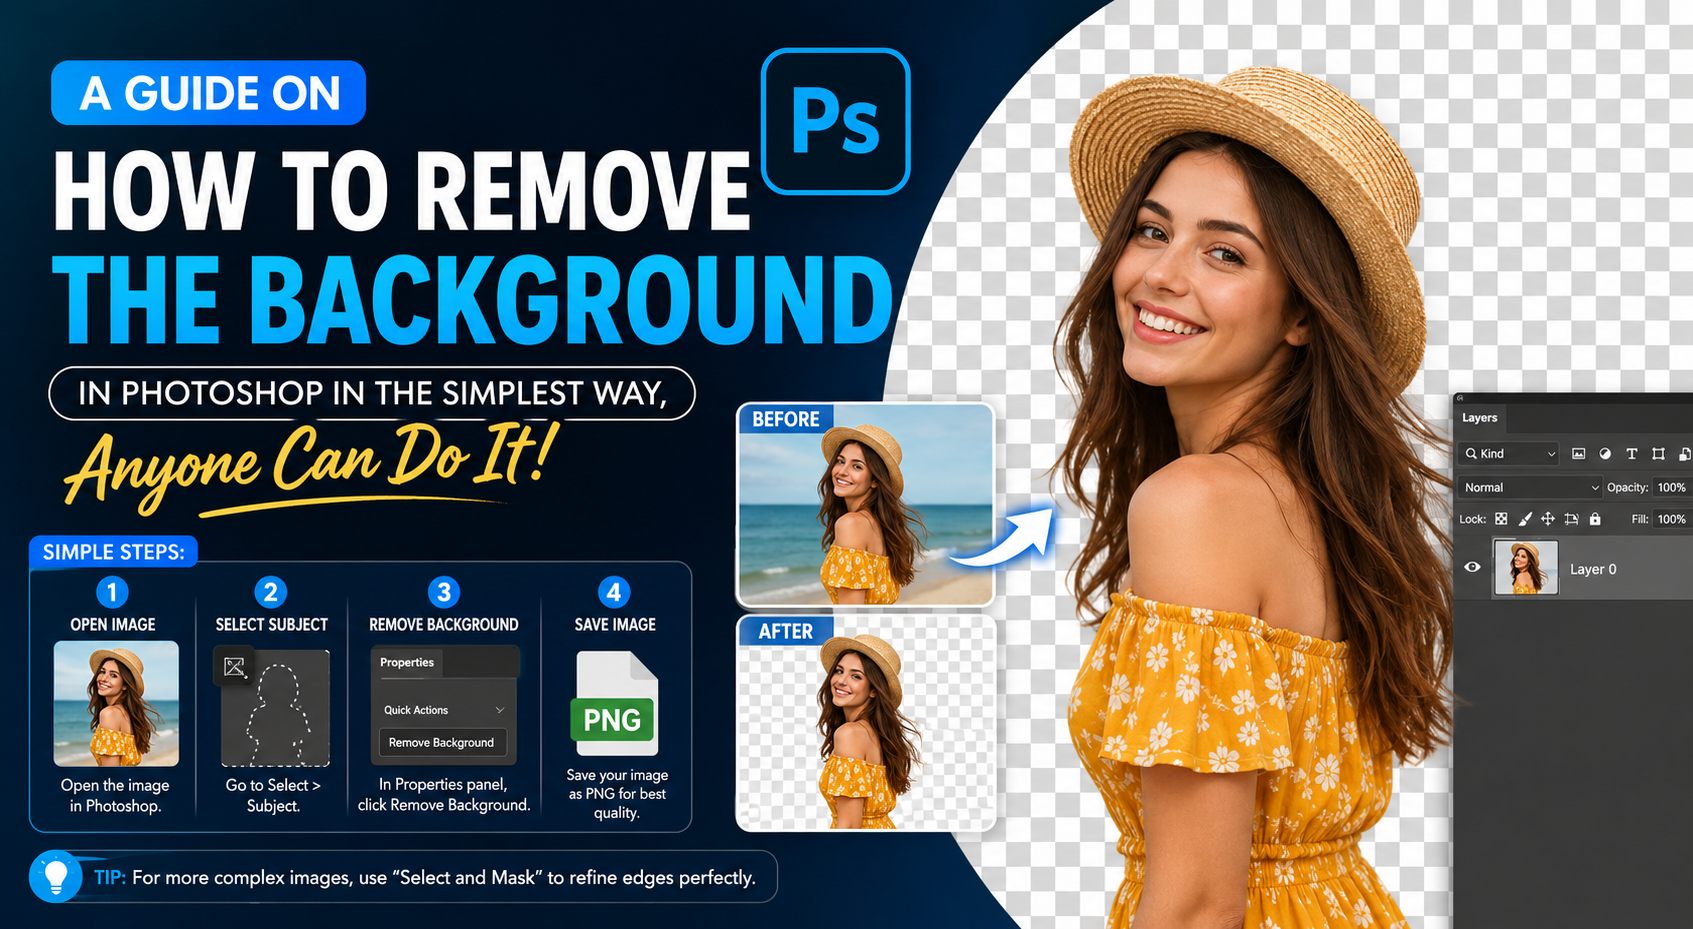
A guide on how to remove the background in Photoshop in the simplest way, anyone can do it.
Nội dung
- 1. Why is background separation necessary?
- 2. Separate the background using the Pen Tool
- Step 1: Open the image and select the Pen Tool.
- Step 2: Select Path mode
- Step 3: Draw a border around the object.
- Step 4: Finish the outline
- Step 5: Convert Path into Selection
- Step 6: Separate the background
- 3. Separate the background using the Focus Area feature.
- Step 1: Open the image and select Focus Area.
- Step 2: Adjust the parameters in the Focus Area.
- Step 3: Confirm the selection
- Step 4: Create a new background
- 4. Separate the background using the Object Selection tool.
- Step 1: Open the image and select the Object Selection tool.
- Step 2: Select the image selection mode.
- Step 3: Draw a selection around the object.
- Step 4: Refine the selection area
- Step 5: Separate the background
- 5. Separate the background using the Magic Wand tool.
- Step 1: Open the image and select the Magic Wand tool.
- Step 2: Adjust the Tolerance value
- Step 3: Choose a background
- Step 4: Refine the selection area
- Step 5: Separate the background
- 6. Conclusion
Among the many outstanding features that Photoshop possesses, background removal is one of the most important and widely used techniques.
1. Why is background separation necessary?
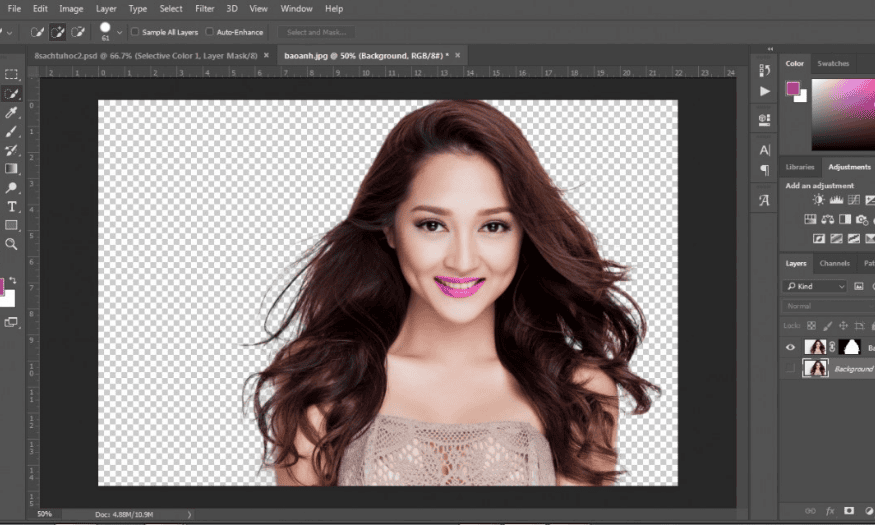
Background removal is an important step in image editing. There are many reasons why you might need to remove the background, such as:
-
Highlighting the main subject : When you remove the background, the main subject will stand out more, attracting the viewer's attention.
-
Background Change : Background Separation allows you to change the background of an image. You can superimpose objects onto a new background, creating unique and creative images.
-
Graphic design : In design, background separation makes it easier to combine different elements, from text to images, creating a perfect final product.
-
Image editing : Background removal is also an important part of image editing, helping to eliminate unwanted elements and improve the overall image .
2. Separate the background using the Pen Tool
The Pen Tool in Photoshop allows users to create precise outlines that follow the shape of objects in an image. This is especially useful when working with images that have many intricate details or edges that need to be separated from the background.
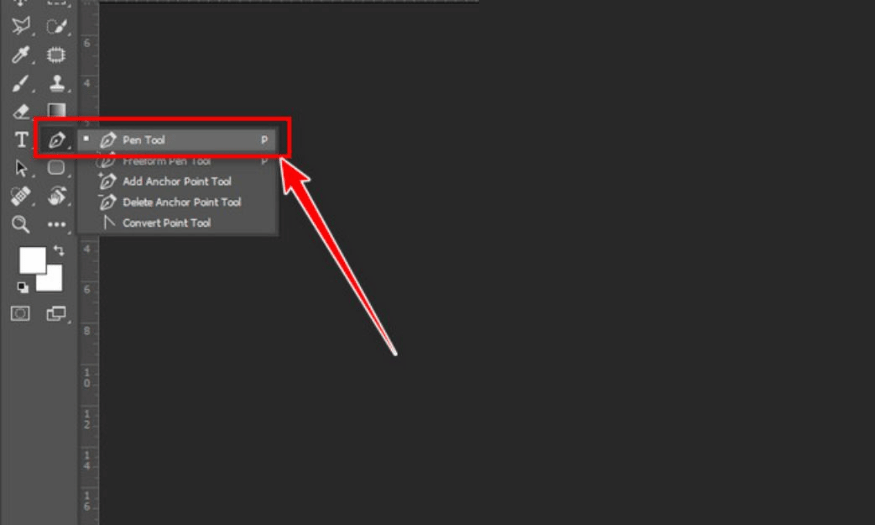
Step 1: Open the image and select the Pen Tool.
First, you need to open the image you want to edit in Photoshop. Once the image is open, find the Pen Tool in the left-hand toolbar. The Pen Tool icon is a pen with a pointed tip. Click on it to select the tool.
Step 2: Select Path mode
On the options bar at the top of the Photoshop window, you'll see a series of options for the Pen Tool. Here, select the "Path" mode. This mode allows you to draw outlines without creating an immediate selection, giving you more freedom to adjust the outline.
Step 3: Draw a border around the object.
Start by clicking on the point where you want to begin drawing the outline. To create a curve that follows the shape of the object, drag the mouse while holding down the mouse button. Anchor points will appear, allowing you to create smooth curves. If you need to adjust the anchor points, hold down the Ctrl key (Windows) or Command key (Mac) and drag these points to change the curve shape. If you want to change the direction of the curve, hold down the Alt key (Windows) or Option key (Mac) and drag the handles.
Step 4: Finish the outline
Once you've finished drawing the outline around the object, click on the starting point to close the outline. You'll then see a Path surrounding the object, indicating that you've completed creating the outline.
Step 5: Convert Path into Selection
To convert a border into a selection, right-click on the Path and select “Make Selection”. A dialog box will appear, allowing you to adjust the Feather Radius. Change this value to soften the edges of the selection, making the background separation more natural.
Step 6: Separate the background
Once you have your desired selection, you have two options. First, you can press Ctrl + J (Windows) or Command + J (Mac) to copy the object to a new layer, allowing you to retain the object without damaging the original background. If you want to remove the background, simply press the Delete key to eliminate the unwanted background.
3. Separate the background using the Focus Area feature.
Photoshop's Focus Area feature is a smart and very useful tool that allows users to easily separate the background based on the sharpness of objects in an image. This method is especially helpful when working with images containing many complex details and varying depths of field.
Step 1: Open the image and select Focus Area.
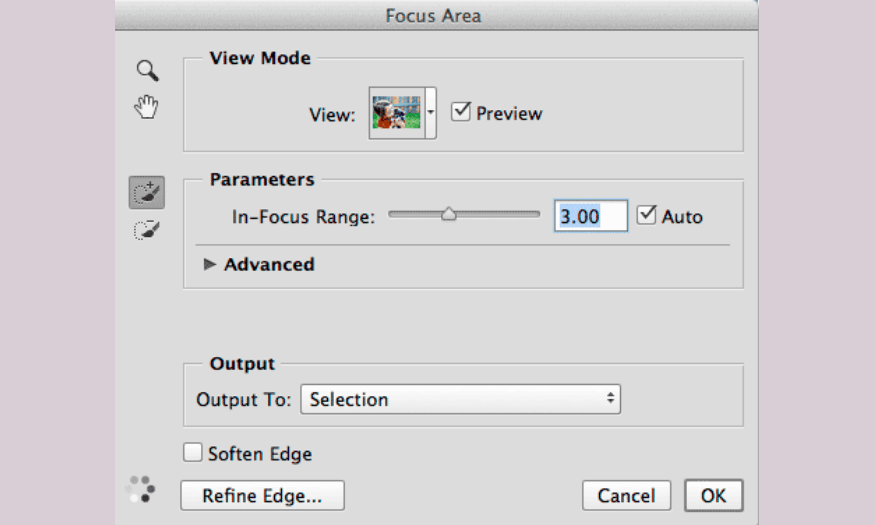
First, open the image you want to edit in Photoshop. Once the image is uploaded, go to the top menu and select Select > Focus Area . A new window will appear, allowing you to adjust the parameters to optimize the selection area.
Step 2: Adjust the parameters in the Focus Area.
In the Focus Area window, you'll see several options to improve the precision of your selection:
-
In-Focus Range : Adjust this slider to determine the level of sharpness you want to select. Higher values will include more sharp areas, while lower values will only select very sharp parts.
-
Image Noise Level : This option helps you remove image noise, which is important when working with photos that have a lot of fine detail.
-
Edge Detection : Use this option to improve object edge detection. By adjusting the value, you can make the edges clearer, resulting in more accurate background separation.
Additionally, you can use the Add to Focus Area (+) and Subtract from Focus Area (-) tools to add or subtract selections. This allows you to fine-tune the selection as desired, ensuring that you only select the objects you want to keep.
Step 3: Confirm the selection
Once you're satisfied with your selection and feel that the selection is accurate, press the OK button to apply. Photoshop will automatically create a new layer containing only the object that has been separated from the background.
Step 4: Create a new background
You can add a new background layer to replace the old one. To do this, press Ctrl + Shift + N to create a new layer. Next, you can choose a color or gradient for this new background layer. This helps create a more complete and appealing image.
4. Separate the background using the Object Selection tool.
The Object Selection tool is an advanced feature introduced in Photoshop 2020, giving users the ability to quickly and accurately select objects with just a few simple steps. Below is a detailed guide on how to remove the background using the Object Selection tool.
Step 1: Open the image and select the Object Selection tool.
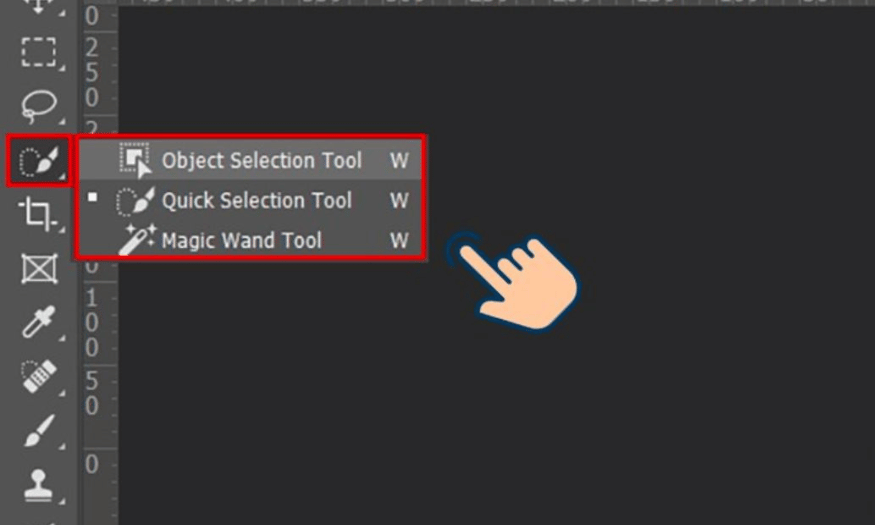
After the image has been uploaded, locate the Object Selection tool in the left-hand toolbar. This tool is in the same menu as the Quick Selection Tool. Click the Object Selection Tool icon to select it.
Step 2: Select the image selection mode.
On the options bar at the top of the Photoshop window, you'll see two selection modes: Rectangle and Lasso . Choose the mode that best suits the shape of the object you want to separate. If the object is square, choose Rectangle. Conversely, if the object has a more complex shape, Lasso will be a better choice.
Step 3: Draw a selection around the object.
Once you've selected the mode, drag your mouse to draw a rectangle or curve around the object you want to separate. Photoshop will automatically detect and select the object within the area you've drawn. This process is quick and accurate, saving you time.
Step 4: Refine the selection area
You can use tools like Select and Mask , Refine Edge , or Quick Mask to clean up and refine your selection. The Select and Mask tool lets you adjust the edges of the selection, while Refine Edge improves the sharpness of details. Quick Mask is also a useful option if you want to manually edit the selections.
Step 5: Separate the background
Once you're satisfied with the selection, the next step is to remove the background. You have two options: press Ctrl + J (Windows) or Command + J (Mac) to copy the object to a new layer, or press the Delete key to completely remove the old background. If you choose to copy, you'll keep the object in a separate layer, making it easier to work with it without damaging the original background.
5. Separate the background using the Magic Wand tool.
The Magic Wand tool allows users to select areas with similar colors in an image. This is an ideal option when you want to separate a monochrome background or images with little intricate detail.
Step 1: Open the image and select the Magic Wand tool.
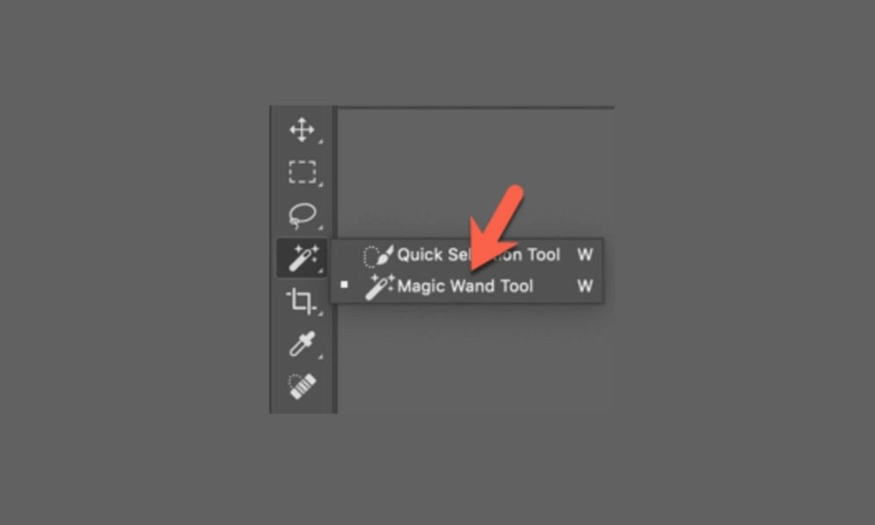
This tool is located in the same menu as the Quick Selection Tool and the Object Selection Tool. Click the Magic Wand icon to select it.
Step 2: Adjust the Tolerance value
On the options bar at the top of the window, you'll find an option called Tolerance . This is an important parameter that determines the degree of color similarity in the selection area. The higher the Tolerance value, the more similar colors the tool will select, creating a larger selection area. Conversely, if the value is low, only very close colors will be selected. Adjust this value to suit your image for the best results.
Step 3: Choose a background
After adjusting the Tolerance value, click on the area of the background you want to separate. The Magic Wand tool will automatically select areas of similar color around the area you clicked. If your background has many different colors or complex color areas, you can hold down the Shift key while clicking to add more selections to the selected area. Conversely, if you want to remove an area from the selection, hold down the Alt key (Windows) or Option key (Mac) and click on that area.
Step 4: Refine the selection area
To ensure a perfect selection, you can use the Select and Mask , Refine Edge , or Quick Mask tools . These tools allow you to clean and refine the selection, creating sharper edges and removing unwanted areas.
Step 5: Separate the background
Press Ctrl + J (Windows) or Command + J (Mac) to copy the object to a new layer, keeping the original background, or press the Delete key to completely remove the old background. If you choose to copy, the object will be kept separate, making it easy to edit without damaging the original image.
6. Conclusion
Background removal in Photoshop is an important skill that anyone should know, especially if you work in design or image editing. This article has covered various methods, from the Pen Tool, Focus Area, Object Selection to the Magic Wand. Each method has its own advantages, and you can choose the appropriate feature for your design project depending on your needs.





















VIP Products








Best Selling Products
Upgrade genuine Capture One account
120 USD
Capcut Pro 1 Year
39 USD
Plugin Retouch4me
69 USD
Autodesk All App Account Copyright
120 USD
Genuine Adobe Illustrator account
99 USD
Genuine Cheap Canva Pro
39 USD
Adobe Photoshop Copyright - Full App
120 USD
Windows 10 & 11 Pro Key
36 USD
ChatGPT Plus Account (GPT-4)
16 USD
MidJourney Account
29 USD
Upgrade Genuine Office 365
49 USD
Upgrade Duolingo Super
29 USD
Copyright Adobe Lightroom Account
59 USD
Adobe Premiere Pro Account
99 USD
Freepik Premium Account
59 USD