Best Selling Products
Instructions for creating a 1979 Alien movie poster using Photoshop
Nội dung
- 1. A few words about the movie Alien 1979
- 2. Resources needed to create an Alien movie poster
- 3. Preparing the Alien Movie Poster in Adobe InDesign
- 4. How to Create Text for an Alien Movie Poster
- 5. How to create an egg for an Alien movie poster
- 6. Add a Glow Effect to the Alien Poster
- 7. Finalizing the Alien Movie Poster in InDesign
- 8. Adding Texture to the Alien Movie Poster
Although released in 1979, the movie Alien still leaves a deep impression on many generations of viewers. It is the first smoke for many movies about space monsters later. To pay tribute to this movie, please join Sadesign to recreate the Alien movie poster using Photoshop through the following shares.
1. A few words about the movie Alien 1979
Alien is a science fiction, horror film produced by Ridley Scott in 1979. The film tells the story of the crew of the spaceship Nostromo on their way home when they are attacked by an aggressive extraterrestrial creature called Xenomorph. When the crew members are killed one by one, the heroine Ripley must face the aliens alone on the deserted ship.
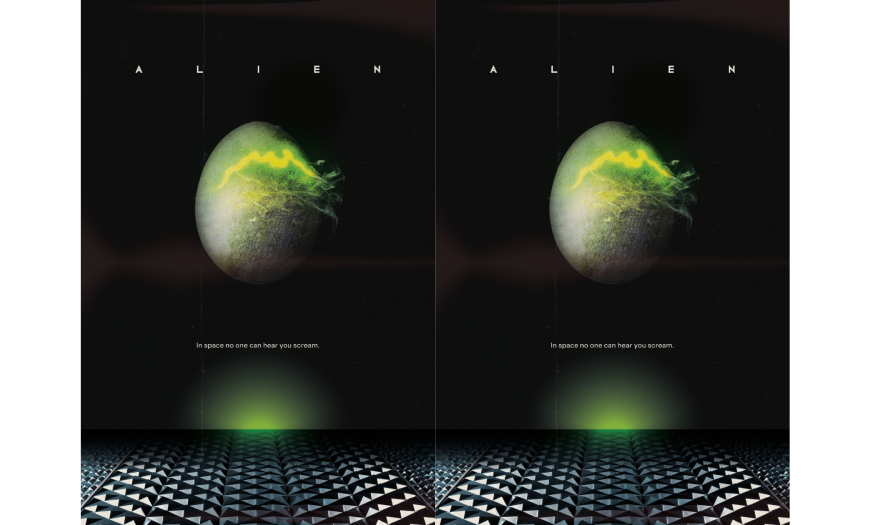
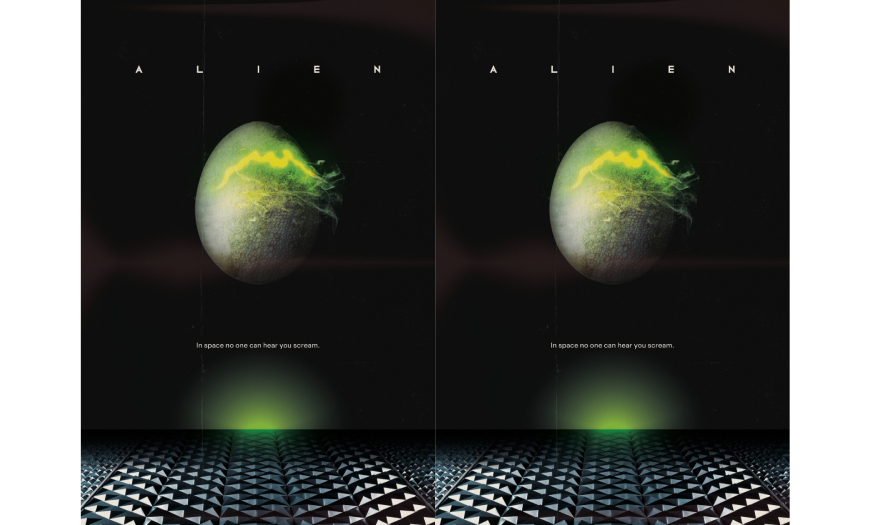
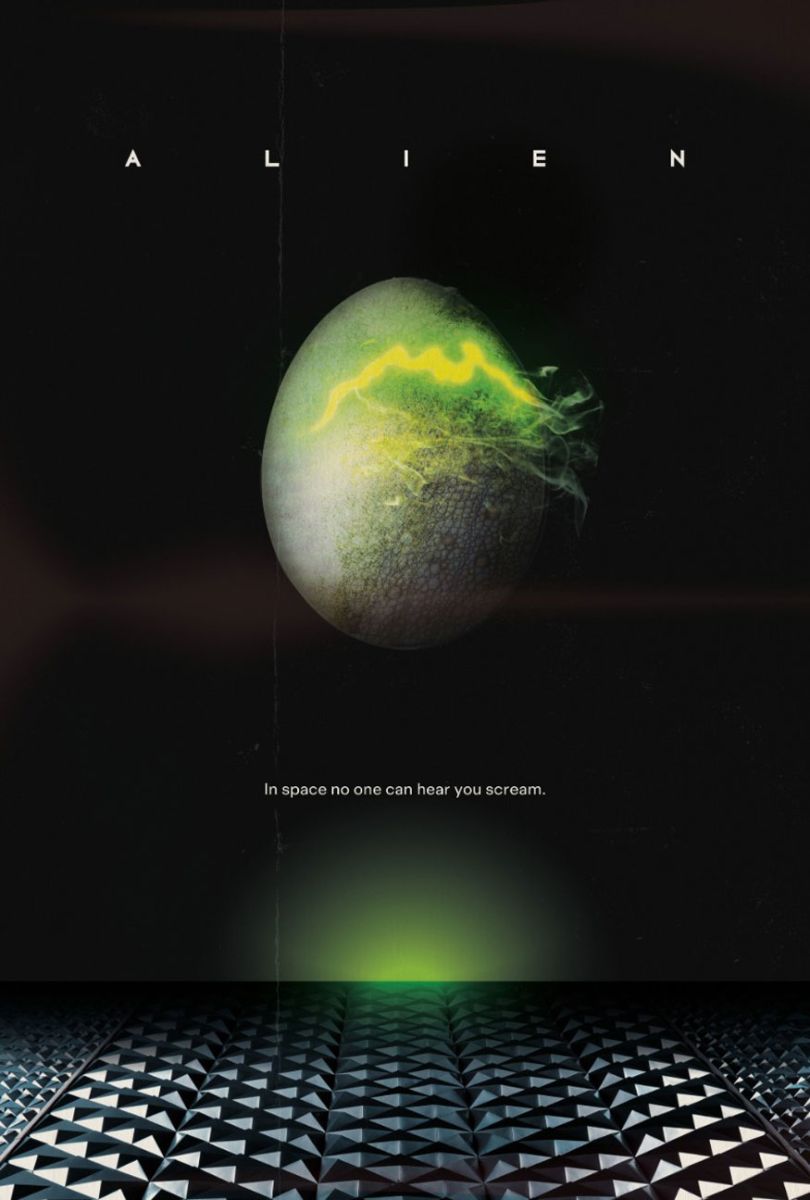
The 1979 Alien movie poster is iconic in the history of film marketing. It features a glowing alien egg over the famous slogan, “In space no one can hear you scream.” The blue and yellow hues against a deep black background seem to convey the mystery and horror in it.
Graphic artist Philip Gips, who also created designs for Rosemary’s Baby (1968) and Fatal Attraction (1987), created the Alien movie poster, which is a perfect visual interpretation of the film’s dark mood. The metal mesh at the bottom of the poster evokes the endless corridors of the ship, while the strange glowing cracks on the floating egg hint at something dangerous about to appear.
2. Resources needed to create an Alien movie poster
To create a poster with the right Alien 1979 vibe, we need to prepare some resources as follows:
Egg image with background separated
Elephant skin texture
Gecko skin texture
Lizard scale texture
Smoke with background separated
Liquid glass texture
MBF Atom font
Extensa Grotesk font
Metallic geometric texture
Folded paper texture
Download these resources to your computer, put them in an easy-to-find file to use throughout the following design steps.
3. Preparing the Alien Movie Poster in Adobe InDesign
In this tutorial, we'll use Adobe InDesign to set up the poster layout and Adobe Photoshop to create the Alien egg and explore how to add a glow effect in Photoshop. Then, we'll go back to InDesign to finish the Alien movie poster.
Follow these steps:
Step 1: First, open InDesign and go to File => New => Document. Click Print at the top of the window that opens.
To create a poster in the standard One Sheet movie poster size, set the Width to 27 in and the Height to 40 in.
.jpg)
Set the Margins to 1 in and add a Bleed of 0.25 in before clicking Create.
.jpg)
Step 2: Go to Window => Layers and click on Layer 1, rename it Background. Use the Create new layer icon at the bottom of the panel to create a series of five more layers above them, called Metal, Egg, Smoke, Type, and Paper Texture.
Lock all layers except the Background layer, as this is the layer we'll work on first.
.jpg)
Next, on the menu bar, go to Window => Color => Swatches and create three new CMYK swatches with the following color codes:
Deep Black: C=82 M=72 Y=62 K=91
Neon Yellow Green: C=33 M=0 Y=100 K=0
If you're planning on sharing your poster online instead of printing it, you can switch the Color Mode of these swatches to RGB, which will make your greens look more vibrant.
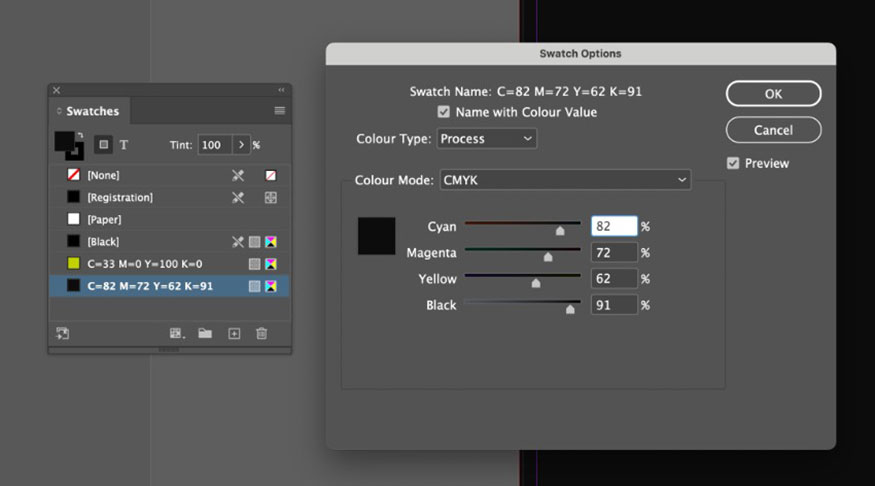
Step 3: On the Background layer, use the Rectangle Tool (M) to create a shape across the entire page, setting the Fill to Deep Black.
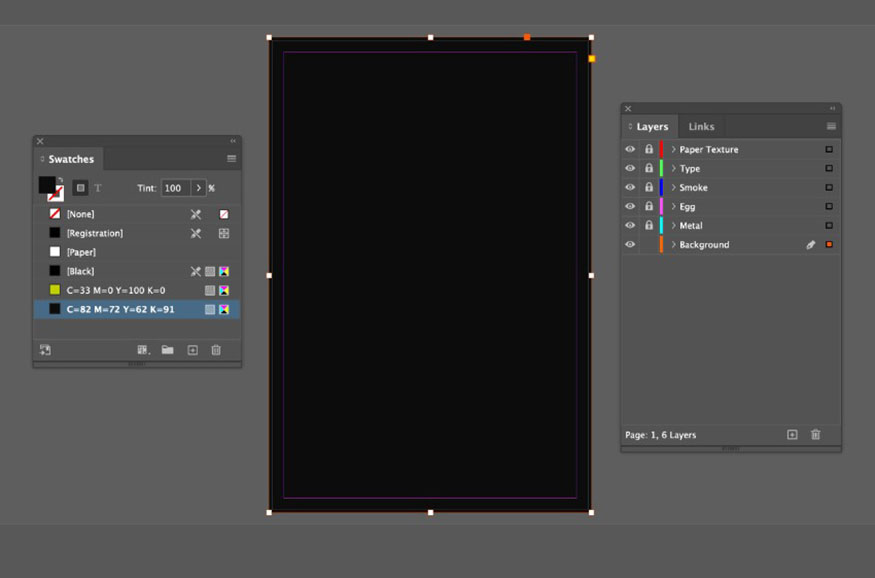
Step 4: Unlock the Metal layer. Use the Ellipse Tool (L) to create a wide oval at the bottom of the movie poster. Set the Fill to Neon Yellow Green.
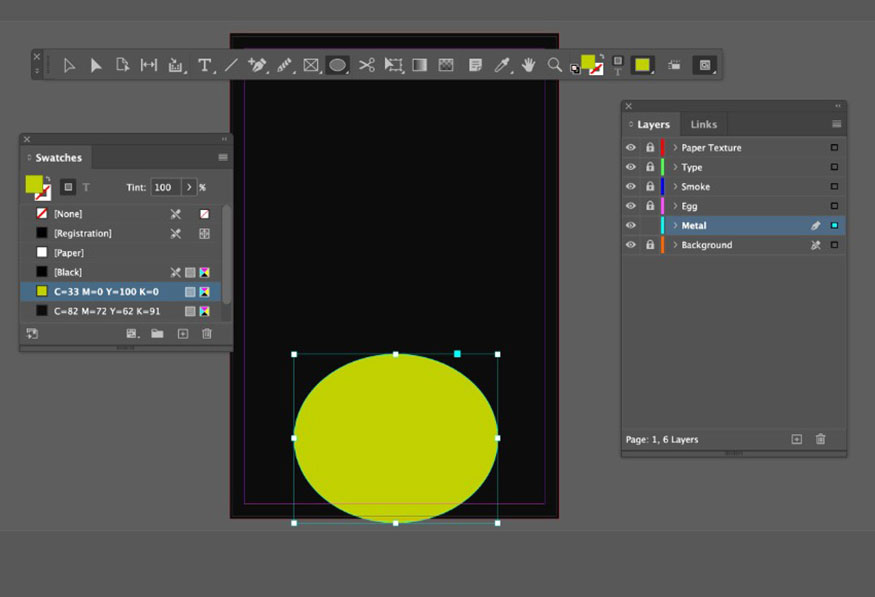
While you have the oval selected, go to Object => Effects => Transparency, setting the Mode to Hard Light.
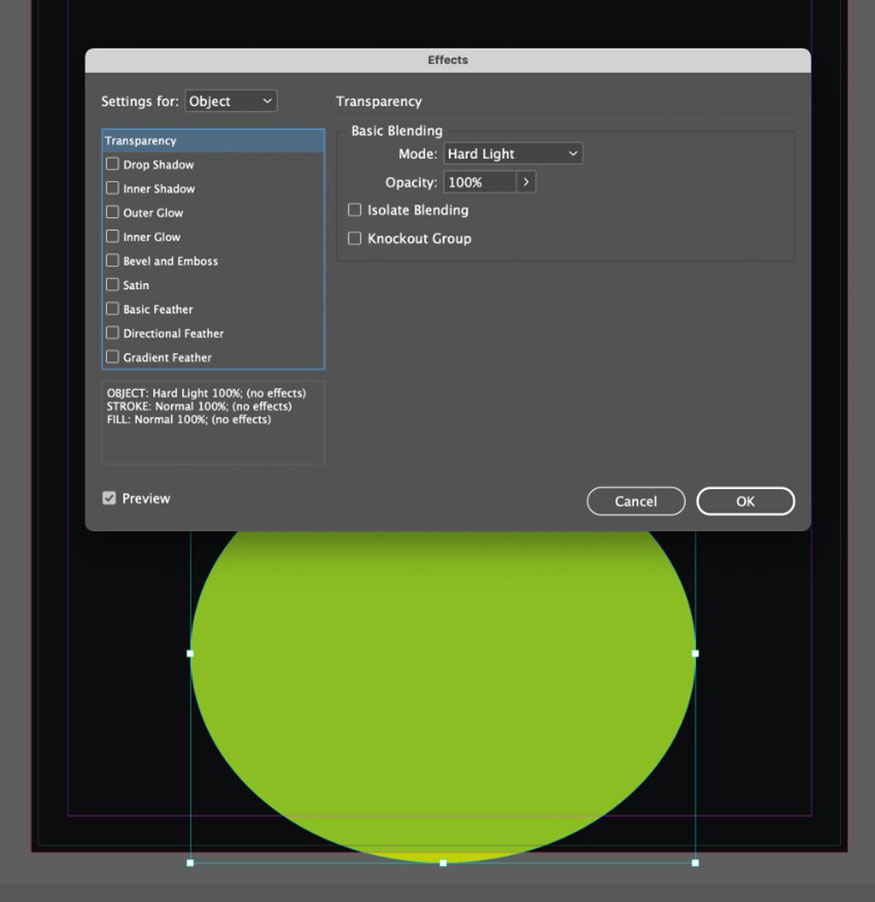
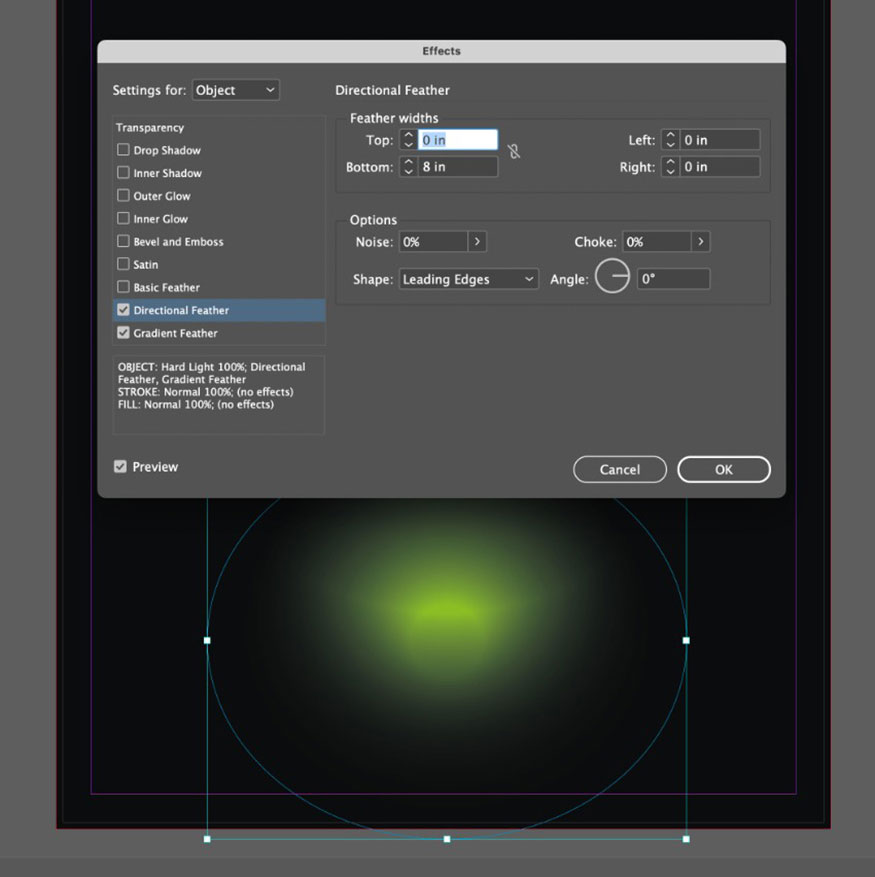
Click Gradient Feather at the bottom of the left menu and set the Type to Radial, allowing the gradient to become transparent towards the edges of the oval.
.jpg)
Finally, click Directional Feather. Set the Bottom Feather Width to 8 in to allow for a stronger gradient towards the top half of the oval.
Step 5: On the Metal layer, use the Rectangle Frame Tool (F) to draw an image frame at the bottom of the poster, extending to the midpoint of the back oval.
Go to File => Place and select the metal geometric texture image, click Open and right-click => Flip Vertical to make the metal layer appear to have a vanishing perspective towards the centre of the oval.
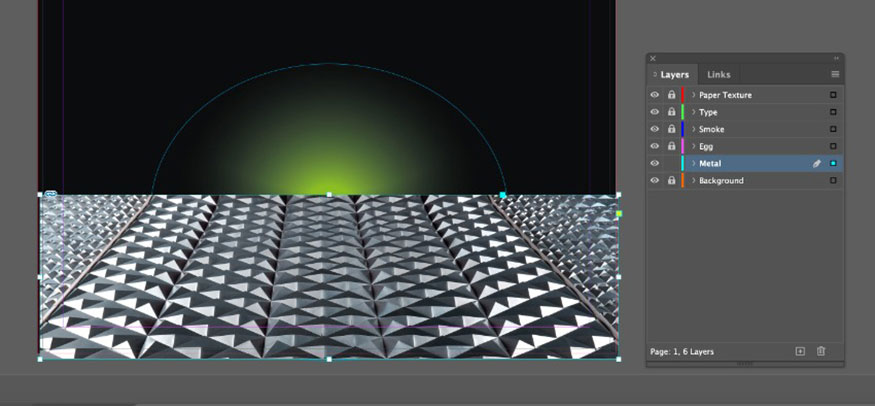
With the image frame selected, go back to Object => Effects => Gradient Feather. Set the Type to Linear and let the metal image fade towards the top, allowing some of the green light to shine through to the back.
.jpg)
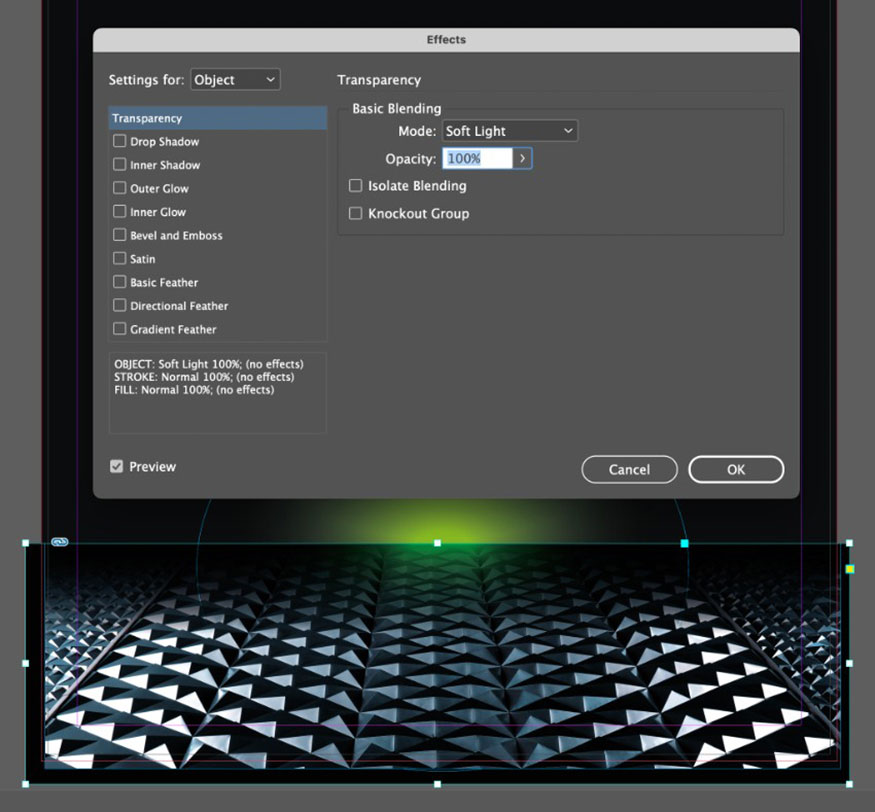
Then go to Edit => Copy, Edit => Paste in Place the image frame, creating a copy of the metal effect. Go to Object => Effects => Transparency, set the Mode to Soft Light. This will give a higher contrast in the image, creating a dark and gloomy effect.
4. How to Create Text for an Alien Movie Poster
One of the most important parts of a poster is the text with the movie title and the famous tagline. Because of this, we need to add some text to make the poster look like Alien 1979.
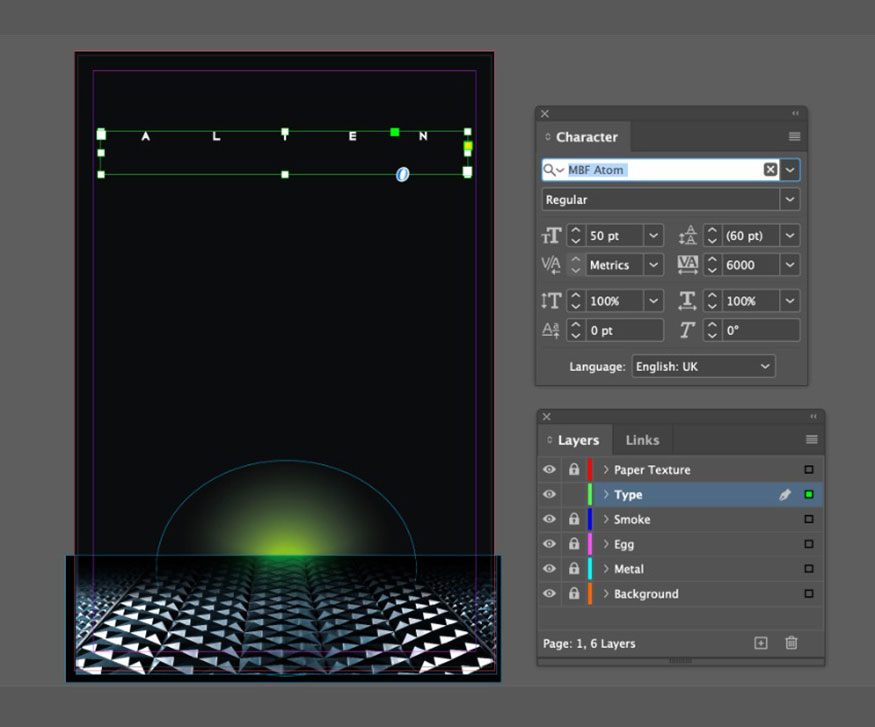
Step 1: Working on the Type layer, use the Type Tool (T) to create a large text frame towards the top, in the middle of the poster. Type in the movie title, set the font to MBF Atom and the size to 50 pt. Adjust the Font Color to [Paper]. For the standard Alien style, give the text a large Tracking of 6000.
Copy and paste the text frame to build the other parts of the title, reducing the Font Size to 'THE'.
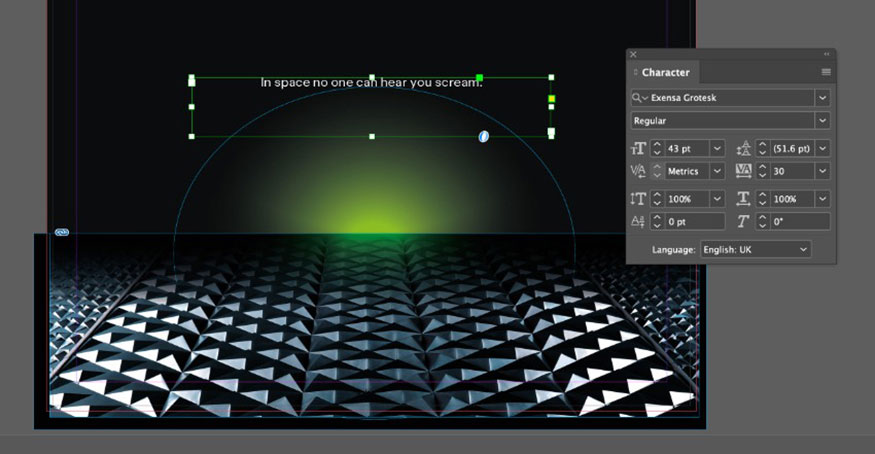
Step 2: Create a second text frame further below the movie title, right on top of the green oval. Type in the famous tagline, "In space no one can hear you scream." Set the font to Exensa Grotesk, Size 43 pt, with Tracking 30.
5. How to create an egg for an Alien movie poster
The alien egg image is the main character, the highlight of the entire poster. Once we have the text, we will proceed to add the egg to our design.
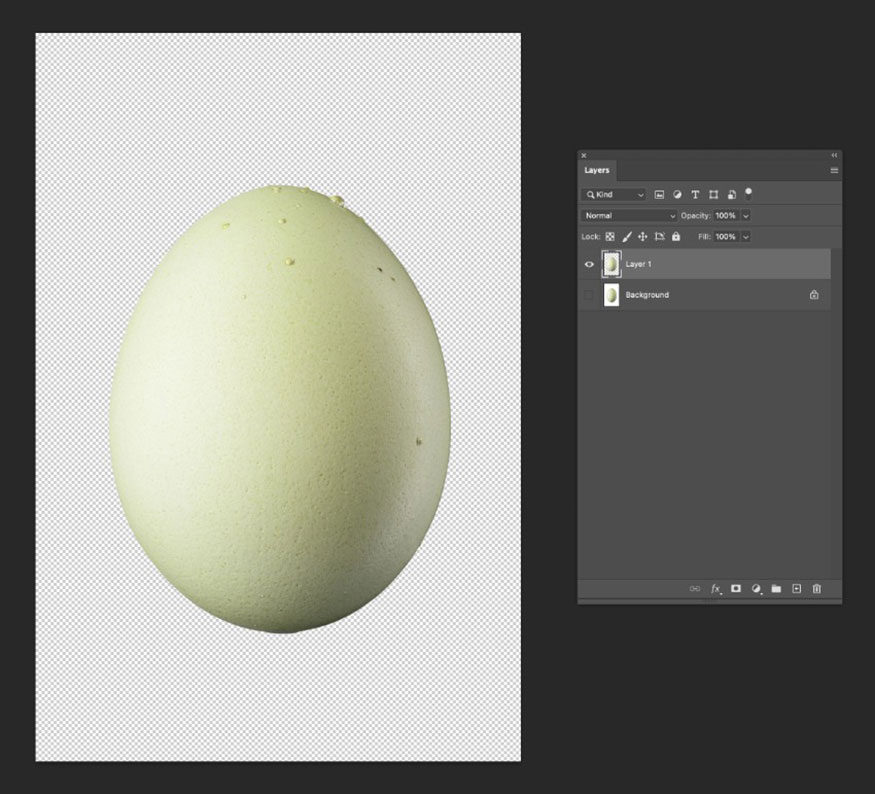
Step 1: Now, go to File => Save your InDesign poster and minimize the window. We will come back to this issue in a moment. Open the egg image with the background removed in Photoshop.
Duplicate the Background layer and remove the white background by selecting Select Subject from the top panel. Copy the selected egg into a new layer and turn off or delete the layers below.
Step 2: Go to File => Place the elephant skin texture image on top of the egg.
.jpg)
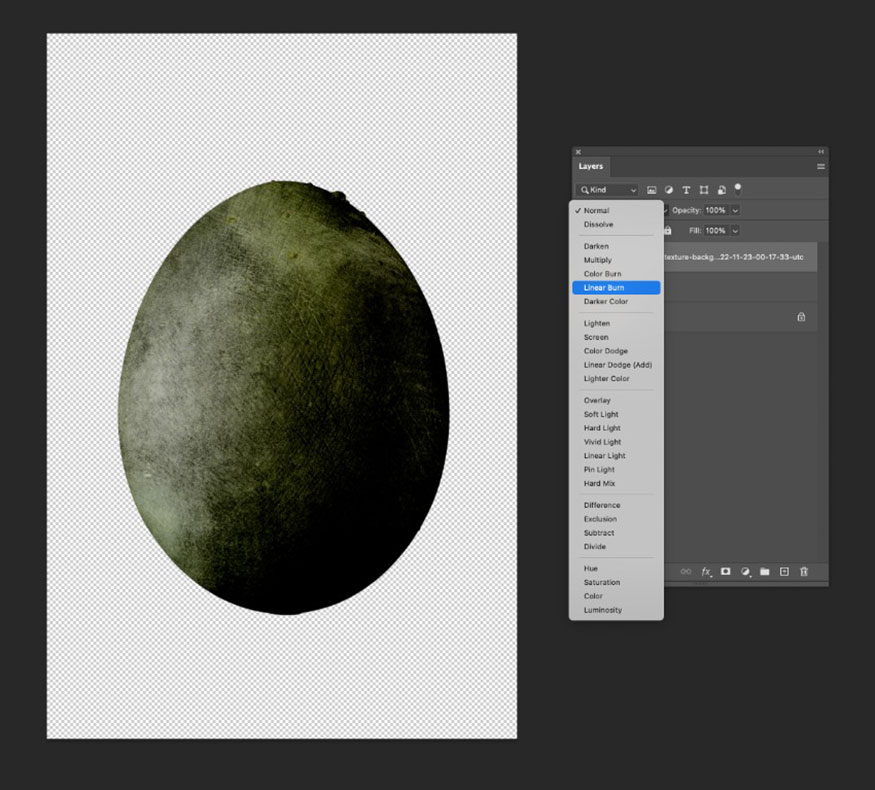
With the elephant skin layer selected in the Layers panel, hold down Ctrl or Alt and click on the egg layer below to confine the texture to just the egg shape.
Set the elephant skin layer's Blend Mode to Linear Burn.
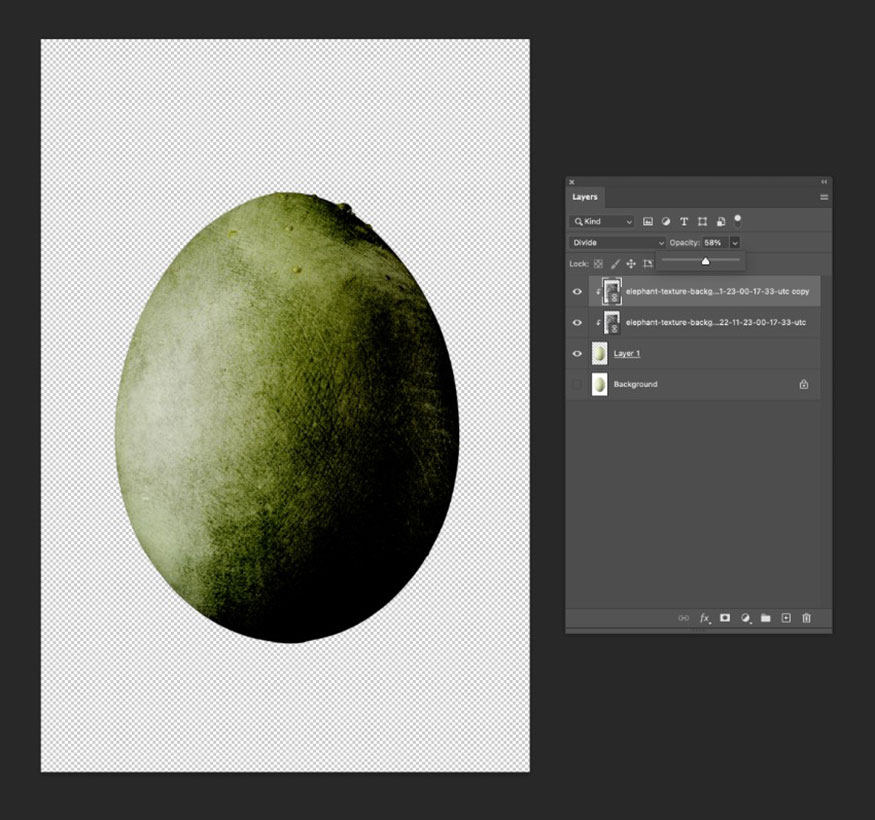
Duplicate the elephant skin layer and set the copy's Blend Mode to Divide, reducing the Opacity to around 60%.
Step 3: Go to File => Place the chameleon skin texture image above the elephant skin layers.
.jpg)
Press Alt/Ctrl to attach this layer to the elephant skin and egg layers below. Then change the Blend Mode to Lighter Color and reduce the Opacity to 24%.
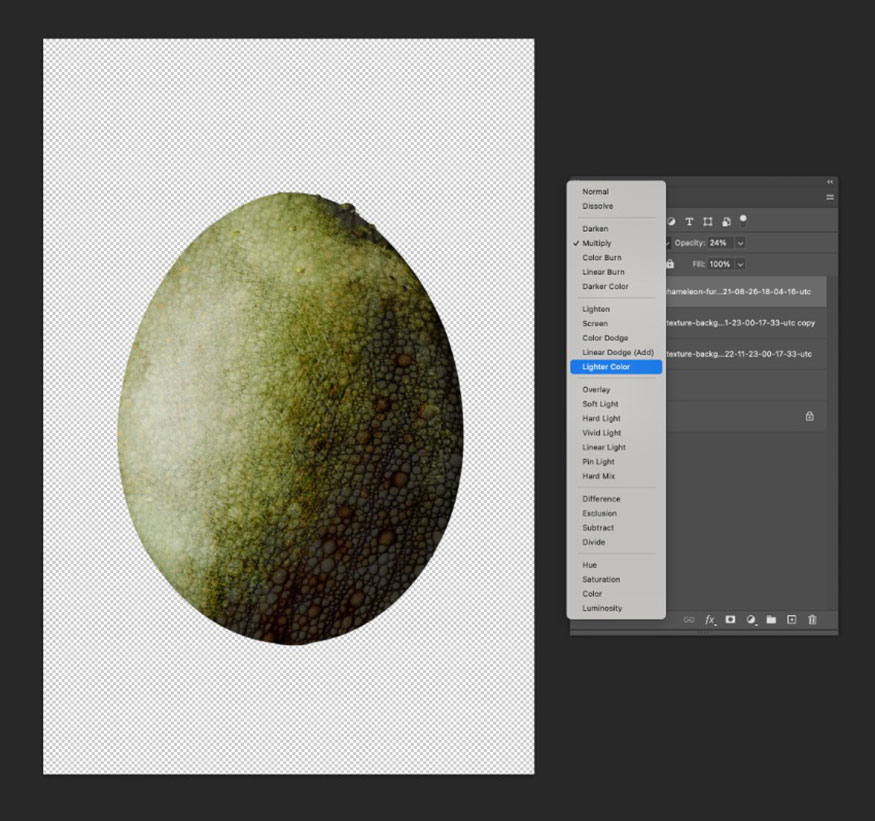
Duplicate the chameleon skin layer and set the copy's Blend Mode to Subtract, reducing the Opacity to 20%.
.jpg)
Step 4: Go to File => Place and place the lizard scales on top of the existing layers. Let it cover the left half of the egg, as shown below.
.jpg)
Duplicate this lizard scales layer and right-click => Flip Horizontal. Align the two layers exactly to create a larger symmetrical image. Then select both layers in the Layers panel and right-click => Merge Layers to merge them.
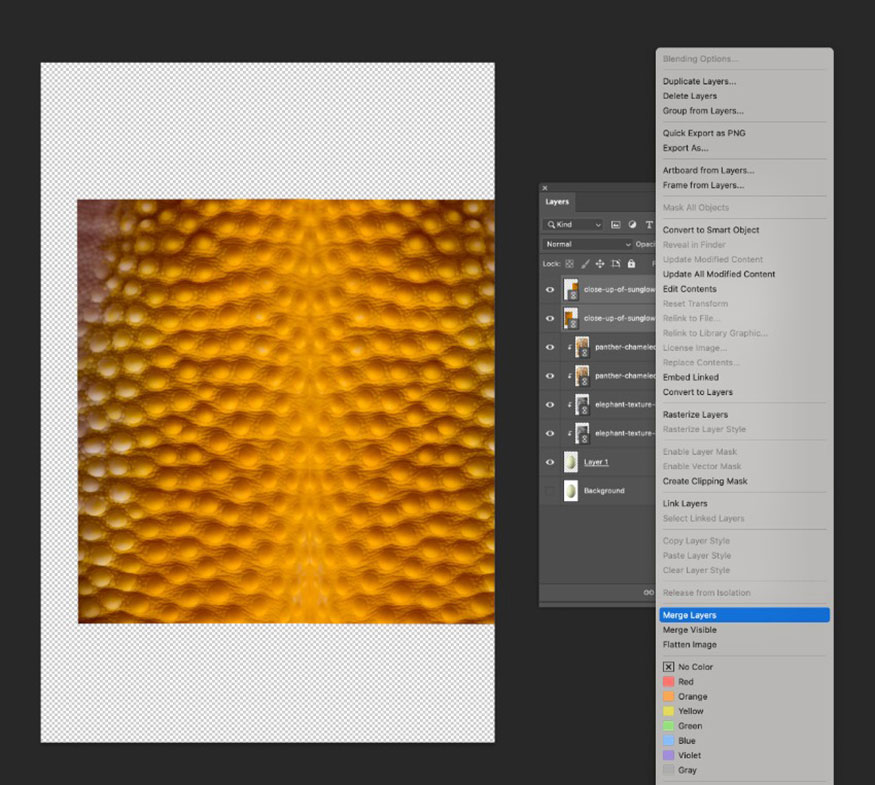
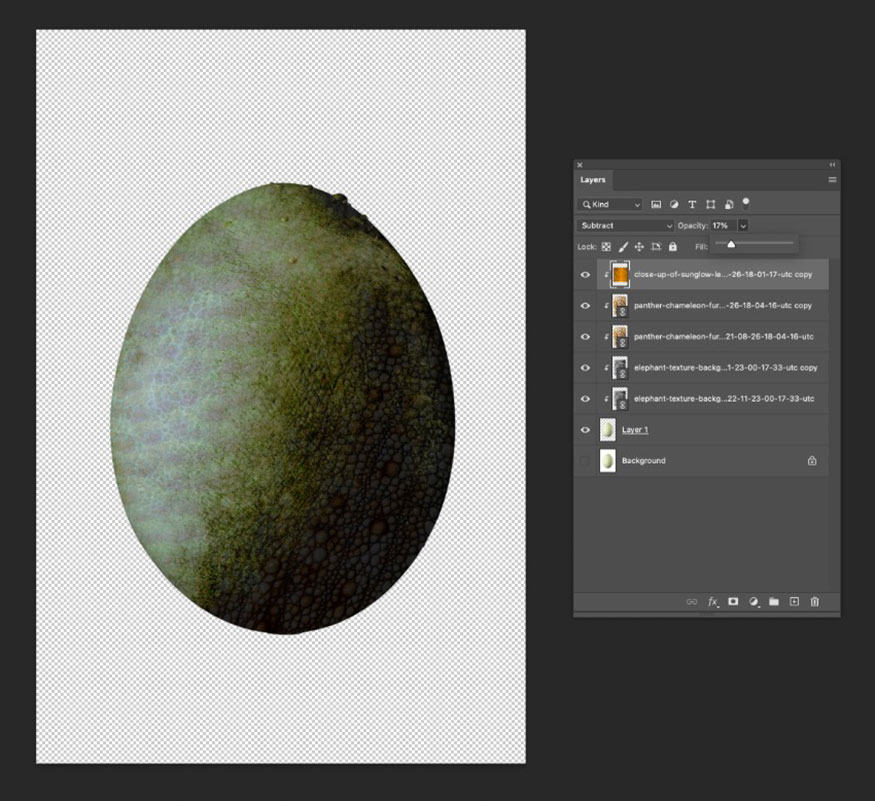
Set the Blend mode of this merged layer to Subtract, with an Opacity of 17%.
Step 5: Now that we have given the egg a lot of alien texture, we can add some 3D shiny effects to make the egg look more appealing.
Place one of the oval PNG glass images from the liquid glass texture on top of the egg and align it to fit the size. Set the Blend mode of this liquid glass layer to Screen.
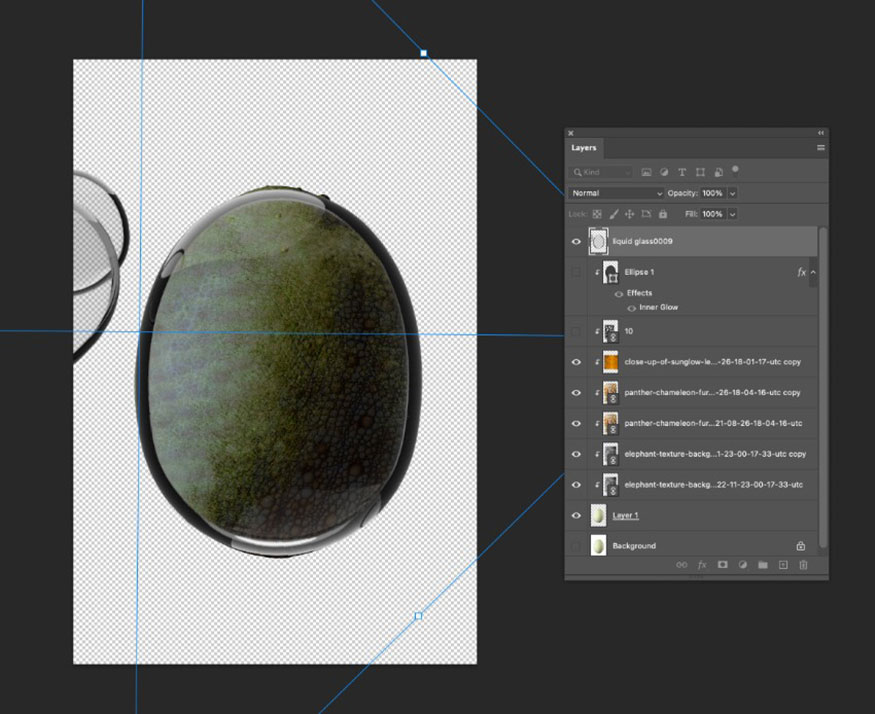
Set the Blend mode of this liquid glass layer to Screen.
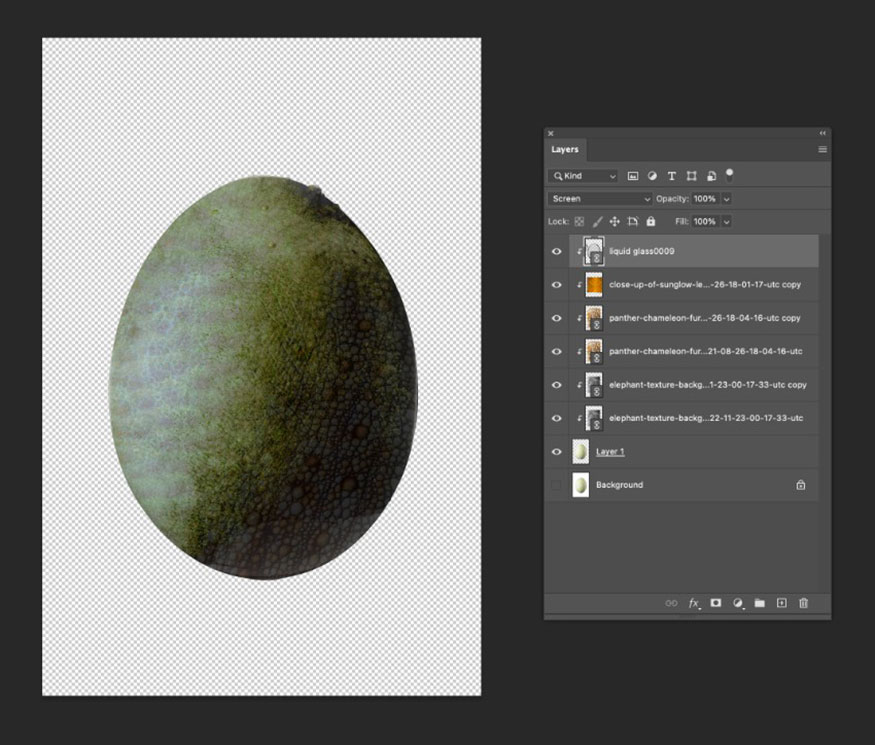
Step 6: Use the Pen Tool (P) to draw around the edge of the egg on a new layer. Make sure the selection in the top panel is set to Shape, not Path.
Set the Fill for your shape to a dark gray from the Swatches panel.
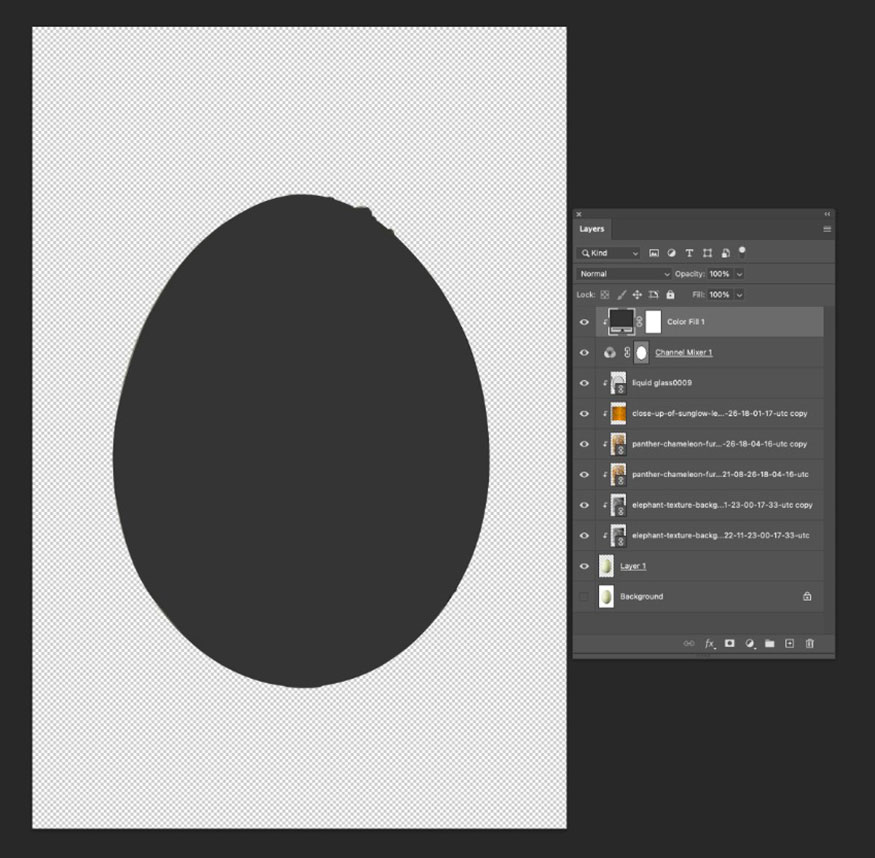
Double-click on the black egg layer to open the Layer Style panel. Click on Inner Glow, with the following settings: The color of the glow is set to a white to transparent gradient from right to left. Blend to Screen and Opacity to 100%. Set the Technique to Softer, Choke to 17% and Size to 70 px.
Click OK.
.jpg)
Then adjust the layer's Blend mode to Screen and Opacity to 25%.
.jpg)
6. Add a Glow Effect to the Alien Poster
With your alien egg almost done, it’s time to create a glowing crack on the egg to complete the alien effect.
Step 1: First, place all your existing layers into a new folder, name it Egg. Create a new folder above that, name it Neon.
Working on a new layer within the Neon folder and making sure the option in the top panel is set to Shape, use the Pen Tool (P) to draw a rough crack shape across the top of the egg.
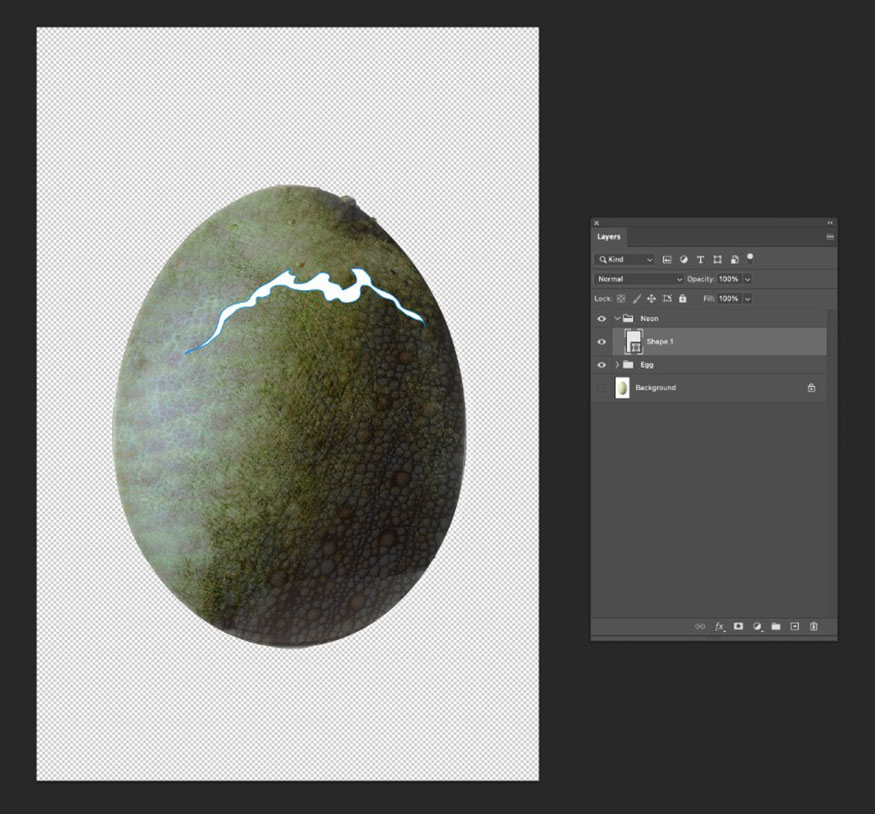
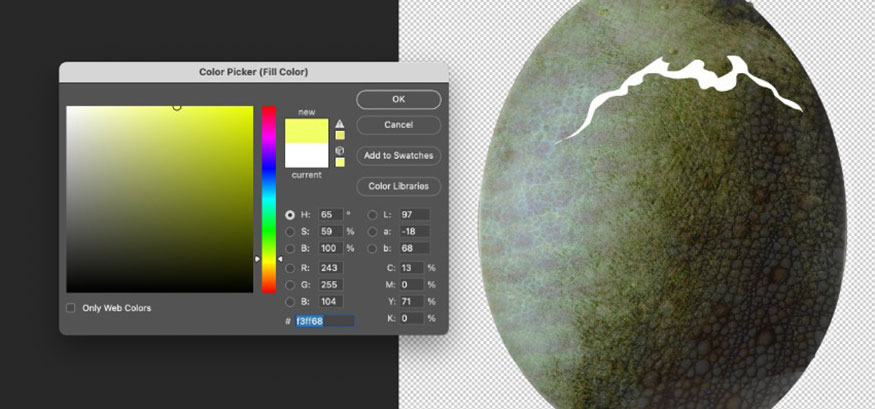
Color this crack shape a very light neon yellow, R=243 G=255 B=104.
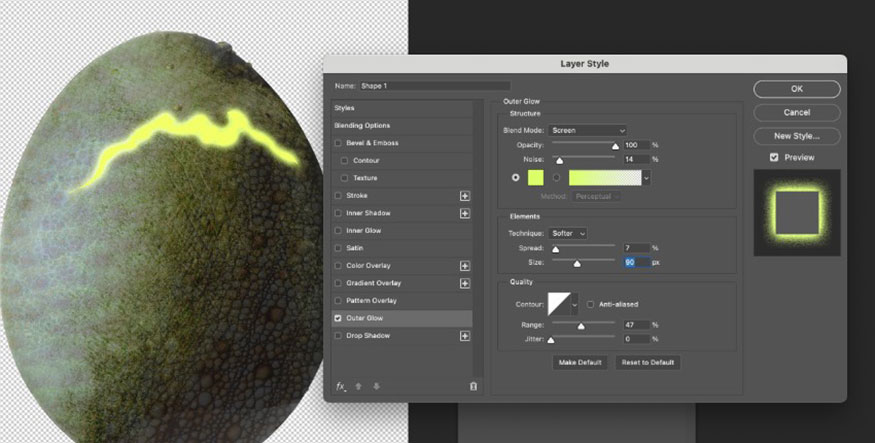
Step 2: Double-click on the crack shape layer to open the Layer Style panel.
Click on Outer Glow and set the Blend Mode to Screen, with an Opacity of 100%. Add 14% Noise and adjust the Color of the glow to the same pale neon yellow as before.
Set the Spread to 7%, Size to 90 px and Range to 47%.
Step 3: Duplicate the crack layer and double-click on this duplicated layer, returning to the Outer Glow options.
For this duplicate, adjust the Blend mode to Pin Light, Opacity to 65%, Noise to 14%, Spread to 20% and Size to 250 px.
.jpg)
Step 4: Return to the original crack layer and set the Blend mode of this layer to Pin Light, with an Opacity of 86%.
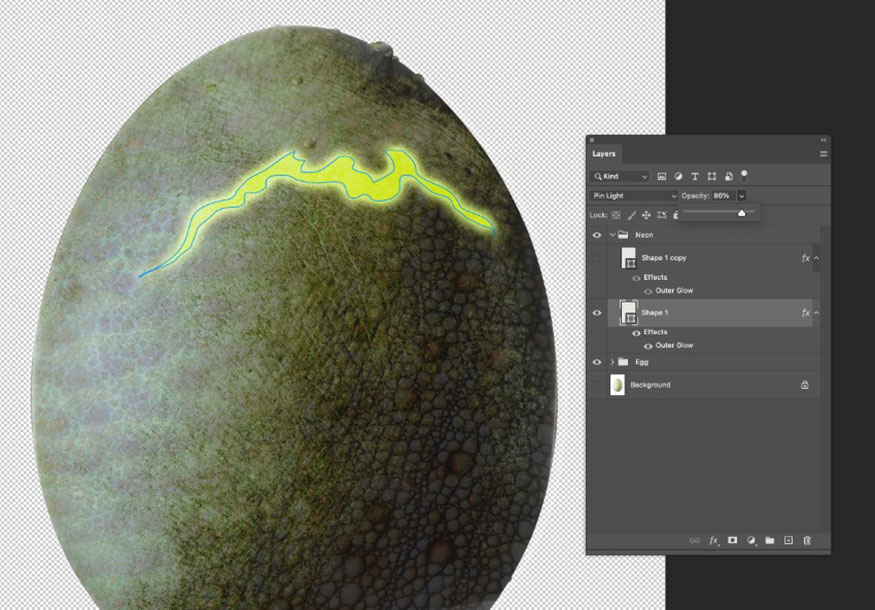
Set the Blend mode of the duplicated layer above to Pin Light and an Opacity of 70%.
.jpg)
Step 5: To make the crack glow with ambient light, on the menu bar go to File => Place, select one of the smoke PNG images (number 022) from the smoke pack into the Photoshop document. Place it on the right side of the crack.
Create a Fill layer above, set this swatch to a light neon green with the color code R=218 G=255 B=104. Press Alt/Ctrl to attach this swatch to the smoke layer, tinting it green.
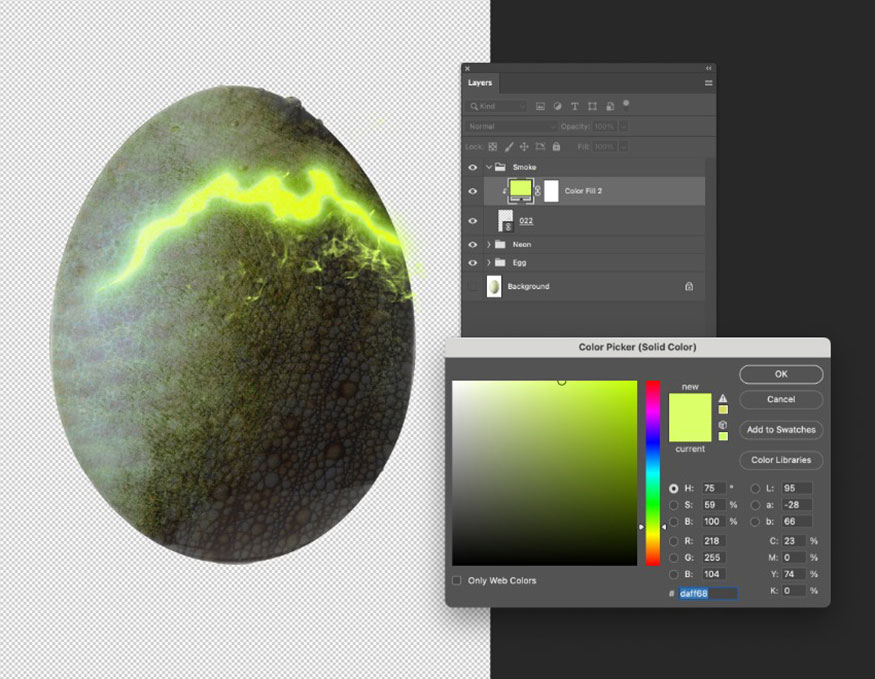
Set the blend mode of the smoke layer to Pin Light, with an Opacity of 77%.
.jpg)
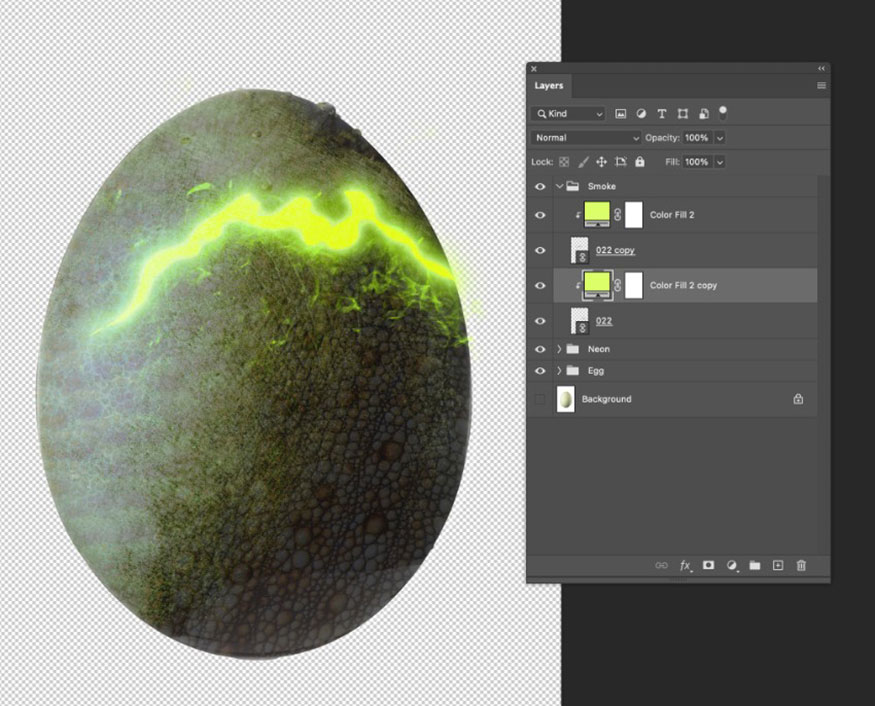
Duplicate the smoke layer, also allowing this layer to be tinted green. Place this layer on the left side of the crack, rotating if necessary to fit the edge of the crack.
Your Photoshop alien egg is complete! We'll have to finalize some details in InDesign, but for now, go to File => Save your egg as a PSD file.
Step 6: Before you exit Photoshop, open one of the smoke PNG images from the smoke pack in a separate Photoshop window.
Color the smoke with a neon green swatch, R=243 G=255 B=104 and File => Save this as a PSD file. We'll use it as an additional effect on our InDesign poster.
.jpg)
7. Finalizing the Alien Movie Poster in InDesign
Let's head back to Adobe InDesign to finish creating our Alien Movie Poster.
Step 1: Unlock the Egg layer, on the menu bar select File => Place your new alien egg PSD image onto the top of the poster.
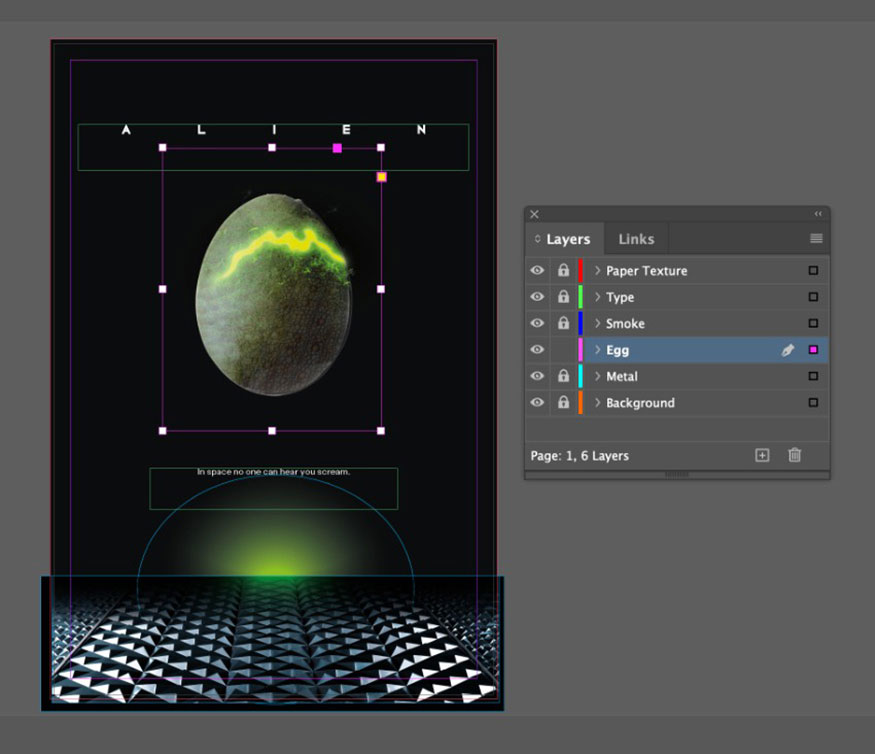
Step 2: To blend the egg into the poster background, we can do a few tricks. First, with the egg frame selected, go to Object => Effects => Transparency and reduce the Opacity a bit, to 93%.
.jpg)
Then click Inner Glow. Set the Mode to Multiply and the color to Deep Black. With the Source set to Edge, set the Size to 1 in, Choke to 15% and Noise to 9%.
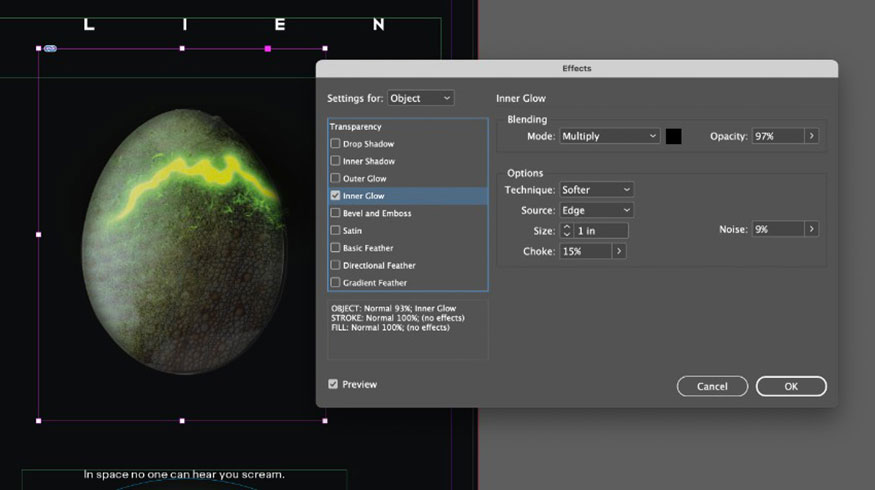
Then add a Gradient Feather effect to the image, setting the Angle to around 50 degrees.
.jpg)
Step 3: To make the cracked egg's glow really pop, we can enhance the glow of the light effect. Use the Pencil Tool (N) to draw along the crack and set the Stroke Width to 0.1 pt. Set the Stroke Color to [Paper].
.jpg)
With the path selected, go to Object => Effects => Outer Glow. Set the Mode to Lighten, choose the Neon Yellow Green swatch for the Color, and set the Opacity to 100%. The Size should be 3.6, Noise 7%, and Spread 46%.
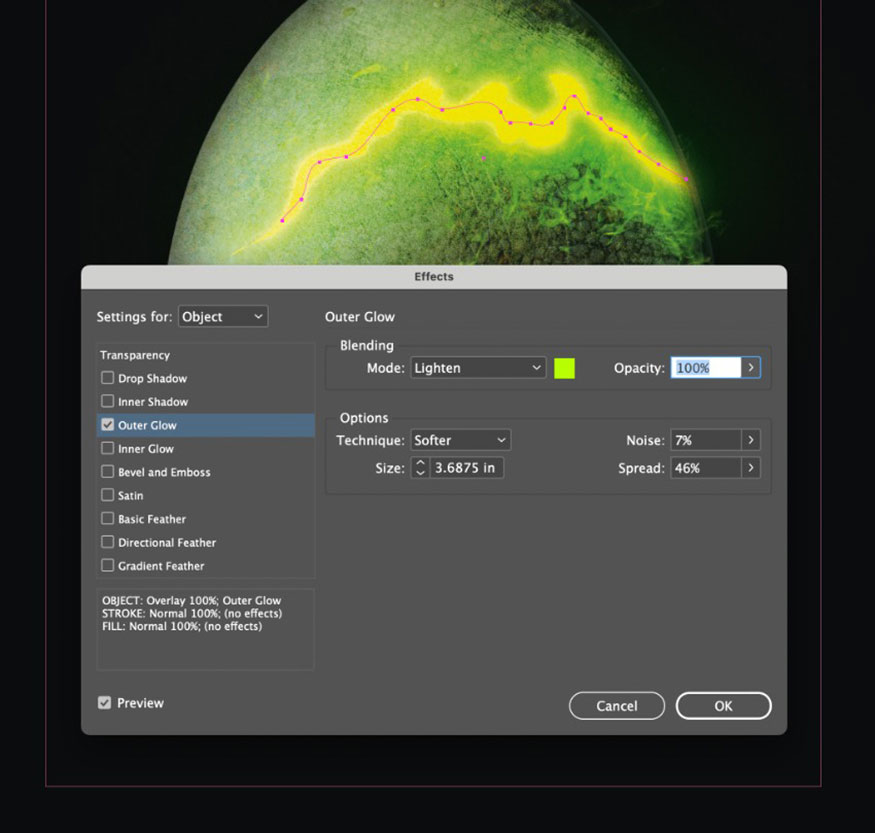
Step 4: To enhance the 3D quality of the egg, use the Ellipse Tool (L) to draw a wide oval on the bottom half of the egg, setting the Fill to [Paper].
.jpg)
With the oval selected, go to Object => Effects => Transparency. Set the Mode to Overlay and the Opacity to 75%.
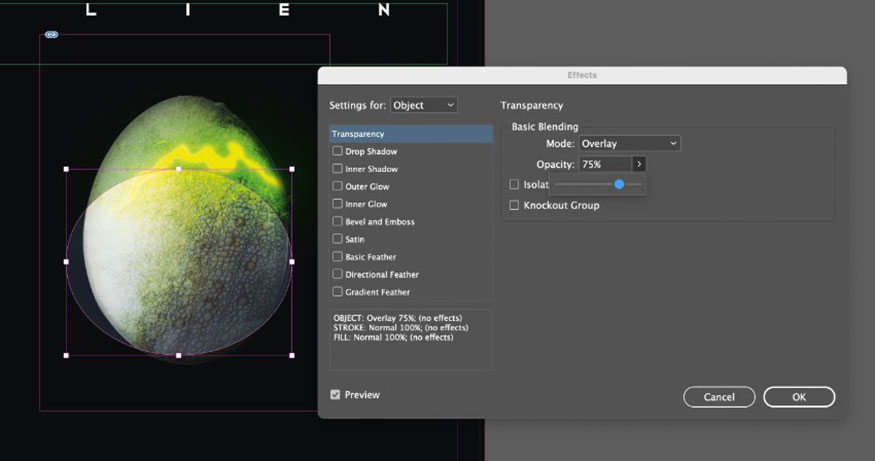
Click on Gradient Feather and apply a Radial gradient, with the transparent part of the gradient on the outer edge of the oval.
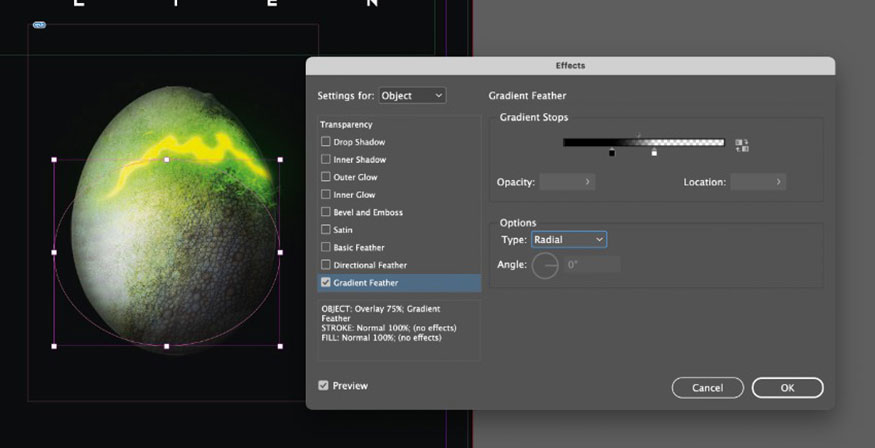
Step 5: Unlock the Smoke layer, on the menu bar go to File => Place the isolated blue smoke PSD image you prepared earlier.
Make the smoke appear to spill out the bottom edge of the crack in the egg.
.jpg)
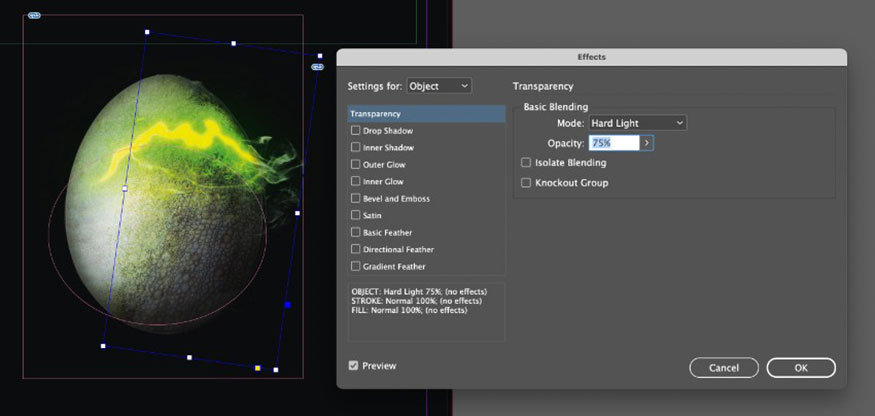
With the smoke image frame selected, go to Object => Effects => Transparency. Adjust the Mode to Hard Light and reduce the Opacity to 75%.
8. Adding Texture to the Alien Movie Poster
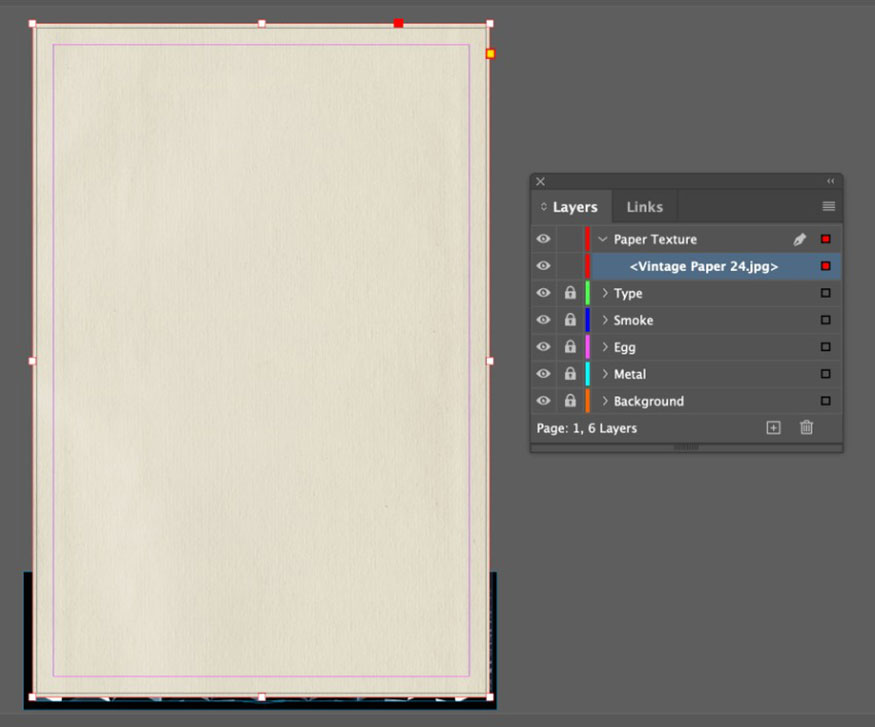
We've basically created the Alien movie poster. But to make it the most complete, let's complete the final step. Unlock the Paper Texture layer at the top of the layer chain.
Step 1: Go to File => Place one of the paper textures (number 24) from the folded paper texture bundle into a new image frame that spans the entire poster.
Step 2: Go to Object => Effects => Transparency. Adjust the Mode to Multiply and the Opacity to 75%. Click OK.
.jpg)
And that's it, your Alien movie poster is complete. It's got that 1979 Alien vibe, all weird and charming.
To export your poster as a PDF for printing, go to File => Export and select PDF (Print) from the Format option. In the dialog box that opens, select Press Quality from the Preset option and include Bleed in your export.
Alternatively, you can also go to File => Export your poster design as a JPEG or PNG image to share online.
This is a summary of the steps to create an Alien movie poster. It requires combining many tools together, so be patient and do it meticulously. You can also try to change the parameters as you like to get the most unique results.
Installation and support contact information:
🏡 SADESIGN Software Company Limited
📨 Email: phamvansa@gmail.com
🌍 Website: https://sadesign.ai


.png)


