Best Selling Products
Ways to adjust light and dark for photos using Photoshop
Nội dung
There are currently many tools to support adjusting the brightness and darkness of photos using Photoshop. Let's refer to the following shares with SaDesign.
1. Adjust the brightness and darkness of the photo using Photoshop with Blending Mode
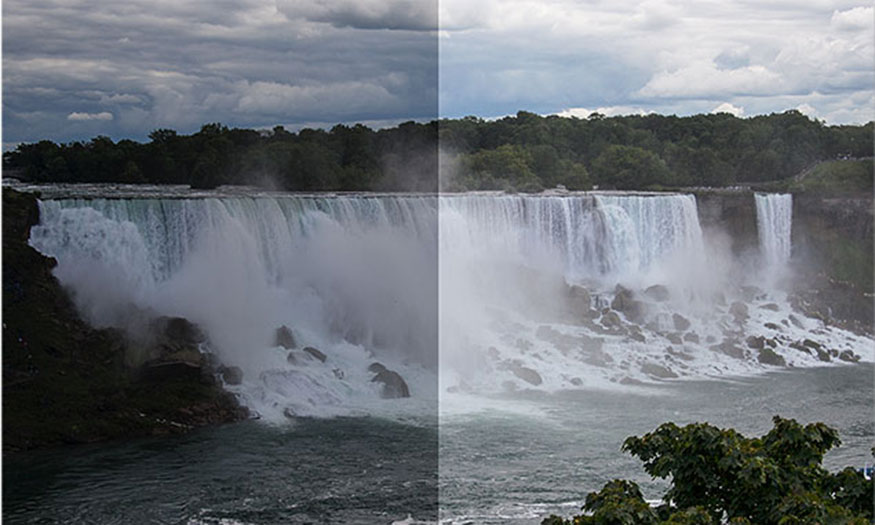
One of the most used ways to adjust the brightness and darkness of photos in Photoshop is Blending Mode. It is also known as blending mode. This is a set of effects that blends the colors of colored pixels from different layers together.
This blending tool follows the rule of mixing 2 or more layers of color or different objects to create a new image with new color tones and effects for the photo in Photoshop. Blending Mode currently has a total of 27 different color blending effects, giving you the ability to adjust the brightness and darkness of your photo in Photoshop in a very diverse way.
To adjust the brightness and darkness of a photo using Photoshop with Blending Mode, we can follow these basic steps:
Step 1: We need to open the photo we want to adjust the brightness and darkness for in Photoshop. You can open the photo by going to File => Open => Select the photo to open => Open. Or you can also use the shortcut key Ctrl + O to open the photo.
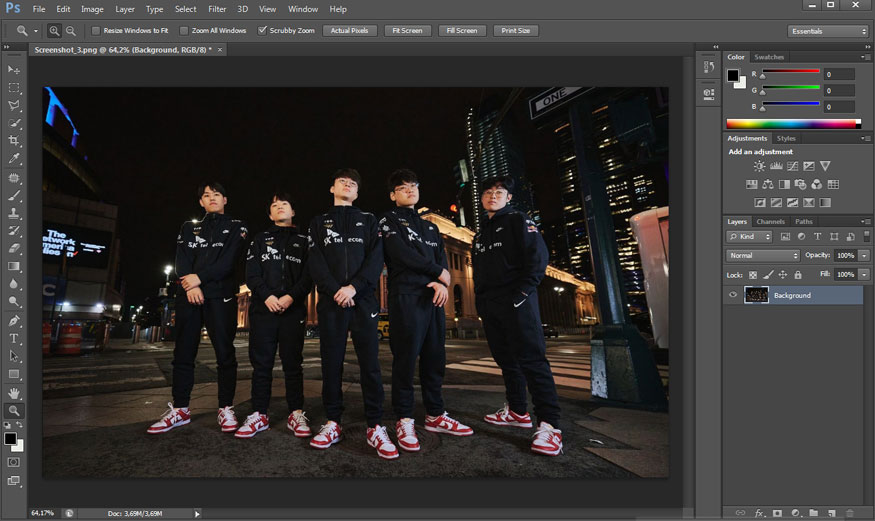
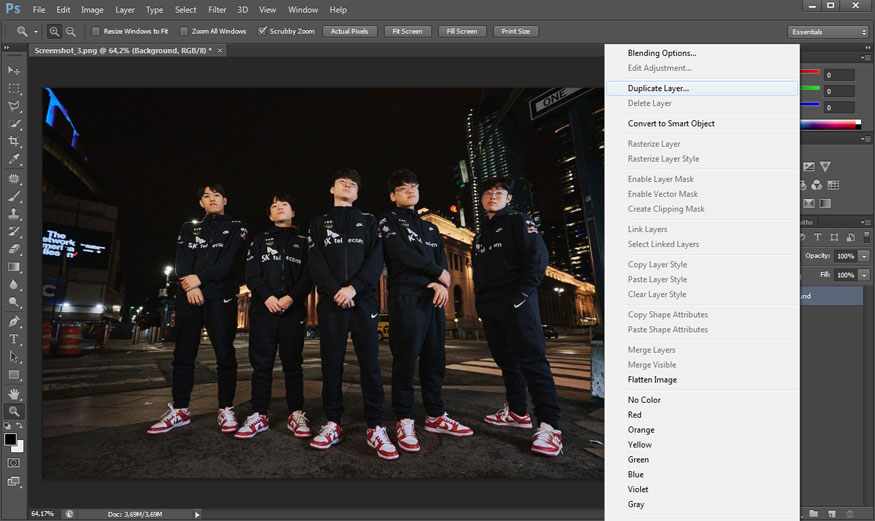
Step 2: Right-click on the Background layer => select Duplicate Layer... to duplicate the layer.
Step 3: Click on Blend mode and select the appropriate color blend style.
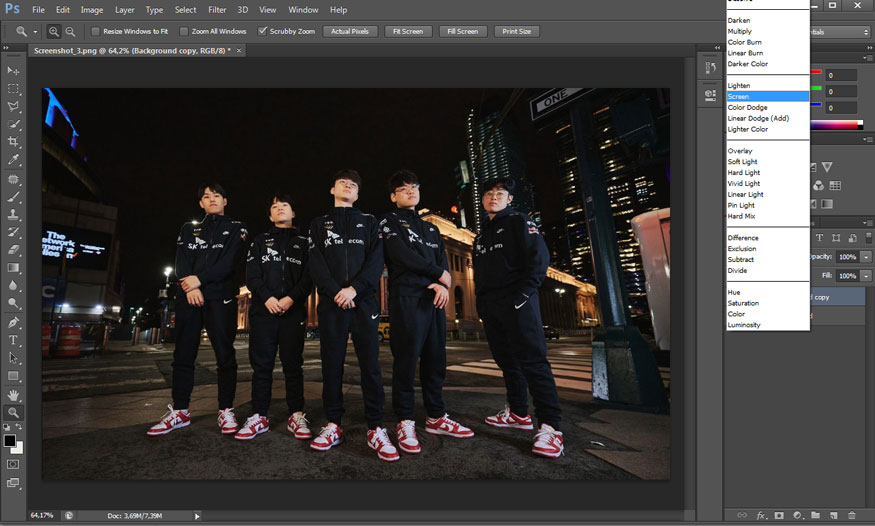
Depending on the color of the image, you can choose the appropriate color blending style. As in the image below, I choose the Screen color blending style to make the image brighter and more beautiful.
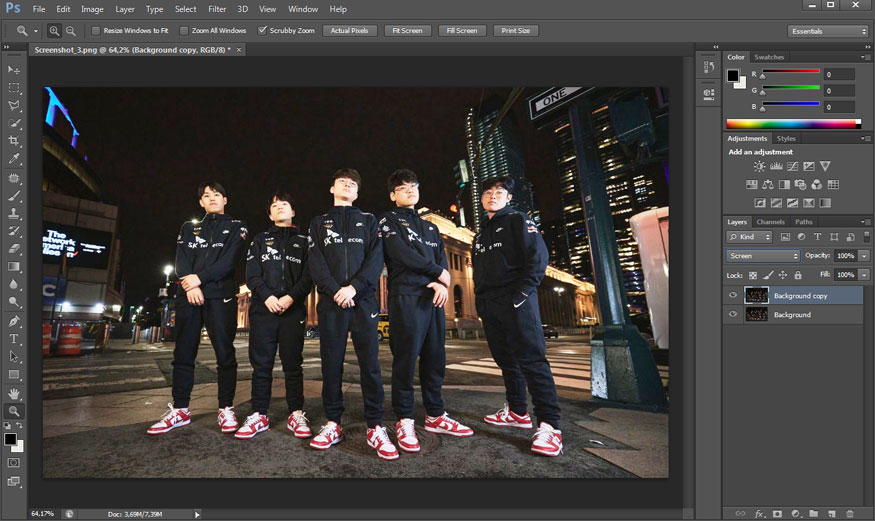
If you want the photo to be darker, you can choose the Soft Light or Hard Light color blend.
So you have finished adjusting the brightness and darkness of the photo using Photoshop with Blending Mode.
2. Adjust brightness/contrast
You can also adjust the brightness and darkness of your photos in Photoshop with the Brightness/Contrast tool. In this tool, Brightness adjusts the brightness and darkness of neutral color points. Contrast adjusts the contrast of photo details.
To adjust the brightness and darkness of a photo using Photoshop using Brightness/Contrast, we follow these basic steps:
Step 1: We need to open the photo we want to adjust the brightness and darkness for in Photoshop. You can open the photo by going to File => Open => Select the photo to open => Open. Or you can also use the shortcut key Ctrl + O to open the photo.
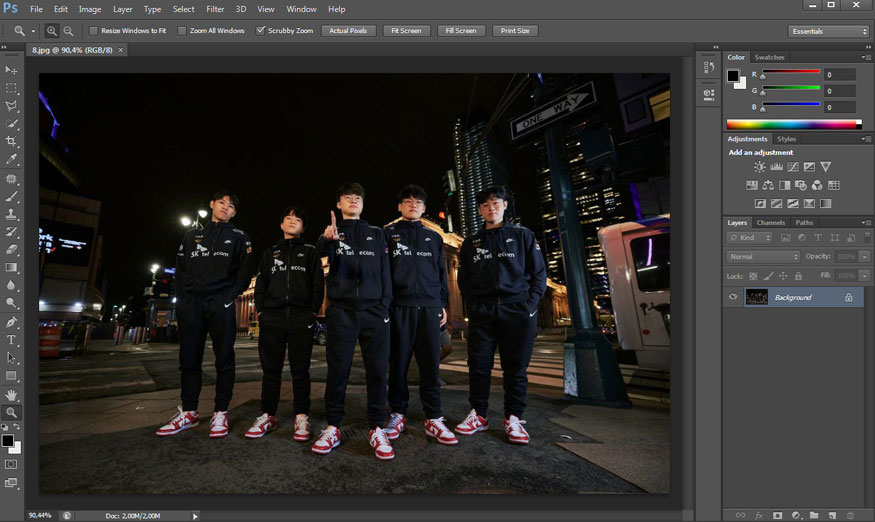
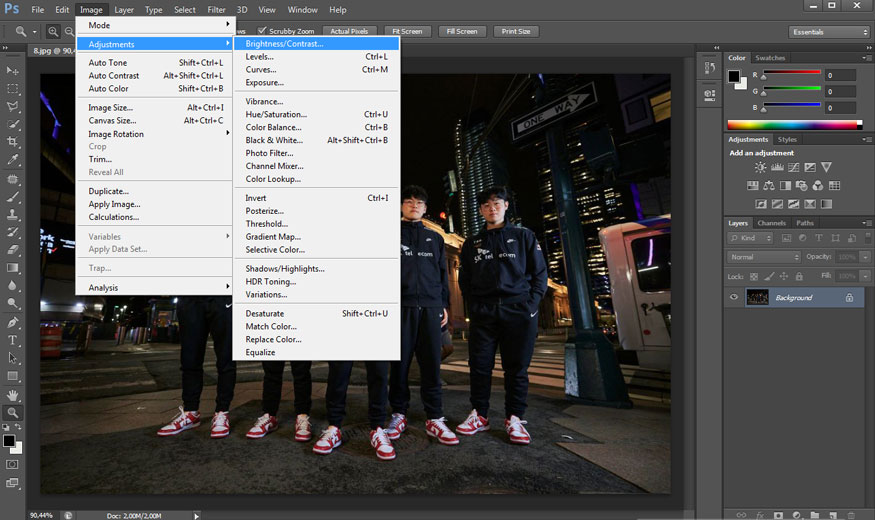
Step 2: On the menu bar, select Image => select Adjustments => select Brightness/Contrast…
Step 3: The Brightness/Contrast adjustment window will appear. Drag the slider to adjust.
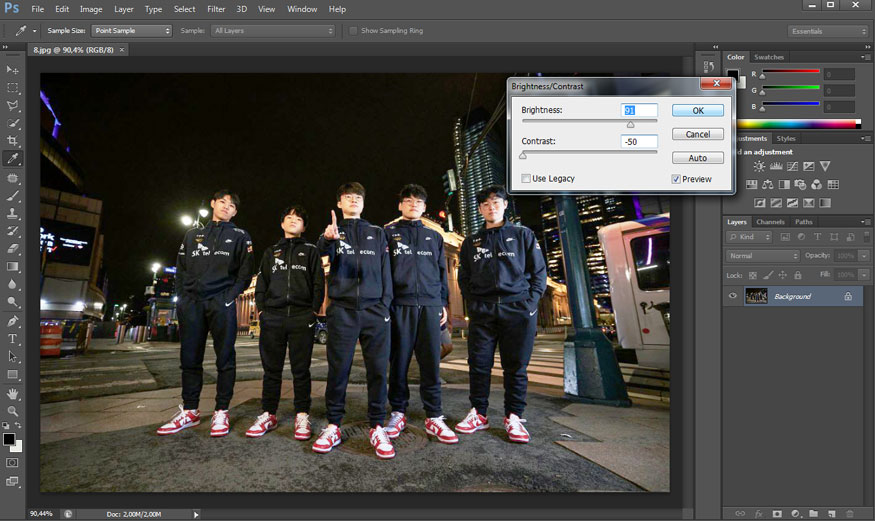
Drag the Brightness slider to the right to increase the brightness and vice versa. With Contrast, when you drag the slider to the right, it will darken the image and vice versa. After editing, click OK.
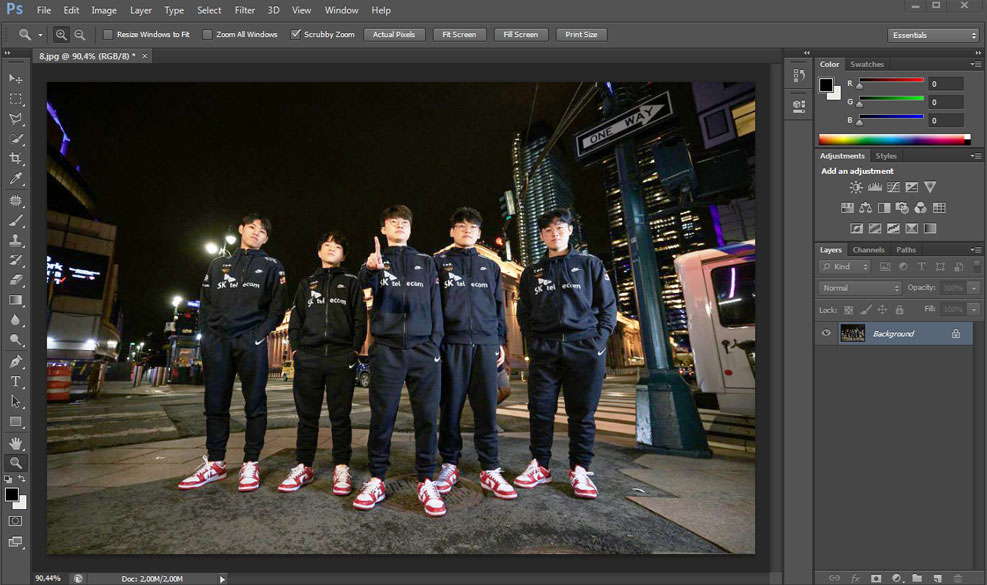
3. Adjust brightness with Levels
Adjusting the brightness and darkness of photos in Photoshop can also be done very simply with the Levels feature. It allows users to adjust the color balance, contrast and brightness of the photo.
You can adjust the brightness and darkness of photos in Photoshop through the Levels command by following some basic steps as follows:
Step 1: We need to open the photo we want to adjust the brightness and darkness for in Photoshop. You can open the photo by selecting File on the menu bar then selecting Open => select the photo to open => press Open. Or you can also use the shortcut key Ctrl + O to open the photo.
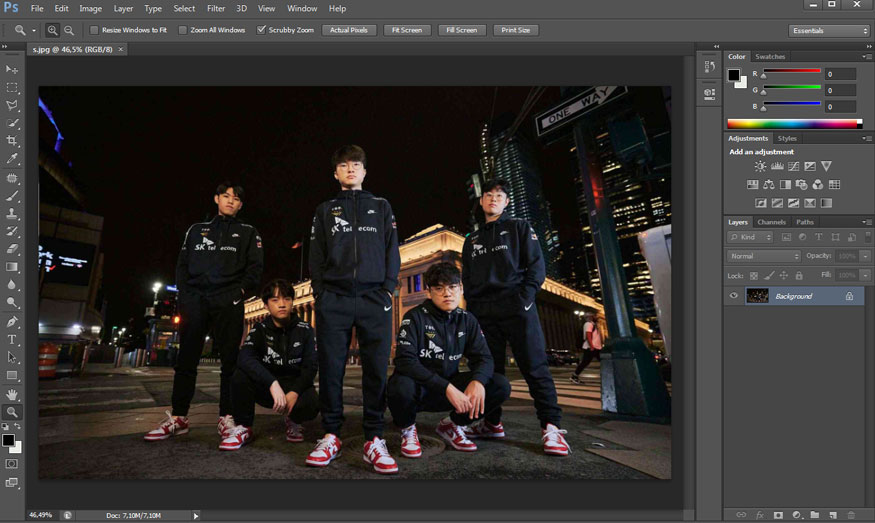
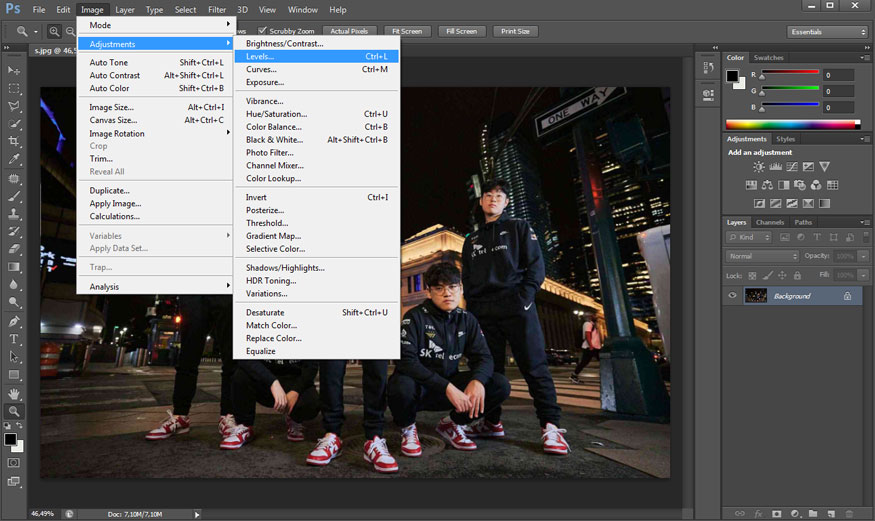
Step 2: On the menu bar, select Image => select Adjustments => select Levels…
Step 3: We can see in the Levels dialog box there are 3 pen icons. Use these 3 pens from left to right to dot the darkest, mid-range and brightest areas of the image.
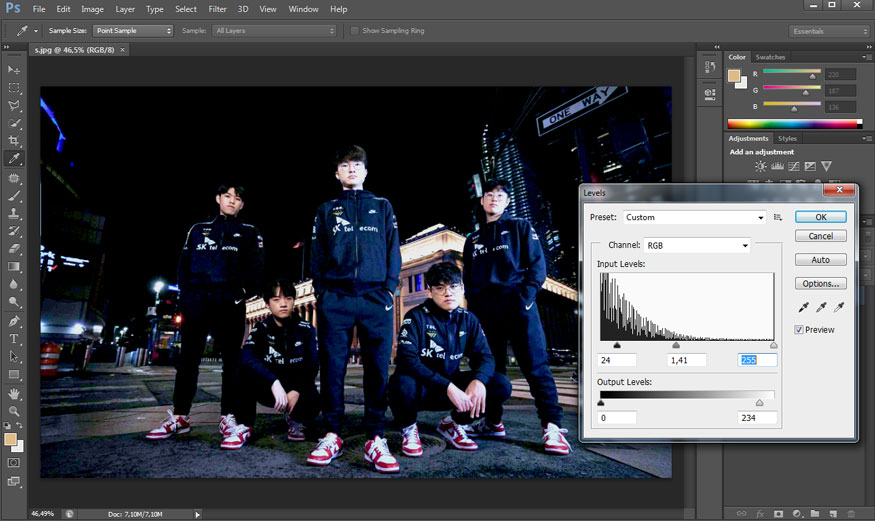
After each color selection, set the Input Levels and Output Levels and view the sample image to adjust accordingly. Once done, click OK.
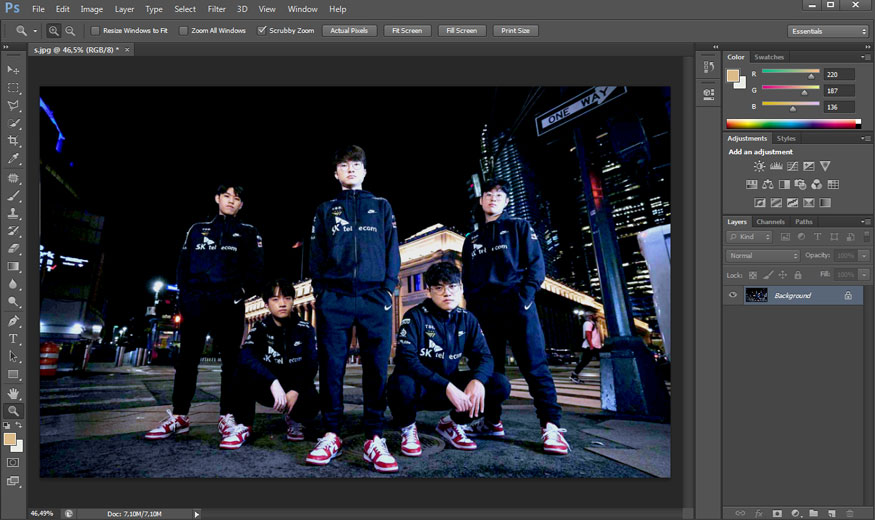
So you know how to adjust the brightness and darkness of photos using Photoshop with the Levels command, very simple, right?
4. Adjust brightness and darkness with Curves
If you are looking for a way to adjust the brightness of a photo in Photoshop, do not ignore the Curves command. It is used to increase the contrast between light and dark, help balance colors as well as correct the range of tones for each pixel area in the image. Curve means curve, it can be said that using the Curves tool is to edit the brightness of the color by adjusting a graph. This graph is a collection of image tone values from darkest to lightest. When not edited, the graph is a straight line, after being edited, it will become one (or more) curve.
To be able to adjust the brightness and darkness of photos using Photoshop with Curves, let's refer to the simple steps below.
Step 1: First, we need to open the photo that you want to adjust the brightness and darkness for in Photoshop. You can open the photo by going to File => Open => Select the photo to open => Open. Or you can also use the shortcut key Ctrl + O to open the photo.
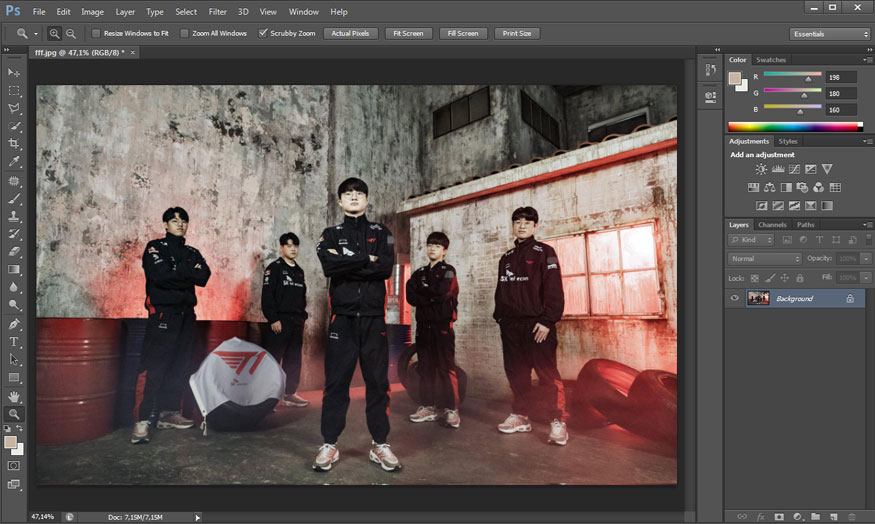
Step 2: On the menu bar, select Image => select Adjustments => select Curves…
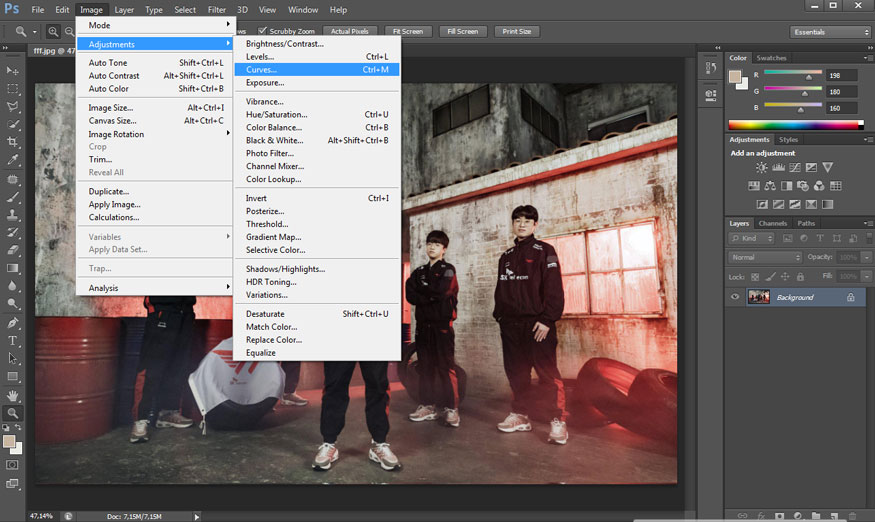
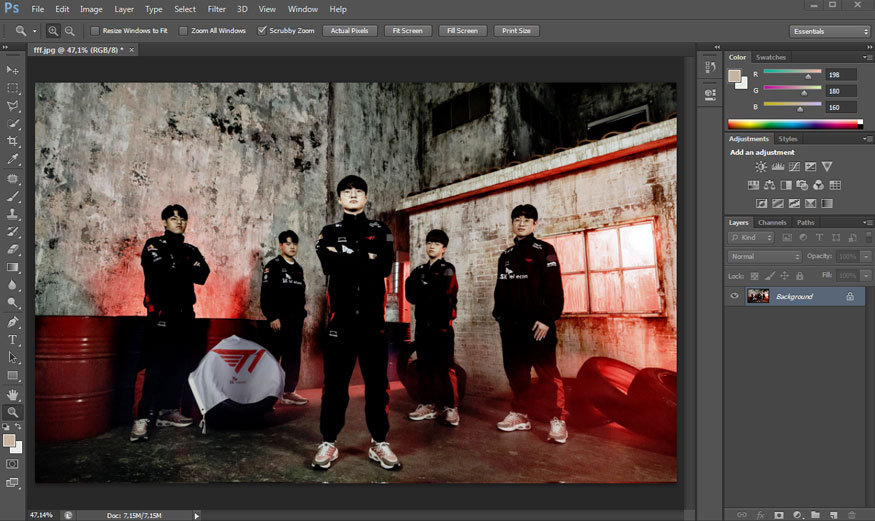
Step 3: Adjust the curve of the graph upward to brighten the photo or downward to darken the photo.
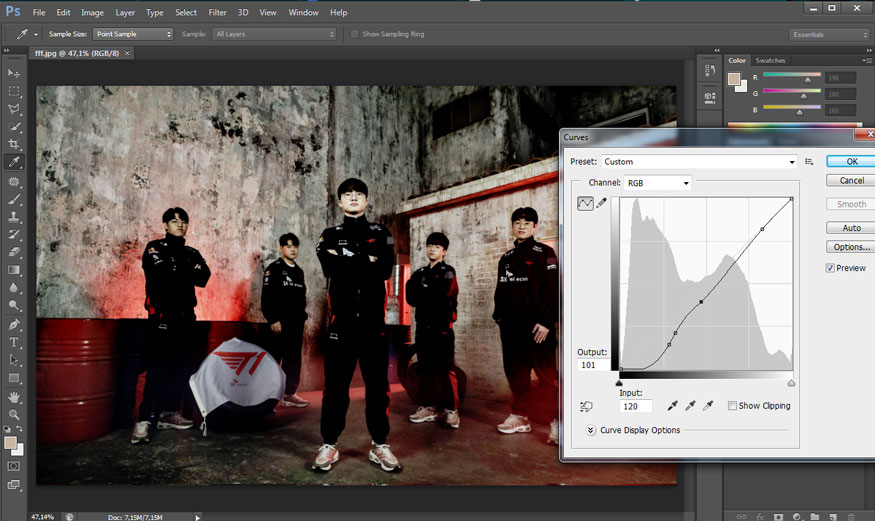
You can also select each color channel in Channel and then adjust the graph accordingly. After you have finished adjusting the image, click OK to finish.
5. Adjust the brightness and darkness of photos in Photoshop using Exposure
In addition to the 4 ways to adjust the brightness of photos in Photoshop as mentioned above, we can also adjust with the Exposure tool. Exposure is the exposure of the photo. This tool allows you to adjust the overall brightness of the photo. Exposure is a great tool to set a basic color tone for your photo before you start making more specific edits.
To adjust the brightness of a photo using Photoshop with Exposure, we can follow the basic steps below.
Step 1: First, open the photo you want to adjust the brightness and darkness for in Photoshop. To open the photo, on the menu bar, select File, then select Open => select the photo to open => press Open. Or to make it simpler, you can use the shortcut key Ctrl + O to open the photo.
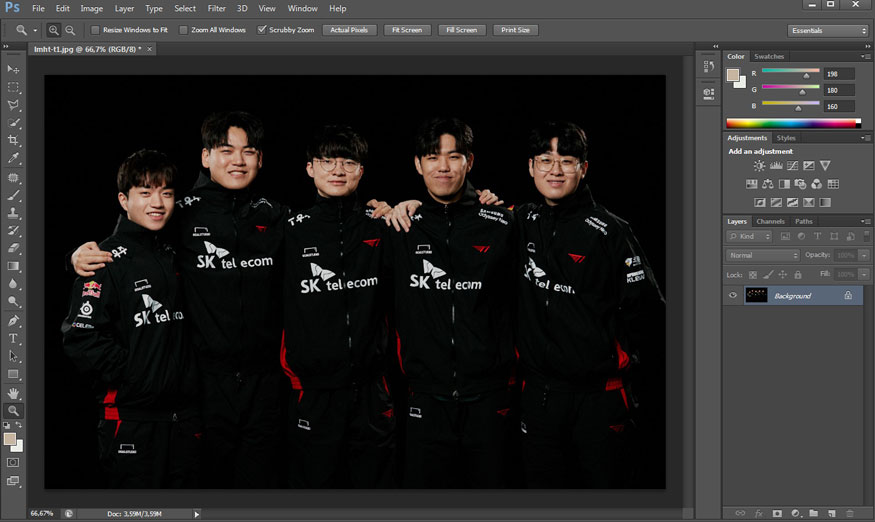
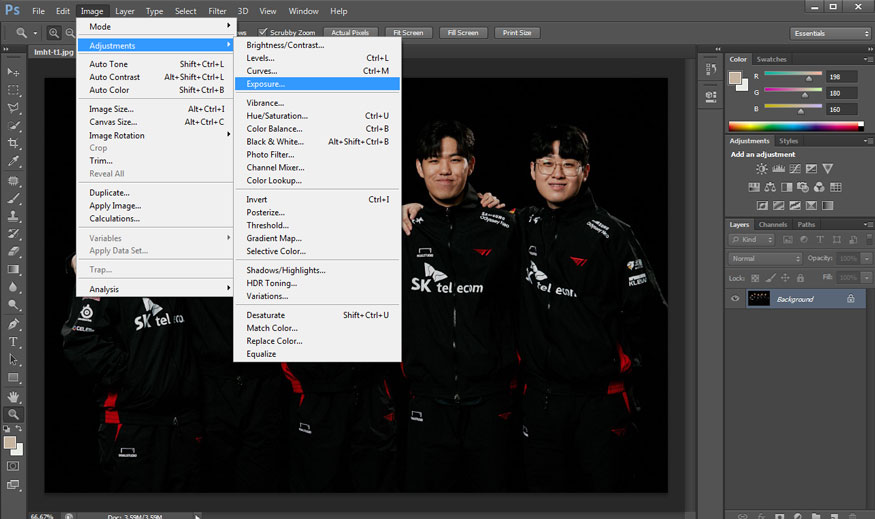
Step 2: On the menu bar, select Image => select Adjustments => select Exposure.
Step 3: In the Exposure dialog box, you need to note these parameters to adjust for the best photo.
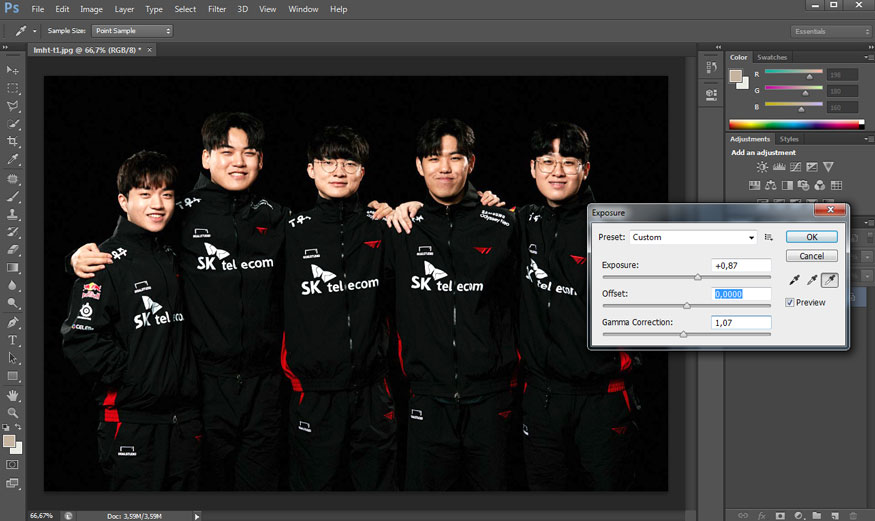
Exposure: allows you to adjust the brightness of the photo. If you set this parameter too high, the photo will be overexposed.
Offset: if this parameter is greater than 0, the image will be covered with a layer of white. If the parameter is less than 0, the color will feel darker.
Gamma Correction: when this index is greater than 1, the image color will be dark. If this parameter is less than 1, it will be white.
Adjust the parameters, and look at the changes in the image to adjust the brightness and darkness most appropriately. After adjusting, click OK.

Installation and support contact information:
🏡 SADESIGN Software Company Limited
📨 Email: phamvansa@gmail.com
🌍 Website: https://sadesign.ai


.png)


