Best Selling Products
Design logo with photoshop "SIMPLE" Anyone can do it
Nội dung
- 6 steps to design a logo using Photoshop CS6
- Step 1: Create a new workspace
- Step 2: Create the basic shape for the logo
- Step 3: Add texture to the logo
- Step 4: Create colors for the logo
- Step 5: Add text to the logo
- Step 6: Create a shadow effect
- Instructions for designing your Logo using Photoshop
- How to design your Logo using Adobe Firefly
- Frequently Asked Questions When Designing Logos Using Photoshop
Normally, to design logos in graphics, people often use Adobe Illustrator (AI) software. However, we can completely create quality logos with Photoshop. If you do not know how to design a logo with Photoshop, please read the sharing that SADESIGN brings in the following article!

6 steps to design a logo using Photoshop CS6
Designing a Photoshop logo is not as complicated as many people think. You can design a logo with Photoshop CS6 with 6 simple steps as follows:
Step 1: Create a new workspace
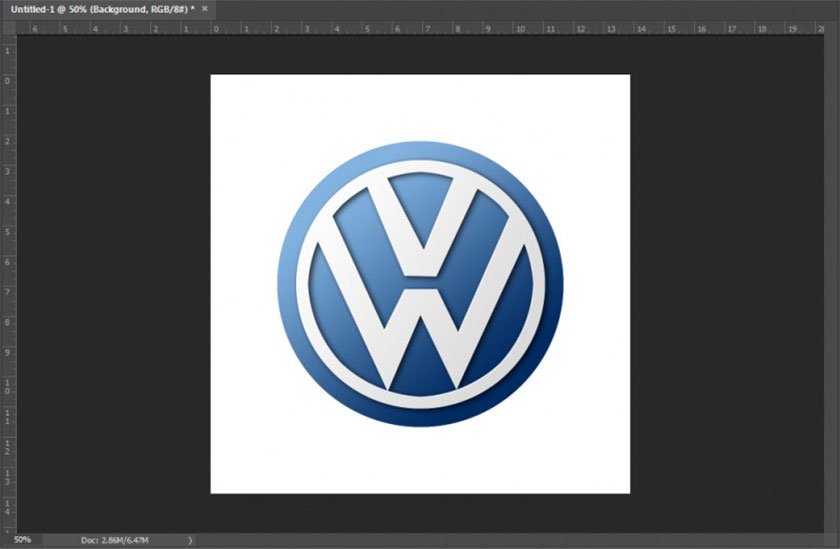
Go to Photoshop -> select File -> New (or press Ctrl + N) -> create a square background image with the size 1000 pixels x 1000 pixels (this is the standard size in logo design).
You can create additional baselines to help position logo elements, making logo design easier as follows: select View -> New Guide -> create Horizontal and Vertical baselines at 50%.
Step 2: Create the basic shape for the logo
Depending on your design idea, you can create suitable lines and shapes for the logo. Click on the Elliptical Marquee Tool (M) to draw the necessary circle -> hold down the Shift key to get a selection area with the appropriate size on the background image frame created in the step above.
.jpg)
Use the color tool in Photoshop to fill the background (the color layer below) and foreground (the color layer above). In the toolbar, for the Foreground color, use the color code #82B2E0, and for the Background, enter the color code #012B62.
(1).jpg)
If you want to set the background color, press Ctrl + Backspace. Select the Gradient Tool -> click on the color strip in the upper left corner of the screen -> select the Gradient mode as Foreground to Background.
(1).jpg)
Drag and drop into the selection area from the top left corner to the right corner -> select Ctrl+D to cancel the selection area operation.
(1).jpg)
Step 3: Add texture to the logo
Create a new layer by pressing Ctrl + Shift + N, at the circle created in the step above -> select the Elliptical Marquee Tool (M) while holding down the shift key to create another undistorted circle -> select Edit -> Stroke -> width 25px and Color to white, code #ffffff -> OK is successful for creating a circular pattern.
.jpg)
If you want to create a text image in your logo, you can do it in the following 2 ways:
Using Pen Tool: In the workspace, click to create Anchor Points (endpoints). When the last endpoint coincides with the first endpoint, the shape is complete -> press enter to create a selection -> press Alt + Backspace to fill the newly created shape with color.
Using the Polygonal Lasso Tool: Do the same thing as with the Pen Tool, but when you're done with the shape you'll need to create a selection and fill it with color.
.jpg)
Step 4: Create colors for the logo
You can change Fill and Stroke to your personal logo color, note that you should not fill a single color, instead you should use Rectangle to fill light and dark colors. This tool will help the logo color to be more beautiful and have more depth.
Step 5: Add text to the logo
To add text to your logo, use the Text tool (shortcut key T) and add text as required. When you design your own logo, choose the appropriate font to help the design look beautiful and harmonious.
Step 6: Create a shadow effect
This is the final step to designing a logo with Photoshop, we proceed in the following order:
Select the layer containing the letter icon -> right-click to select Blending Options -> customize the parameters in Dropshadow, Inner Shadow and Gradient Overlay to create the logo effect.
.jpg)
Use the Convert to Smart Object operation to apply to all layers to bring high-quality images -> download free logo to your device.
.jpg)
Above are 6 specific steps for us to create a logo with Photoshop extremely simple and easy. However, creating a unique, new logo requires the designer to research with creative ideas. In addition, you should also learn and improve other operations to be able to create the most complete logo design for yourself.
Instructions for designing your Logo using Photoshop
To design your Logo using Photoshop most simply, you should install Photoshop 2023 or Photoshop Beta because they are integrated with artificial intelligence to make expressing ideas easier.
First, click New File -> select Art & illustration -> select size, name and click Create.
.jpg)
Next, use the Marquee Tool (M) to create a selection, the logo will be limited within this selection. If possible, create multiple layers with multiple selections to combine into a complex Logo to make them more attractive.
After having the selection, click on Generative Fill or click on Edit -> select Generative Fill.
.jpg)
For example, to design a logo with a tiger symbol, enter the English content "a tiger face, vector look". This is the command for Adobe's artificial intelligence to create a tiger face logo. The logo is created in Vector style instead of 3D. Accordingly, when you want to design a logo with a symbol, write the detailed content and click Generate.
.jpg)
The result is a very satisfying logo in just seconds even if you are not a professional designer.
To add other details to the logo as desired, you can create more layers, add selections and command Photoshop to perform as required to create a complete logo.
.jpg)
How to design your Logo using Adobe Firefly
For those who do not know how to use Photoshop but still want to design a logo, you can use Adobe Firefly software. First, you need to register for an Adobe Firefly account -> select Text to Image -> select Generate. This feature is similar to Generative Fill in Photoshop but much easier to use.
.jpg)
For example, if you want to design a photography logo, write "Photography Logo" -> select Generate. If you want details, you can enter logo color, shape,... as you like.
.jpg)
You see, Adobe Firefly returns results with 4 very beautiful Logo designs, choose the most beautiful Logo in the right corner to continue adjusting. Click on the word Edit next to Logo -> select Generative Fill, Adobe Firefly will immediately transfer the Logo to the editing section like Photoshop.
.jpg)
For example, if you don't like the pink Logo, click on Background and wait a few seconds for Adobe Firefly to remove the Logo background as shown in the illustration. Enter the new background content in English then select Generate, when you have the result, click Keep. With just a few simple steps, we have an extremely beautiful and impressive Logo.
.jpg)
If you want to adjust the details on the Logo, click Remove -> click on the points you want to edit -> select Remove and wait for Adobe Firefly to adjust the marked points.
.jpg)
Once completed, click Download -> click Continue to download the Logo to your computer -> Select a storage location -> click Save to save.
.jpg)
Frequently Asked Questions When Designing Logos Using Photoshop
What is the fastest way to design a Logo using Photoshop?
The fastest and easiest way to design a logo with Photoshop is to use Photoshop 2023 or AI Photoshop 2023 , the second option is to design a logo using the Generative Fill feature in Photoshop.
Why can't I design a Logo using Generative Fill in Photoshop?
In this case, you need to use the original Photoshop with an internet connection to be able to use Generative Fill.
Can I enter Vietnamese content into Generative Fill to design a Logo?
Yes, because Photoshop now supports Vietnamese, but the results will not be as accurate as in English.
Hopefully, the above ways to design logos using Photoshop will help you create the most satisfactory logos for yourself. SaDesign wishes you success!


