Best Selling Products
Detailed Instructions for Creating Beautiful Vintage Photo Effects in Photoshop
Nội dung
- 1. Overview of Vintage Color Effects
- 2. What is Vintage Color Effect?
- 3. Prepare Your Photo Before You Begin
- 3.1 Step 1: Convert Image to Black and White (Optional)
- 3.2. Step 2: Create Basic Vintage Color Effect
- 3.3. Step 3: Create Scratches and Matte Film
- 3.4. Step 4: Apply Exposure and Shadow Effects
- 3.5. Step 5: Final Adjustment
- 4. Practical Applications of Vintage Color Effects
- 5. How to Create Vintage Color Effects?
Discover how to create beautiful vintage photo effects in Photoshop in simple steps, giving your photos a classic and impressive look.

1. Overview of Vintage Color Effects
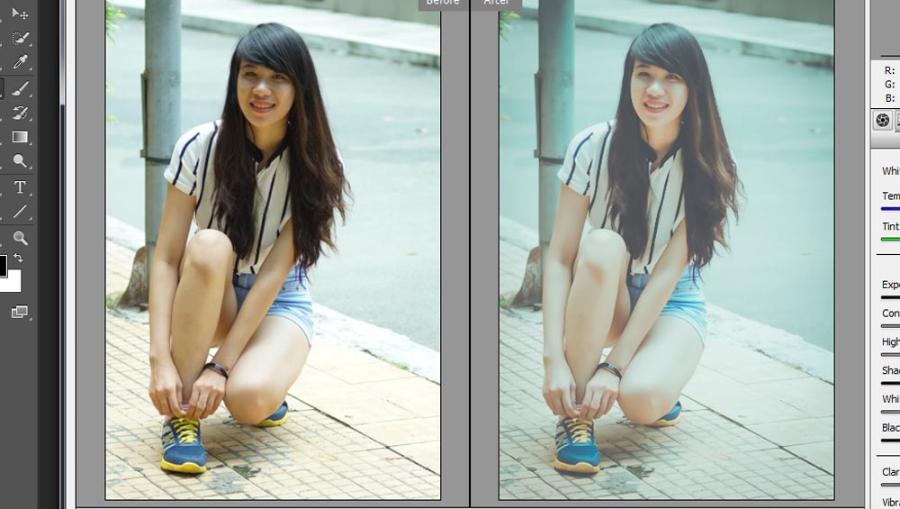
Before going into the details of how to create vintage color photo effects, let’s learn about the characteristics of vintage style in photography. This style is often associated with warm, pale and slightly faded tones, creating a nostalgic and artistic feeling. Vintage photos often have a combination of dim light, neutral colors and elements that soften the image.
.jpg)
Creating this effect in Photoshop is not just about simple color correction but also a subtle combination of editing techniques like contrast, lighting, saturation and even fake scratch layers to make the photo look more vintage.
2. What is Vintage Color Effect?
Vintage color effects are a style of photo editing or color design that aims to recreate the beauty of previous decades. The main color tones are usually warm, soft shades such as brown, pale yellow, moss green or pale pink. This effect is often used to simulate the feeling of photos taken with vintage film cameras or old printed documents.
Salient features of this effect include:
- Dull colors: Reduce saturation to create a soothing feel.
- Soft lighting: Use a soft or backlit effect to enhance the aesthetic.
- Grain: Adds small grains to simulate the quality of vintage film.
- Warm color tones: Create a sense of closeness and nostalgia.
The Origin and Meaning of the Vintage Color Effect
The vintage color effect originated from a time when photography and printing technology were not as developed as it is today. Early photos often had imperfect colors due to limitations in techniques and materials. However, it was this "imperfection" that became a unique beauty, evoking memories of a bygone era.
In a modern context, the vintage color effect is not only an aesthetic style but also has a deeper meaning:
- Evokes a sense of nostalgia: Associated with memories and cultural values of previous generations.
- Make a difference: Highlight products or images in the diverse digital age.
- Emotional connection: Brings a sense of authenticity, closeness and warmth.
3. Prepare Your Photo Before You Begin
.jpg)
Before applying any effects, make sure your photo is of good enough quality to achieve optimal results. High resolution, well-lit photos will make it easier to create a vintage effect. If your photo is too dark or too bright, you can use the lighting adjustment tool in Photoshop to create a photo with a moderately bright background.
3.1 Step 1: Convert Image to Black and White (Optional)
One of the most common steps in creating a vintage effect is to convert your photo to black and white, then subtly add color back. To do this, you will need:
Open the image in Photoshop.
Vào menu Image → Adjustments → Black & White.
Adjust the color sliders to create the right amount of brightness and darkness for your image.
However, if you want to keep the color image, you can skip this step and move on to the next step.
3.2. Step 2: Create Basic Vintage Color Effect
To create a vintage color effect, you need to apply some color and contrast editing operations:
a) Adjust Color With Selective Color
Vào Layer → New Adjustment Layer → Selective Color.
In the Selective Color window , you can adjust the basic colors like red, yellow, blue and green as you like.
To create a vintage feel, you can reduce the saturation of some colors, creating a faded and faded look.
b) Create a Pale Yellow With Hue/Saturation
Next, create a Hue/Saturation adjustment layer .
Adjust Hue to give the photo a light yellow or brown cast.
Reduce Saturation to fade the colors, creating a more aged feel.
c) Adjust Contrast
To give your photo depth and pop, use the Curves tool to adjust the brightness and darkness of your photo.
Vào Layer → New Adjustment Layer → Curves.
Create a slight "S" curve to increase the contrast between light and dark areas.
3.3. Step 3: Create Scratches and Matte Film
The vintage effect is often associated with scratches, stains, and other signs of age. To give your photos a more vintage look, you can create some fake scratches:
Search the internet for old, scratched textures or overlays or create your own using brushes in Photoshop.
Download the texture and place it on the photo as a new layer.
Edit this layer by changing the blending mode to Overlay or Soft Light , and lowering the opacity for a softer effect.
Additionally, you can apply a light Noise layer to add a “film blur” look. Go to Filter → Noise → Add Noise and choose a moderate level to create a light noise effect.
3.4. Step 4: Apply Exposure and Shadow Effects
To add some depth and blur to your photos, try applying specific exposure and shadow effects like these:
a) Create Dim Light
Vào Layer → New Adjustment Layer → Brightness/Contrast.
Increase the brightness a little, but not too much, to create softness without losing detail in the photo.
b) Add Shadow Effect
You can also add soft shadows using the Gradient Tool to create shadows around specific areas of the photo, thereby highlighting the central parts.
3.5. Step 5: Final Adjustment
Once you have done the above editing steps, you can make some final tweaks to perfect your vintage effect.
.jpg)
Adjust Brightness : Check the brightness of the photo again and adjust again if necessary.
Add a light color layer : To add more vintage feel, you can create a light color layer (like brown or gold) and adjust the opacity of this layer until you get the desired result.
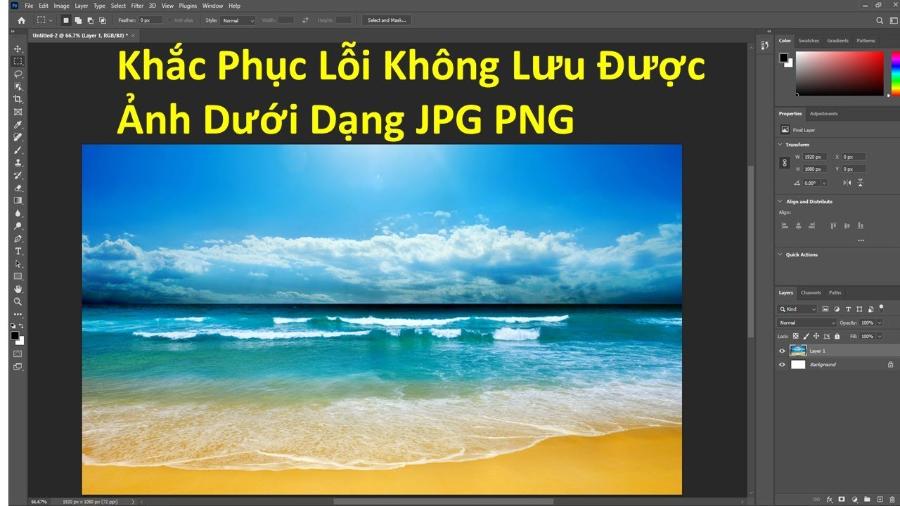
Save Image : Finally, don't forget to save your image in JPEG or PNG format for easy use.
4. Practical Applications of Vintage Color Effects
Vintage photo effects are not just a design trend, but a way to create emotional photos and add depth to your work. By applying basic editing techniques in Photoshop, you can absolutely create classic, warm and impressive photos.
Experiment with different tools and techniques to create a unique vintage look that reflects your personality and artistic vision. Vintage color effects are widely used in many creative fields, including:
a. Photography
In photography, vintage color effects are often used to create classic-style photos, especially in weddings, portraits, or fine art photography. Photographers often use editing software such as Adobe Lightroom or Photoshop to recreate vintage tones in a subtle way.
b. Graphic Design
In graphic design, this effect often appears in posters, product packaging, logos or invitations. The vintage style helps the product stand out and easily attract customers' attention.
c. Media and Advertising
Many advertising campaigns use vintage color effects to create a sense of friendliness and trustworthiness. This is also a way for brands to connect with customers through emotional factors.
d. Fashion and Interior
Not only limited to the field of images, vintage style is also applied in fashion and interior design. Clothing collections or living spaces with a classic breath always have a special attraction for those who love sophistication and nostalgia.
5. How to Create Vintage Color Effects?
.jpg)
The vintage color effect is not only an aesthetic trend but also a symbol of the connection between the past and the present. With the ability to evoke strong emotions and create a unique mark, this style has affirmed its solid position in the creative world. To create a vintage color effect, you can follow the following basic steps:
1. Desaturation: Lighten the color to create a soothing feeling for the eyes.
2. Color Grading: Use warm tones like light yellow or brown.
3. Add Grain: Increase the realism of the image.
4. Use filters: Apply presets available on editing software.
In addition, you can also refer to online tools or mobile applications that support creating vintage color effects quickly and conveniently.


