Best Selling Products

Capcut Pro 1 Year
39 USD

Freepik Premium Account
59 USD

Upgrade Genuine Office 365
49 USD

Genuine Adobe Illustrator account
99 USD

Adobe Photoshop Copyright - Full App
120 USD

Copyright Adobe Lightroom Account
59 USD

Autodesk All App Account Copyright
120 USD

Upgrade genuine Capture One account
120 USD

Upgrade Duolingo Super
29 USD

ChatGPT Plus Account (GPT-4)
16 USD

Genuine Cheap Canva Pro
39 USD

Plugin Retouch4me
69 USD

MidJourney Account
29 USD

Windows 10 & 11 Pro Key
36 USD

Adobe Premiere Pro Account
99 USD
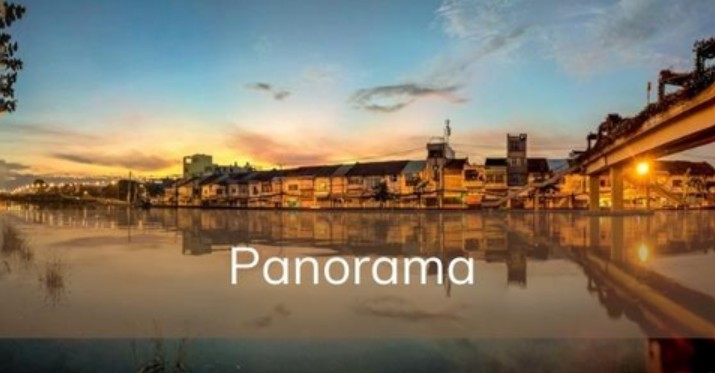
Discover Panorama: Secrets to Taking Stunning Panoramic Photos
Nội dung
- 1. Basic information about Panorama
- 2. Types of Panorama photos
- 3. Applications of Panorama
- 4. Panorama photography guide
- 4.1. Equipment preparation and installation
- 4.2. Shooting technique
- 4.3. Take Panorama photos on your phone
- 4.4. Post-processing
- 5. Panorama photo processing tips and tools
- 5.1. Tips for processing Panorama photos
- 5.2. Panorama image processing tool
- 5.3. Notes on image processing
- 6. Frequently Asked Questions (FAQ)
Join SaDesign to unlock the secret of panorama photography with small but extremely effective tips. The article will guide you step by step to help large scenes become "fascinating" right in the picture.
Panorama has become an indispensable trend, especially for those who are passionate about capturing vast, majestic spaces. Panorama not only provides a super wide angle view to help viewers "quickly capture" the panorama, but also creates an impressive, engaging visual experience. In this article, you will learn about the origin of the term, panorama shooting techniques on cameras and phones, as well as practical applications to create impressive photos. SaDesign hopes that after reading, you will confidently hold the camera and explore space in a completely new way.
1. Basic information about Panorama
Panorama is a term used to describe a type of photography or photographic technique that depicts a scene with an extremely wide angle, allowing the viewer to feel as if they are standing in the middle of the scene. The word "Panorama" comes from the Greek words "pan" meaning "whole" and "horama" meaning "scenery". The term originated in the 19th century and was originally used to describe large panoramic paintings of nature.
Nowadays, Panorama photography has developed strongly thanks to modern technology. This is a technique of combining many consecutive photos into a single photo, creating a super wide angle of view, up to 360 degrees. Panorama photography can be done easily with devices such as smartphones, digital cameras or specialized cameras.
.png)
Benefits and applications of Panorama photos
Capture details: Panorama photos allow you to reproduce scenes in high detail, including foreground and background.
Create a sense of reality: Wide angle of view creates the feeling of actually standing in the space being captured.
Suitable for many fields: From tourism, real estate to events, Panorama helps viewers have a comprehensive view.
Popular types of Panorama photos
Partial Panorama: A wide angle photo, usually used for phones or basic devices.
360° Panorama: A technique for creating circular panoramic photos, requiring professional shooting and photo stitching skills.
Panorama photos are not only beautiful but also help expand the perspective, fully preserving the space and emotions in every moment.
2. Types of Panorama photos
Panorama photos come in different types depending on how they are taken and what they are used for. Here are the most common types, along with their characteristics and how to use them.
.png)
Partial Panorama:
This type of photo is created by stitching together several separate photos. It is often easily done on devices such as phones or digital cameras. Partial Panorama is a good place to start learning about panoramic photography.
Horizon Panorama:
Horizontal panoramas, often used to capture large landscapes such as skylines, coastlines, or mountains, are a popular photographic technique that allows you to capture a wide expanse of space that is much larger in width than it is in height.
Vertical Panorama:
This technique is used to photograph tall subjects, such as buildings or trees. Vertical Panorama photos often have a greater height than width, giving a sense of detail and power.
360 Panorama:
This type of photography recreates the entire surrounding space, often used for architectural, real estate, or interior projects. 360 Panorama photography requires specialized equipment and software, providing a vivid, interactive visual experience.
Choosing the right type of Panorama photo will depend on the needs and skills of the photographer, as well as the type of equipment being used.
3. Applications of Panorama
Panorama photos bring many practical applications in life and technology thanks to the ability to reproduce large spaces in a realistic and impressive way. Below are the outstanding applications of Panorama:
.png)
In art photography: Panorama photos help photographers capture the entire space, from natural landscapes to architectural works, creating spectacular, deep photos.
Real estate applications: This technique is used to create virtual tours, providing detailed and comprehensive views of interior and exterior spaces.
In tourism and destination promotion: Travel companies and destinations use Panorama photos to showcase panoramic views of prominent areas, helping to attract tourists.
In the technology field: Panorama is applied in the development of virtual reality (VR) and augmented reality (AR), bringing a more vivid interactive experience.
Applications in daily life: Users can take souvenir photos with groups of friends or family at tourist destinations without missing the beautiful surrounding scenery.
Creating Panorama photos is easy today thanks to modern mobile devices and panoramic photography software, opening up many creative opportunities and applying technology in life.
4. Panorama photography guide
Taking Panorama photos requires not only technique but also careful preparation to ensure the best quality photos. Below are detailed steps to take Panorama photos on DSLR cameras and smartphones.
.png)
4.1. Equipment preparation and installation
Equipment required:
Camera: It is recommended to use a camera that supports RAW format for easy post-editing.
Lens: Prefer lenses with focal lengths of 50mm or longer to reduce distortion.
Tripod: Helps keep the camera steady and avoid shaking when panning.
Camera settings:
Set to Manual mode to fix the aperture, shutter speed, and ISO settings.
Ideal aperture: f/8 to f/16 for large depth of field.
Shoot in RAW format to preserve maximum image detail and dynamic range.
.png)
4.2. Shooting technique
Define the scene: Select highlights, midtones, and shadows to set the appropriate exposure parameters.
Pan slowly: Move the camera from left to right or vice versa, making sure the frames overlap by at least 30% to make it easier to stitch the photos.
Test Shots: Before shooting the entire scene, take a few test shots to check the lighting and focus.
4.3. Take Panorama photos on your phone
Use Panorama mode: Most phones today support this shooting mode, easily accessible via the camera app.
Move the phone slowly: Hold the phone straight and pan slowly to ensure the image quality is not distorted or blurry.
Avoid shooting moving objects: To avoid distortion, choose still scenes.
4.4. Post-processing
Use software like Adobe Lightroom or Photoshop to combine and edit photos. For RAW photos, you can adjust brightness, color, and remove distortion to get the perfect photo.
5. Panorama photo processing tips and tools
Panorama photo processing plays an important role in creating a perfect panoramic photo. Here are some useful tips and tools to help you optimize your Panorama photo processing.
.png)
5.1. Tips for processing Panorama photos
Take photos with the right amount of overlap: When taking Panorama photos, make sure the photos have a minimum overlap of 20-30% so that the processing software can combine the photos smoothly.
Use RAW image format: RAW allows you to retain more information about the image, making it easier to adjust lighting, detail, and color in post-production.
Steady the camera: Use a tripod or hold it steady with your hands to avoid shaking, making sure the frames are aligned.
Adjust camera settings: Use manual mode to keep settings like aperture, shutter speed, and ISO the same between frames, keeping lighting and color consistent.
Crop and align: After merging the photos, use the crop tool to remove excess areas and balance the photo layout.
5.2. Panorama image processing tool
There are many specialized software that support Panorama photo processing and stitching, including:
.png)
Adobe Lightroom and Photoshop: These are powerful tools for stitching Panorama photos with the Photomerge feature, which automatically stitches and adjusts frames.
Hugin: A free and open source software, providing flexible options for Panorama image processing and perspective adjustment.
Microsoft ICE: This tool helps to combine photos quickly and easily with a friendly interface.
AutoPano Pro: A professional software that automatically recognizes connection points and stitches images with high precision.
5.3. Notes on image processing
Lighting: Adjust the overall lighting to ensure harmony between parts of the photo.
Sharpness: Use the sharpening tools to bring out details and avoid blurry images.
Color: Check and adjust colors to make photos more vivid and realistic.
.png)
6. Frequently Asked Questions (FAQ)
How is taking panorama photos with a smartphone different from a DSLR?
Smartphones are convenient, auto-pairing is fast but manual control is not flexible. DSLRs provide high quality, manual control, but require tripod and post-production software.
Can I use a telephoto lens to take panoramas?
Possible, but requires more panels and larger overlap (30–40%). Low distortion, good detail. However, too much movement will easily cause nodal points to shift, making it difficult to merge.
How to combine panoramas without distortion?
Choose the appropriate projection: cylindrical if only horizontal, spherical for 360°. Fix the nodal point, overlap enough, use a specialized tripod.
When do you need HDR stitching and when do you just need regular panorama stitching?
HDR panorama when the scene has a large difference in brightness (the difference between the sky's light and the dark is too different). Normally, panoramas are only combined when the light is even or can be adjusted with curves.
Panorama is not only a technique to capture wide open spaces but also a “bridge” to bring viewers closer to nature, architecture, or any scene you want to share. Don’t be afraid to experiment with different angles, lenses, and most importantly, practice patiently to master the technique of keeping nodal points and controlling overlap.


VIP Products


Best Selling Products
Capcut Pro 1 Year
39 USD
Freepik Premium Account
59 USD
Upgrade Genuine Office 365
49 USD
Genuine Adobe Illustrator account
99 USD
Adobe Photoshop Copyright - Full App
120 USD
Copyright Adobe Lightroom Account
59 USD
Autodesk All App Account Copyright
120 USD
Upgrade genuine Capture One account
120 USD
Upgrade Duolingo Super
29 USD
ChatGPT Plus Account (GPT-4)
16 USD
Genuine Cheap Canva Pro
39 USD
Plugin Retouch4me
69 USD
MidJourney Account
29 USD
Windows 10 & 11 Pro Key
36 USD
Adobe Premiere Pro Account
99 USD