Best Selling Products
Experience Taking Stunning Bokeh Photos For Beautiful Moments
Nội dung
- 1. What is Bokeh?
- 1.1 Mechanism of bokeh creation
- 1.2 Distinguishing between good and bad bokeh
- 1.3. Popular Types of Bokeh
- 2. Factors Affecting Bokeh Quality
- 3. Stunning Bokeh Photography Techniques
- 4. Bokeh Photo Editing
- 5. Common Mistakes When Taking Bokeh Photos and How to Fix Them
- 6. Tips for Taking Beautiful Bokeh Photos
- 7. Conclusion
Discover the technique of shooting stunning bokeh with useful tips. Understand aperture, focal length and distance to create impressive bokeh effects in photography.

Bokeh is a photographic effect that creates soft, blurred spots of light that help highlight the subject and add depth to the photo. To achieve a sparkling bokeh, the photographer needs to understand aperture, focal length, distance, and appropriate focusing techniques. In this article, sadesign will take you on a journey to explore the world of sparkling bokeh. From basic knowledge about the definition and mechanism of creating bokeh, to factors that affect the quality of bokeh, effective bokeh photography techniques, and even the secrets of editing bokeh photos to achieve the desired results.
1. What is Bokeh?
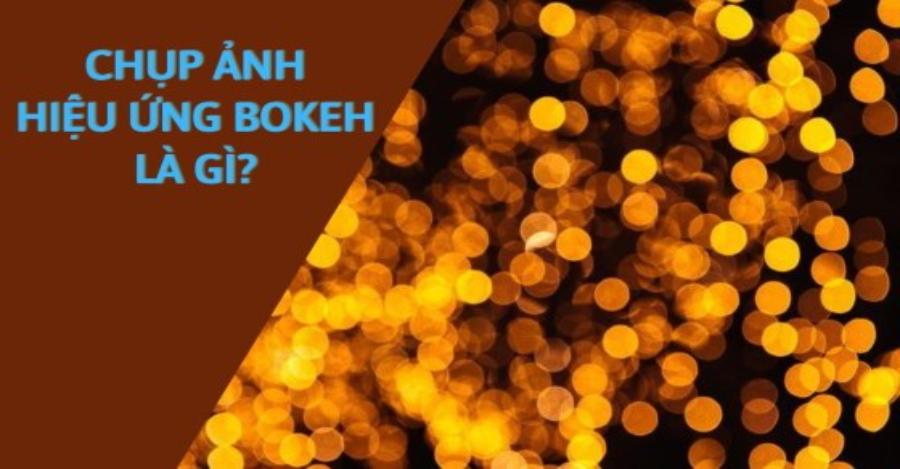
Bokeh is the effect of blurring the background or bright areas in a photo, creating soft and artistic spots of light. This technique is often seen in portrait, macro or night photography, helping to highlight the subject and increase the aesthetics of the photo.
.jpg)
Bokeh is not just a blur effect, but also affects the visual perception of the viewer. The smoothness, shape and quality of bokeh depends on many factors such as lens aperture, aperture blade design and distance between the subject and the background.
1.1 Mechanism of bokeh creation
Bokeh is created when taking photos with a shallow depth of field , usually achieved by using a large aperture . As the aperture widens (e.g. f/1.4, f/1.8, f/2.8), the depth of field decreases. This means that only a small portion of the image is in focus (usually the subject), leaving the areas in front of and behind the subject blurred. Small light sources in this blurred area of the image will appear as circles, polygons, or other shapes, depending on the design of the lens.
1.2 Distinguishing between good and bad bokeh
Good Bokeh: Usually has a smooth blur, the circles of light are round or nearly round in shape, without distortion, bright edges or distracting details. Good bokeh creates a soft, pleasing background and subtly highlights the subject.
Bad Bokeh: Often has harsh blurring, distorted light circles, bright edges, or distracting details. Bad bokeh can make a photo look cluttered, unpleasant, and less aesthetically pleasing.
1.3. Popular Types of Bokeh
Bokeh is a popular visual effect in photography that creates a blur in out-of-focus areas to highlight the main subject. There are many different types of bokeh, each with its own distinct feel and often used depending on the photographer's creative goals.
Creamy Bokeh
Smooth bokeh, without hard edges, creates a soft and natural feel. This type of bokeh is often found in high-end lenses with many aperture blades and large apertures. Creamy Bokeh, also known as "Creamy Bokeh," is one of the most common and sought-after types of bokeh in photography. This type of bokeh creates a soft and smooth blurring of the background, subtly highlighting the main subject.
The characteristic of smooth bokeh is usually due to the use of a lens with a large aperture (f/1.2, f/1.4, or f/1.8) and high-quality optical design, creating evenly rounded, undistorted light circles. This effect is often used in portraiture or artistic photography, where focus on the subject and aesthetic sense are important. Controlling the distance between the subject, the background, and the camera also plays an important role in creating the perfect smooth bokeh.
Polygonal Bokeh
Bokeh has a polygonal shape when the lens has a small number of aperture blades, which is often found in cheap lenses or lenses with small apertures. This effect is often more obvious in photos taken at night, when there are many small light sources such as street lights or lights from buildings. Using polygonal bokeh not only helps to highlight the subject but also adds depth and interest to the frame, bringing an artistic and professional feel to the photographic work.
Swirly Bokeh
The bokeh effect creates swirls around the subject, popular with vintage lenses like the Helios 44-2. This effect is often created by vintage lenses or lenses with special designs, such as the Petzval lens. The swirling bokeh not only highlights the subject but also creates a unique aesthetic, making the photos more impressive and attractive. However, using this type of bokeh requires careful consideration to ensure that the effect does not upset the balance and harmony of the overall image.
Bubble Bokeh
Blurry spots with bright edges around them, often produced by old lenses or lenses with special lenses.
Additionally, hard bokeh and soft bokeh are also two popular styles, with hard bokeh having sharp edges while soft bokeh has a softer feel. Understanding the different types of bokeh and how to apply them will help photographers improve the quality and aesthetics of their work.
2. Factors Affecting Bokeh Quality
.jpg)
Many factors affect the quality of bokeh in a photo, including:
Aperture:
Large apertures (f/1.4, f/1.8, f/2.8) are the most important factor in creating strong bokeh. Large apertures create a shallow depth of field, blurring the background and foreground significantly.
Relationship between aperture and depth of field: The larger the aperture, the shallower the depth of field, and the stronger the bokeh.
Focal Length:
Telephoto lenses (long focal lengths) create stronger bokeh than wide-angle lenses. This is because telephoto lenses have a shallower depth of field than wide-angle lenses at the same aperture.
Reason: Telephoto lenses have the ability to compress space, making the background appear closer and therefore more blurred.
Distance to subject:
Closer distances create stronger bokeh. When you photograph a subject at close range, the depth of field decreases, making the background more blurred.
Reason: When you shoot close up, the lens needs to focus on a smaller area, making the areas in front and behind that area blurry.
Distance from subject to background:
The farther away the background is, the stronger the bokeh will be. The farther the background is from the subject, the more blurred it will be.
Reason: When the background is far away, light sources in the background will be represented as smaller circles or polygons, creating a beautiful bokeh effect.
Lens quality:
The optical design of a lens greatly affects the shape and smoothness of the bokeh. Lenses with good optical design tend to produce round, smooth, distortion-free bokeh.
Factors like aperture blades, lens design: The more aperture blades, the rounder the bokeh. Lens design also affects how the lens renders out-of-focus light sources.
3. Stunning Bokeh Photography Techniques
To create beautiful and impressive bokeh photos, you need to master the following photography techniques:
.jpg)
Choose the right lens: Lenses with large apertures such as 50mm f/1.8, 85mm f/1.4, 70-200mm f/2.8 are popular choices for creating beautiful bokeh. If you use a mirrorless or DSLR camera, you should invest in a lens with a large aperture to optimize the bokeh effect.
Large Aperture Prime Lenses: Prime lenses with large apertures (e.g. 50mm f/1.4, 85mm f/1.8) are ideal for bokeh photography. They allow you to open the aperture as wide as possible, creating a shallow depth of field and strong bokeh.
Zoom lenses with large apertures: Some high-end zoom lenses also have large apertures (e.g. 70-200mm f/2.8), allowing you to shoot bokeh at a wide range of focal lengths.
Wide Aperture Setting: Use aperture priority (A/Av) or manual (M) mode to set a large aperture. This creates a more pronounced background blur, resulting in softer bokeh.
Camera settings:
Aperture Priority Mode (A or Av): This mode allows you to control the aperture, while the camera automatically adjusts the shutter speed to ensure correct exposure.
Widest possible aperture: To create strong bokeh, open the aperture as wide as possible (e.g. f/1.4, f/1.8, f/2.8).
Precise focus:
Focus on the subject: To make the subject stand out, focus precisely on the subject and create contrast with the background.
Use manual focus (MF) when necessary: In some cases, autofocus can be difficult, especially when shooting at large apertures. Using manual focus will give you more precise control over the focus point.
Composition: Keep your subject close and make sure the background is far enough away to create a distinct blur. If the background is too close, the bokeh may not be as effective as you want it to be.
Create distance between subject and background: The greater the distance between subject and background, the stronger the bokeh.
Look for a background with lots of small light sources: Small light sources in the background (e.g. lamps, sunlit leaves, dew drops) will create a nice bokeh effect.
Using Filters and DIY Effects: ND filters help reduce the amount of light reaching the sensor, allowing for a larger aperture even in bright conditions. Additionally, you can use a piece of cardboard cut out in the shape of a heart, star or special shape to create a bokeh effect in the desired shape.
Post-Processing Edits to Enhance Bokeh: Photoshop or Lightroom software can help enhance the bokeh effect by further blurring the background or increasing the brightness of the blurred highlights.
Using light: Small light sources such as LEDs, street lights, decorative lights or sunlight filtering through leaves can create a shimmering and magical bokeh. Placing your subject in front of these light sources will make the bokeh effect more vibrant.
Light from behind or side: Light from behind or to the side of the subject can create a bokeh effect, making the subject stand out more.
Soft Light: Soft light (e.g. yellow light, off-center light) creates soft, natural bokeh.
Bokeh portrait photography:
Focus on the face: When taking bokeh portraits, focus on the subject's face and create bokeh in the hair, shoulders, or background.
Use bounce lighting: Bounce lighting can create beautiful bokeh effects around your subject.
Creative bokeh photography:
Create bokeh from natural light sources: You can create bokeh from natural light sources such as dew drops, sunlight through leaves, or light reflecting off water.
Create bokeh from artificial light sources: You can create bokeh from artificial light sources such as string lights, lanterns, or other decorative lights.
Use accessories to create shaped bokeh: Some accessories like bokeh filters or bokeh lens hoods can help you create bokeh with special shapes (e.g. heart shapes, star shapes).
4. Bokeh Photo Editing
In some cases, you may want to enhance or adjust the bokeh effect while editing your photo. Photoshop provides a number of tools and techniques to help you do this:
.jpg)
Enhance bokeh with Photoshop:
Using the Gaussian Blur filter: The Gaussian Blur filter can be used to blur the background and enhance the bokeh effect. However, use this filter carefully to avoid losing the details of the subject.
Using selection tools: Selection tools (e.g. Quick Selection Tool, Pen Tool) can be used to select an area of the background and blur it. This allows you to control the bokeh area more precisely.
Use lighting effects: You can use lighting effects in Photoshop to add sparkle and magic to bokeh.
Notes when editing bokeh:
Don't go overboard with the blur: Overdoing the bokeh can make the photo look artificial and unnatural. Keep the subject sharp to create contrast with the background.
Adjust color and contrast to match the bokeh: The color and contrast of the background should match the color and contrast of the subject to create a harmonious and aesthetically pleasing photo.
5. Common Mistakes When Taking Bokeh Photos and How to Fix Them
When taking bokeh photos, you may encounter the following errors:
Bokeh noise (grain): This often happens when taking photos in low light conditions and using high ISO.
Solution: Reduce ISO, use artificial lighting, or reduce noise during photo editing.
Distorted (non-round) bokeh: This often occurs when using lenses with poor optical design or when shooting at the largest aperture.
Solution: Choose a lens with good optical design, or close the aperture a bit.
Bokeh is too harsh (not soft): This often happens when the background has too much detail or when the light is too harsh.
How to fix: Choose a simpler background, use soft lighting, or increase the distance between the subject and the background.
Subject doesn't stand out: This often happens when the bokeh is too strong or when the subject and background have similar colors and brightness.
Solution: Choose a background that contrasts with the subject, or use lighting to highlight the subject.
6. Tips for Taking Beautiful Bokeh Photos
To become a master of bokeh photography, keep these tips in mind:
Practice often: Taking bokeh photos is a skill that needs to be learned. Practice often to get familiar with your camera and lens settings.
Explore and get creative: Don't be afraid to experiment with different photography techniques to create unique bokeh effects.
Learn from professional photographers: Look at the work of professional photographers to learn from their experience and techniques.
Patience and attention to detail: Taking great bokeh shots requires patience and attention to detail. Take your time to find the right angle, set up your camera properly, and edit your photos carefully.
7. Conclusion
Bokeh is a powerful and artistic tool in photography. Mastering the knowledge and experience shared in this article will help you create sparkling bokeh photos , beautiful background blur , and express unlimited creativity.


