Best Selling Products

Upgrade Genuine Office 365
49 USD

Autodesk All App Account Copyright
120 USD

Genuine Adobe Illustrator account
99 USD

Capcut Pro 1 Year
39 USD

ChatGPT Plus Account (GPT-4)
16 USD

Genuine Cheap Canva Pro
39 USD

Copyright Adobe Lightroom Account
59 USD

Upgrade genuine Capture One account
120 USD

Freepik Premium Account
59 USD

Upgrade Duolingo Super
29 USD

Adobe Premiere Pro Account
99 USD

MidJourney Account
29 USD

Plugin Retouch4me
69 USD

Windows 10 & 11 Pro Key
36 USD

Adobe Photoshop Copyright - Full App
120 USD
Explore the Camera RAW Photo Editing Workflow in Photoshop for Professional Photographers
Nội dung
- 1. The nature of RAW format and the power of Camera RAW filter
- How to open Camera RAW in Photoshop
- 2. Exploring the interface and basic tool groups in Camera RAW
- Basic Panel – The core of all adjustments
- White Balance and Temperature
- 3. Advanced color adjustment techniques in Camera RAW
- Color Mixer (HSL) Panel – Fine color control Adjust Hue, Saturation, Luminance for each color channel.
- Color Grading – Creating cinematic atmosphere
- 4. Using Detail and Optics to refine optical quality
- Noise reduction (Denoise) and sharpening
- Fixing lens issues in Optics panel
- 5. Optimizing selections with new-generation Masking tools
- Select Subject and Select Sky – Maximum time-saving
- Brush, Linear Gradient and Radial Gradient
- 6. Important notes to optimize workflow in Camera RAW
- Managing Presets to speed up editing
- Setting accurate Workflow Options
- 7. Post-processing mindset: When is enough in Camera RAW
- Avoiding “Over-processing”
- Always checking Histogram
- 8. Techniques for High Dynamic Range (HDR) and Panorama in Camera RAW
- Guide to creating HDR from multiple exposures
- Merging Panorama while keeping RAW format
- 9. Optimizing the Calibration panel – The secret of unique color tones
- Understanding interaction of primary color channels
- Handling color cast and shadows with Tint and Shadows
- 10. Professional batch processing workflow
- Using Synchronize effectively
- Smart exporting with Save Image tool
- 11. Conclusion
A detailed guide to using Camera RAW in Photoshop from basic to advanced. Discover how to edit color, brightness, and recover RAW image details professionally for photographers.
1. The nature of RAW format and the power of Camera RAW filter
RAW data is often compared to a digital negative. Understanding it helps maximize equipment potential.
Why shoot and edit with Camera RAW
RAW retains all original sensor data without compression or automatic processing. Camera RAW provides full control over exposure, color temperature, and saturation. Non-destructive editing ensures original data remains unchanged.
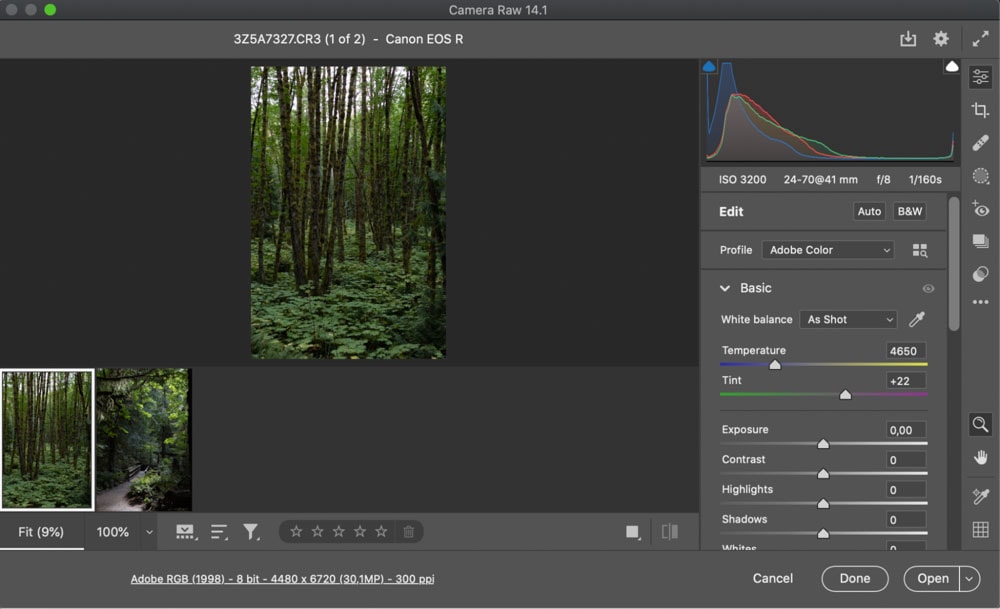
How to open Camera RAW in Photoshop
RAW files open automatically in Camera RAW. JPEG/TIFF can use Camera RAW Filter (Ctrl + Shift + A).
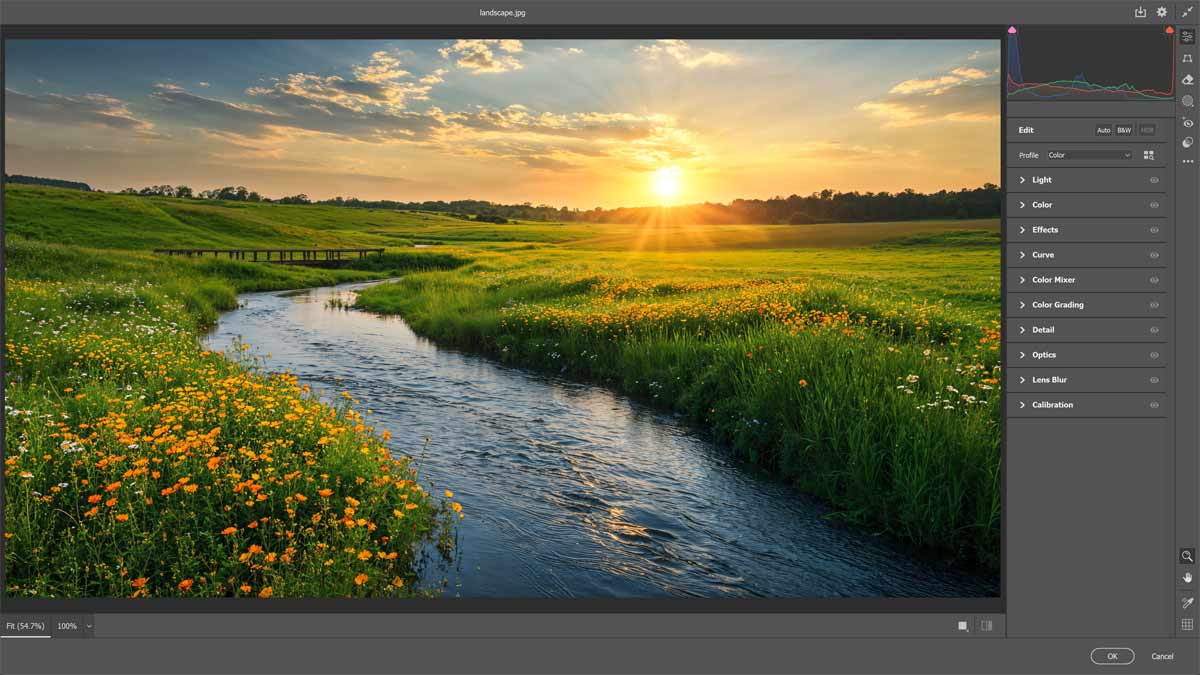
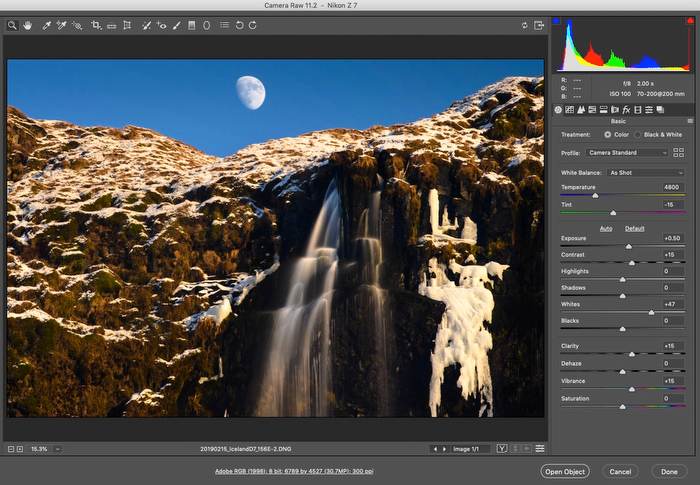
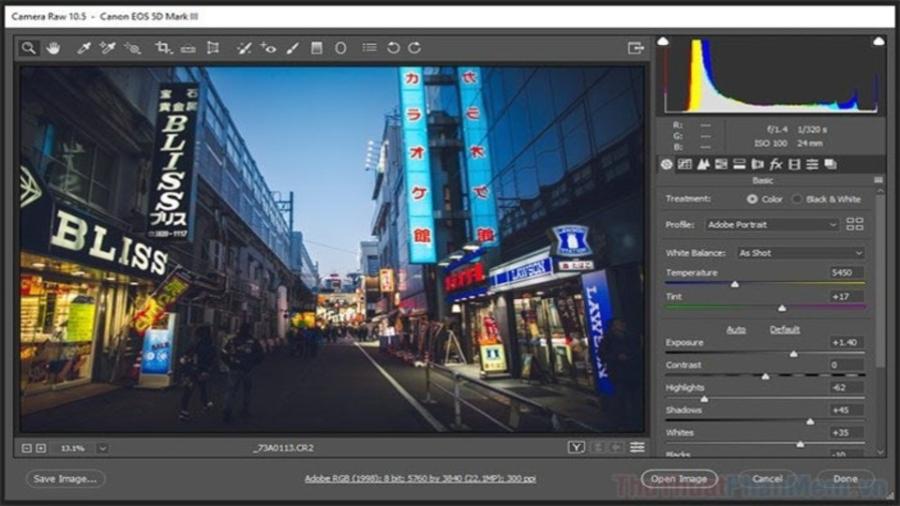
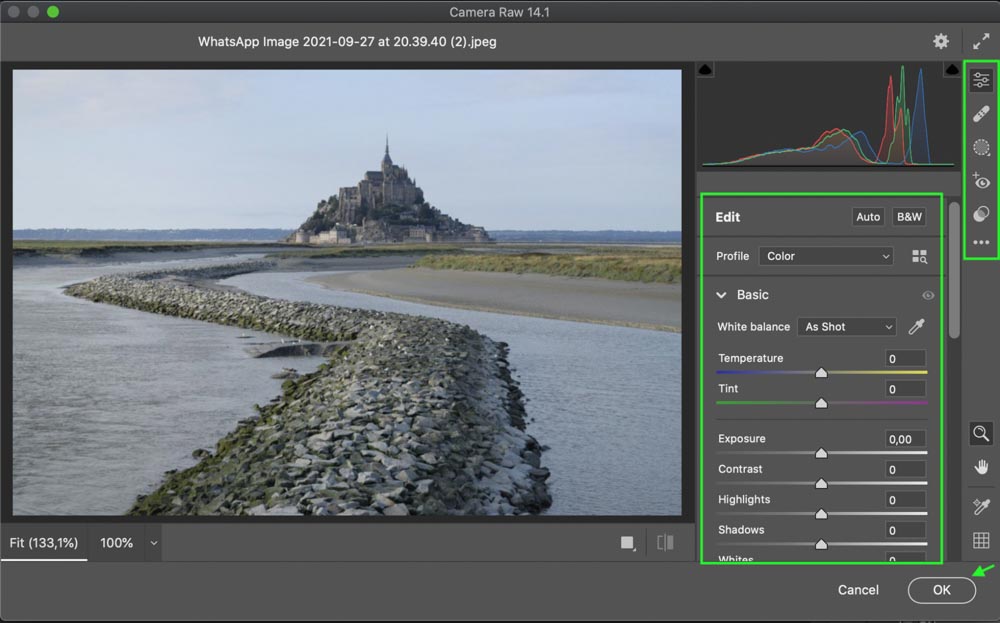
2. Exploring the interface and basic tool groups in Camera RAW
Basic Panel – The core of all adjustments
Includes Exposure, Contrast, Highlights, Shadows, Whites, Blacks. Shadows slider helps recover details.
White Balance and Temperature
Adjust color temperature and tint for accurate tones.
3. Advanced color adjustment techniques in Camera RAW
Color Mixer (HSL) Panel – Fine color control
Adjust Hue, Saturation, Luminance for each color channel.
Color Grading – Creating cinematic atmosphere
Control Midtones, Shadows, Highlights for cinematic effects.
4. Using Detail and Optics to refine optical quality
Noise reduction (Denoise) and sharpening
Use AI-based Denoise and sharpening tools.
Fixing lens issues in Optics panel
Correct distortion and chromatic aberration.
5. Optimizing selections with new-generation Masking tools
Select Subject and Select Sky – Maximum time-saving
AI-based automatic selections.
Brush, Linear Gradient and Radial Gradient
Flexible masking tools for complex adjustments.
6. Important notes to optimize workflow in Camera RAW
Managing Presets to speed up editing
Save color styles as presets.
Setting accurate Workflow Options
Use Adobe RGB or ProPhoto RGB, 16-bit depth.
7. Post-processing mindset: When is enough in Camera RAW
Avoiding “Over-processing”
Maintain natural appearance.
Always checking Histogram
Ensure balanced exposure.
8. Techniques for High Dynamic Range (HDR) and Panorama in Camera RAW
Guide to creating HDR from multiple exposures
Merge bracketed images into HDR.
Merging Panorama while keeping RAW format
Create high-resolution panorama images.
9. Optimizing the Calibration panel – The secret of unique color tones
Understanding interaction of primary color channels
Adjust RGB interpretation.
Handling color cast and shadows with Tint and Shadows
Correct unwanted color tones.
10. Professional batch processing workflow
Using Synchronize effectively
Apply edits across multiple images.
Smart exporting with Save Image tool
Export efficiently in batches.
11. Conclusion
Using Camera RAW in Photoshop is a journey from understanding raw data to mastering modern tools. It allows photographers to express vision and emotion effectively while improving workflow efficiency and output quality.


VIP Products


Best Selling Products
Upgrade Genuine Office 365
49 USD
Autodesk All App Account Copyright
120 USD
Genuine Adobe Illustrator account
99 USD
Capcut Pro 1 Year
39 USD
ChatGPT Plus Account (GPT-4)
16 USD
Genuine Cheap Canva Pro
39 USD
Copyright Adobe Lightroom Account
59 USD
Upgrade genuine Capture One account
120 USD
Freepik Premium Account
59 USD
Upgrade Duolingo Super
29 USD
Adobe Premiere Pro Account
99 USD
MidJourney Account
29 USD
Plugin Retouch4me
69 USD
Windows 10 & 11 Pro Key
36 USD
Adobe Photoshop Copyright - Full App
120 USD