Best Selling Products

Autodesk All App Account Copyright
120 USD

Upgrade genuine Capture One account
120 USD

ChatGPT Plus Account (GPT-4)
16 USD

Upgrade Genuine Office 365
49 USD

Windows 10 & 11 Pro Key
36 USD

Plugin Retouch4me
69 USD

Freepik Premium Account
59 USD

Genuine Adobe Illustrator account
99 USD

Adobe Photoshop Copyright - Full App
120 USD

Copyright Adobe Lightroom Account
59 USD

Capcut Pro 1 Year
39 USD

Upgrade Duolingo Super
29 USD

Genuine Cheap Canva Pro
39 USD

MidJourney Account
29 USD

Adobe Premiere Pro Account
99 USD
Exploring the Camera RAW Editing Workflow in Photoshop for Professional Photographers
Nội dung
- 1. The Nature of the RAW Format and the Power of the Camera RAW Filter
- 2. Exploring the Interface and Basic Tool Groups in Camera RAW
- 3. Advanced Color-Grading Techniques in Camera RAW
- 4. Using Detail and Optics to Perfect Optical Quality
- 5. Optimizing Selections with Next-Generation Masking Tools
- 6. Important Notes for Optimizing Your Camera RAW Workflow
- 7. Post-Processing Mindset: Knowing When Enough Is Enough in Camera RAW
- 8. Processing High Dynamic Range (HDR) Photos and Panoramas Directly in Camera RAW
- 9. Optimizing the Calibration Panel – The Secret Behind Signature Color Tones
- 10. Professional Batch Processing Workflow
- 11. Conclusion
A detailed guide to using Camera RAW in Photoshop, from basic to advanced. Discover how to adjust color, brightness, and recover detail in RAW photos professionally.
1. The Nature of the RAW Format and the Power of the Camera RAW Filter
RAW data is often compared to a digital "negative film." Understanding it clearly helps photographers make full use of the power their equipment holds..jpg)
Why You Should Shoot and Edit Using Camera RAW
The RAW format retains all the original data captured by the sensor, without going through any compression or automatic white-balance processing by the camera's internal chip. When this file is brought into Camera RAW, the user gains absolute control over parameters such as exposure, color temperature, and saturation. Camera RAW's non-destructive editing capability lets you make a whole series of changes without ever altering the file's original data. This provides complete peace of mind, letting you return to the original state at any time if you feel your earlier adjustments weren't quite right.
How to Open Camera RAW in Photoshop
Normally, when you drag a RAW-format file (such as .CR2, .NEF, .ARW) into Photoshop, the Camera RAW dialog will appear automatically. However, for files already in JPEG or TIFF format, you can still take advantage of this tool's power by going to the Filter menu and selecting Camera RAW Filter (shortcut Ctrl + Shift + A). Using Camera RAW as a filter on a layer makes the workflow more flexible, allowing you to apply Layer Mask techniques or adjust Opacity to control how strongly the effect impacts the photo.
2. Exploring the Interface and Basic Tool Groups in Camera RAW
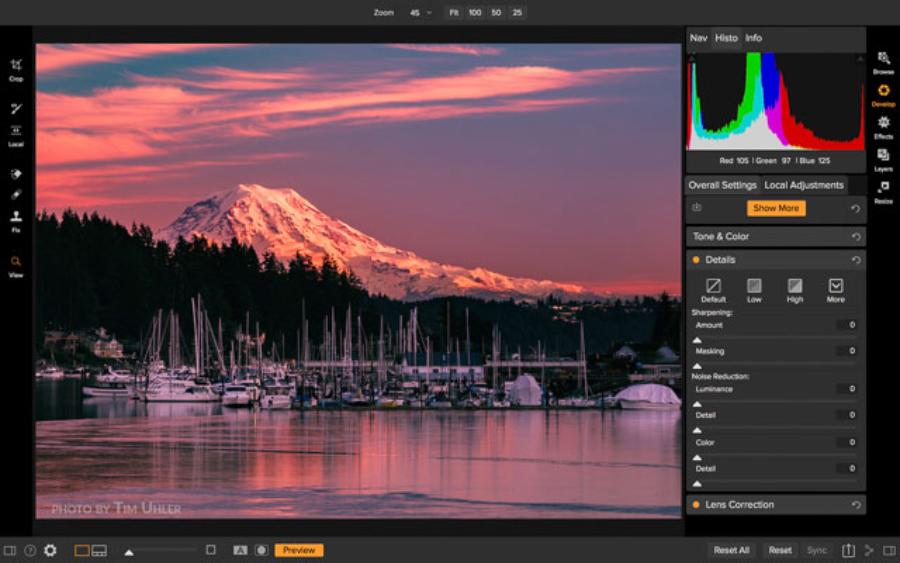
The Camera RAW interface is designed very methodically, divided into separate panels for each function related to light and color processing.
The Basic Panel – The Soul of Every Adjustment
The Basic panel is where every post-processing workflow begins. Here you'll find the most important sliders, such as Exposure, Contrast, Highlights, Shadows, Whites, and Blacks. An important technique when using this panel is to take advantage of the Shadows slider to recover detail in overly dark areas without affecting the photo's overall brightness. In addition, the Texture and Clarity settings help enhance sharpness and surface detail, which is especially effective in landscape and architectural photography.
White Balance and Temperature
White balance in Camera RAW is an extremely powerful feature. If you accidentally set the wrong Kelvin value while shooting, you can fully correct it in post-production without altering pixel tonality the way you would on a JPEG. The Temperature slider lets you shift the color tone from cool blue to warm yellow, while the Tint slider balances tone between green and magenta. Mastering these two sliders helps you recreate the real atmosphere and emotion present at the moment the shutter was pressed as faithfully as possible.
3. Advanced Color-Grading Techniques in Camera RAW
Color is the main element that creates an artistic style. Camera RAW provides tools that let you intervene deeply in each individual color channel.
The Color Mixer (HSL) Panel – Managing Subtle Tones
The Color Mixer panel lets you adjust three main parameters for each color channel: Hue, Saturation, and Luminance. For example, you can make a blue sky more intense by lowering the Luminance slider on the Blue channel, or turn green leaves into autumn yellow by adjusting the Hue slider on the Green channel. This separation lets users intervene in a specific subject within the photo without affecting other color areas, creating harmony and subtlety in the overall piece.
Color Grading – Building a Cinematic Look
The Color Grading feature replaces the older Split Toning tool, offering three color wheels representing Midtones, Shadows, and Highlights. This is a powerful tool for applying film-like or artistic color "tones." By applying a cool blue tone to the Shadows and a warm orange tone to the Highlights, you'll instantly create the "cinematic" color effect commonly seen in Hollywood films. The ability to adjust the Balance between color regions makes the tonal transition smoother and more natural.
4. Using Detail and Optics to Perfect Optical Quality
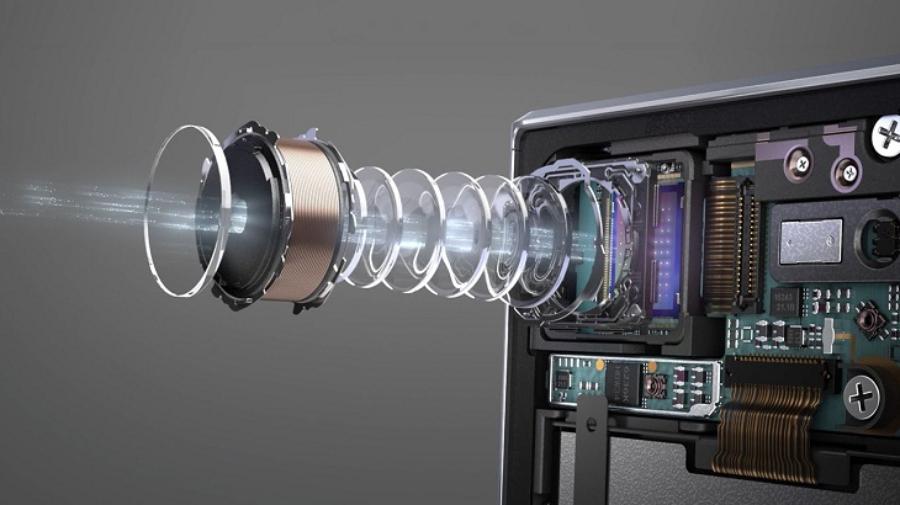
Cameras and lenses sometimes run into inherent physical flaws such as noise or distortion. Camera RAW has smart algorithms to fix these issues..jpg)
Denoise and Sharpening
In the Detail panel, the Sharpening feature enhances the sharpness of object edges. To avoid white halos, hold the Alt key while dragging the Masking slider to precisely define the area that needs sharpening. Notably, with the help of artificial intelligence, the Denoise feature in newer versions of Camera RAW can remove noise extremely effectively while still preserving skin texture or fine detail — something manual noise-reduction methods used to struggle with.
Fixing Lens Errors in the Optics Panel
Every lens has certain inherent optical flaws, such as chromatic aberration or focal-length-related distortion. In the Optics panel, checking "Remove Chromatic Aberration" and "Enable Profile Corrections" lets Photoshop automatically recognize the type of lens you're using and apply precise corrective adjustments. This simple action will make straight lines in architecture look straighter and eliminate annoying color fringing in high-contrast areas.
5. Optimizing Selections with Next-Generation Masking Tools
The most groundbreaking advance in Camera RAW in recent years is its AI-integrated Masking system, which allows for intelligent subject selection without complex manual cutting and pasting.
Select Subject and Select Sky – Maximum Time Savings
Instead of having to use a brush meticulously to select the sky or a subject, now all you need is a single click on the Select Subject or Select Sky feature. Photoshop will automatically calculate and generate an extremely precise selection. Once you have the selection, you can change the brightness, color, or sharpness for that subject alone. This technique creates separation between the subject and the background, giving the photo more depth and better visual guidance.
Brush, Linear Gradient, and Radial Gradient
These are classic masking tools, but they remain extremely useful. Linear Gradient is well suited for balancing light between the sky and the ground in landscape photos, while Radial Gradient is ideal for creating a focused light effect on a subject's face in portrait photography. Combining different mask operations (Add, Subtract, Intersect) allows users to create the most complex selections, meeting even the most demanding creative intentions.
6. Important Notes for Optimizing Your Camera RAW Workflow
For a smooth post-production process with the highest efficiency, you need to pay attention to your system settings and working habits..jpg)
Managing Presets to Speed Up Editing
If you've found a color formula you're happy with, save it as a Preset. This not only lets you apply the look quickly across a batch of similar photos but also ensures consistency across an entire photo set. Presets in Camera RAW can be organized into folders, making it easy to manage your own treasure trove of color "secrets." However, remember that every photo has different lighting conditions, so after applying a Preset, you should still make small fine-tunings to achieve the most perfect result.
Setting Up Workflow Options Precisely
At the bottom of the Camera RAW interface, there's a line of text describing the export parameters (Color Space, Bit Depth, Resolution). For professional editing purposes, you should choose the Adobe RGB or ProPhoto RGB color space for the widest possible color gamut. Bit Depth should be set to 16 Bits/Channel to avoid color banding when making strong light adjustments. In addition, selecting "Open in Photoshop as Smart Objects" lets you double-click the layer in Photoshop to return to the Camera RAW control panel at any time, maintaining flexible editing capability and preserving image quality.
7. Post-Processing Mindset: Knowing When Enough Is Enough in Camera RAW
No matter how powerful a tool is, it's only a means of serving the artist's vision. Overusing the sliders can lead to a counterproductive result.
Avoiding "Over-processing"
A common mistake among beginners is pushing the Clarity, Saturation, or HDR sliders too far, making the photo look heavy, unnatural, and straining to look at. Always check the photo at actual size (100% zoom) to make sure no strange noise or color errors have appeared. A well-edited photo is one where the viewer senses its beauty but can hardly detect the traces of software intervention. Subtlety lies in knowing when to stop, in order to preserve the soul and authenticity of the moment.
Always Check the Histogram
The histogram, located in the top-right corner, is the most accurate tool for measuring light. Try to adjust things so the graph is evenly distributed, avoiding peaks that pile up too far to the left (losing shadow detail) or too far to the right (blown-out highlights). Learning to read the histogram will help you make objective adjustment decisions, without being fooled by the illusory brightness of your computer screen or your surrounding work environment.
8. Processing High Dynamic Range (HDR) Photos and Panoramas Directly in Camera RAW
One of Camera RAW's advantages over other post-production software is its ability to merge images directly from raw data, preserving an extremely high dynamic range without needing to export an intermediate file.
Guide to Creating an HDR Image from Multiple Exposures
In extremely challenging lighting conditions, such as shooting into strong backlight, a single RAW file sometimes can't hold all the data for both the sky and the ground. Select the photos shot at different exposure levels (bracketing), then right-click and choose Photo Merge > HDR. Camera RAW will create a new DNG file that integrates all the data from the original photos. The magical part is that you can drag the Exposure slider up and down across an extremely wide range and the image will remain smooth, with no noise or color banding appearing at the transition areas.
Merging a Panorama While Keeping the RAW Format
Stitching panoramic photos usually requires a powerful computer and a complicated process, but with the Panorama Merge feature in Camera RAW, everything becomes much simpler. The software will automatically detect common points, correct lens distortion, and stitch the photos together into one giant Panorama file. Because the resulting file remains in RAW format, you can perform color grading, white balance, and noise reduction uniformly across the entire large image, creating majestic landscape works with ultra-high resolution.
9. Optimizing the Calibration Panel – The Secret Behind Signature Color Tones
Located at the bottom of the list of control panels, Calibration is often overlooked by many people, but it's actually the "key" to creating the signature color styles — such as skin tones — used by famous photographers..jpg)
Understanding the Interaction Between the Three Primary Color Channels
Unlike the Color Mixer, which affects existing colors, Calibration acts directly on how Camera RAW interprets the Red, Green, and Blue color data from the sensor. By changing the Hue and Saturation sliders of the Blue Primary channel, you can change the tone of the entire photo in a very distinctive way, making skin appear rosier or creating the characteristic green tint of classic film footage.
Handling Color Fringing and Shadows with Tint and Shadows
In this panel, the Shadows Tint slider lets you remove unwanted color casts in the darkest areas of the photo (often tinted blue or purple due to digital noise). Bringing the shadow areas to a perfectly neutral state will make the photo look cleaner, add more depth, and make the dominant colors in the highlight and midtone areas stand out.
10. Professional Batch Processing Workflow
For event or wedding photographers who have to process thousands of photos at once, data synchronization technique is a vital skill for ensuring both timeline and quality of work.
Using the Synchronize Feature Effectively
Once you've finished editing a representative photo for a particular scene, select all the remaining photos in the filmstrip on the left, then click the Sync button. A panel will appear letting you choose the specific parameters you want to copy over (such as White Balance, Exposure, or Masking).
Smart Image Export with the Save Image Tool
Instead of opening each photo in Photoshop to save it, you can use the Save Image button right within Camera RAW to export images in bulk. Here, you can set up an automatic file-naming structure, the export format (JPEG, PSD, or TIFF), and your desired size.
Adobe Photoshop — Genuine Licensed
11. Conclusion
This guide to using Camera RAW in Photoshop is a journey from understanding raw data to mastering Adobe's most modern supporting technologies. This isn't merely a technical step — it's where a photographer expresses their vision and emotion onto every frame. Mastering the basic adjustment panels, advanced color-management techniques, and the ability to make use of AI masking will help you save considerable time while raising the quality of your work to a whole new level.





















VIP Products








Best Selling Products
Autodesk All App Account Copyright
120 USD
Upgrade genuine Capture One account
120 USD
ChatGPT Plus Account (GPT-4)
16 USD
Upgrade Genuine Office 365
49 USD
Windows 10 & 11 Pro Key
36 USD
Plugin Retouch4me
69 USD
Freepik Premium Account
59 USD
Genuine Adobe Illustrator account
99 USD
Adobe Photoshop Copyright - Full App
120 USD
Copyright Adobe Lightroom Account
59 USD
Capcut Pro 1 Year
39 USD
Upgrade Duolingo Super
29 USD
Genuine Cheap Canva Pro
39 USD
MidJourney Account
29 USD
Adobe Premiere Pro Account
99 USD