Best Selling Products

Plugin Retouch4me
69 USD

Adobe Photoshop Copyright - Full App
120 USD

Windows 10 & 11 Pro Key
36 USD

Freepik Premium Account
59 USD

MidJourney Account
29 USD

Adobe Premiere Pro Account
99 USD

Copyright Adobe Lightroom Account
59 USD

Genuine Cheap Canva Pro
39 USD

Upgrade Duolingo Super
29 USD

Upgrade Genuine Office 365
49 USD

Upgrade genuine Capture One account
120 USD

ChatGPT Plus Account (GPT-4)
16 USD

Autodesk All App Account Copyright
120 USD

Genuine Adobe Illustrator account
99 USD

Capcut Pro 1 Year
39 USD
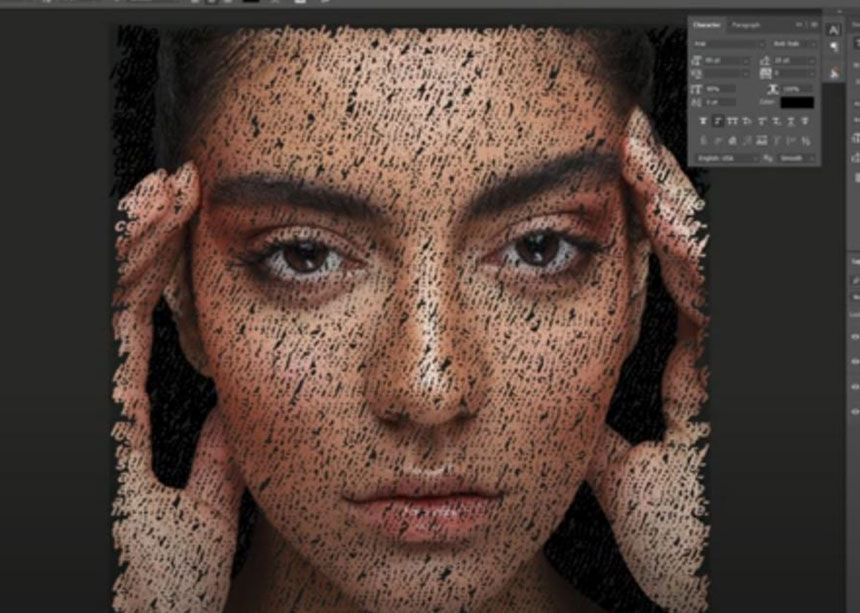
Fastest Text Portrait Effect
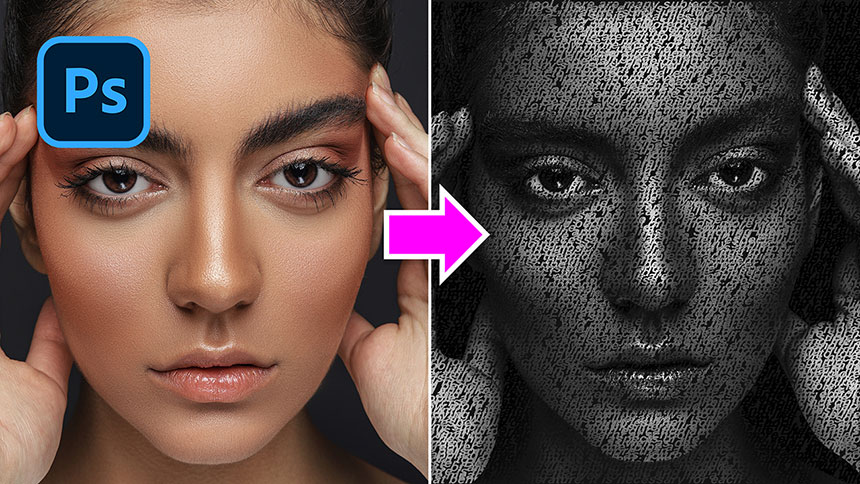
Hi, today I’m gonna show you how to add text in a portrait photo.
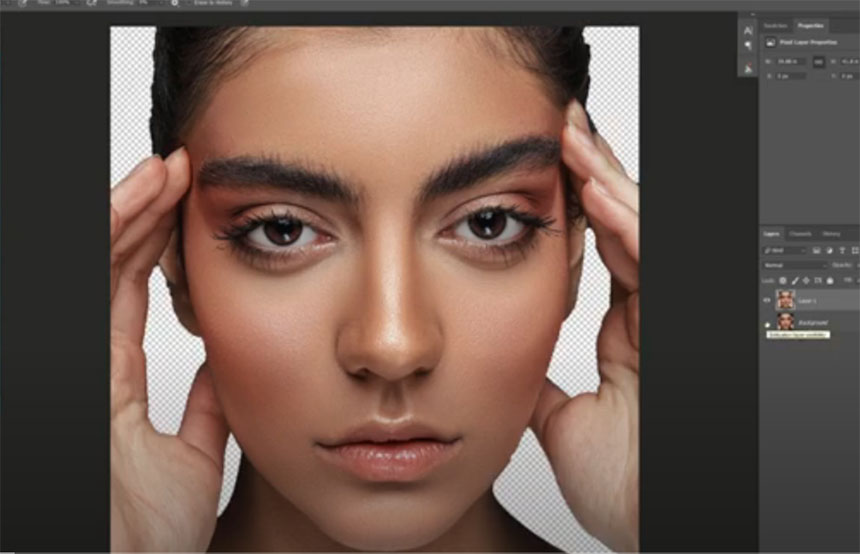
First, you have to cut the subject out of background. Here, layer 1 is the subject that I already separated
In background layer, click to this icon to create a new layer, set foreground color to the color of background. Fill its color with shortcut ALT or OPTION+Delete
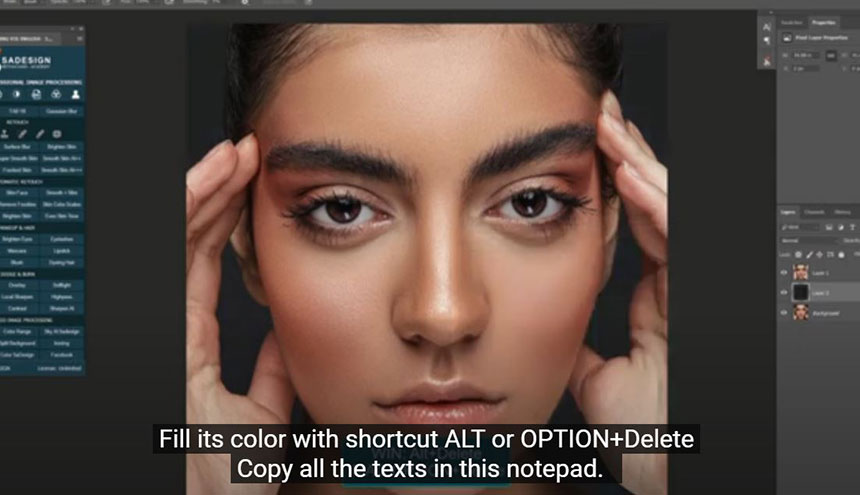
Copy all the texts in this notepad. Pick up Text tool, black in foreground color, choose your font.
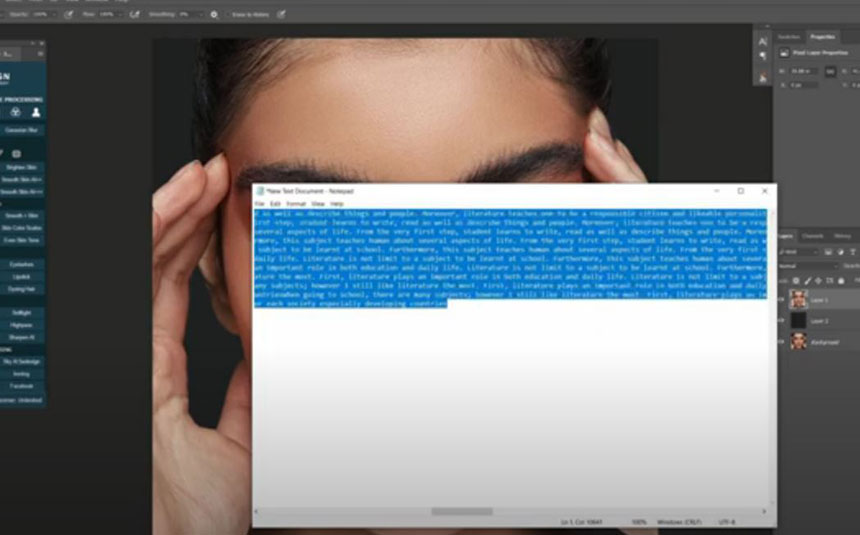
Draw a shape to cover all the document, paste the text two times to fill up the document.
Enter to complete In Character tab, set the height between texts at 20, size at 90 Take the text layer below layer 1, press CTRL+ALT+G or CMD+OPTION+G to clipping mask layer 1 to text layer.

In text layer, increase the size to 95 Create black and white adjustment layer, Red -19, Yellow 0 Create curves adjustment, add contrast to it by increasing highlight and decreasing shadow Reduce text size to 85 Height 25
Enjoy! Hope that you like this tutorial, hit like and leave comments in case you want me to clarify something on this clip. Thanks for watching!
REGISTER FOR FREE PHOTOSHOP LEARNING
============================
The most powerful Retouch tool processor
DOWNLOAD:
✅ SADESIGN PANEL ENGLISH: https://sadesign.ai/retouching/
✅ SADESIGN PANEL VIETNAM: https://www.retouching.vn/


VIP Products


Best Selling Products
Plugin Retouch4me
69 USD
Adobe Photoshop Copyright - Full App
120 USD
Windows 10 & 11 Pro Key
36 USD
Freepik Premium Account
59 USD
MidJourney Account
29 USD
Adobe Premiere Pro Account
99 USD
Copyright Adobe Lightroom Account
59 USD
Genuine Cheap Canva Pro
39 USD
Upgrade Duolingo Super
29 USD
Upgrade Genuine Office 365
49 USD
Upgrade genuine Capture One account
120 USD
ChatGPT Plus Account (GPT-4)
16 USD
Autodesk All App Account Copyright
120 USD
Genuine Adobe Illustrator account
99 USD
Capcut Pro 1 Year
39 USD