Best Selling Products

MidJourney Account
29 USD

Capcut Pro 1 Year
39 USD

Adobe Premiere Pro Account
99 USD

Autodesk All App Account Copyright
120 USD

Freepik Premium Account
59 USD

Upgrade Duolingo Super
29 USD

Adobe Photoshop Copyright - Full App
120 USD

ChatGPT Plus Account (GPT-4)
16 USD

Windows 10 & 11 Pro Key
36 USD

Plugin Retouch4me
69 USD

Genuine Cheap Canva Pro
39 USD

Genuine Adobe Illustrator account
99 USD

Upgrade Genuine Office 365
49 USD

Upgrade genuine Capture One account
120 USD

Copyright Adobe Lightroom Account
59 USD
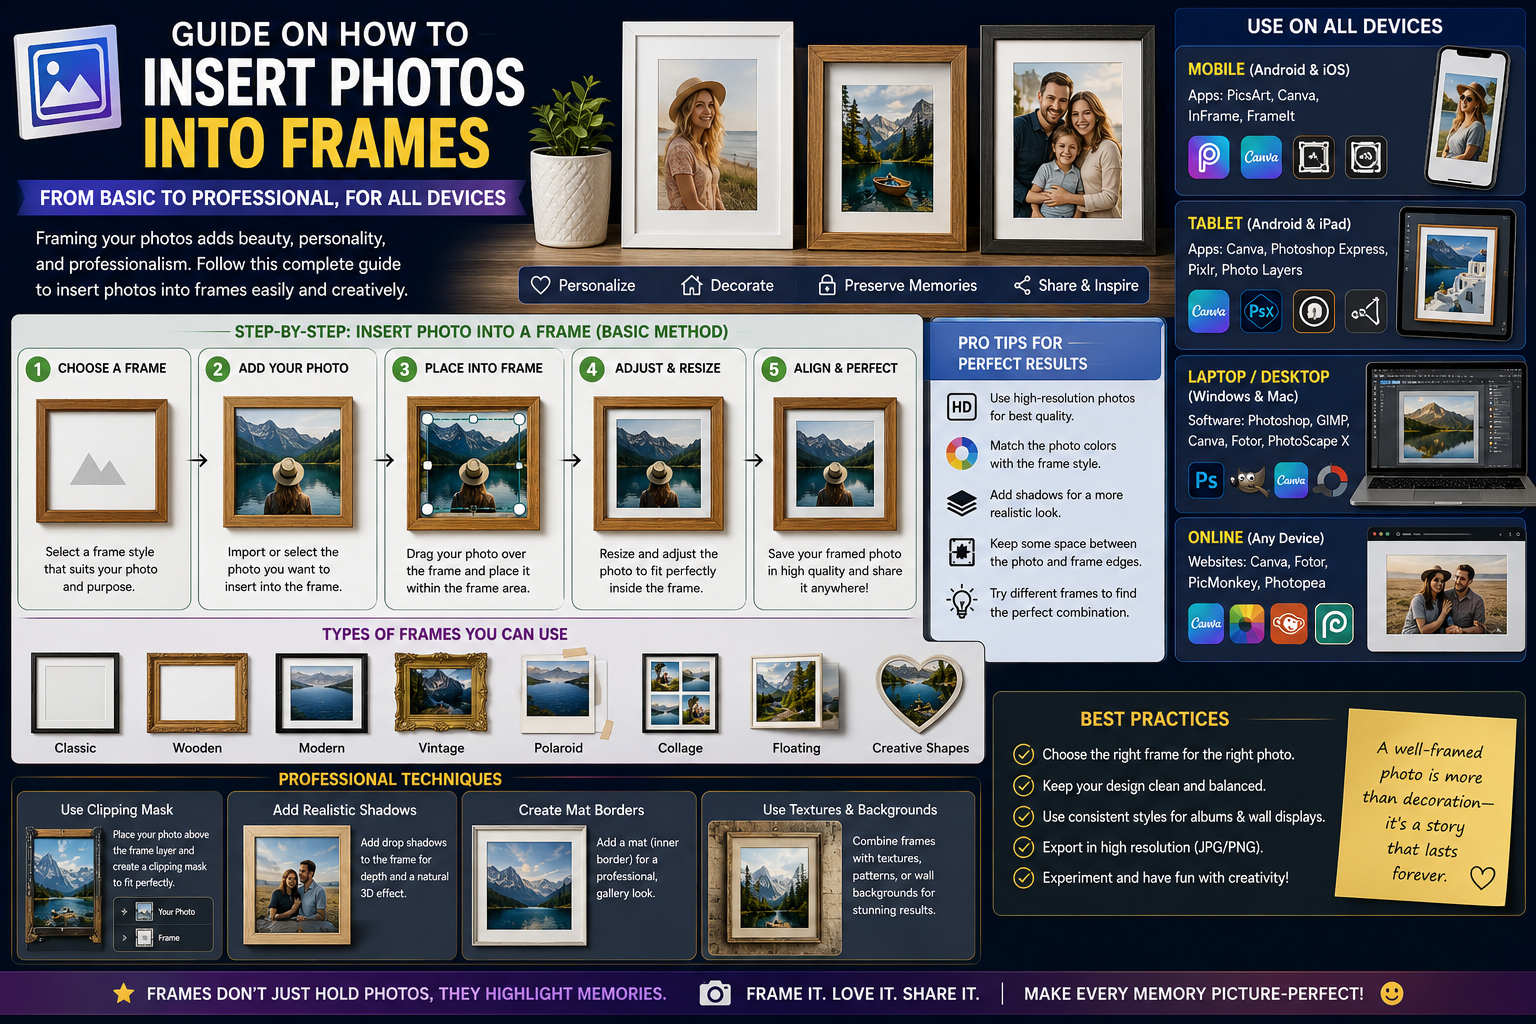
GUIDE ON HOW TO INSERT PHOTOS INTO FRAMES, FROM BASIC TO PROFESSIONAL, FOR ALL DEVICES
Nội dung
- 1. Why is embedding images into frames becoming popular?
- 1.1 Enhancing the aesthetic appeal of media publications
- 1.2 Protecting copyrights and creating brand identity
- 1.3 Optimizing size for each platform
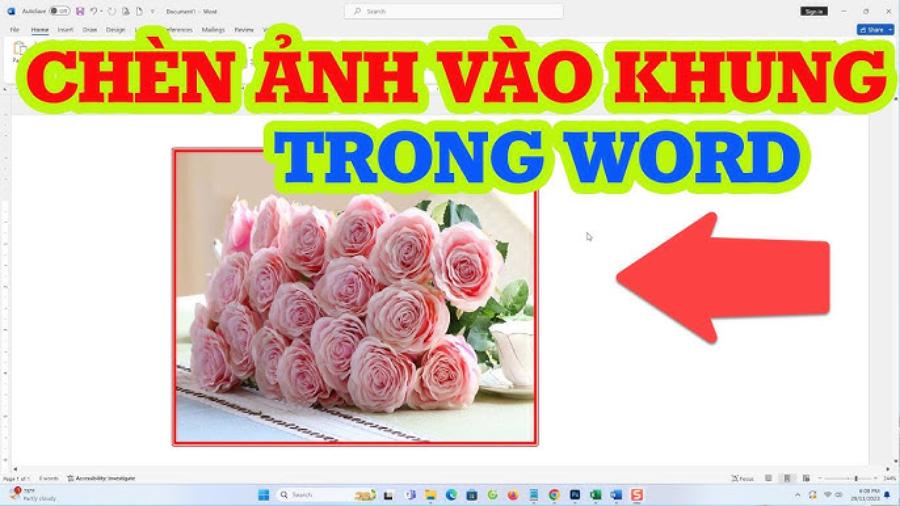
- 2. Method for inserting images into a frame using Microsoft Word software
- 2.1 Using the built-in Picture Frames feature
- 2.2 Formatting image frames using the Shapes tool
- 3. Procedure performed using Adobe Photoshop software
- 3.1 Professional Application of Clipping Mask Technique
- 3.2 Create a border directly using the Stroke effect
- 4. Solution for inserting images into online frames using Canva
- 4.1 Discover a treasure trove of diverse frames
- 4.2 Drag and drop operation to complete the artwork
- 5. Top image editing apps on mobile phones
- 5.1 Using the PicsArt mobile app
- 5.2 Edit artistic photos with the Snapseed app
- 6. Important considerations for achieving an aesthetically pleasing frame.
- 6.1 Choose a frame color that matches the photo.
- 6.2 Ensure a balanced ratio between the frame and the subject.
- 6.3 Pay attention to the image resolution quality.
- 7. Introducing the groundbreaking appvip.ai tool for image design.
- 8. Conclusion
Detailed instructions on how to insert photos into frames using computers, phones, and specialized software. Discover incredibly easy tips for designing artistic photos here.
1. Why is embedding images into frames becoming popular?
The increasingly demanding digital aesthetic requires content creators to constantly innovate in their visual presentation. Integrating traditional images into pre-established formats is becoming an optimal method for creating differentiation. Behind this trend are practical benefits in both artistic and technical aspects of media communication.
1.1 Enhancing the aesthetic appeal of media publications
A regular photograph sometimes lacks the appeal to viewers on digital platforms. Utilizing outlines or surrounding geometric structures creates a strong visual focal point, making the image more streamlined and artistic.
1.2 Protecting copyrights and creating brand identity
Many businesses and content creators choose this method to synchronize their brand identity. Custom-designed frames with logos help viewers easily remember the brand, while minimizing illegal image copying on the internet.
1.3 Optimizing size for each platform
Each social media platform has its own specific display size standards. Using a predefined frame to place images allows you to easily control the aspect ratio, preventing important details from being cropped out when uploading.
2. Method for inserting images into a frame using Microsoft Word software
Below is a detailed introduction to section "2. How to insert images into a frame using Microsoft Word ," written in a professional copywriter style, SEO-friendly, without using questions in the introduction and minimizing repetition at the beginning of sentences:
Many people mistakenly believe that graphic design or image integration requires specialized editing applications. In reality, Microsoft's familiar word processor boasts a powerful and intuitive set of formatting tools. Choosing this solution allows office workers, students, and professionals to save time while still creating visually stunning slideshows, documents, or essays. Let's explore the simple steps below to optimize your document layout.
2.1 Using the built-in Picture Frames feature
Office users can easily create beautiful framed photos right in their familiar text editor. The software's menu offers a wide variety of border styles, from simple to complex 3D shadow effects.
-
Step 1: Open the document and select the Insert tab , then click on Pictures to upload an image from your computer.
-
Step 2: Double-click the inserted image to activate the Picture Format toolbar .
-
Step 3: In the Picture Styles section , select from the available frame templates to suit your preferences.
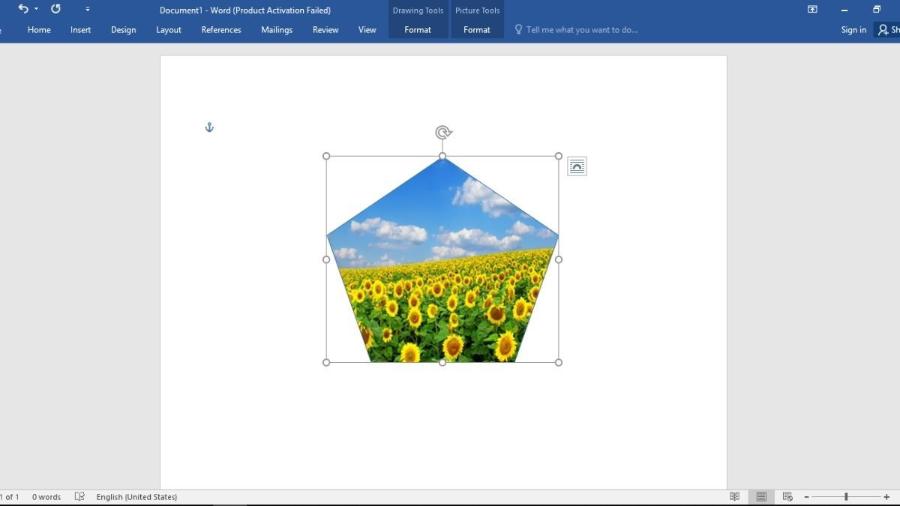
2.2 Formatting image frames using the Shapes tool
For those who want their photos to fit neatly within special shapes like circles, hearts, or stars, the Shapes tool is the perfect solution.
-
Step 1: Access the Insert tab , select Shapes , and draw any shape on the document.
-
Step 2: Right-click on the shape you just drew, select Format Shape to open the properties panel in the upper right corner.
-
Step 3: In the Fill section , check the Picture or texture fill box , then click the Insert button to select the image you want to insert inside the shape.
3. Procedure performed using Adobe Photoshop software
3.1 Professional Application of Clipping Mask Technique
Clipping Mask is one of Photoshop's most fundamental and powerful techniques, allowing you to hide a portion of an image based on the shape of a layer directly beneath it.
-
Step 1: Create a geometric area using the Rectangle Tool or Ellipse Tool to serve as the background.
-
Step 2: Drag and drop the image you want to process into the workspace and place this image layer directly on top of the shape layer you just created.
-
Step 3: Press and hold the Alt key on your keyboard, move the mouse cursor to the boundary between the two layers until a downward arrow icon appears, then left-click. Your image will immediately be perfectly compressed within the frame.
3.2 Create a border directly using the Stroke effect
This method is suitable for those who want to create a simple, sharp border around the entire original image without having to crop or change the image's geometric structure.
-
Step 1: Select the layer containing the image you want to add a border to in the Layers panel.
-
Step 2: Click on the fx icon in the toolbar at the bottom of the Layers panel and select Stroke .
-
Step 3: Adjust parameters such as Size (frame thickness), Position (frame position inside or outside the image edge), and select your desired color in the Color box .
4. Solution for inserting images into online frames using Canva
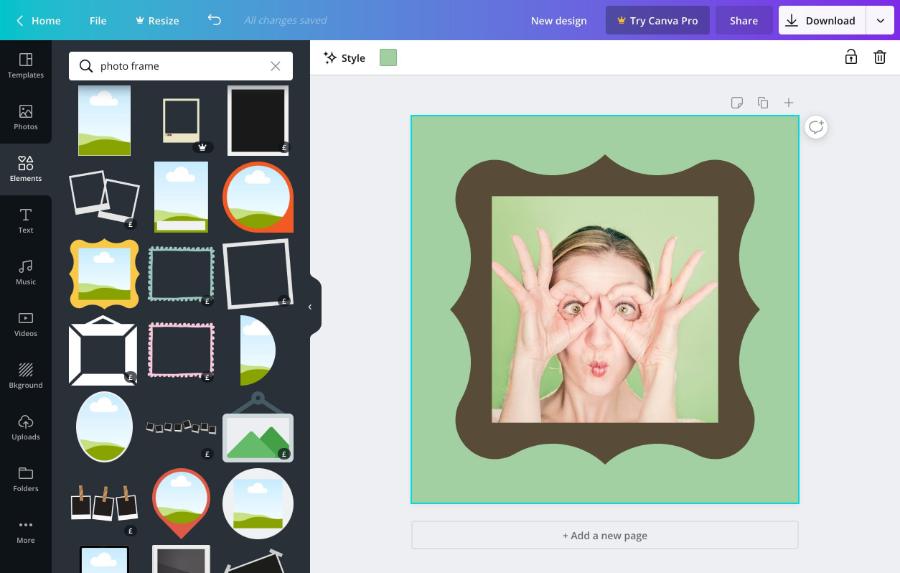
4.1 Discover a treasure trove of diverse frames
This online design platform boasts an incredibly rich grid and frame system, allowing even non-professional users to create high-quality graphic designs in just seconds.
-
Step 1: Log in to the website and create a new design with your desired dimensions.
-
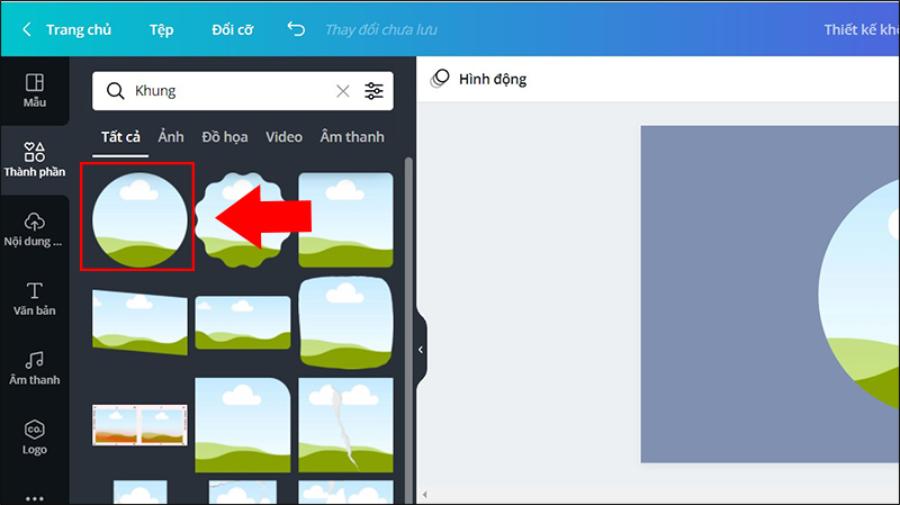
Step 2: Navigate to the Elements menu in the left-hand toolbar, scroll down to find the Frames section .
-
Step 3: Select a suitable frame style from the displayed list and click to add it to the main design space.
4.2 Drag and drop operation to complete the artwork
The convenience of the online platform lies in its extremely intelligent drag-and-drop mechanism, completely eliminating the complicated steps of coordinate alignment.
-
Step 1: Upload your photo to the system through the Uploads section .
-
Step 2: Press and hold the left mouse button on the uploaded image and drag it to overlap the frame selected in the previous step.
-
Step 3: Release the mouse button, and the system will automatically adjust the aspect ratio so that the image perfectly fits the frame's structure. You can double-click the image to readjust the display area if needed.
5. Top image editing apps on mobile phones
5.1 Using the PicsArt mobile app
PicsArt is currently one of the most popular image editing apps on both Android and iOS operating systems thanks to its rich feature set and intuitive interface.
-
Step 1: Launch the app and tap the pink plus icon to select a photo from your phone's gallery.
-
Step 2: Swipe the toolbar at the bottom of the screen to the right, find and select the Frames or Shape Mask feature .
-
Step 3: Select a suitable frame theme, adjust the opacity, and click the checkmark in the upper right corner to save the result.
5.2 Edit artistic photos with the Snapseed app
This Google-developed app offers advanced yet highly accessible photo editing capabilities, especially its vintage frame adding feature.
-
Step 1: Open the Snapseed app, tap anywhere on the screen to import the photo you want to process.
-
Step 2: Click on the Tools option in the menu bar at the bottom to display the full list of functions.
-
Step 3: Select the Frames icon . Here you can choose from film reel frames, raw paper frames, or minimalist white frames. Adjust the frame width by swiping left or right on the screen.
6. Important considerations for achieving an aesthetically pleasing frame.
6.1 Choose a frame color that matches the photo.
The color of the frame should complement and enhance the beauty of the main subject, rather than detracting from the overall image. Choosing neutral tones such as black, white, gray, or colors present in the image itself will create a harmonious and pleasing overall effect for the viewer.
6.2 Ensure a balanced ratio between the frame and the subject.
The thickness of the frame needs to be carefully considered based on the overall size of the image. A frame that is too thick will suffocate the image's display space, while a frame that is too thin will not provide a clear boundary separating it from the surrounding background.
6.3 Pay attention to the image resolution quality.
The process of resizing images to fit various frame sizes can sometimes reduce display quality. It's best to use high-resolution original images to avoid pixelation and blurring after the image merging process is complete.
7. Introducing the groundbreaking appvip.ai tool for image design.
The rapid development of artificial intelligence technology has opened up entirely new ways of creating content. The web platform appvip.ai is a pioneering solution that helps users automate the entire process of complex graphic editing. No longer dependent on cumbersome manual operations, the intelligent system here allows you to realize any design idea with just a few lines of concise text. Next-generation algorithms automatically recognize the subject, analyze the layout and color scheme to suggest and create unique, artistic, and trendy image frames.
8. Conclusion
Mastering graphic design tools offers a significant advantage in conveying visual messages. Skillful image insertion techniques allow you to easily transform plain images into captivating works of art. Flexibly apply methods ranging from basic Word techniques to advanced Photoshop and Canva to optimize your daily workflow.





















VIP Products








Best Selling Products
MidJourney Account
29 USD
Capcut Pro 1 Year
39 USD
Adobe Premiere Pro Account
99 USD
Autodesk All App Account Copyright
120 USD
Freepik Premium Account
59 USD
Upgrade Duolingo Super
29 USD
Adobe Photoshop Copyright - Full App
120 USD
ChatGPT Plus Account (GPT-4)
16 USD
Windows 10 & 11 Pro Key
36 USD
Plugin Retouch4me
69 USD
Genuine Cheap Canva Pro
39 USD
Genuine Adobe Illustrator account
99 USD
Upgrade Genuine Office 365
49 USD
Upgrade genuine Capture One account
120 USD
Copyright Adobe Lightroom Account
59 USD