Best Selling Products
How to Convert Black and White Photos to Color photos!
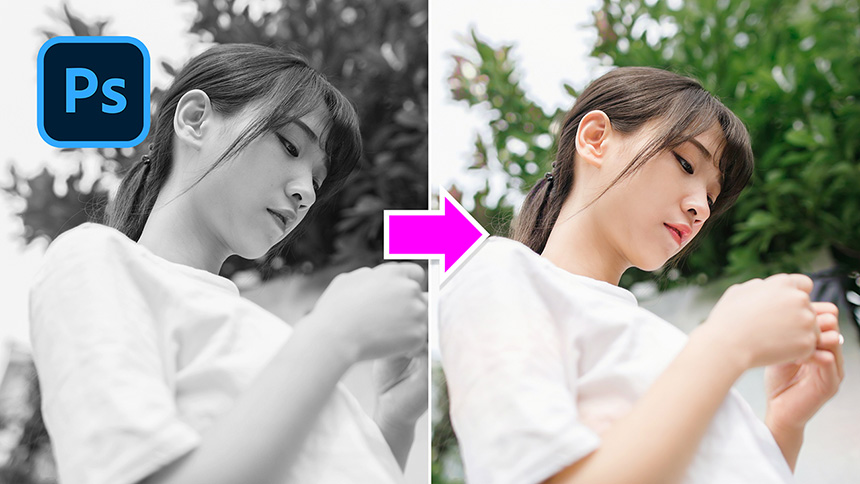
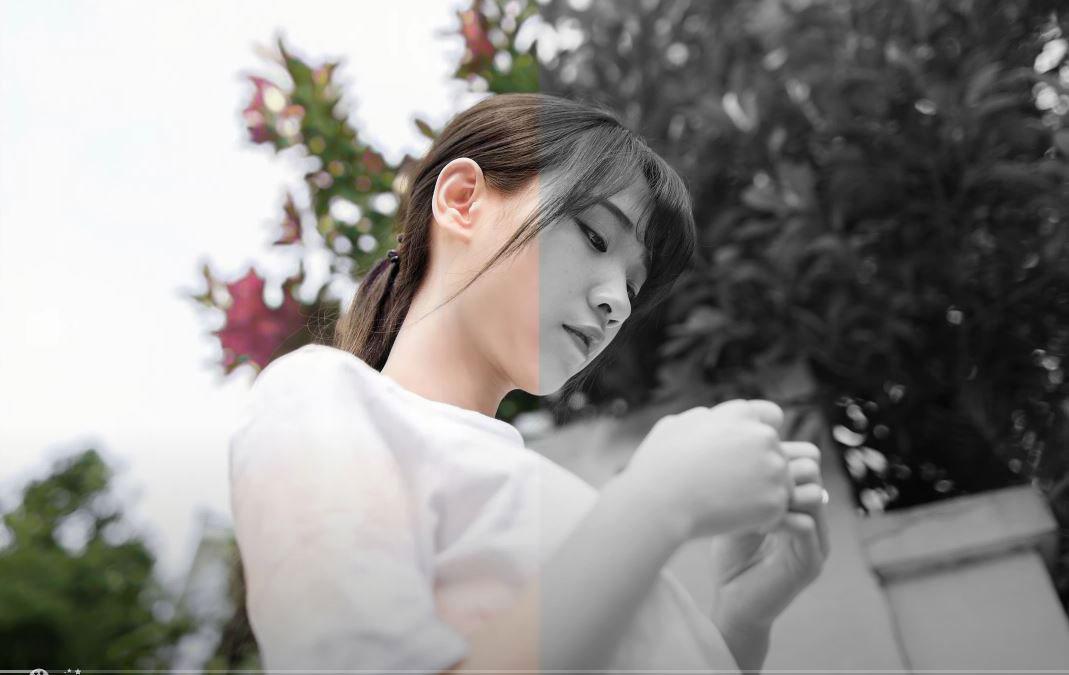
(1). Hi guys, Adobe recently gave Photoshop the ability to instantly colorize photos using Adobe Sensei AI technology. I’ll show you how to turn your black and white photo into colorful one. Stay tuned!
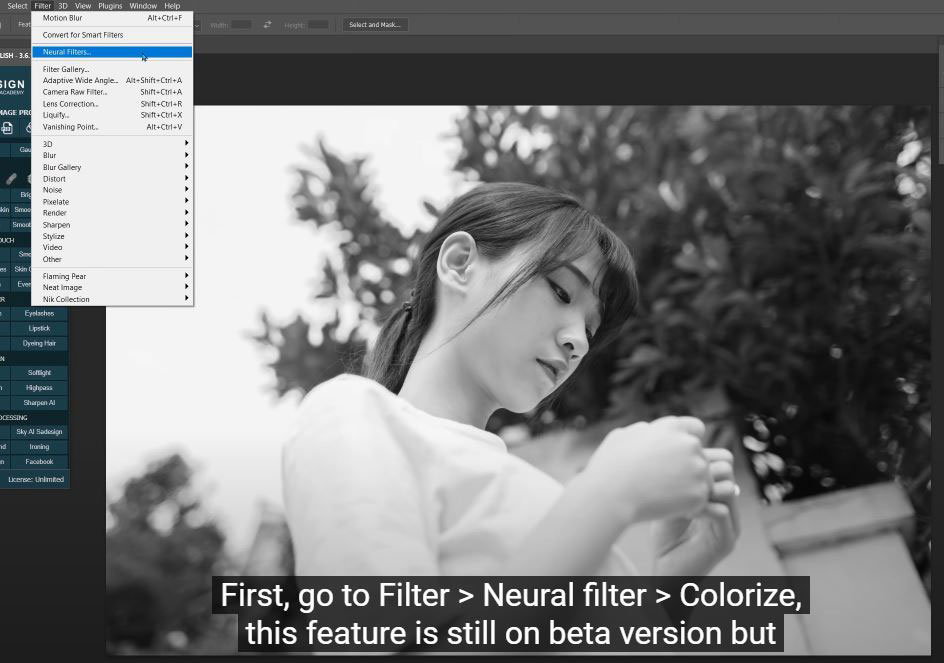
(2). Here, I have this beautiful girl in black and white photo. First, go to Filter > Neural filter > Colorize, this feature is still on beta version but it works really well, right? Please notice that, this feature is available on the latest version. If you are using old one of Photoshop, make sure to update it.
(3).
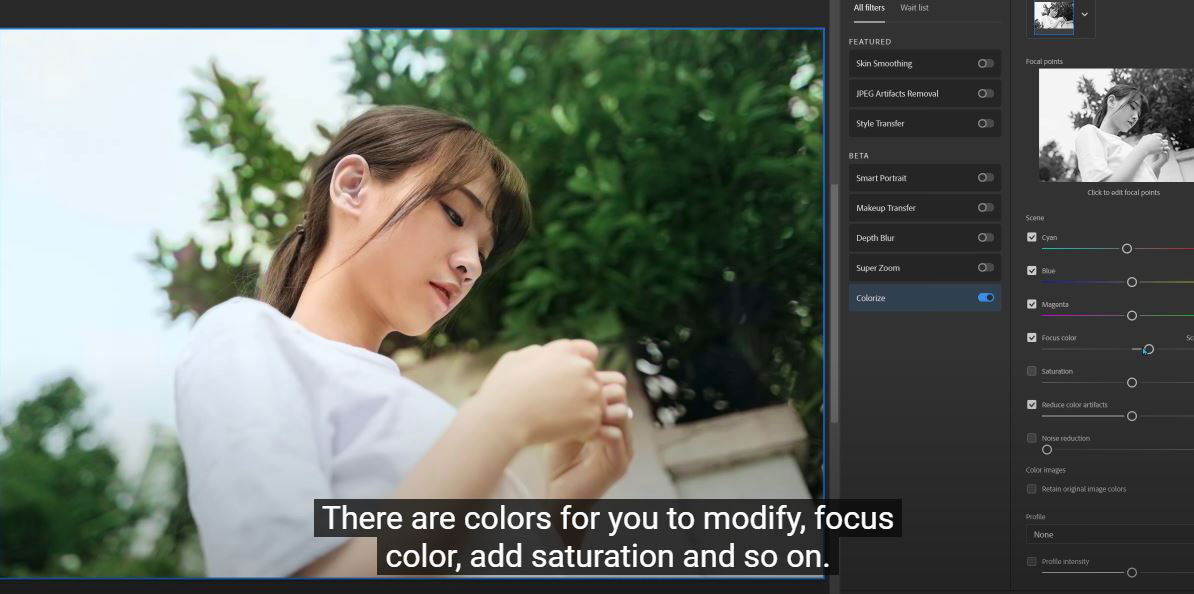
After you click the toggle to turn it on, Photoshop will use its image recognition technology to colorize the elements of your photos in the way it thinks best.
If some areas of the photo have a little bit off, you can custom adjustments in the panel of colorize.
There are colors for you to modify, focus color, add saturation and so on. Lots of options to boost up your photo to another level. Once, you are done, the result is added on top of your layer.
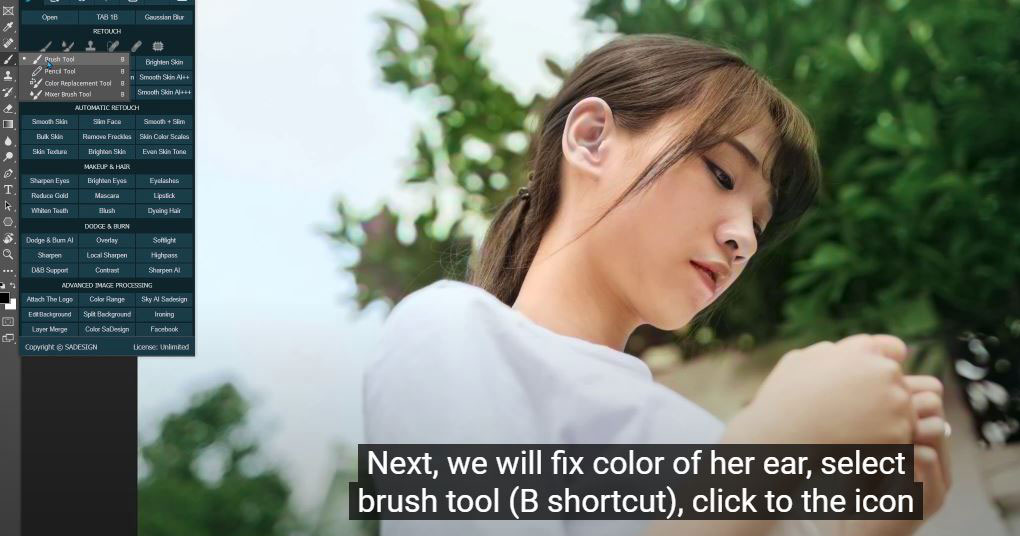
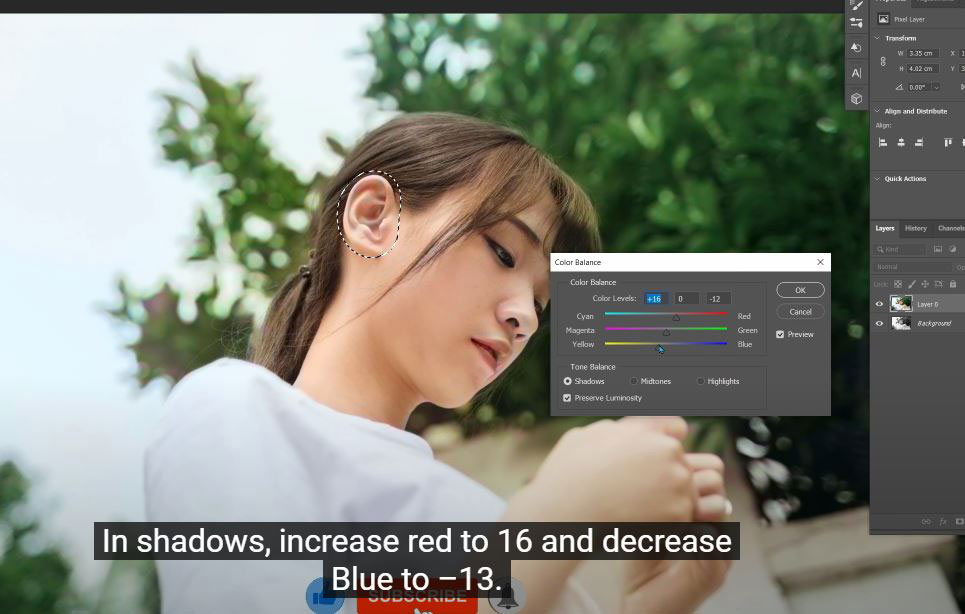
(4). Next, we will fix color of her ear, select brush tool (B shortcut), click to the icon below black and white color. It's “edit in quick mask mode” (Q shortcut). After you are choosing that mode, the layer filled with red, then just paint over her ear and click again to the quick mask to turn it off. Now, her ear is selected.
(5). Open color balance by pressing CTRL or CMD + B, in color balance window, there are 3 tone balance: Shadows, Midtones and Highlights. In Midtones, let’s increase red to 9, decrease blue to –4. In shadows, increase red to 16 and decrease Blue to –13. Last thing, Highlights, red to 7, green to 1 and blue to –4. the color in her ear is now balance, it’s the same tone with her skin.
(6). Let’s use brush and quick mask again to select the areas of her face and hands. Open curves with shortcut CTRL or CMD + M, brighten the selection by increase midtone a little bit. That’s is!
There is another the way to colorize your black and white photo in case you don’t want to update your Photoshop. Go to the website: myheritage.com, upload your photo and just wait for the processing completed.
he result looks awesome, this website is for free to use. However, they will put the watermark to the photo. If you don’t want that, just update your account to premium.
Now, just download it and put it to Photoshop to see the difference. It’s great right? Please leave comments to let’s us know which methods of colorize is better in your opinion. Thank you for watching!
? DOWNLOADS Practical pictures: https://drive.google.com/file/d/1CIDW94tnTJBxt-coJrR7Hg3Q_eikE6aJ/view?usp=sharing
Watch the video here:
REGISTER FOR FREE PHOTOSHOP LEARNING
============================
The most powerful Retouch tool processor
DOWNLOAD:
✅ SADESIGN PANEL ENGLISH: https://sadesign.ai/retouching/
✅ SADESIGN PANEL VIETNAM: https://www.retouching.vn/


