Best Selling Products

Genuine Cheap Canva Pro
39 USD

Genuine Adobe Illustrator account
99 USD

ChatGPT Plus Account (GPT-4)
16 USD

MidJourney Account
29 USD

Upgrade Genuine Office 365
49 USD

Upgrade Duolingo Super
29 USD

Upgrade genuine Capture One account
120 USD

Autodesk All App Account Copyright
120 USD

Adobe Photoshop Copyright - Full App
120 USD

Capcut Pro 1 Year
39 USD

Copyright Adobe Lightroom Account
59 USD

Adobe Premiere Pro Account
99 USD

Windows 10 & 11 Pro Key
36 USD

Freepik Premium Account
59 USD

Plugin Retouch4me
69 USD
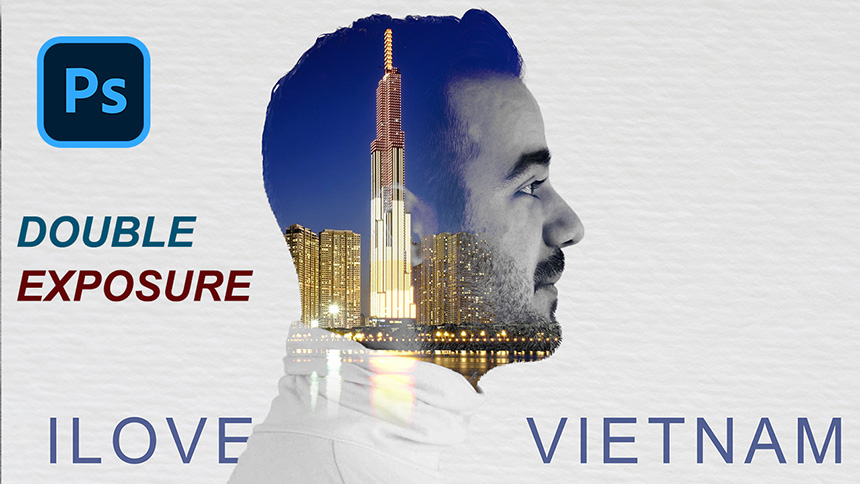
This is The Easiest Way to Create Double Exposure Effect
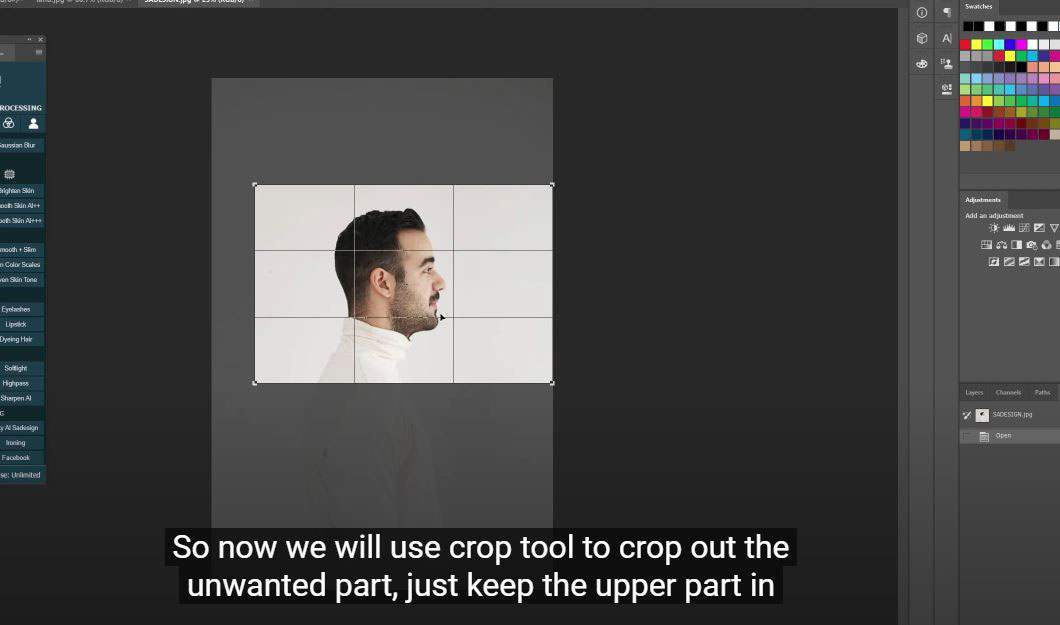
In this video, I’ll show you how to create a unique double exposure effect using Photoshop. Let’s get started! (1). Here, I have a photo of a guy for an example, you can take your own photo if you like. So now we will use crop tool to crop out the unwanted part, just keep the upper part in this case.
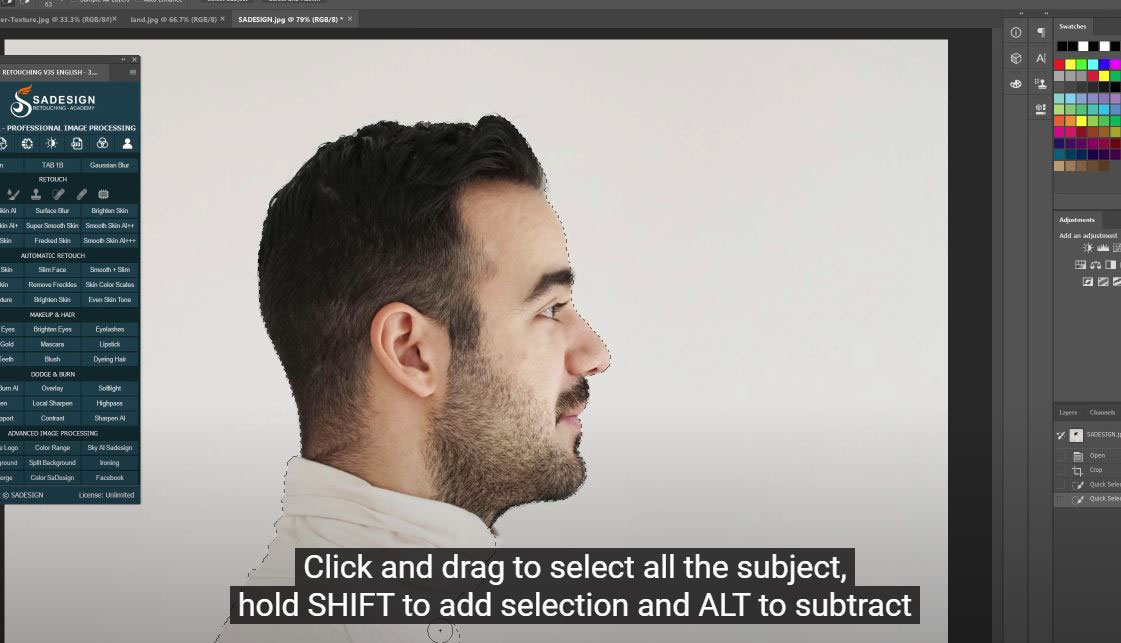
(2). Next, we will separate the subject with the background, zoom in and use quick selection tool (W shortcut) to select the subject. Click and drag to select all the subject, hold SHIFT to add selection and ALT to subtract the selection.
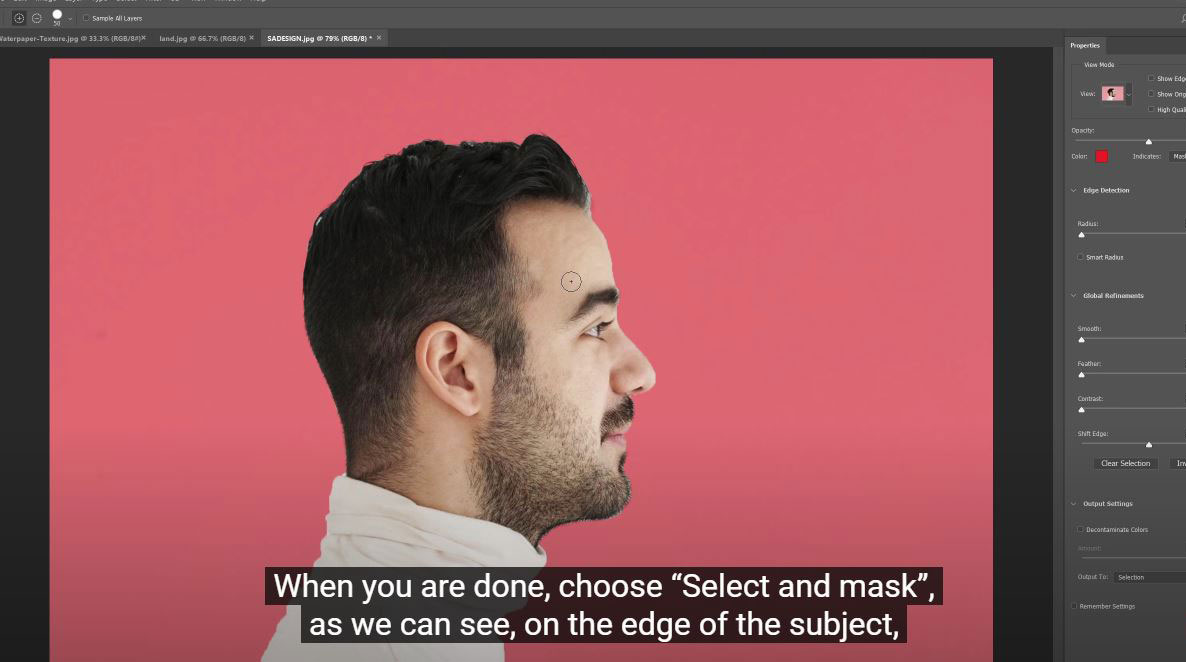
(3). When you are done, choose “Select and mask”, as we can see, on the edge of the subject, the selection is not good enough so now we will use the “Refine edge brush tool” to paint over the edge of subject, like hair, forehead to make it softer. In the output to box, make sure to choose “New layer with layer mask”.
(4). Let’s me turn off the background layer so you can see the subject is now separated to the background. We have to apply a white background and to do that, go and right click to the adjustment icon and select “solid color” and change the color to white. Now we have the model with the white background.

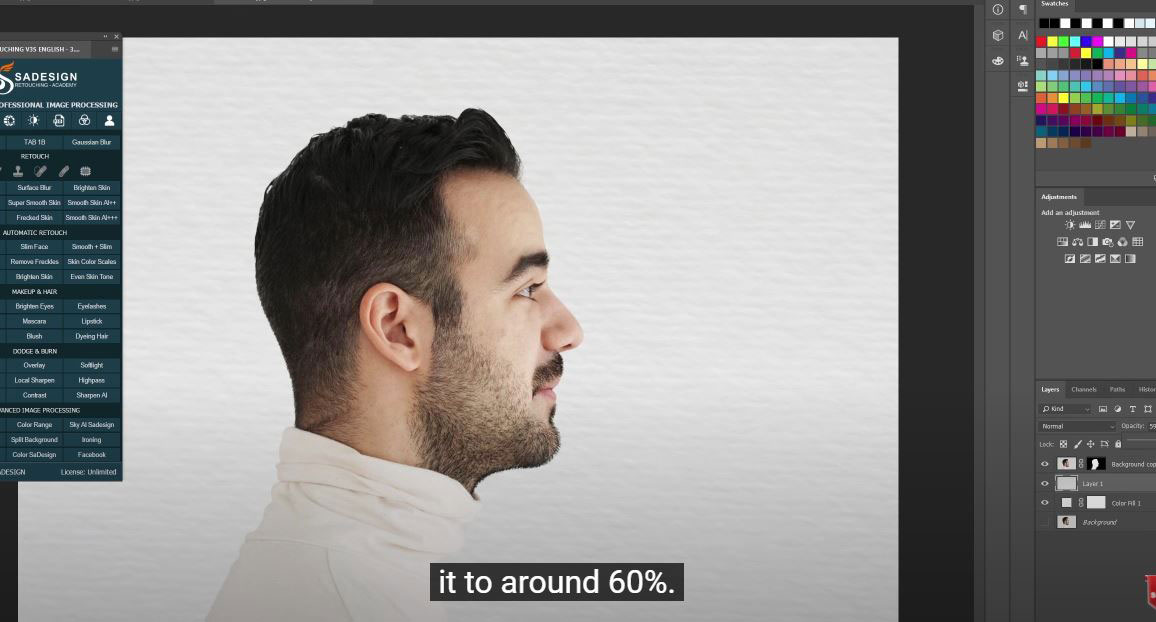
(5). Next steps, this is the background to use for double exposure effect. It’s the Landmark 81 in Ho Chi Minh city. Here is the water paper for using as the background. Use CTRL or CMD + A to select it, move to the model photo and paste it with CTRL or CMD + V. It seems the background is not white as I wanted so I’ll reduce the opacity of it to around 60%.
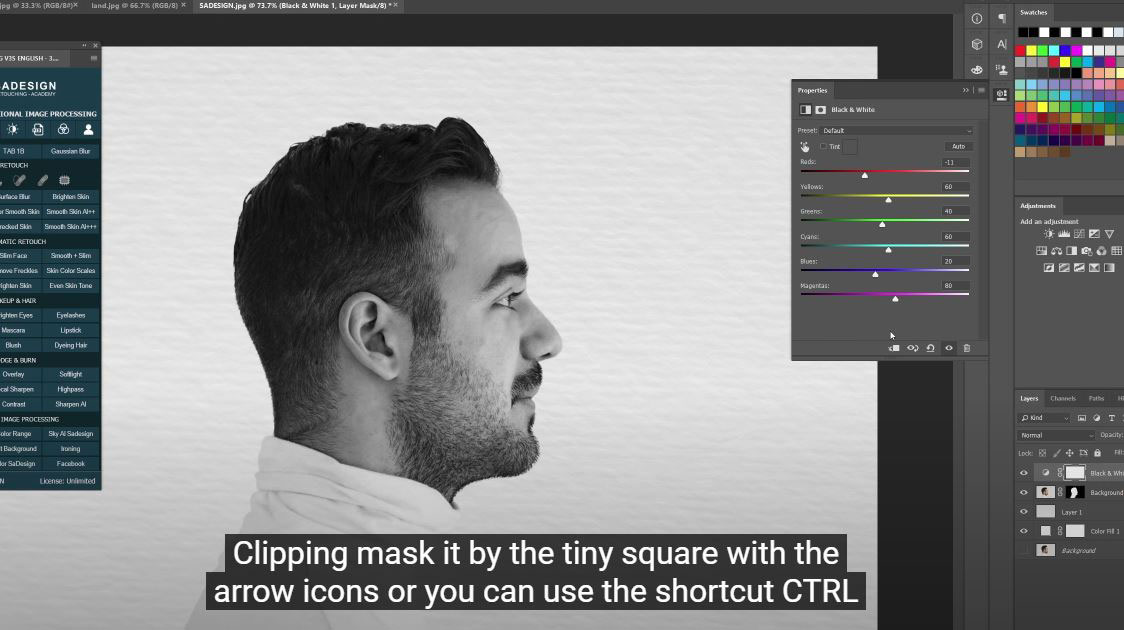
(6). Then, we will remove the color of model by using “Black & White” layer, reduce reds channel to –11 to darken the shadow a little bit. Clipping mask it by the tiny square with the arrow icons or you can use the shortcut CTRL + ALT + G or CMD + OPTION + G for MAC.
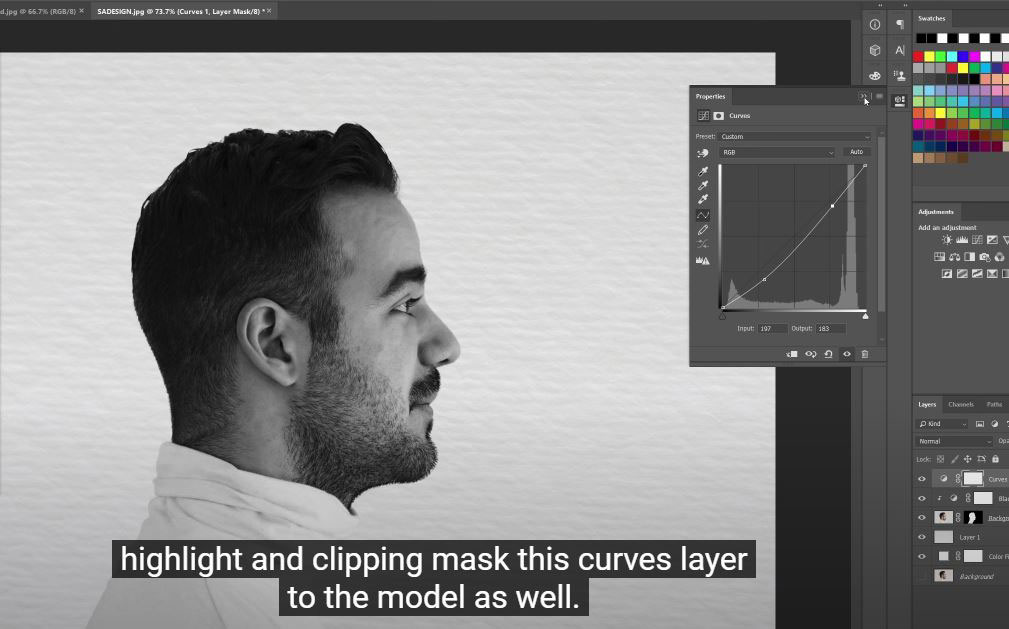
(7). Then, I will darken the subject a bit more with “Curves” by decreasing shadow and highlight and clipping mask this curves layer to the model as well. So it will affect only to the subject, not the background.
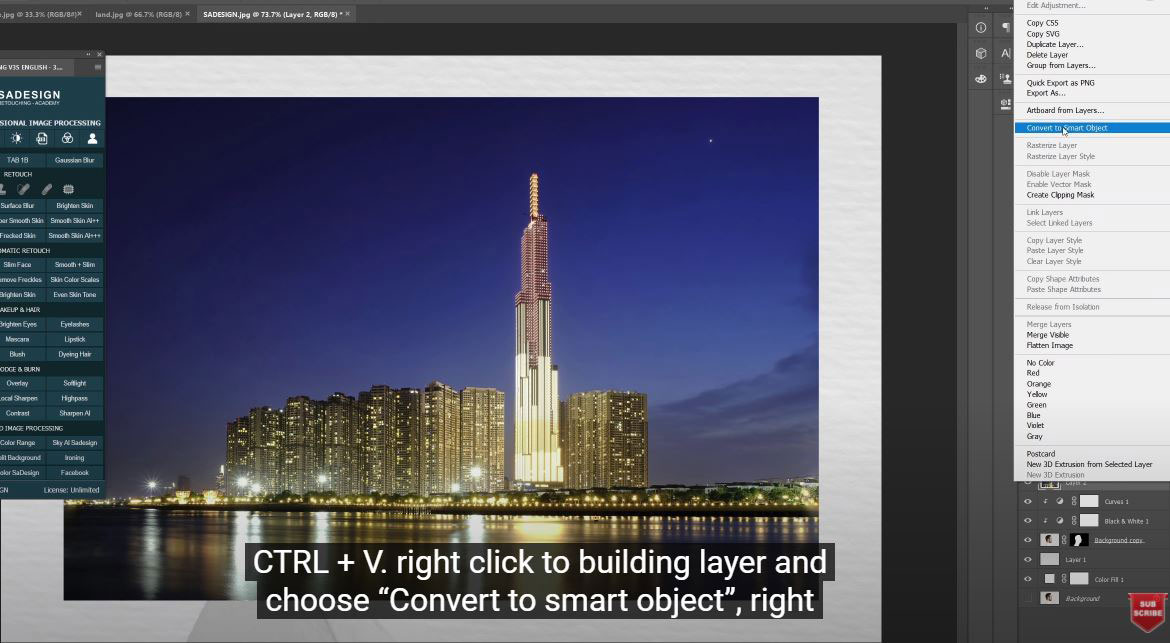
(8). Move to the Landmark 81 tower, use CTRL + A to copy the whole photo and paste it with CTRL + V. right click to building layer and choose “Convert to smart object”, right lick to the layer again and choose clipping mask. Now we see the model and building matching together, use CTRL + T to move the building layer till it fix with your intension, change blending mode from normal to lighten to taking back the model face.
(9).Add layer mask to the building the second icon at the bottom right corner. Now, use black brush with the flow around 51% to paint slightly on his shirt to remove a bit of reflection of the building, just to make the double exposure effect softly, and paint on his eyebrow to take back the original black color. It’s quite good until now.

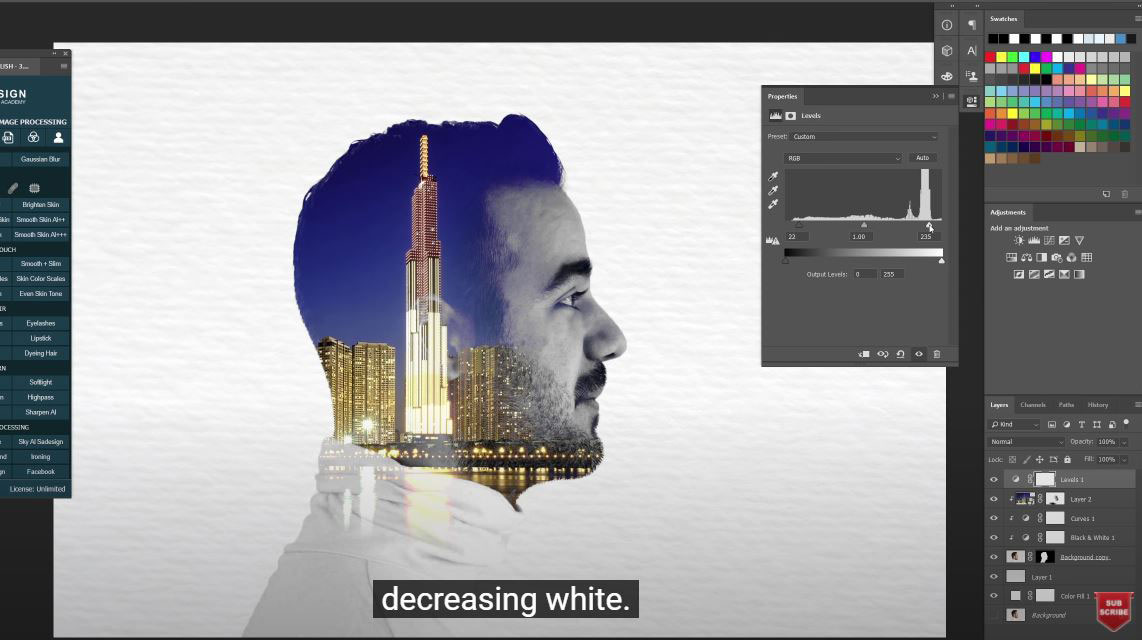
(10). Let’s me increase a bit of contrast with “Levels” layer by increasing black and decreasing white. Remember to clipping mask it so it won’t affect to the background. Use brush again to eliminate areas that you don’t want to apply the effect and adjust the opacity to 62%.
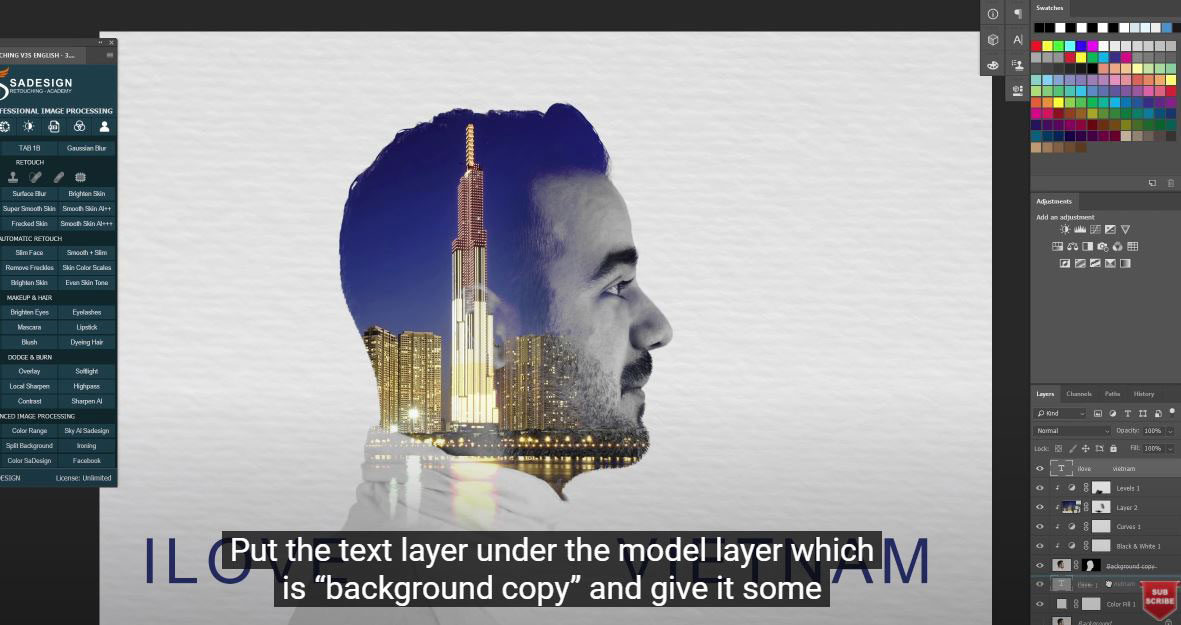
(11). Finally, I’ll decorate this photo with some text for example … I LOVE VIETNAM. Press CTRL or CMD + T to resize it. Add some space between them so it will make the subject stand out even more. Put the text layer under the model layer which is “background copy” and give it some minor adjustment to get the final perfect result. That’s all for this tutorial. Enjoy!
If you find this tutorial is helpful, please hit like and subscribe buttons and you can enjoy our tutorials about Photoshop technique, tips while learning. Free tutorials are launch day by day so it will satisfy your needs in case you are interested in Photoshop. Please leave comments right below the video in case you have any questions. Thank you and See ya!
Watch the video here:
REGISTER FOR FREE PHOTOSHOP LEARNING
============================
The most powerful Retouch tool processor
DOWNLOAD:
✅ SADESIGN PANEL ENGLISH: https://sadesign.ai/retouching/
✅ SADESIGN PANEL VIETNAM: https://www.retouching.vn/


VIP Products


Best Selling Products
Genuine Cheap Canva Pro
39 USD
Genuine Adobe Illustrator account
99 USD
ChatGPT Plus Account (GPT-4)
16 USD
MidJourney Account
29 USD
Upgrade Genuine Office 365
49 USD
Upgrade Duolingo Super
29 USD
Upgrade genuine Capture One account
120 USD
Autodesk All App Account Copyright
120 USD
Adobe Photoshop Copyright - Full App
120 USD
Capcut Pro 1 Year
39 USD
Copyright Adobe Lightroom Account
59 USD
Adobe Premiere Pro Account
99 USD
Windows 10 & 11 Pro Key
36 USD
Freepik Premium Account
59 USD
Plugin Retouch4me
69 USD