Best Selling Products

Genuine Adobe Illustrator account
99 USD

Adobe Photoshop Copyright - Full App
120 USD

Capcut Pro 1 Year
39 USD

Genuine Cheap Canva Pro
39 USD

Upgrade genuine Capture One account
120 USD

Autodesk All App Account Copyright
120 USD

MidJourney Account
29 USD

Copyright Adobe Lightroom Account
59 USD

Upgrade Duolingo Super
29 USD

Windows 10 & 11 Pro Key
36 USD

Freepik Premium Account
59 USD

Upgrade Genuine Office 365
49 USD

Adobe Premiere Pro Account
99 USD

ChatGPT Plus Account (GPT-4)
16 USD

Plugin Retouch4me
69 USD
How to Create Glowing Tattoo Portrait Effect in Photoshop

Hi, today I’ll show you how to create glowing tattoo of portrait photo in Photoshop. As usual, I leave these stocks in the description’s link so you can download and practise along with me throughout the process.
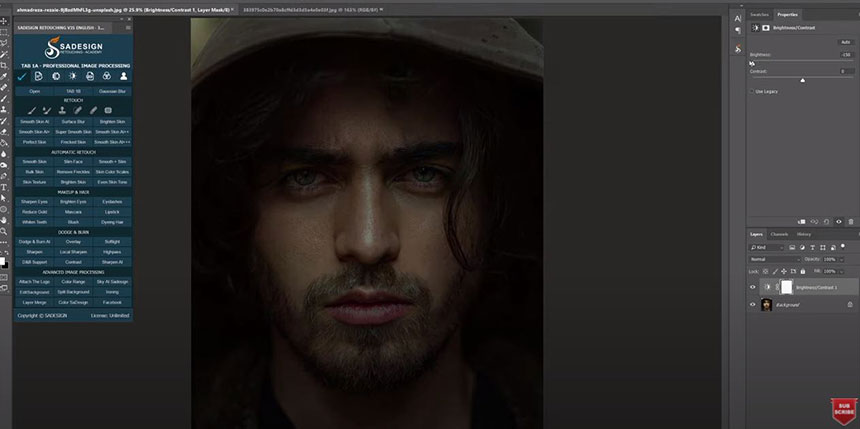
After open your portrait photo, we will darken it first, click to adjustment icon and select “Brightness/contrast”. Decrease brightness all the way down to -150 and increase contrast to 50
Click to the mask, use brush tool (B shortcut), opacity 10%, black in foreground color. Now, paint slightly on his cheek where to apply the tattoo.
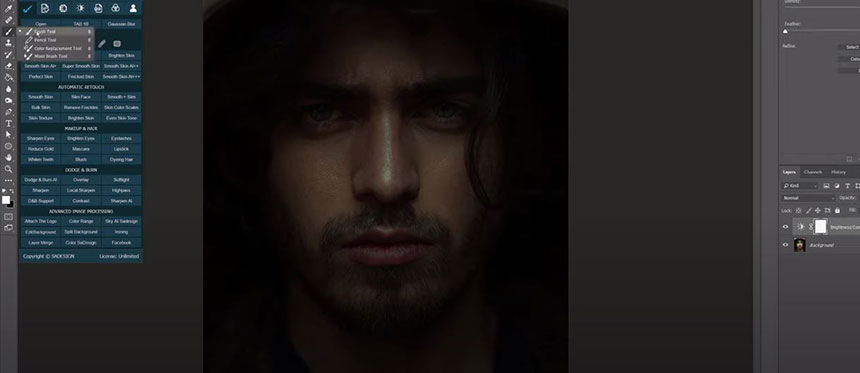
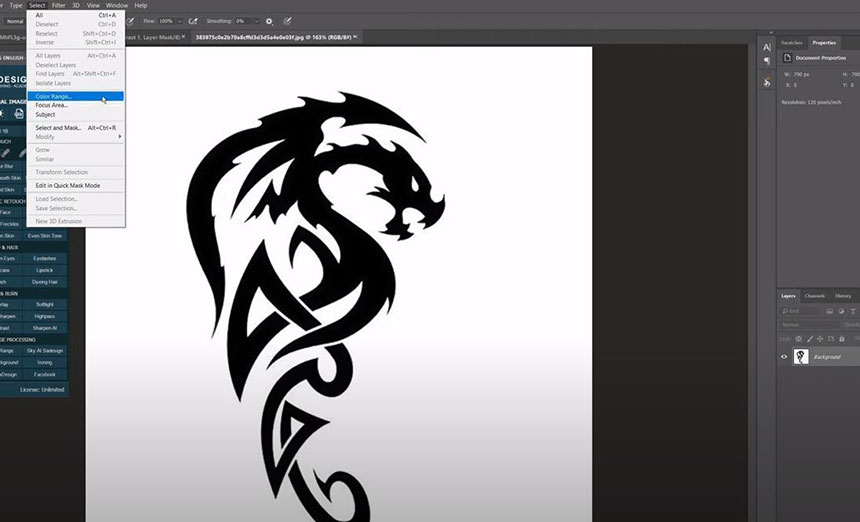
Brighten his eyes and lips as well. Next, in this tattoo, we are going to separate it from the background. Go to Select > Color Range > in Select, choose “Shadows” OK
Shift + F6 to add 1 pixel of feather radius to soften the selection. CTRL or CMD + J to take the selection to new layer.
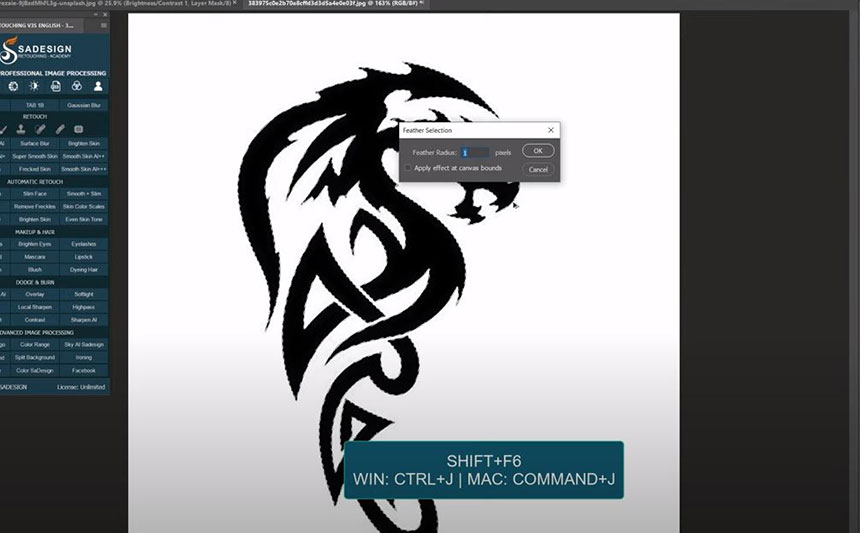
Pick up move tool, click and drag this tattoo to our project. Release the cursor when it’s in the background.
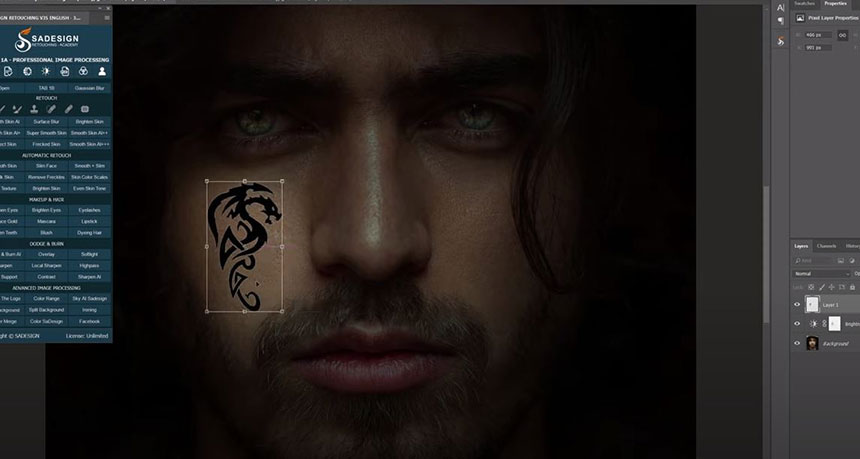
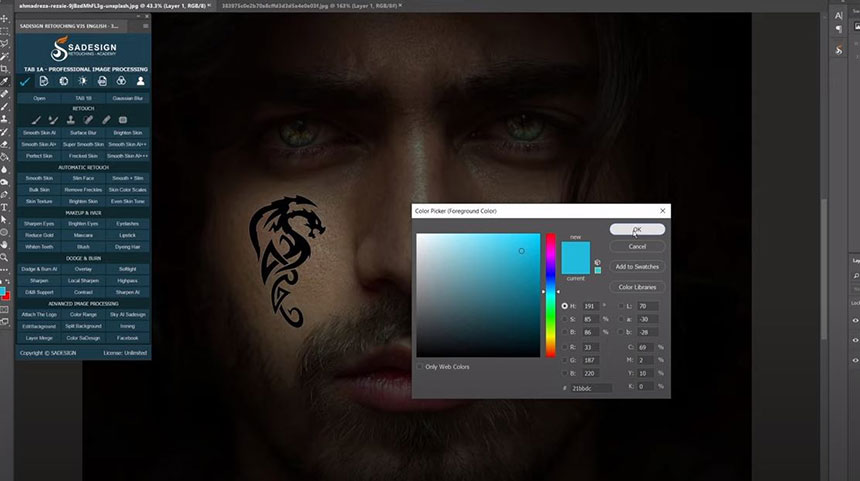
You can adjust the size and position with CTRL+T In foreground color, select this color, the code is #21bbdc Hold CTRL and Click to layer 1 to take the selection, fill it with foreground color by using ALT or OPTION + Delete. CTRL+D to deselect
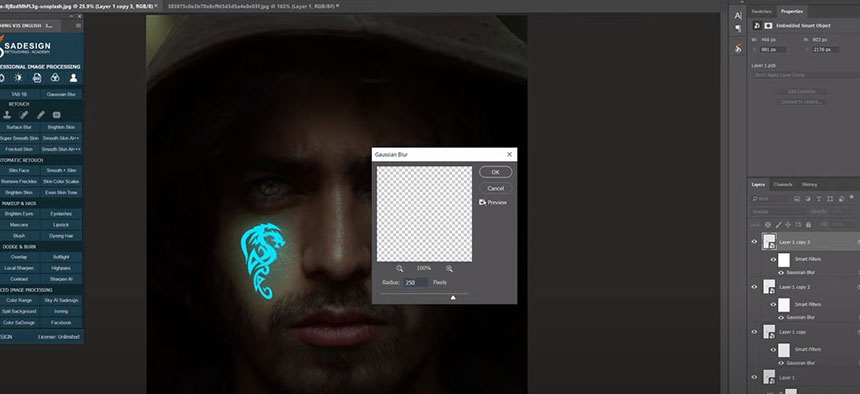
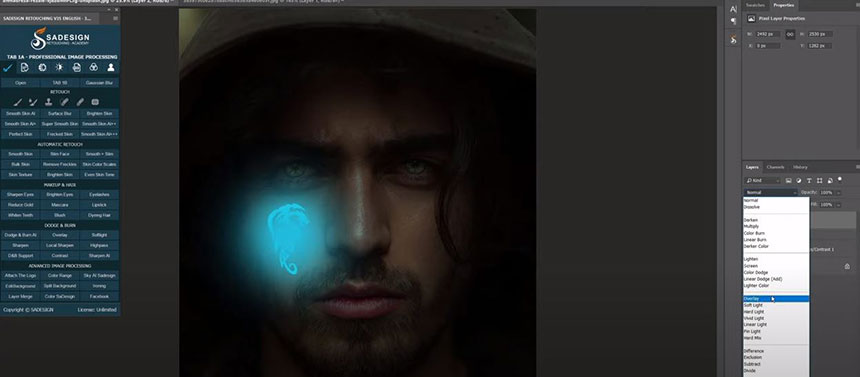
Right click to layer 1 and choose “Convert to smart object” Duplicate it with CTRL+J Change its blend mode to “Overlay” Head to Filter > Blur > Gaussian Blur > 5 pixels Duplicate it again, change the amount of gaussian blur in this top layer to 150 pixels by double clicking it.

You can see the tattoo now glowing a bit, to make it more glowing, just duplicate the layer with CTRL+J. Then increase the radius pixels of Gaussian blur even more. This time will be 250 pixels. Put all tattoo layers into Group with this icon so we can manage it easily later on.
Create a new layer, pick up brush tool, opacity 100%, make sure foreground color still the same color of the tattoo. Increase the brush size with this bracket ]. Now dab right in the tattoo, change blend mode from normal to “Overlay” Increase Brush size even more to apply this color on his face.
Next, we will glow his eyes. Create a new layer, decrease size of brush with this bracket [ and paint the below iris to make it shine.
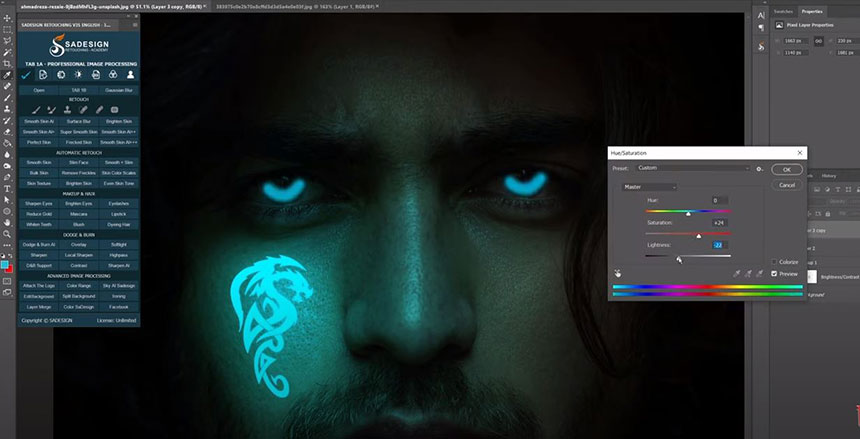
CTRL+J to duplicate it, use move to and move to the other eye. Merge these Iris layers with CTRL+E Press CTRL + U to open “Hue/Saturation”, increase saturation to 24 and decrease lightness to -22. Adjust opacity to 30%
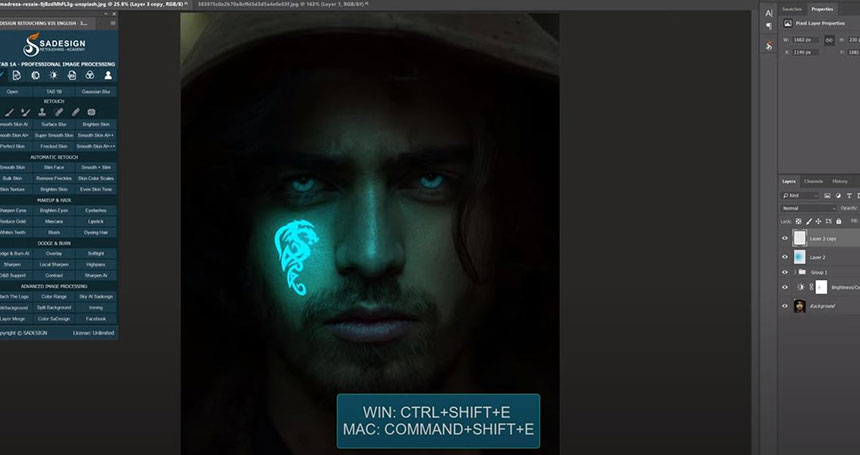
Create a stamp visible layer, which is the combination of all layers from the current layer that is being selected. Press CTRL+SHIFT+E for WIN or CMD+SHIFT+E for MAC
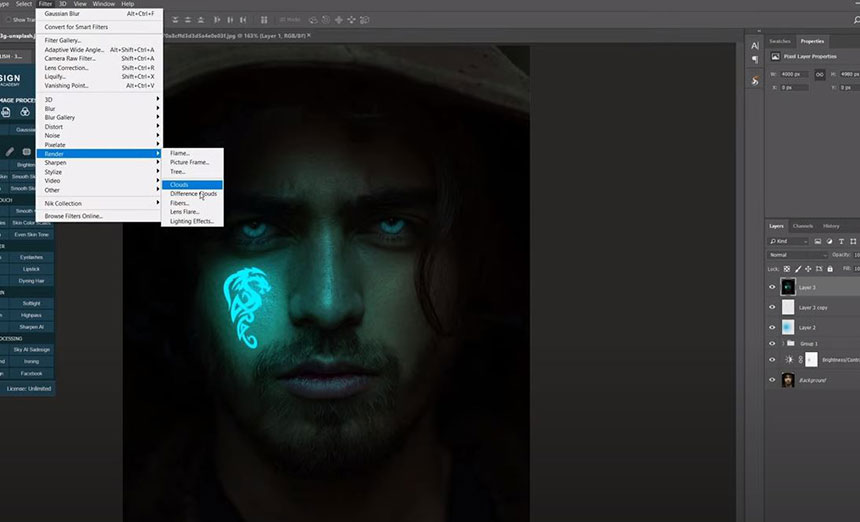
Head to Filter > Render > Lighting Efffects > Drop down menu in Preset and select “Custom” You can expand or scale down the circle lighting effect as you see fit. Make sure to select the color just the same as the tattoo’s color. OK
Click to this icon to create layer mask to it, use Brush tool, opacity 10%, black in foreground. Paint on his lips to reduce the lighting effect. Just bring back a little bit the original color of his lips Create Curves adjustment layer, decrease highlight and increase shadow to make the photo in dark mode.
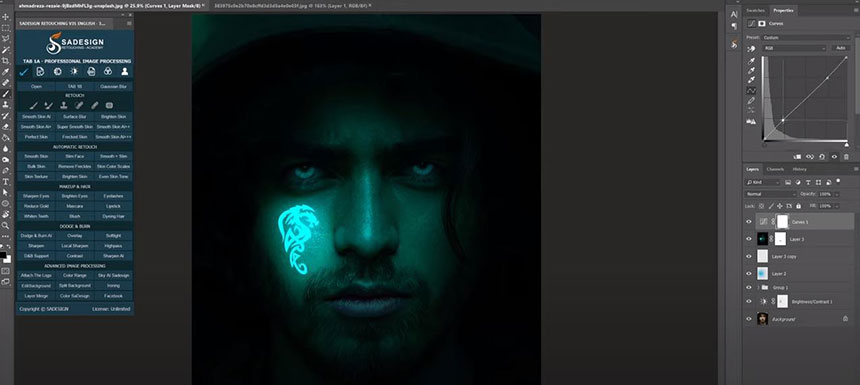
Alright! Now, just put all layers into a group so we can see the before and after.
Hope you like this video. Don’t forget to like and subscribe to our channel (if not). See you in the next tutorial.
REGISTER FOR FREE PHOTOSHOP LEARNING
============================
The most powerful Retouch tool processor
DOWNLOAD:
✅ SADESIGN PANEL ENGLISH: https://sadesign.ai/retouching/
✅ SADESIGN PANEL VIETNAM: https://www.retouching.vn/


VIP Products


Best Selling Products
Genuine Adobe Illustrator account
99 USD
Adobe Photoshop Copyright - Full App
120 USD
Capcut Pro 1 Year
39 USD
Genuine Cheap Canva Pro
39 USD
Upgrade genuine Capture One account
120 USD
Autodesk All App Account Copyright
120 USD
MidJourney Account
29 USD
Copyright Adobe Lightroom Account
59 USD
Upgrade Duolingo Super
29 USD
Windows 10 & 11 Pro Key
36 USD
Freepik Premium Account
59 USD
Upgrade Genuine Office 365
49 USD
Adobe Premiere Pro Account
99 USD
ChatGPT Plus Account (GPT-4)
16 USD
Plugin Retouch4me
69 USD