Best Selling Products
How To Cut Out Hair Fast in Photoshop
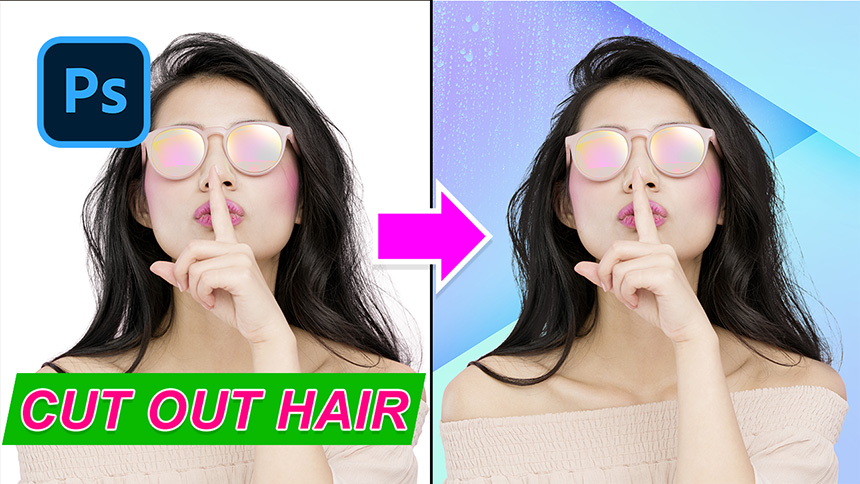
Hi there, this is SaDesign, today I’ll show you how to select subject especially the hair in a few minutes.
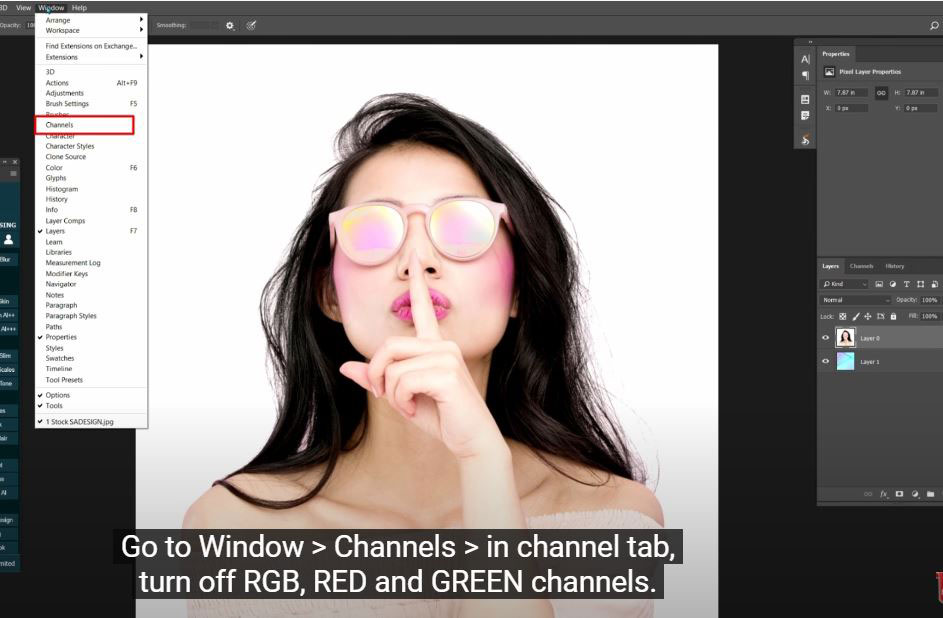
(1).At first, there are two layers, one is the subject with white background and another one is background that I want to put it in. Go to Window > Channels > in channel tab, turn off RGB, RED and GREEN channels. Duplicate Blue one by clicking and dragging it to the copy icon. Open levels box with shortcut CTRL or CMD + L. Now we increase the black by dragging the small black triangle to the right to make the subject even blacker which means separate it to the background. We also drag the white point to the left.
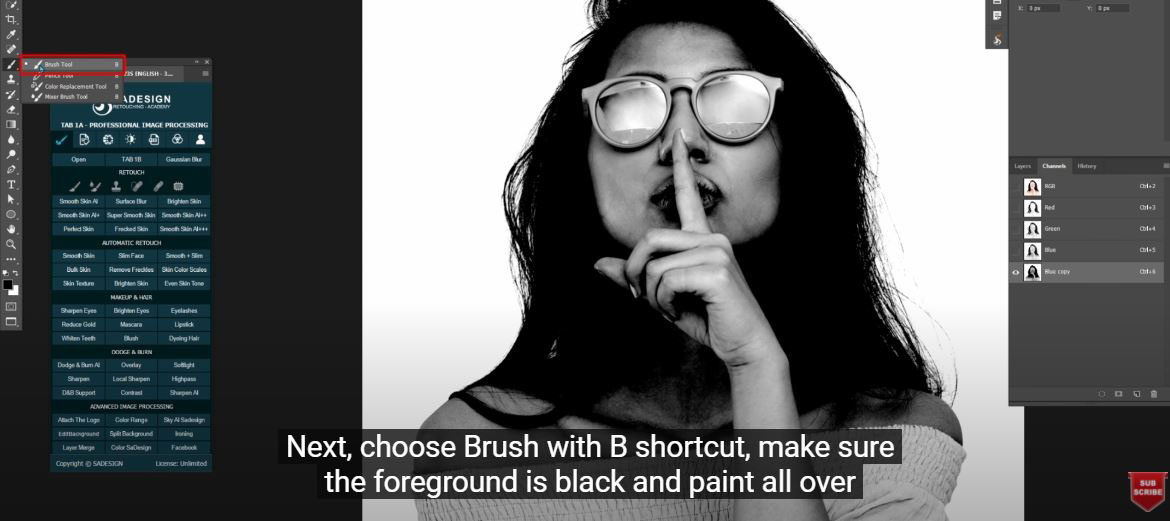
(2). Next, choose Brush with B shortcut, make sure the foreground is black and paint all over the subject to make it completely black.
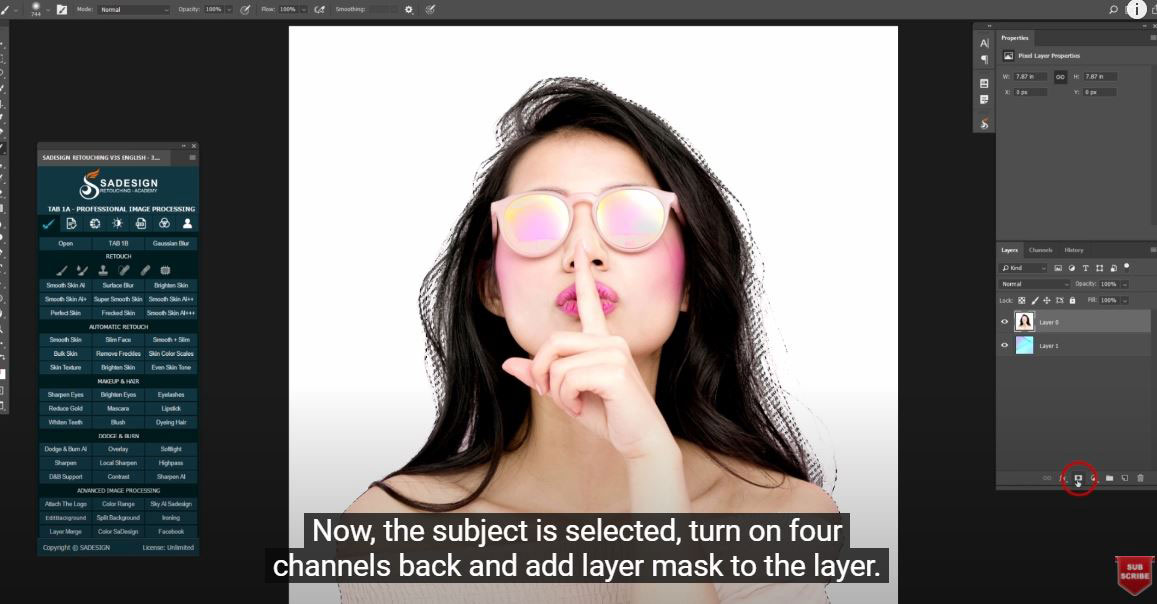
(3).Before painting on her body, we use pen tool to make the selection of her body and then paint it later. By this way, we cannot paint out to the background. When you are done, hold CTRL or CMD and click to the Blue copy channel to get the selection of the subject. Now, the subject is selected, turn on four channels back and add layer mask to the layer. Choose blur tool to blur the edge of the subject to make it soft and smooth between subject the background. Hold ALT or OPTION and click on the mask and paint over the edge. The strength around 50%. Turn off the mask when you are done.
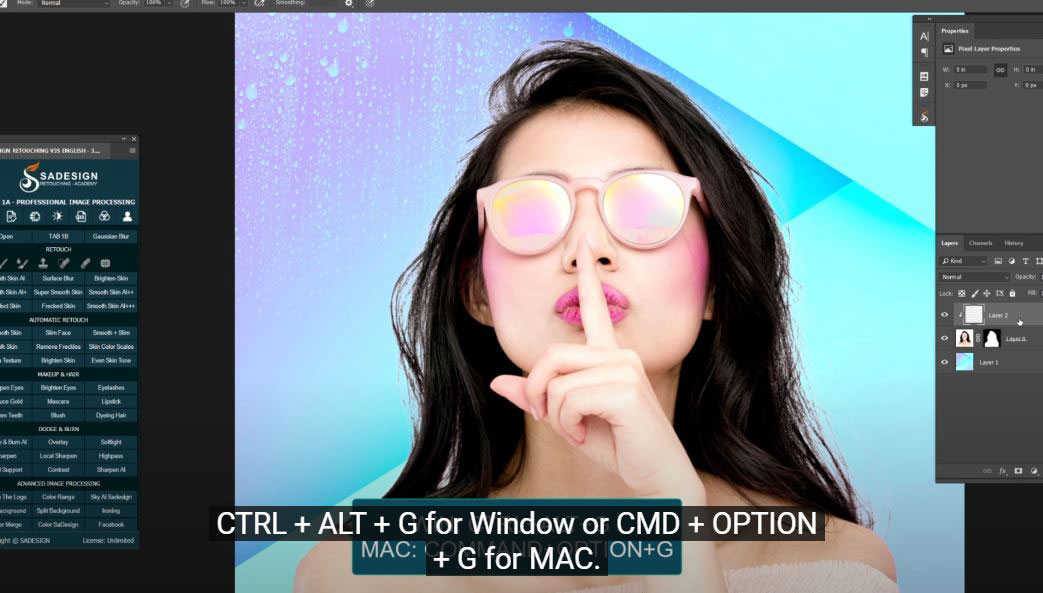
(4). Final step is to darken her hair, create new layer and create clipping mask to it by shortcut CTRL + ALT + G for Window or CMD + OPTION + G for MAC. Using brush with black color in foreground, change the mode to “Darken” and paint over her hair where is supposed to be black. Look at the before and after to see the changes that we’ve made and enjoy.
If you like Photoshop and Photograph just like SaDesign and you want to get more and more tips, techniques, experience from us. Make sure to subscribe our channel by simply clicking the subscribe button and you will get tons of free tutorials that SaDesign share about Photoshop technique on a daily basic. If you have any ideas, don’t hesitate to leave comments right below the video. We look forward to see your thoughts. Thanks so much for following and supporting SaDesign. See you guys in the following tutorials. Bye Bye!
REGISTER FOR FREE PHOTOSHOP LEARNING
============================
The most powerful Retouch tool processor
? DOWNLOADS Practical pictures: https://drive.google.com/file/d/1e5GnT_DEv36DVI3P9-l7heLJxuFxKPxg/view?usp=sharing


