Best Selling Products
How to Draw Circles in Photoshop in a Simple and Effective Way
Nội dung
- 1. Understanding the Shape Tool in Photoshop
- 2. How to Draw a Simple Circle
- 2.1 Method 1: Using the Ellipse Tool (U)
- 2.2. Method 2: Use the Elliptical Marquee Tool (M)
- 3. How to Create a Transparent Circle
- 4. How to Create Concentric Circles
- 5. Create a Gradient Effect for a Circle
- 6. Draw a Circle Using the Marquee Tool
- 7. Save and Export Files
- 8. Conclusion
A step-by-step guide to drawing a circle in Photoshop with just a few basic steps. Learn the steps to create a perfect circle easily.

Photoshop is a powerful tool that allows you to unleash your creativity in design. Whether you are a beginner or an experienced user, drawing a circle in Photoshop will become extremely simple when you follow the instructions below.
1. Understanding the Shape Tool in Photoshop
The Shape Tool is a great helper for drawing basic shapes, including circles. This tool is located in the toolbar on the left side of the Photoshop interface , helping you create different shapes such as rectangles, squares, circles, or polygons.

To draw a circle, select the Ellipse Tool , located in the Shape Tools group. This tool not only helps you draw circles easily, but also allows you to customize the size, color, and border of the shape.
2. How to Draw a Simple Circle
In the process of using Photoshop, drawing a circle is a basic but very important operation, especially when you need to create graphic designs or edit images. This article will guide you on how to draw a simple and effective circle using the Ellipse Tool (U). This is one of the most popular and easy-to-do methods.
2.1 Method 1: Using the Ellipse Tool (U)
Step 1: Select the Ellipse Tool
- Open Photoshop software on your computer.
- Access the toolbar located on the left side of the screen, then find and select the Ellipse Tool (U). If you don't see the ellipse icon, you can right-click on the Shape Tool to expand the options and select the Ellipse Tool.
Step 2: Draw a Circle
- After selecting the Ellipse Tool, move the mouse pointer to the working area.
- Hold down the Shift key on your keyboard and drag your mouse to draw a circle. Holding down the Shift key ensures that your drawing will have equal height and width ratios, creating a perfect circle instead of an ellipse.
Step 3: Customize Size and Color
- Once you've finished drawing, you can adjust the size or position of the circle using the Move Tool (V).
- To change the color, select the circle you just drew, then access the customization bar at the top of the screen or the Properties panel to edit the Fill (inner color) and Stroke (outline) colors.
Step 4: Save File
- Once finished, you can save your design file by going to File > Save As menu and choosing the appropriate format such as PSD, PNG or JPEG.
2.2. Method 2: Use the Elliptical Marquee Tool (M)

Guide you how to use Elliptical Marquee Tool (M) to create circle in Photoshop easily and accurately.
Step 1: Open Photoshop and Create a New File
First, open Photoshop on your computer. Then, create a new file by going to File > New, or pressing Ctrl + N (Windows) or Command + N (Mac). In the settings window, you can customize the file size and resolution as needed.
Step 2: Select the Elliptical Marquee Tool
The Elliptical Marquee Tool is part of the selection tools group in Photoshop. To select this tool, you can do one of the following:
- Press the M keyboard shortcut. If the Rectangular Marquee Tool is selected, right-click its icon on the toolbar and select the Elliptical Marquee Tool from the drop-down menu.
- Or, you can find the rectangle icon on the left toolbar of the screen and switch to Elliptical mode.
Step 3: Draw a Circle
Once you have selected the Elliptical Marquee Tool, you can start drawing a circle by following these steps:
1. Hold Shift: To ensure your selection is a perfect circle (not distorted into an ellipse), hold the Shift key on your keyboard while dragging your mouse.
2. Drag: Left-click at the starting point on the canvas, then drag to create a circular selection. The size of the circle depends on how far you drag.
3. Adjust position (if needed): If you want to move the selection while keeping the same size, hold the Space bar and drag the mouse to change the position.
Step 4: Color or Add Effects
Once you have created a circular selection, you can perform a variety of actions:
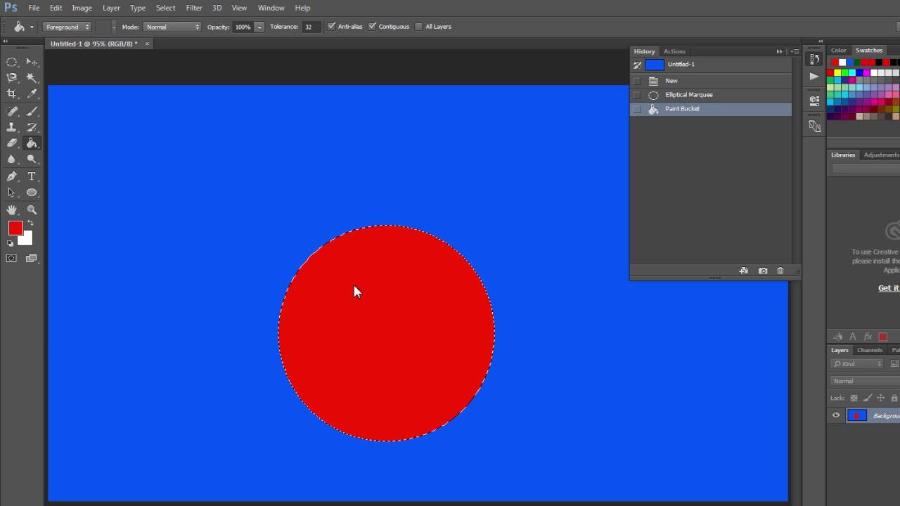
- Fill color: Select the desired color from the color palette (Color Picker), then press Alt + Backspace (Windows) or Option + Delete (Mac) to fill the selected area.
- Add effects: You can apply effects like drop shadows, gradients, or strokes by going to the Layer > Layer Style menu.
Step 5: Deselect
When you're done, you'll need to deselect the area to continue. To do this, press Ctrl + D (Windows) or Command + D (Mac).
The Elliptical Marquee Tool (M) not only helps you create simple circles but also greatly supports professional graphic design. With the above instructions, hopefully you will easily use this tool in Photoshop to meet your work needs.
3. How to Create a Transparent Circle
Sometimes you need a circle with just a border and no background color. To do this:
Once you have finished drawing the circle, click Fill on the top toolbar.
Select the square icon with the red diagonal line to remove the background color.
Customize the border by choosing a color and thickness in the Stroke section .
This transparent circle is often used as an accent or decorative border.
4. How to Create Concentric Circles
Concentric circles are circles that have the same center but different sizes. To create this type of shape:
Draw the first circle as usual.
Duplicate the circle by selecting Ctrl + J (Windows) or Cmd + J (Mac).
Shrink or enlarge the duplicated circle by pressing Ctrl + T (Windows) or Cmd + T (Mac), then hold the Alt key while dragging to ensure the circle is enlarged or reduced evenly from the center.
5. Create a Gradient Effect for a Circle

Gradient is a soft color transition effect that makes a circle more dynamic. To add a gradient:
Select the circle you just created, then go to the top toolbar and select Fill .
Choose the appropriate Gradient type, for example: Linear , Radial , or Angle .
Customize the color and direction of the gradient in the Gradient Editor panel .
6. Draw a Circle Using the Marquee Tool
In addition to using the Ellipse Tool, you can draw circles using the Marquee Tool:
Select the Elliptical Marquee Tool from the left toolbar.
Hold down the Shift key while dragging to create a circular selection.
Fill the selection by going to Edit > Fill or pressing Shift + F5 .
This is especially useful when you want to create a circle quickly without having to edit the outline or color details.
7. Save and Export Files
Once you've completed your design, don't forget to save and export your file. To save:
Go to File > Save As , choose PSD format to keep the layers intact.
If you want to export the file for use, choose File > Export > Export As , then choose the appropriate format such as PNG , JPEG , or SVG .
Buy Cheap Photoshop License
8. Conclusion
Drawing circles in Photoshop is not as complicated as many people think. Just follow the steps that sadesign has guided above, you can create perfect circles for any design project. Whether you are a beginner or familiar with Photoshop, regular practice will help you improve your skills and be more creative in each work.


