Best Selling Products

Plugin Retouch4me
69 USD

Genuine Cheap Canva Pro
39 USD

Upgrade Genuine Office 365
49 USD

Adobe Photoshop Copyright - Full App
120 USD

Upgrade genuine Capture One account
120 USD

Capcut Pro 1 Year
39 USD

Genuine Adobe Illustrator account
99 USD

Windows 10 & 11 Pro Key
36 USD

Copyright Adobe Lightroom Account
59 USD

Adobe Premiere Pro Account
99 USD

ChatGPT Plus Account (GPT-4)
16 USD

Upgrade Duolingo Super
29 USD

Freepik Premium Account
59 USD

MidJourney Account
29 USD

Autodesk All App Account Copyright
120 USD
How to edit a 4x6 photo to a standard 3x4 size without distortion.
Nội dung
- 1. WHY DOES ADJUSTING THE SIZE OF ID PHOTOS OFTEN RESULT IN INCORRECT for IDENTITY CARDS?
- 2. UNDERSTANDING THE RATIO WHEN EDITING A 4X6 PHOTO TO A 3X4
- 2.1. Differences in Aspect Ratio
- 2.2. Conversion of standard printing pixel units
- 2.3. Units of measurement and aspect ratio
- 3. HOW TO PROFESSIONALLY EDIT A 4X6 PHOTO TO A 3X4 PHOTO USING PHOTOSHOP
- 3.1. Using the Crop Tool (Keyboard shortcut C)
- 3.2. Aligning facial features
- 3.3. Use the Content-Aware Fill feature to compensate for excess space.
- 3.4. Optimizing sharpness after resizing
- 4. LOSS-FREE RESIZE TECHNIQUES IN PHOTOSHOP
- 4.1. Adjusting parameters in Image Size
- 4.2. Using Resampling Mode
- 5. ONLINE TOOLS TO SUPPORT RAPID CONVERSION
- 5.1. Advantages of online image processing
- 5.2. Notes on security and resolution
- 6. VISIT APPVIP.AI TO DISCOVER SMART GRAPHICS SOLUTIONS
- 7. SECRETS TO MAINTAINING THE GOLDEN RATIO WHEN CONVERTING DIMENSIONS
- 7.1. Avoid image stretching.
- 7.2. The proportion of headroom
- 8. NOTES ON PREPARING FILES FOR PRINTING AFTER EDITING
- 8.1. CMYK and RGB Color Systems
- 8.2. Arrange the photos on the printing paper.
- 9. CONCLUSION
Detailed instructions on how to edit a 4x6 photo to a 3x4 size using Photoshop and online tools. Secrets to cropping ID photos to the correct aspect ratio while maintaining extremely high resolution for printing.
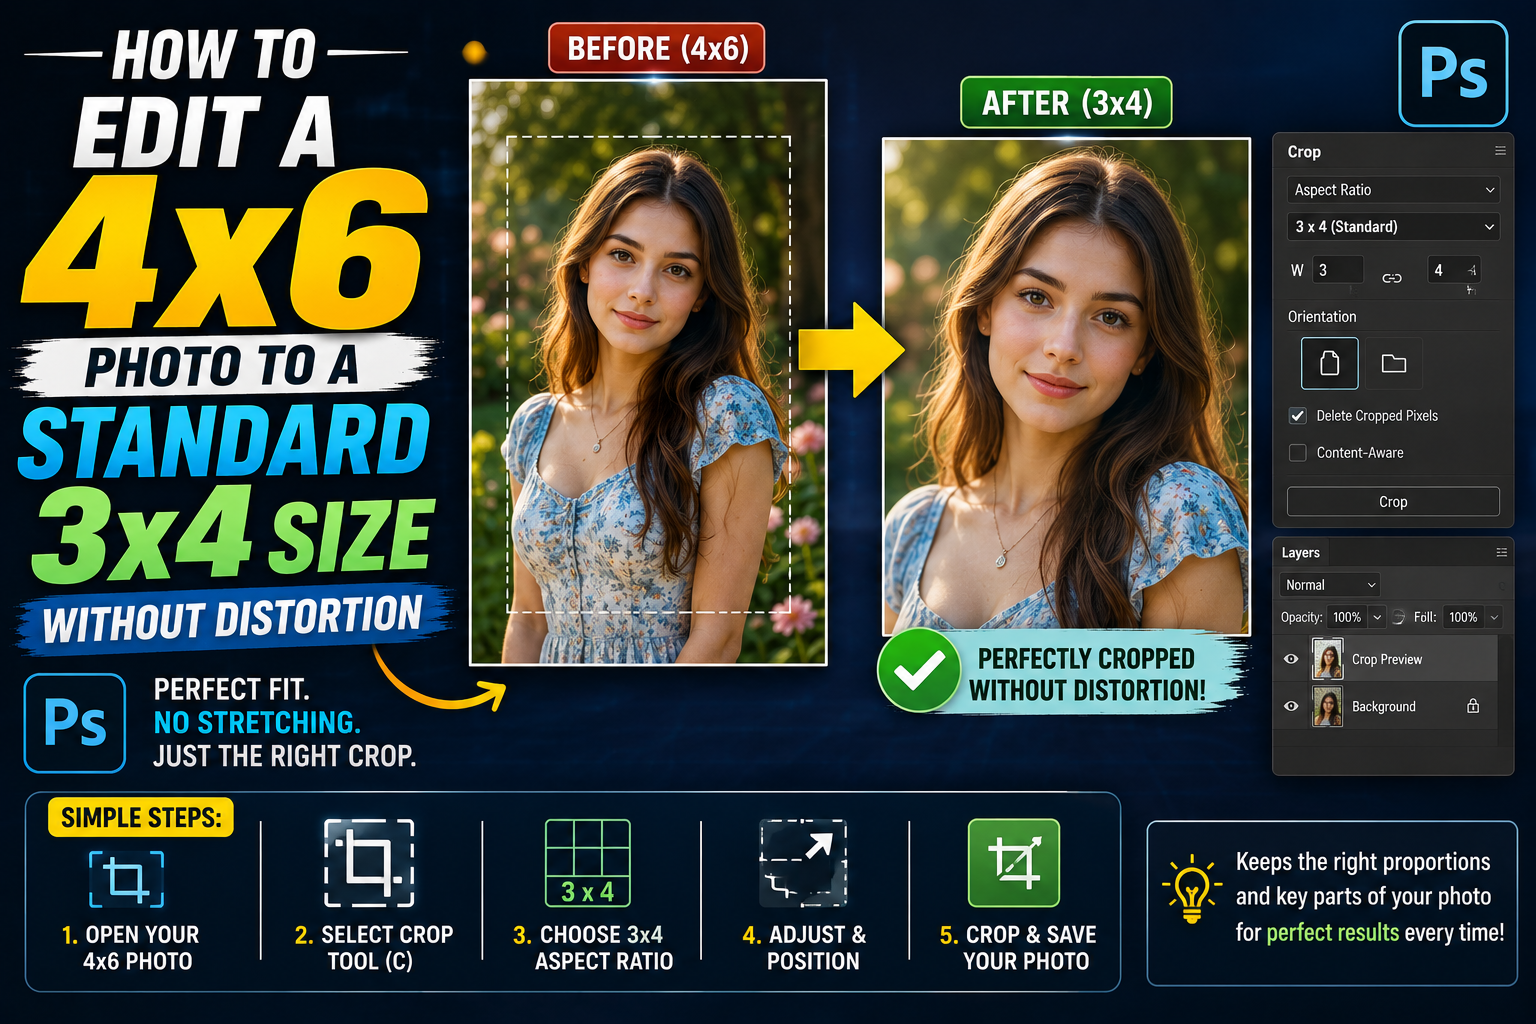
1. WHY DOES ADJUSTING THE SIZE OF ID PHOTOS OFTEN RESULT IN INCORRECT for IDENTITY CARDS?
Many people mistakenly believe that simply reducing the overall size will transform a 4x6 photo into a 3x4. In reality, these are two completely different aspect ratios: 2:3 and 3:4. Attempting to squeeze a long, vertical rectangular frame into a frame with a significantly wider width often results in faces being stretched horizontally or details becoming blurred. Properly resizing a 4x6 photo to a 3x4 requires a good understanding of composition and pixel density to ensure that the printed image retains the truest possible representation of the subject.
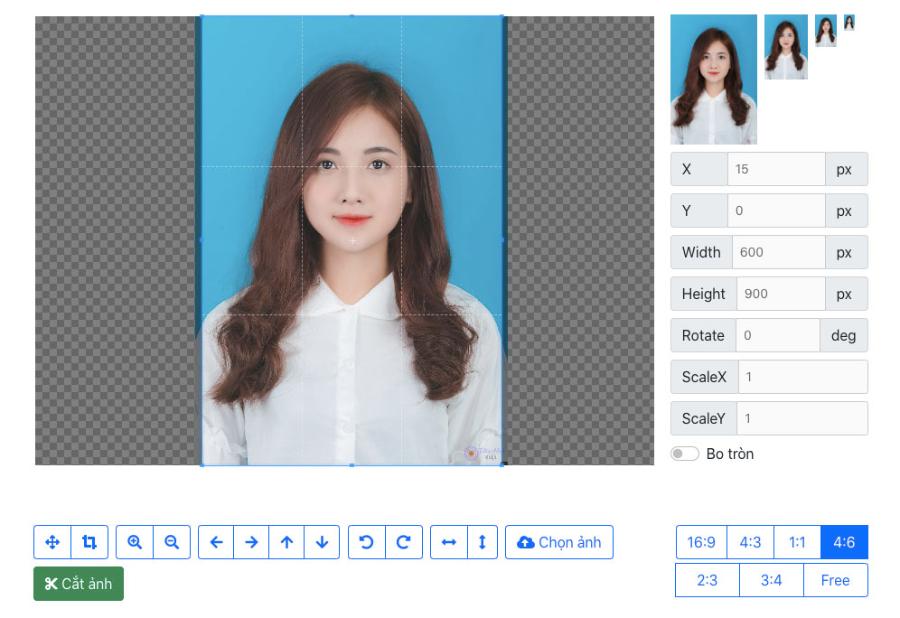
2. UNDERSTANDING THE RATIO WHEN EDITING A 4X6 PHOTO TO A 3X4
Before you begin, you need to understand the nature of these two dimensions to avoid visual errors.
2.1. Differences in Aspect Ratio
4x6 and 3x4 photos do not have the same aspect ratio. A 4x6 photo is equivalent to a 2:3 ratio, while a 3x4 photo is equivalent to a 3:4 ratio. Therefore, you cannot simply "shrink" the photo, as this will cause the face to appear unnaturally elongated or flattened.
2.2. Conversion of standard printing pixel units
To achieve the sharpest print quality (300 DPI), you need to remember the corresponding pixel specifications. A 4x6 photo typically measures around 472 x 709 pixels, while a 3x4 photo needs to be 354 x 472 pixels. Maintaining the correct pixel density is key to preventing the image from becoming blurry after cropping.
2.3. Units of measurement and aspect ratio
A 4x6 (40x60mm) photo is commonly used for passports or international visas. Meanwhile, a 3x4 (30x40mm) photo is the gold standard for driver's licenses, student IDs, and job applications in Vietnam. This difference in aspect ratio means you'll have to crop out a portion of the original photo (usually the shoulders or the upper background) instead of trying to resize the entire image.
3. HOW TO PROFESSIONALLY EDIT A 4X6 PHOTO TO A 3X4 PHOTO USING PHOTOSHOP
Photoshop is the most powerful tool for performing this task while ensuring the highest aesthetic quality for portraits.
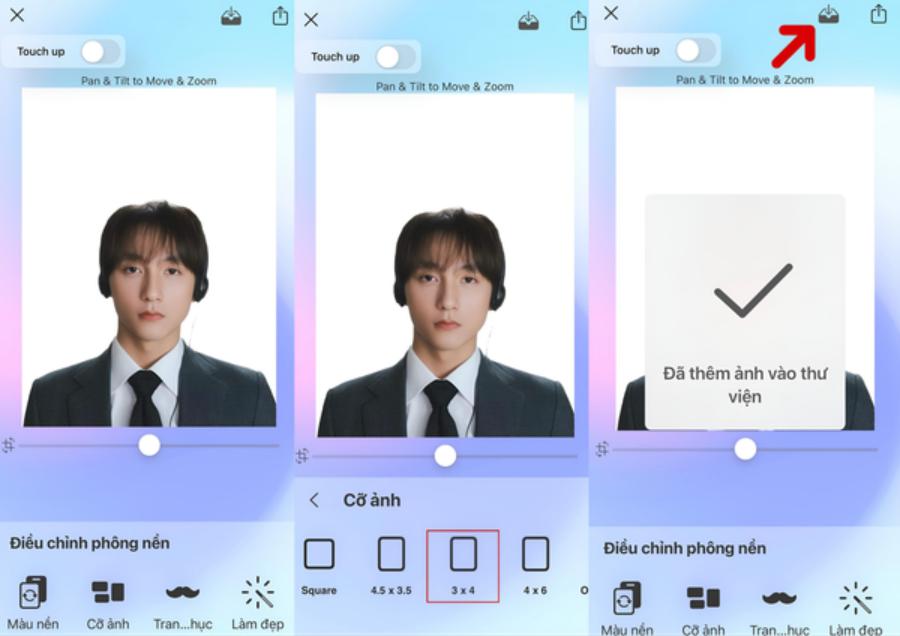
3.1. Using the Crop Tool (Keyboard shortcut C)
This is the most accurate method for reshaping the image frame. After opening the 4x6 image in Photoshop, select the Crop Tool from the toolbar. In the parameter box above, directly enter "3 cm" in the width field and "4 cm" in the height field.
3.2. Aligning facial features
When the 3x4 frame appears, you can move the photo or zoom in/out so that the face is centered. The golden rule for ID photos is that the top of the head should not touch the top edge, and the shoulders should be symmetrical. Once you are satisfied, press Enter to complete cropping the photo.
3.3. Use the Content-Aware Fill feature to compensate for excess space.
In some specific cases, when the original 4x6 photo is taken too close together or has a very narrow vertical frame, cropping it to a 3x4 ratio (which has a wider horizontal aspect ratio) can result in the shoulders being cut off or creating meaningless empty spaces on either side. To solve this problem, you shouldn't stretch the image drastically. Instead, use the Content-Aware Fill feature . Simply expand the canvas to the sides to the required 3x4 size, then use the selection tool to create a selection around the empty areas and let Photoshop automatically calculate and fill in the background.
3.4. Optimizing sharpness after resizing
A crucial step that professional designers often take after resampling a 4x6 photo to a 3x4 size is restoring sharpness. Because the cropping and pixel resampling process can slightly blur the details of the eyes, lips, and hairline, you should apply the Smart Sharpen or Unsharp Mask filter . Adjust the Amount to around 50-80% and the Radius to a low level (0.5 to 1.0) to highlight details without creating graininess or artificial white borders. Paying attention to sharpness at this final stage ensures that when printed at a smaller size, the ID photo retains its clarity and sharpness, making facial recognition in legal documents easier and more accurate.
4. LOSS-FREE RESIZE TECHNIQUES IN PHOTOSHOP
If you don't want to crop any parts but only want to change the overall size, the Image Size process will be applied.
4.1. Adjusting parameters in Image Size
Access the Image menu > Image Size (keyboard shortcut Ctrl+Alt+I). You need to uncheck the Constrain Proportions icon if you want to force the image to the desired size, but be careful as this can easily distort the image. A better way is to reduce the width to 3cm and then use the Crop tool to handle the excess height.
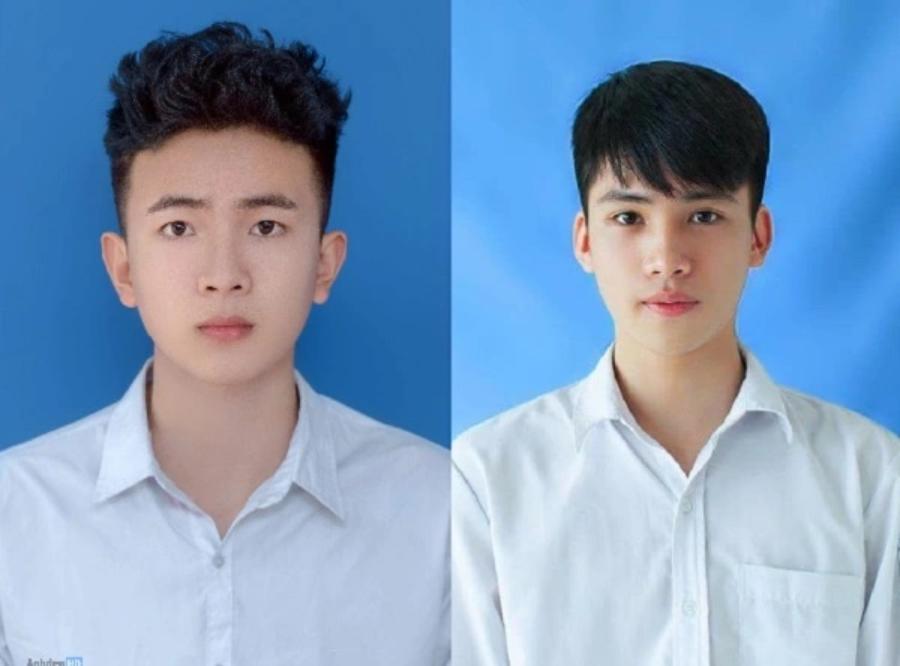
4.2. Using Resampling Mode
When reducing the image size, select the Bicubic Sharper (reduction) mode . This algorithm helps maintain sharpness for fine details such as strands of hair or eyes, which are crucial elements of a high-quality ID photo.
5. ONLINE TOOLS TO SUPPORT RAPID CONVERSION
For those who are not graphic designers, websites that support automation are a great lifesaver.
5.1. Advantages of online image processing
Online tools allow you to edit 4x6 photos into 3x4 photos with just a few clicks, without needing to install heavy software. Most of these platforms have built-in AI for facial recognition and automatically suggest the optimal cropping frame for the user.
5.2. Notes on security and resolution
When using free services, you need to check if the website reduces the resolution of the images. Always prioritize websites that allow downloading JPG or PNG in the highest quality to ensure that the printed images are not blurry.
6. VISIT APPVIP.AI TO DISCOVER SMART GRAPHICS SOLUTIONS
In today's technologically advanced era, optimizing image workflows is crucial. The website appvip.ai provides a diverse ecosystem of useful tools and resources for those who love design and photo editing. Here, you can find advanced solutions that simplify management and post-processing. Accessing appvip.ai not only keeps you updated on the latest graphic design trends but also offers helpful tips for easily and effectively processing ID photos and portraits to meet international standards.
7. SECRETS TO MAINTAINING THE GOLDEN RATIO WHEN CONVERTING DIMENSIONS
The biggest mistake when editing a 4x6 photo to a 3x4 is altering the facial structure of the subject.
7.1. Avoid image stretching.
Never use the Free Transform command to stretch the edges of a 4x6 image to fit perfectly into a 3x4 frame. This will make your client or yourself look unnaturally thinner or fatter. Always hold down the Shift key (in older software versions) to keep the aspect ratio locked.
7.2. The proportion of headroom
In a 3x4 passport photo, the distance from the top of the head to the top edge of the photo should be approximately 1/10 of the total height of the photo. When cropping from a 4x6 file, make sure to leave enough space so the photo looks spacious and meets the standards of relevant authorities.
8. NOTES ON PREPARING FILES FOR PRINTING AFTER EDITING
Once you have obtained the desired 3x4 size, the final step is to prepare the file for optimal printing efficiency.
8.1. CMYK and RGB Color Systems
If you're only using photos for online registration, stick with the RGB color system for vibrant colors on your screen. However, if your intention is to print them, consider switching to the CMYK color system (depending on your printer's requirements) to avoid color discrepancies between your screen and reality.
8.2. Arrange the photos on the printing paper.
A simple trick to save on printing costs is to stack multiple 3x4 photos onto a single 10x15cm sheet of paper (the traditional photo size). With the right photo editing technique to convert a 4x6 photo to a 3x4, you can fit approximately 8 3x4 photos on a single sheet of photo paper while still ensuring enough space to cut each one individually.
9. CONCLUSION
Converting a 4x6 photo to a 3x4 is a simple task, but it requires meticulous attention to detail and an understanding of aspect ratios to ensure a professional-looking result. Mastering tools from Photoshop to online solutions will give you more control over your personal photo editing. Always remember that the quality of a passport photo lies in the accuracy of its lines and the sharpness of its pixels. Hopefully, this article has provided you with enough knowledge to perform this task perfectly.





















VIP Products








Best Selling Products
Plugin Retouch4me
69 USD
Genuine Cheap Canva Pro
39 USD
Upgrade Genuine Office 365
49 USD
Adobe Photoshop Copyright - Full App
120 USD
Upgrade genuine Capture One account
120 USD
Capcut Pro 1 Year
39 USD
Genuine Adobe Illustrator account
99 USD
Windows 10 & 11 Pro Key
36 USD
Copyright Adobe Lightroom Account
59 USD
Adobe Premiere Pro Account
99 USD
ChatGPT Plus Account (GPT-4)
16 USD
Upgrade Duolingo Super
29 USD
Freepik Premium Account
59 USD
MidJourney Account
29 USD
Autodesk All App Account Copyright
120 USD