Best Selling Products

Adobe Premiere Pro Account
99 USD

Genuine Cheap Canva Pro
39 USD

Upgrade Duolingo Super
29 USD

Autodesk All App Account Copyright
120 USD

Upgrade Genuine Office 365
49 USD

Windows 10 & 11 Pro Key
36 USD

Upgrade genuine Capture One account
120 USD

Copyright Adobe Lightroom Account
59 USD

Genuine Adobe Illustrator account
99 USD

Plugin Retouch4me
69 USD

ChatGPT Plus Account (GPT-4)
16 USD

MidJourney Account
29 USD

Adobe Photoshop Copyright - Full App
120 USD

Capcut Pro 1 Year
39 USD

Freepik Premium Account
59 USD
How to Increase Image Sharpness in Photoshop for Clearer, More Professional Photos
Nội dung
- 1. Why is sharpening images in Photoshop necessary?
- 1.1 Improve image quality
- 1.2 Highlight the subject
- 1.3 Prepare for printing
- 1.4 Fix photography mistakes
- 2. Basic principles when sharpening images in Photoshop
- 2.1 Avoid overusing sharpening
- 2.2 Always work on separate layers
- 2.3 Sharpen at the final stage of editing
- 3. Effective ways to sharpen images in Photoshop
- 3.1 Method 1: Use Sharpen Filters
- 3.2 Method 2: Use High Pass Filter
- 3.3 Method 3: Use Camera Raw Filter (Adobe Camera Raw)
- 4. Tips and notes when sharpening images
- 5. Conclusion
During photography or design work, we do not always have ideal lighting conditions, high-end cameras, or perfect settings, so images turning out soft, slightly blurry, or lacking emphasis is very common.
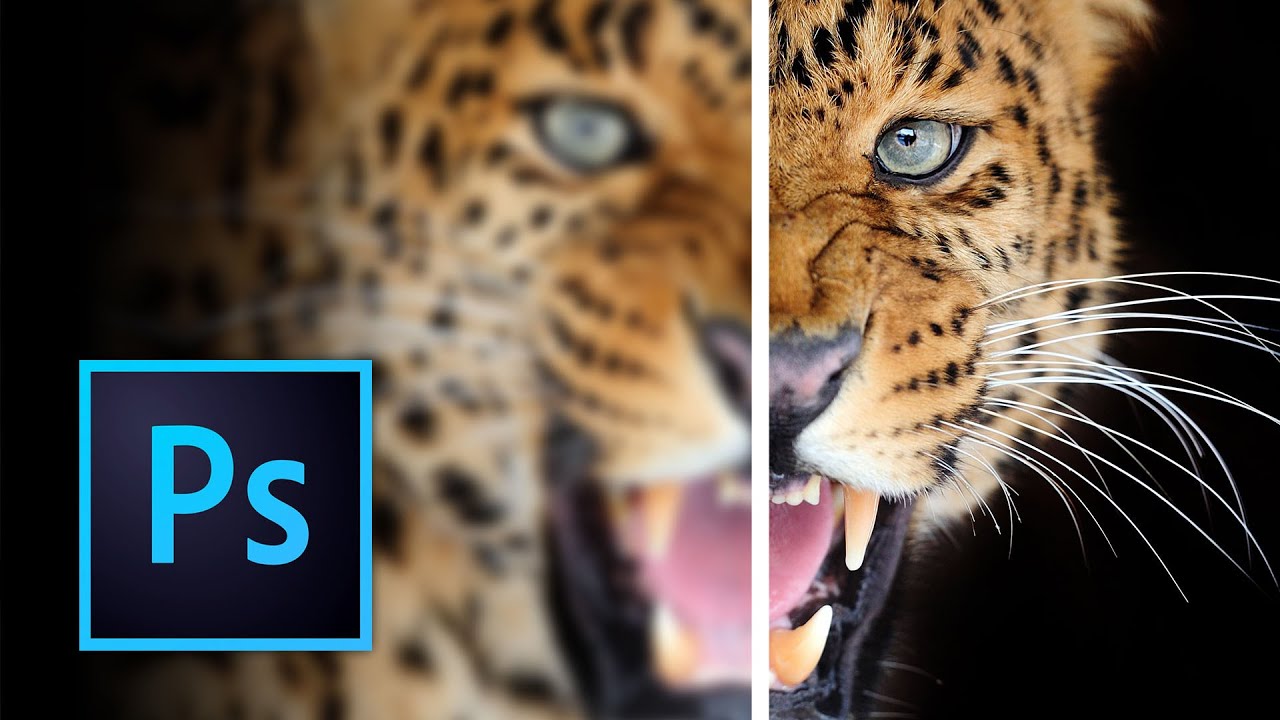
1. Why is sharpening images in Photoshop necessary?
1.1 Improve image quality
Improvng image quality is the most important reason why many people look for ways to sharpen images in Photoshop. In reality, many photos become soft, slightly blurry, or lacking detail due to less-than-ideal shooting conditions such as low light, shaky hands, or inaccurate focus. Sharpening helps edges appear clearer, restores detail, and makes the image feel more vivid and visually appealing.
Not only does sharpening make photos clearer, but it also significantly enhances their overall aesthetic value. Especially for portraits, product photography, or media content, a sharp image creates a more professional, polished, and trustworthy impression. Photoshop’s powerful tools allow you to precisely control sharpness levels, avoiding overly harsh or broken details.
1.2 Highlight the subject
Sharpening images in Photoshop is an effective way to make the main subject stand out. When a photo is blurry, the viewer’s attention can easily become scattered and fail to focus on the most important area. In contrast, when details on the subject are enhanced, sharper outlines naturally attract the viewer’s eyes.
Clarifying the subject not only makes the image more dynamic but also helps communicate its message more clearly. For advertising photos, product shots, or social media content, sharpness plays a huge role in making a strong first impression and retaining attention. Photoshop allows selective sharpening, focusing on the subject while keeping the background soft for depth and professionalism.
1.3 Prepare for printing
When using images for printing purposes, sharpness is an essential factor. A photo that looks fine on-screen may appear blurry, flat, or lose detail when printed if it lacks sufficient sharpness. Therefore, sharpening images in Photoshop is a critical preparation step to ensure print quality remains excellent.
Photoshop lets you control sharpness based on different print sizes and purposes, from posters and brochures to framed displays or personal photo albums. When processed correctly, printed images retain clear details, crisp edges, and balanced colors, enhancing both visual quality and professionalism.
1.4 Fix photography mistakes
During photography, mistakes such as camera shake, missed focus, or poor lighting are hard to avoid, especially in fast-paced or low-light environments. These issues often leave photos blurry, lacking detail, and below expectations. In such cases, sharpening images in Photoshop is a useful solution to “save” otherwise unusable shots.
By clarifying important details and enhancing sharpness properly, Photoshop can recover some of the original image’s weaknesses while improving overall quality. Although it cannot completely replace a perfectly captured photo, correct sharpening techniques can make images clearer, easier to view, and more professional for storage, sharing, or work purposes.
.jpg)
2. Basic principles when sharpening images in Photoshop
When editing images in Photoshop, sharpening is an important step that makes visuals clearer, sharper, and more professional. However, if done incorrectly, images can become over-sharpened, noisy, or lose their natural appearance. Understanding the basic principles of sharpening will help you control the effect better, optimize image quality, and avoid common editing mistakes.
2.1 Avoid overusing sharpening
Sharpening in Photoshop should always be controlled and moderate. Pushing sharpness too high can make images look harsh, reveal noise, and create stiff, unnatural edges. Instead of aiming for extreme sharpness, focus on balance so the image remains clear while still soft and visually pleasant.
Things to remember when sharpening:
-
Increase sharpness only enough to improve detail
-
Avoid revealing noise, especially in skin tones and backgrounds
-
Observe the whole image rather than zooming in too closely
2.2 Always work on separate layers
An important principle when sharpening images in Photoshop is to always edit on a separate layer. This preserves the original image and makes it easy to adjust or undo changes without affecting the entire file. Working with separate layers also makes the editing process more flexible and professional.
Benefits of separate layers:
-
Easily adjust sharpness intensity afterward
-
Turn effects on/off for before-and-after comparison
-
Prevent damage to the original image during repeated edits
2.3 Sharpen at the final stage of editing
Sharpening should always be done at the end of the editing workflow. After adjusting brightness, colors, contrast, or cropping, sharpening helps finalize the image and make it look polished. If done too early, later edits may reduce its effect or make the image appear too harsh.
Why sharpening should come last:
-
Preserves natural balance and realism
-
Avoids unwanted noise or broken details
-
Ensures sharpness matches the final output purpose, whether web or print
-
.jpg)
3. Effective ways to sharpen images in Photoshop
To create clear, sharp, and visually deep images, mastering sharpening techniques in Photoshop is essential. Even slight camera shake, poor lighting, or inaccurate focus can make photos appear soft and lacking detail. From beginner-friendly methods to advanced professional techniques, here are step-by-step ways to sharpen images effectively.
3.1 Method 1: Use Sharpen Filters
Sharpen Filters are among the most common and easiest tools for sharpening in Photoshop. They enhance edges, improve details, and boost overall sharpness without sacrificing naturalness if applied correctly.
Step 1: Duplicate the image layer
Open your image and press Ctrl + J to duplicate the original layer. This preserves the original version for comparison or undoing if needed.
.jpg)
Step 2: Access Sharpen Filters
Go to Filter > Sharpen, where Photoshop offers several sharpening options:
-
Sharpen: Slightly increases sharpness for mildly soft images
-
Sharpen More: Stronger sharpening for blurrier images
-
Unsharp Mask: Popular tool with adjustable settings:
-
Amount: Sharpness intensity
-
Radius: Range of sharpening effect
-
Threshold: Limits which areas are sharpened
-
-
Smart Sharpen: Advanced tool for better sharpness control, noise reduction, and highlight/shadow handling
-
.jpg)
Step 3: Adjust settings appropriately
Fine-tune settings until the image appears sharper without harshness, broken details, or visible noise. Observe the whole image instead of zooming too closely. Click OK when satisfied.
.jpg)
3.2 Method 2: Use High Pass Filter
High Pass Filter is a favorite sharpening technique among designers and photographers because it sharpens details without significantly affecting colors or brightness. It creates refined sharpness while minimizing noise and distortion.
Step 1: Duplicate layer and apply High Pass
Press Ctrl + J, then go to Filter > Other > High Pass.
.jpg)
Step 2: Adjust Radius
A Radius of 1–3 pixels works for most images. Increase until edges become visible while the image remains lightly gray. Avoid excessive values to prevent unnatural sharpness.
.jpg)
Step 3: Select blending mode and adjust Opacity
Change the duplicated layer’s blending mode to Overlay. You can also try Soft Light for subtler sharpening or Hard Light for stronger effects. Reduce Opacity if needed for a more natural result.
This method is especially suitable for portraits, product photography, and landscapes.
.jpg)
3.3 Method 3: Use Camera Raw Filter (Adobe Camera Raw)
If Adobe Camera Raw is installed, this is one of the fastest and most professional sharpening tools available in Photoshop. It not only sharpens details but also controls noise, contrast, and image structure effectively.
Step 1: Open Camera Raw Filter
Select your image layer, then go to Filter > Camera Raw Filter.
(1).jpg)
Step 2: Adjust sharpness in the Detail tab
In the Detail tab, adjust:
-
Sharpening: Increase overall sharpness
-
Radius: Controls edge thickness
-
Detail: Clarifies fine textures
-
Masking: Limits sharpening to key areas while protecting skin/backgrounds
Adjust gradually while monitoring the overall image. Click OK when satisfied.
Camera Raw Filter is ideal for portraits, landscapes, and print-ready design work.
.jpg)
4. Tips and notes when sharpening images
When sharpening images in Photoshop, choosing the right tool is only part of the process. Keep these tips in mind for the best natural-looking results:
-
Always duplicate the original layer for comparison and easy recovery
-
Zoom to 100% or higher to inspect oversharpening or noise
-
Reduce noise before sharpening, especially in low-light images
-
Use Fade (Ctrl/Cmd + Shift + F) after sharpening to soften effects
-
Prioritize overall harmony rather than excessive sharpness
5. Conclusion
Sharpening images in Photoshop is not simply about dragging a slider to make photos look sharper—it is a process that requires understanding and precision to balance detail, clarity, and overall quality. When used correctly, sharpening can improve slightly blurry photos, enhance weak focal points, and avoid common issues such as noise or detail loss. Whether you are new to Photoshop or already experienced, regular practice and flexible use of sharpening methods will gradually elevate your editing skills. Hopefully, through this article, you now have a clearer understanding of the importance of sharpening and feel more confident using Photoshop to improve your image quality. Don’t forget to follow Appvip for more practical editing tips and techniques to help you stay creative and produce sharp, professional-standard visual works.





















VIP Products








Best Selling Products
Adobe Premiere Pro Account
99 USD
Genuine Cheap Canva Pro
39 USD
Upgrade Duolingo Super
29 USD
Autodesk All App Account Copyright
120 USD
Upgrade Genuine Office 365
49 USD
Windows 10 & 11 Pro Key
36 USD
Upgrade genuine Capture One account
120 USD
Copyright Adobe Lightroom Account
59 USD
Genuine Adobe Illustrator account
99 USD
Plugin Retouch4me
69 USD
ChatGPT Plus Account (GPT-4)
16 USD
MidJourney Account
29 USD
Adobe Photoshop Copyright - Full App
120 USD
Capcut Pro 1 Year
39 USD
Freepik Premium Account
59 USD