Best Selling Products

Upgrade Duolingo Super
29 USD

Copyright Adobe Lightroom Account
59 USD

Adobe Photoshop Copyright - Full App
120 USD

Genuine Adobe Illustrator account
99 USD

Plugin Retouch4me
69 USD

MidJourney Account
29 USD

Capcut Pro 1 Year
39 USD

Adobe Premiere Pro Account
99 USD

Genuine Cheap Canva Pro
39 USD

Windows 10 & 11 Pro Key
36 USD

Autodesk All App Account Copyright
120 USD

ChatGPT Plus Account (GPT-4)
16 USD

Upgrade genuine Capture One account
120 USD

Freepik Premium Account
59 USD

Upgrade Genuine Office 365
49 USD
Quick Guide to Creating Photo Borders in Photoshop, Fast and Beautiful Like a Professional Designer
Nội dung
- 1. What Is Creating Photo Borders in Photoshop?
- 2. Benefits of Creating Photo Borders in Photoshop
- 3.1 Basic Method for Creating Photo Borders in Photoshop
- 3.2 Creating Photo Borders in Photoshop with Effects
- 3.3 Creating Borders in Photoshop Using the Rectangle Tool
- 4. Common Mistakes When Creating Photo Borders
- 5. Practical Applications of Creating Photo Borders in Photoshop
- 6. Conclusion
Whether you are just starting to get familiar with Photoshop or have been using this tool for a long time, mastering different ways to add borders and create photo frames will help you save a lot of time while still ensuring strong visual impact.
1. What Is Creating Photo Borders in Photoshop?
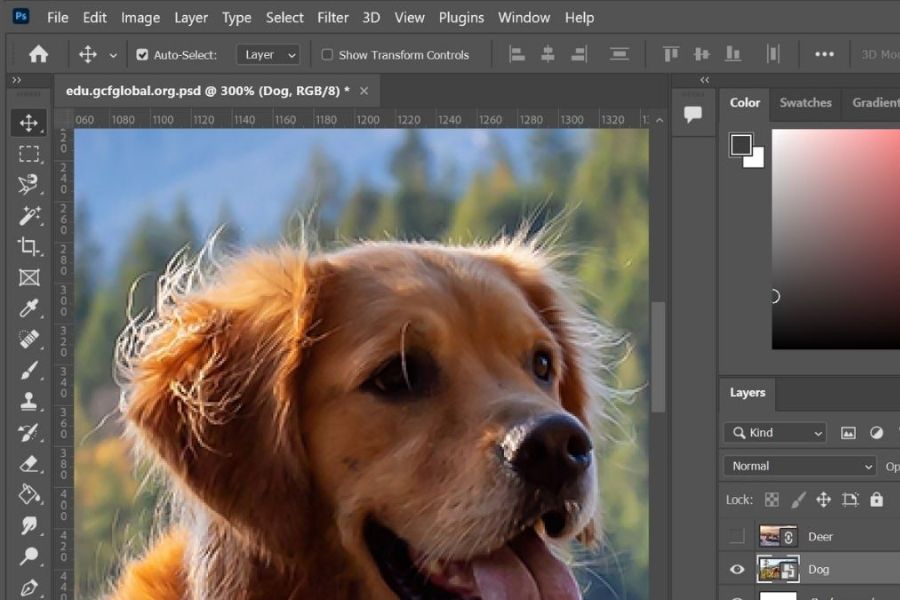
Creating photo borders in Photoshop is the technique of adding an outline around an image to highlight the subject and make the photo appear cleaner and more visually focused. This border can be a simple thin line, a harmonious colored frame, or even a creative artistic effect. Although technically not too complex, borders play an important role in guiding the viewer’s eye and giving the image a complete overall appearance.
In design and photo editing, borders are not only decorative but also help separate the image from its surrounding background, especially when used on websites, social media, or advertising materials. A photo with a clear border tends to attract more attention and avoids looking “lost” among surrounding content. Depending on the purpose, editors may choose a subtle thin border for elegance or a bold thick border to increase attraction and personality.
With Photoshop, creating photo borders becomes much more flexible and controllable. Users can freely adjust color, thickness, shape, and effects to match their desired design style. This flexibility makes border creation a familiar part of the workflow for designers, photographers, and anyone who wants their images to look more professional, polished, and impressive at first glance.
2. Benefits of Creating Photo Borders in Photoshop
Creating photo borders in Photoshop may seem like a small action, but it brings great value during image editing and design. A well-crafted border not only makes the image look cleaner and more structured but also creates a polished, professional impression from the very first glance. Especially in today’s image-heavy social media and digital platforms, adding borders correctly helps your work attract attention and leave a distinctive mark.
Outstanding Benefits of Creating Photo Borders in Photoshop:
Increase Viewer Focus: Borders act like a “guide frame,” directing the viewer’s attention straight to the main subject and reducing distractions from surrounding backgrounds or details.
Highlight Design Content: Whether it is a portrait, product photo, or advertising poster, borders make the subject clearer, more prominent, and easier to remember.
Enhance Overall Aesthetics: A harmonious border in terms of color and thickness makes the composition more balanced and gives the design a professional, refined look.
Flexible for Many Purposes: From social media posts and banners to presentation slides and marketing print materials, suitable borders help images stand out and communicate messages more effectively.
.jpg)
3. How to Create Photo Borders in Photoshop
3.1 Basic Method for Creating Photo Borders in Photoshop
If you are new to Photoshop and looking for a simple, beginner-friendly way to create borders with clear visual results, this basic method is ideal. With just a few familiar steps, you can create a neat border that makes your image look more professional without needing advanced techniques.
3.1.1 Select the Image to Add Borders
First, open Photoshop and import the image you want to edit. You can drag and drop the image directly into the software or use File > Open to load it from your computer. Once displayed, take a moment to examine the composition and imagine what style of border fits best: a subtle thin border or a bold thick frame.
Then press Ctrl + J to duplicate the image layer. This simple step is very important because it preserves the original image in case you need to restart edits later. Working on a duplicated layer makes editing more flexible and reduces mistakes.
.jpg)
3.1.2 Create a Selection Around the Image
When ready, create a selection around the entire image. Go to Select > All, and Photoshop will automatically select the whole working canvas. This is the foundation for defining exactly where the border will appear, ensuring it wraps evenly around the image.
Next, go to Select > Modify > Border to set border thickness. Enter the number of pixels based on your needs, such as 5px for a subtle border or 10–15px for a more obvious, striking frame. Choosing the right thickness directly affects the photo’s overall feel, so avoid making it too thin or excessively thick.
.jpg)
3.1.3 Fill Color for the Border
After creating the border selection, the next step is adding color. Create a new layer by pressing Ctrl + Shift + N. This separates the border from the original image, making future edits much easier.
Finally, go to Edit > Fill, choose your preferred border color, and click OK. You can use white for a minimalist feel, black for strong contrast, or vibrant colors for bold personality. After this step, your image will immediately appear cleaner and more professional.
.jpg)
3.2 Creating Photo Borders in Photoshop with Effects
If you want your photo borders to go beyond simplicity and have depth, dimension, or eye-catching lighting effects, using Layer Style in Photoshop is an excellent choice. This method is fast, editable, and highly flexible, often used by designers for covers, banners, posters, and social media visuals.
3.2.1 Select the Main Image Layer
First, click the layer containing the image you want to border. If you see a lock icon next to it, double-click to unlock it so Photoshop allows editing and effects application. This prevents issues where effects fail to display properly.
Once ready, double-click directly on the image layer or go to Layer > Layer Style > Stroke. The Layer Style window will appear, allowing intuitive customization of border properties and effects.
.jpg)
3.2.2 Customize Border Effects
In the Stroke section, adjust thickness under Size, increasing or decreasing it to match your image composition. For Position, choose Inside to keep the border neatly within the image and avoid corner clipping. Then choose a border color under Color, whether solid, contrasting, or harmonious with the overall design.
The great advantage here is combining additional effects for more dynamic borders. For example, enable Drop Shadow for depth and separation from the background, or use Outer Glow for a soft glowing effect—perfect for creative, tech-style, or youthful designs. All settings remain adjustable until you achieve the desired balance.
.jpg)
3.2.3 Click OK to Finish
After adjusting thickness, color, and effects, simply click OK to apply them. Instantly, the border effect appears, making the image look more dimensional and professional.
The biggest advantage of this method is flexibility: you can revisit and edit the Stroke effect anytime by double-clicking it in the Layers panel. This makes creating multiple design variations extremely convenient.
.jpg)
3.3 Creating Borders in Photoshop Using the Rectangle Tool
The Rectangle Tool is one of the most commonly used border-creation methods among designers and media creators, especially when a clean, precise frame is needed. It works perfectly for banners, posters, advertisements, and social media content where borders define layout structure and highlight key visuals.
3.3.1 Draw a Rectangle Around the Image
First, select the Rectangle Tool (U) from the toolbar. This vector-based tool ensures borders remain sharp regardless of resizing. Then drag to draw a rectangle around your image, either tightly aligned with the edges or slightly larger depending on your desired style.
While drawing, hold Shift to keep proportions balanced. Proper alignment from the start ensures a cleaner, more professional final composition.
.jpg)
3.3.2 Adjust Color and Border Settings
After drawing the rectangle, look at the options bar at the top. Set Fill = None so the inside remains transparent and does not cover your image. Then choose Stroke and set your desired border color, whether neutral for elegance or bold for stronger attraction.
You can also adjust Stroke Thickness to suit the layout. Thin borders feel modern and minimalist, while thicker ones create stronger visual impact. The Rectangle Tool allows easy experimentation with multiple styles.
(1).jpg)
3.3.3 Arrange Layers Properly
Finally, check the layer order in the Layers Panel. If you want the border outside the image, drag the rectangle layer below the photo layer. If you want the border overlaying the image slightly, place it above.
You should also use Align Tools to center the frame accurately. Once complete, you will have a clean, sharp, “designer-standard” border suitable for various Photoshop projects.
.jpg)
4. Common Mistakes When Creating Photo Borders
Adding borders in Photoshop may seem easy, but even small mistakes can make the final result look unprofessional. Recognizing and fixing these issues early saves time and ensures borders stay sharp and harmonious.
Blurred or Unsharp Borders: Usually happens when choosing Outside Stroke or working with low-resolution images.
Fix: Use Inside Stroke and work with higher-resolution images.
Borders Cutting Image Corners: Often caused by locked layers or inaccurate selections.
Fix: Unlock the layer first and carefully check the selection area.
Border Invisible Despite Being Created: Usually happens when border color matches the background or the border layer is hidden behind other layers.
Fix: Change to a contrasting color and move the border layer into the correct position.
5. Practical Applications of Creating Photo Borders in Photoshop
Creating borders is not just decorative—it plays a key role in improving communication effectiveness and visual professionalism across many fields.
Print Design: Posters, flyers, and brochures often use borders to emphasize main content and create visual focus.
Product Photos: Borders make products appear cleaner and more professional on websites and e-commerce platforms.
Personal Portfolios: Borders add neatness and show serious attention to detail when presenting projects or photography.
Social Media Content Design: Borders help visuals stand out on crowded newsfeeds, create style consistency, and attract viewers instantly.
6. Conclusion
Creating photo borders in Photoshop may be a small technique, but it plays a major role in completing an overall design. A suitable border not only clarifies image composition but also elevates emotional impact and aesthetic value. When you understand and flexibly apply border and frame creation methods in Photoshop, the design process becomes faster, smoother, and far more professional. Whether it is a simple border, a softly rounded frame, or a creatively styled design, everything becomes easy once you master the fundamentals. Hopefully, the tips shared in this article will help you feel more confident while editing images and inspire limitless creativity with Photoshop. Do not hesitate to experiment—sometimes just one small border is enough to make your work stand out and leave a strong impression on viewers.





















VIP Products








Best Selling Products
Upgrade Duolingo Super
29 USD
Copyright Adobe Lightroom Account
59 USD
Adobe Photoshop Copyright - Full App
120 USD
Genuine Adobe Illustrator account
99 USD
Plugin Retouch4me
69 USD
MidJourney Account
29 USD
Capcut Pro 1 Year
39 USD
Adobe Premiere Pro Account
99 USD
Genuine Cheap Canva Pro
39 USD
Windows 10 & 11 Pro Key
36 USD
Autodesk All App Account Copyright
120 USD
ChatGPT Plus Account (GPT-4)
16 USD
Upgrade genuine Capture One account
120 USD
Freepik Premium Account
59 USD
Upgrade Genuine Office 365
49 USD