Best Selling Products

Capcut Pro 1 Year
39 USD

MidJourney Account
29 USD

Genuine Cheap Canva Pro
39 USD

Adobe Photoshop Copyright - Full App
120 USD

Adobe Premiere Pro Account
99 USD

Autodesk All App Account Copyright
120 USD

Upgrade Duolingo Super
29 USD

Upgrade genuine Capture One account
120 USD

Genuine Adobe Illustrator account
99 USD

ChatGPT Plus Account (GPT-4)
16 USD

Freepik Premium Account
59 USD

Plugin Retouch4me
69 USD

Copyright Adobe Lightroom Account
59 USD

Windows 10 & 11 Pro Key
36 USD

Upgrade Genuine Office 365
49 USD
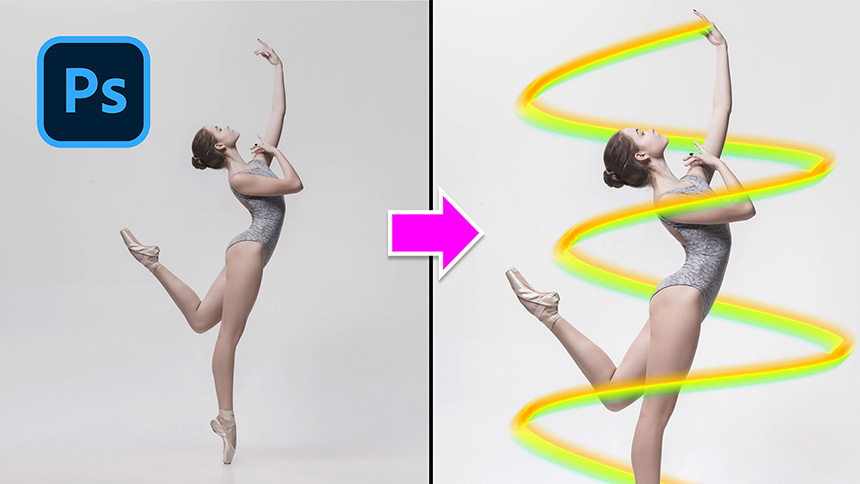
How to Quickly Create a Beautiful Wind Effect Background
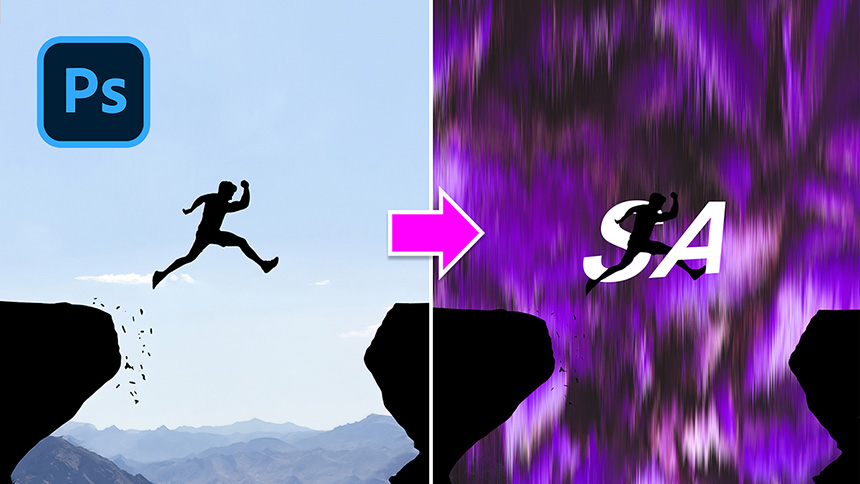
Hi guys, in this video, I’ll share with you the quick way to create a beautiful wind effect background. Stay tuned!
First, I have a stunning green leaves photo, we are going to add wind effect to it.
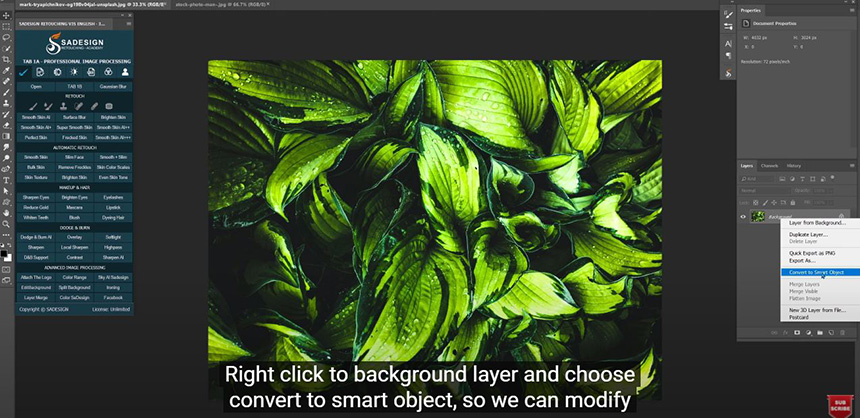
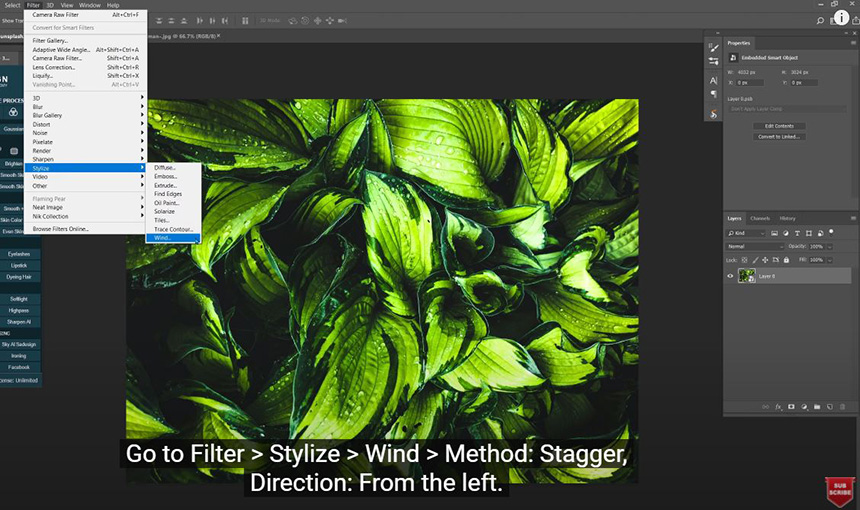
Right click to background layer and choose convert to smart object, so we can modify it non-destructively. Go to Filter > Stylize > Wind > Method: Stagger, Direction: From the left. OK
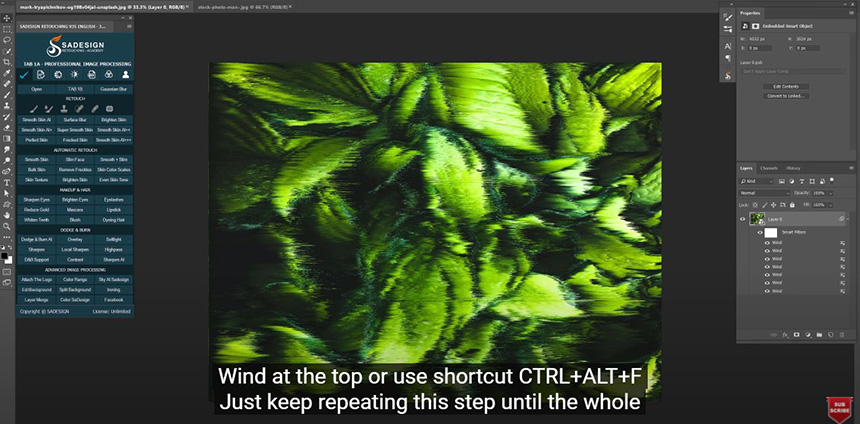
We will repeat this step to add more wind effect to it. Luckily, Photoshop now remember this step, so we just need to go to Filter and choose Wind at the top or use shortcut CTRL+ALT+F Just keep repeating this step until the whole image is completely blurred.
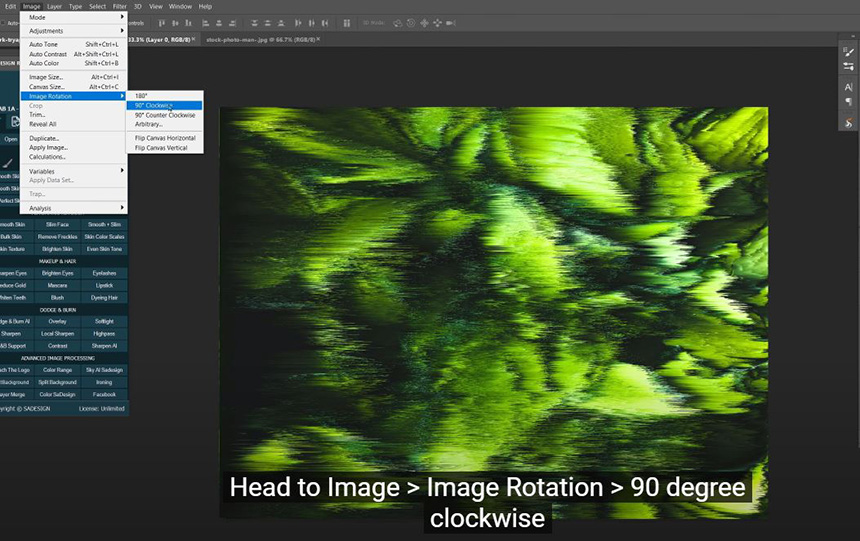
After that, right click to background layer and choose Rasterize layer. Head to Image > Image Rotation > 90 degree clockwise Change color of it to the one that you like, create a Hue/Saturation adjustment layer, move the slider in hue to change the color. I’ll make it more purple.
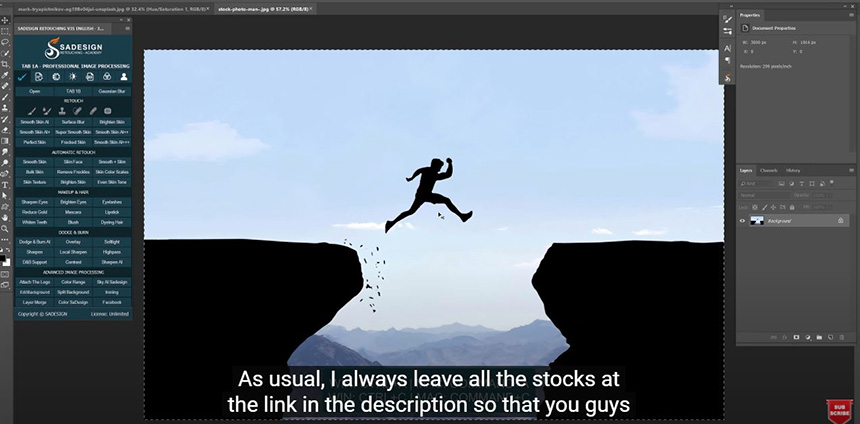
Next, we will take this stock to our project. As usual, I always leave all the stocks at the link in the description so that you guys can freely download and go through the whole tutorial with me step by step. CTRL or CMD + T to expand it until the man is in the middle of the document.
Now, we will remove background and keep the foreground which is the man and the mountains.
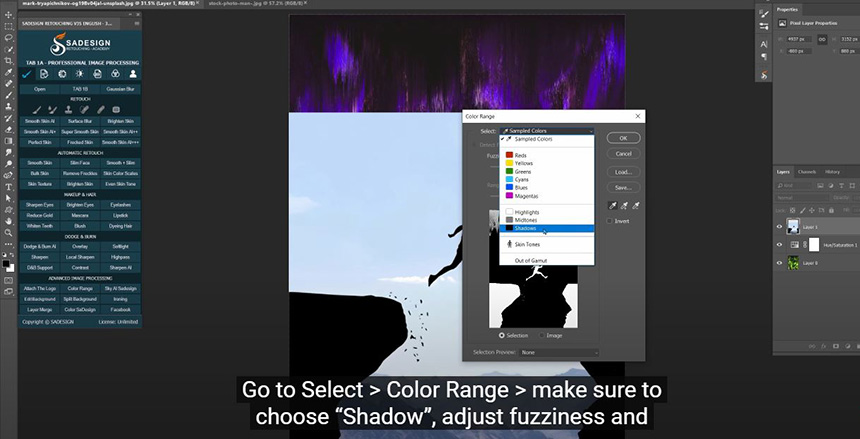
Since it is in black, we will use color range to take the selection. Go to Select > Color Range > make sure to choose “Shadow”, adjust fuzziness and range to the point that you can see the subject is all white except the background. OK
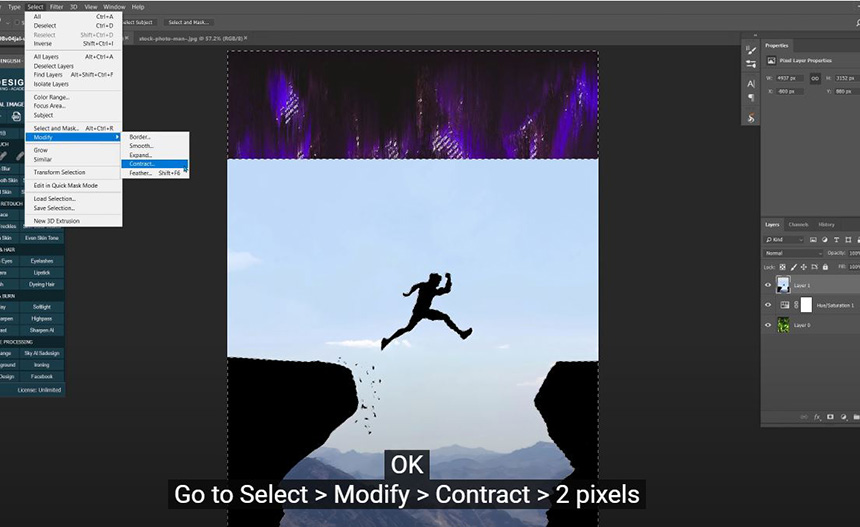
Go to Select > Modify > Contract > 2 pixels Click to layer mask icon to cut the selection to layer mask and see the result. There you go!
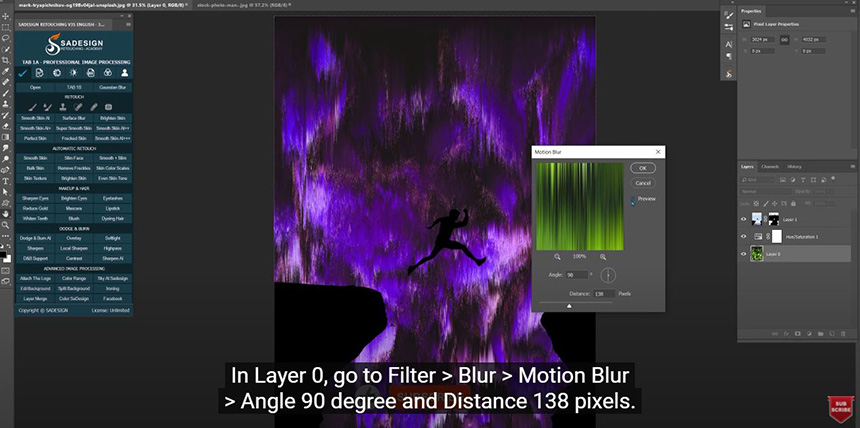
Let’s add motion blur to background. In Layer 0, go to Filter > Blur > Motion Blur > Angle 90 degree and Distance 138 pixels. OK
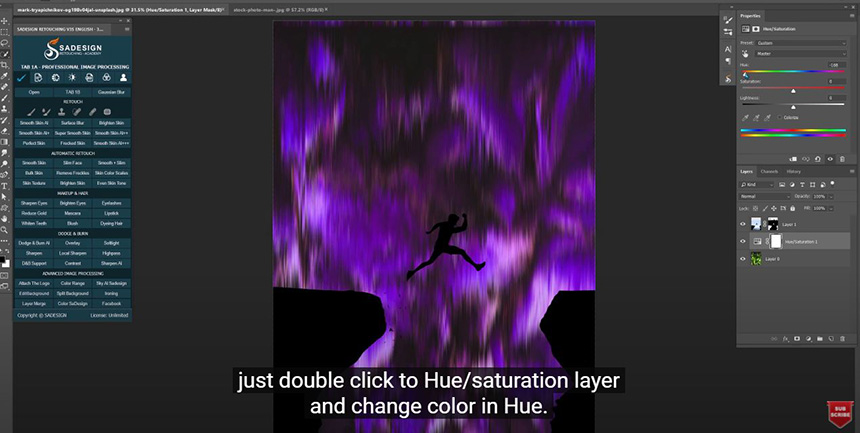
In case you want to change the color of background, just double click to Hue/saturation layer and change color in Hue.
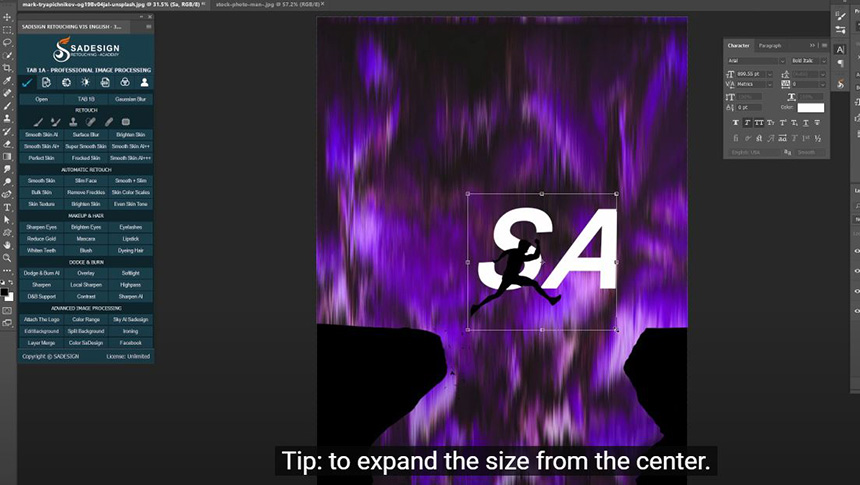
Main part is done, we are going to decorate it with text. Pick up text tool and type any text that you want. You can choose color of text in foreground color before typing or in Character window. Tip: to expand the size from the center. Hold SHIFT+ALT while dragging out.
If you want to make the subject go through the text, hold CTRL and click to the text to take the selection of it first, move to layer mask, use brush with black in foreground and paint to remove a part of his leg, just to make him behind the text. This way makes you feel more depth in the image. There you go!

That’s all for this tutorial, hope that you like this video, If you do, hit like and subscribe buttons. Thanks a lot!
Watch the latest video here:
REGISTER FOR FREE PHOTOSHOP LEARNING
============================
The most powerful Retouch tool processor
DOWNLOAD:
✅ SADESIGN PANEL ENGLISH: https://sadesign.ai/retouching/
✅ SADESIGN PANEL VIETNAM: https://www.retouching.vn/


VIP Products


Best Selling Products
Capcut Pro 1 Year
39 USD
MidJourney Account
29 USD
Genuine Cheap Canva Pro
39 USD
Adobe Photoshop Copyright - Full App
120 USD
Adobe Premiere Pro Account
99 USD
Autodesk All App Account Copyright
120 USD
Upgrade Duolingo Super
29 USD
Upgrade genuine Capture One account
120 USD
Genuine Adobe Illustrator account
99 USD
ChatGPT Plus Account (GPT-4)
16 USD
Freepik Premium Account
59 USD
Plugin Retouch4me
69 USD
Copyright Adobe Lightroom Account
59 USD
Windows 10 & 11 Pro Key
36 USD
Upgrade Genuine Office 365
49 USD