Best Selling Products
Turn photos into vintage nostalgic illustrations from posters
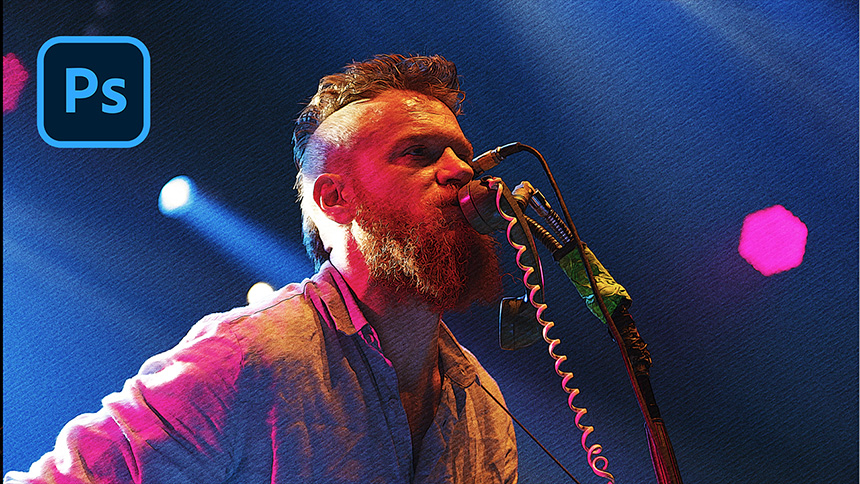
Hi there, let’s me show you how to turn photo into vintage, nostalgic illustrations poster.
I’ll put these stock in the link on the description, feel free to download it anytime.
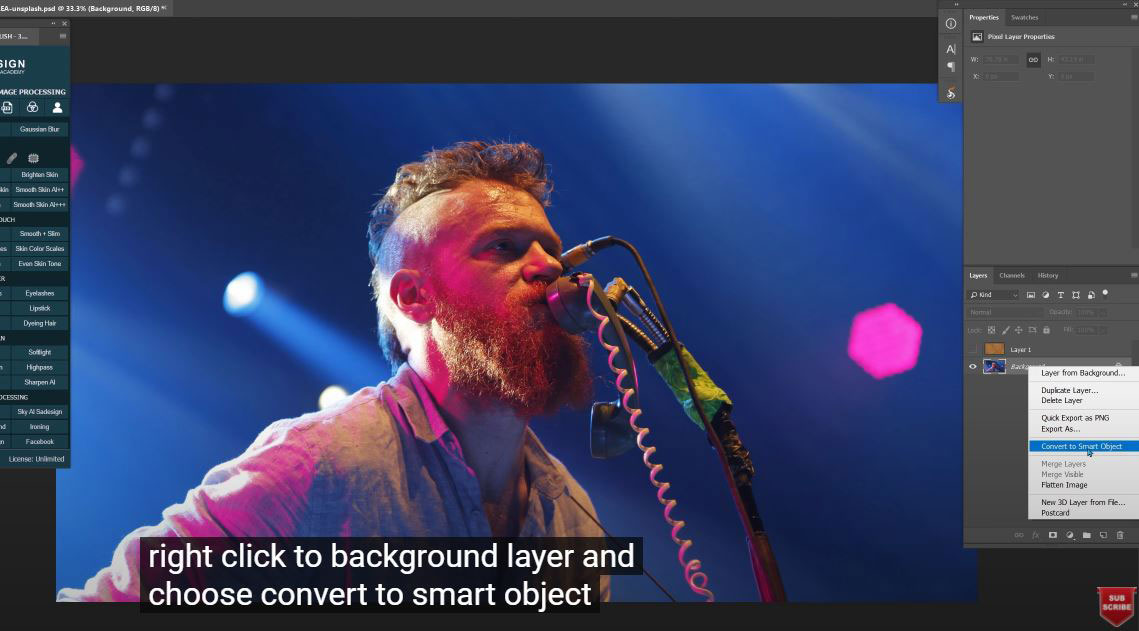
Turn off texture layer, right click to background layer and choose “Convert to smart object”
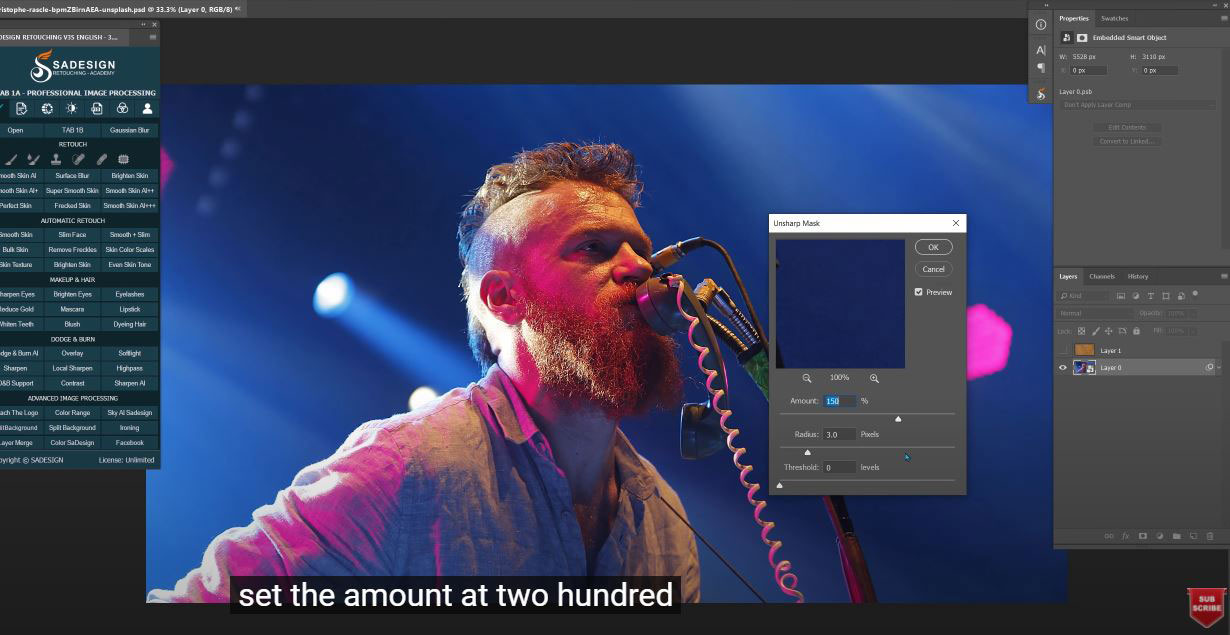
Go to Filter > Sharpen > Unsharp mask, set the amount at 200%, radius 3 pixels and hit enter
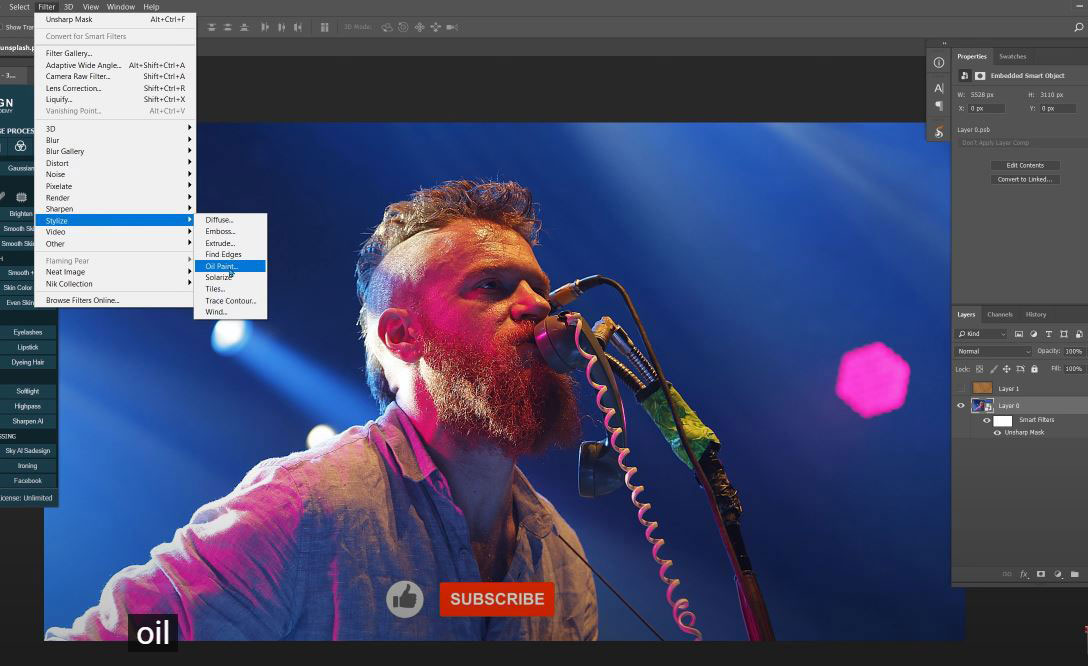
Filter > Stylize > Oil paint> following the values as below:
Stylization 2
Cleanliness 10
Scale 10
Dristle detail 10
Check to lightning
Angel 121 degrees
Shine 0.2
Then confirm
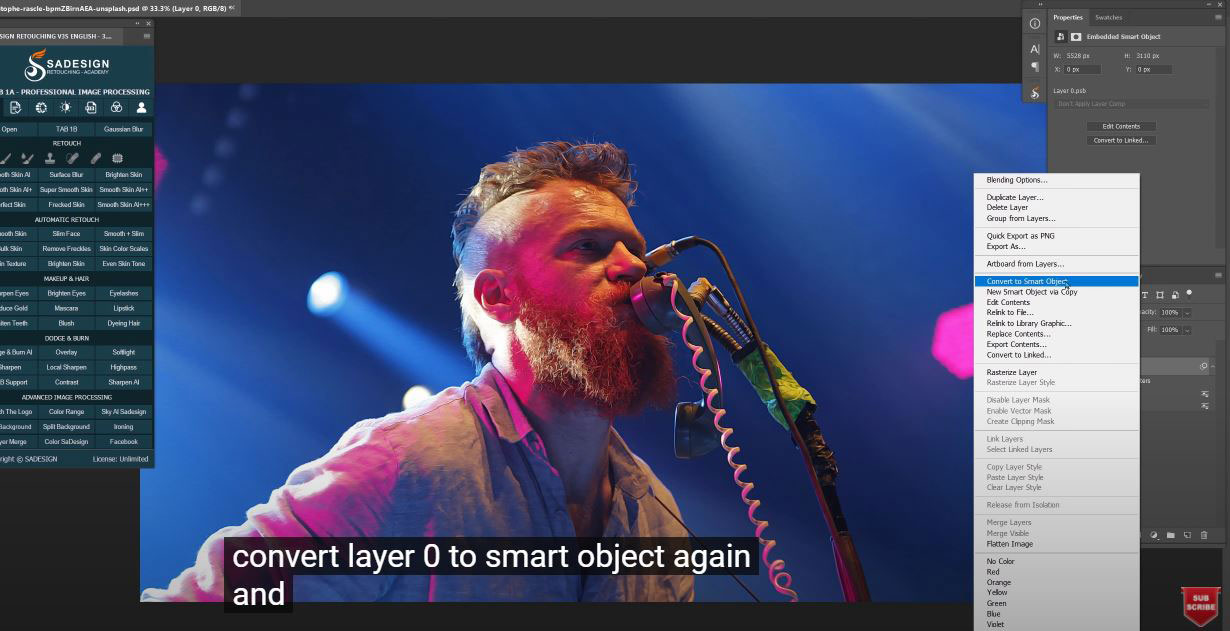
Convert layer 0 to smart object again and duplicate it with CTRL or CMD + J
Open Channels window, we will take the selection of the areas in RGB channel, to do that, hold CTRL and click to RGB channel.
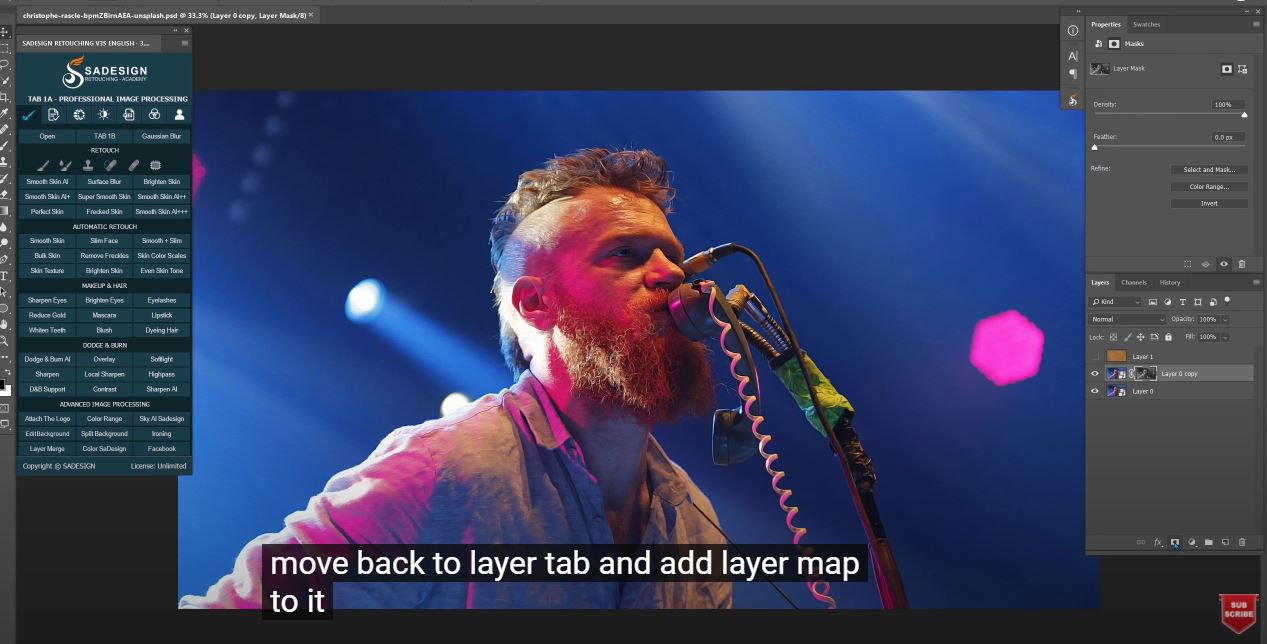
Move back to Layers tab and add layer mask to it.
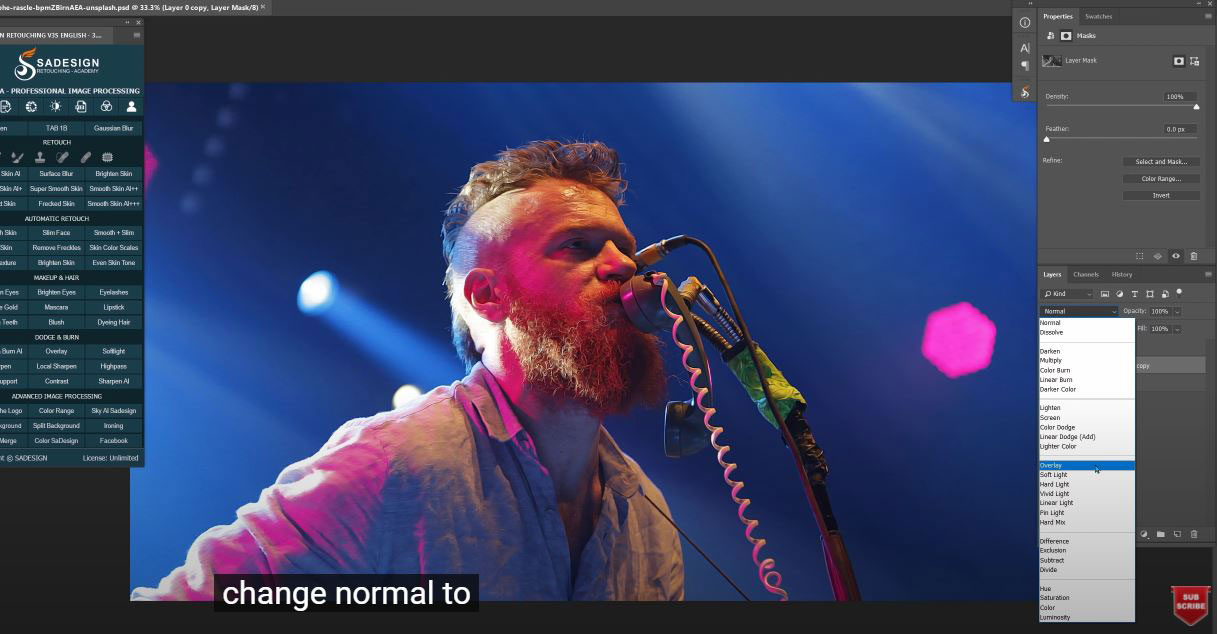
Change normal to overlay in blend mode
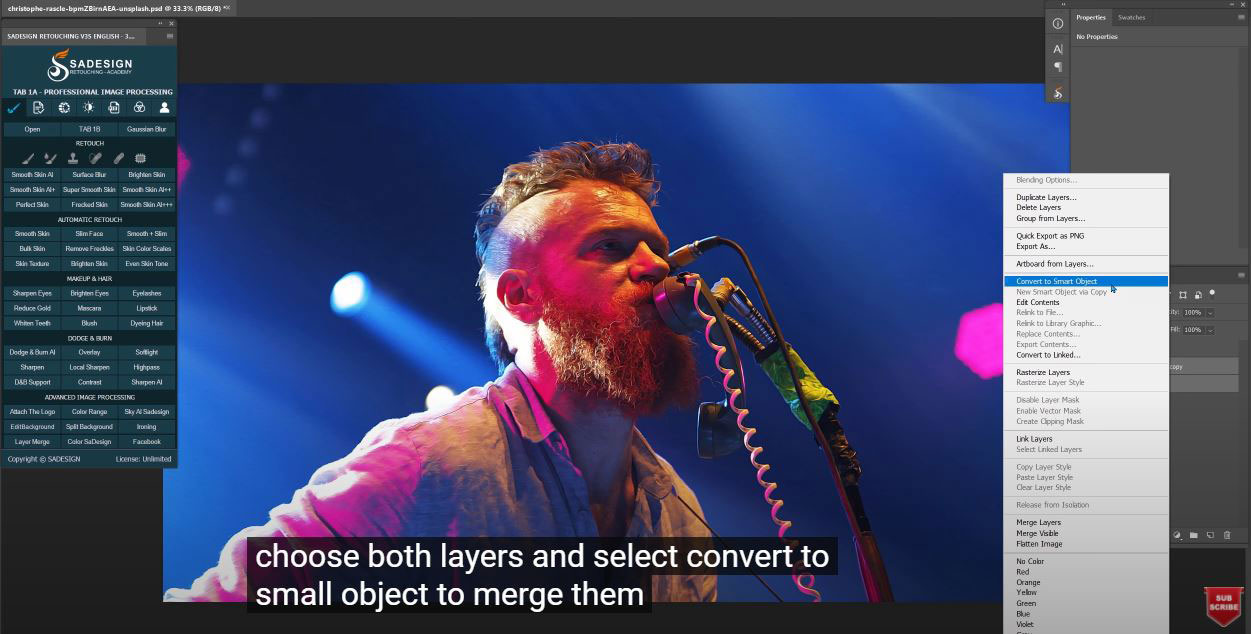
Choose both layers and select “convert to smart object” to merge them and keep it as smart object at the same time
Next, we will add filter to it. Head to Filter > Filter Gallery > open Artistic folder and choose Poster Edges. Make sure to set Edge thickness and posterization in maximum.
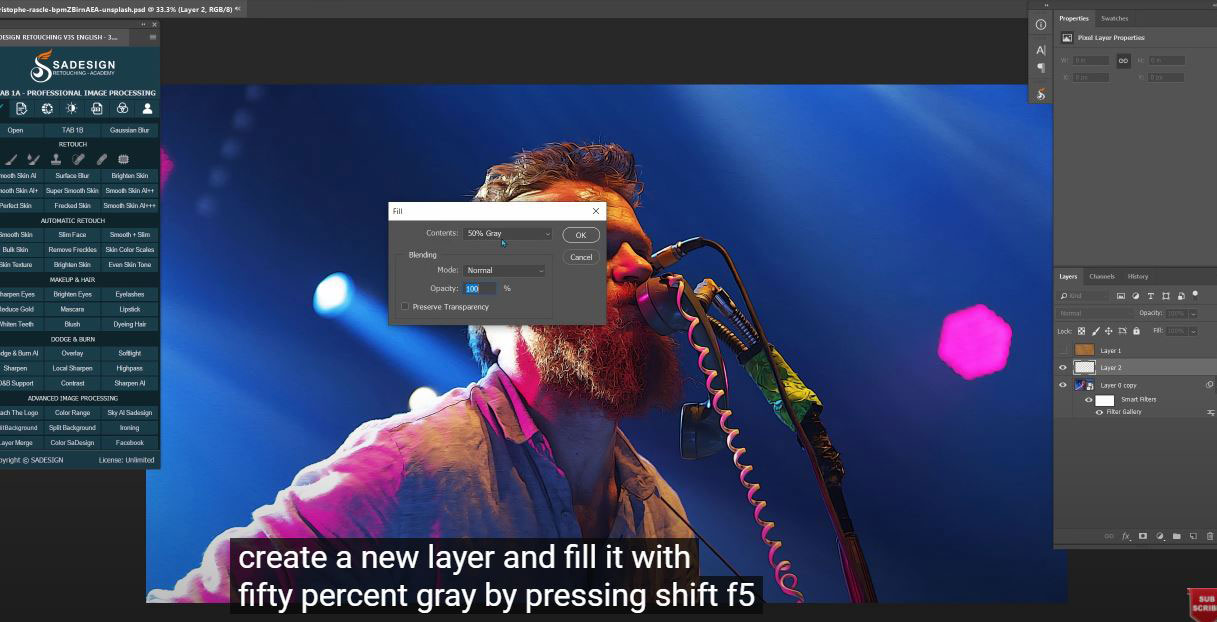
Create a new layer and fill it with 50% gray by pressing Shift+f5 and select 50% gray in contents box
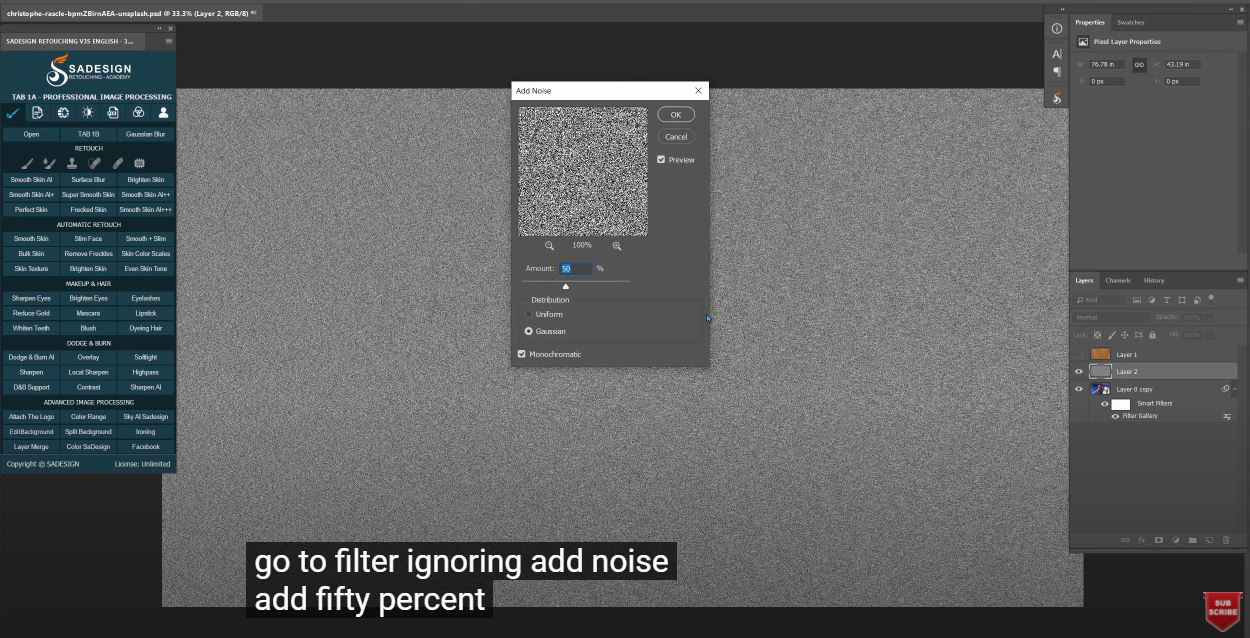
Go to Filter > noise > add noise > add 50% of noise to this layer, ensure to choose “Gaussian” in distribution. Chang to overlay in blend mode.
It has a creamy look now
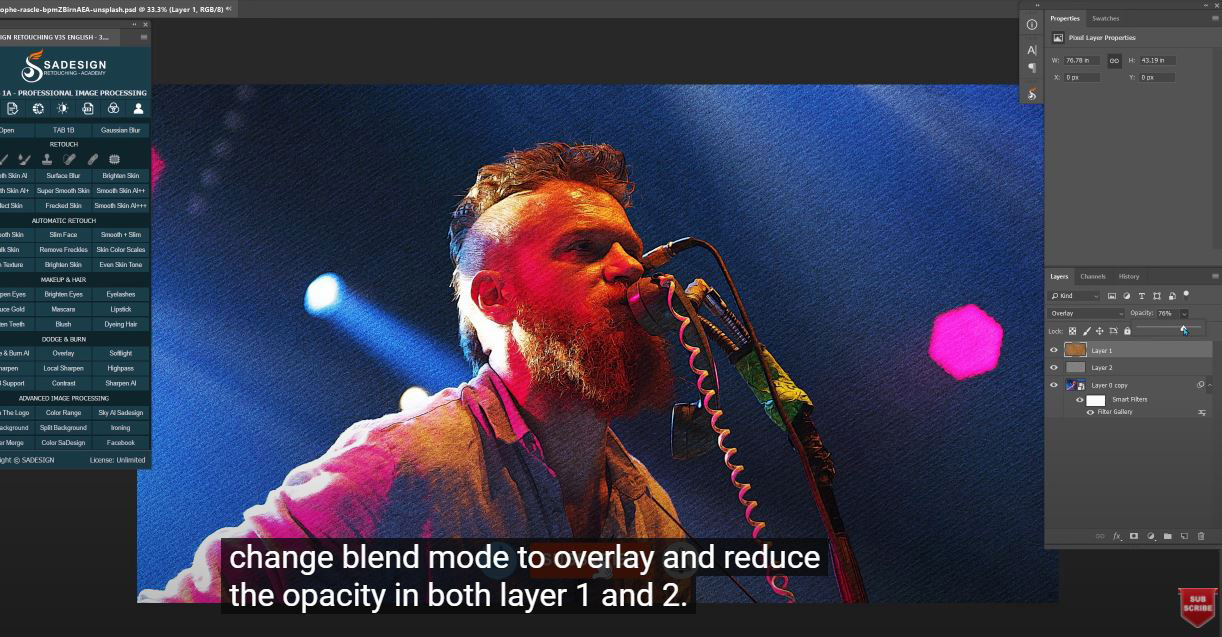
Turn back on layer 1, change blend mode to overlay and reduce the opacity in both layers 1 and 2.
Let’s increase the colors even more, create a vibrance adjustment layer, set vibrance to 42 and saturation –7
There you go! Enjoy before and after.
If you think this video is helpful, hit like, subscribe and ring the bell for any guide videos later on. See ya!
REGISTER FOR FREE PHOTOSHOP LEARNING
============================
The most powerful Retouch tool processor
DOWNLOAD:
✅ SADESIGN PANEL ENGLISH: https://sadesign.ai/retouching/
✅ SADESIGN PANEL VIETNAM: https://www.retouching.vn/


