Best Selling Products
This is The Fastest Way to Convert Photos From Day to Night
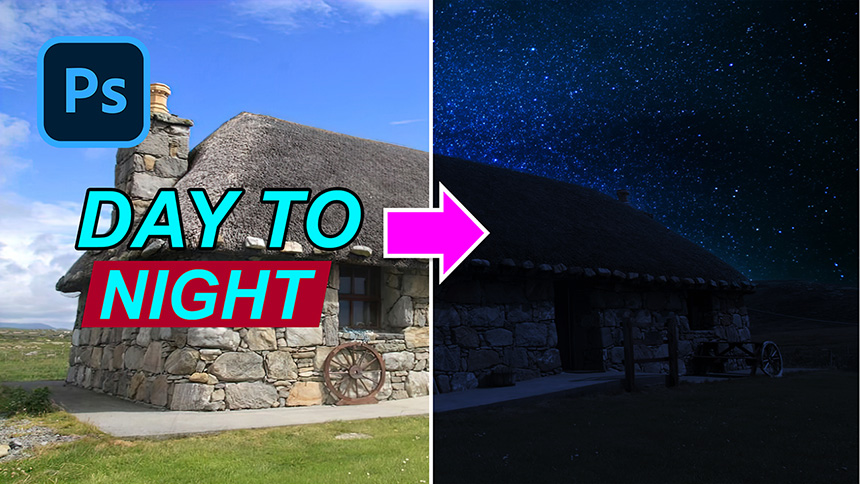
Let’s me show you the way to change day into night in PTS!
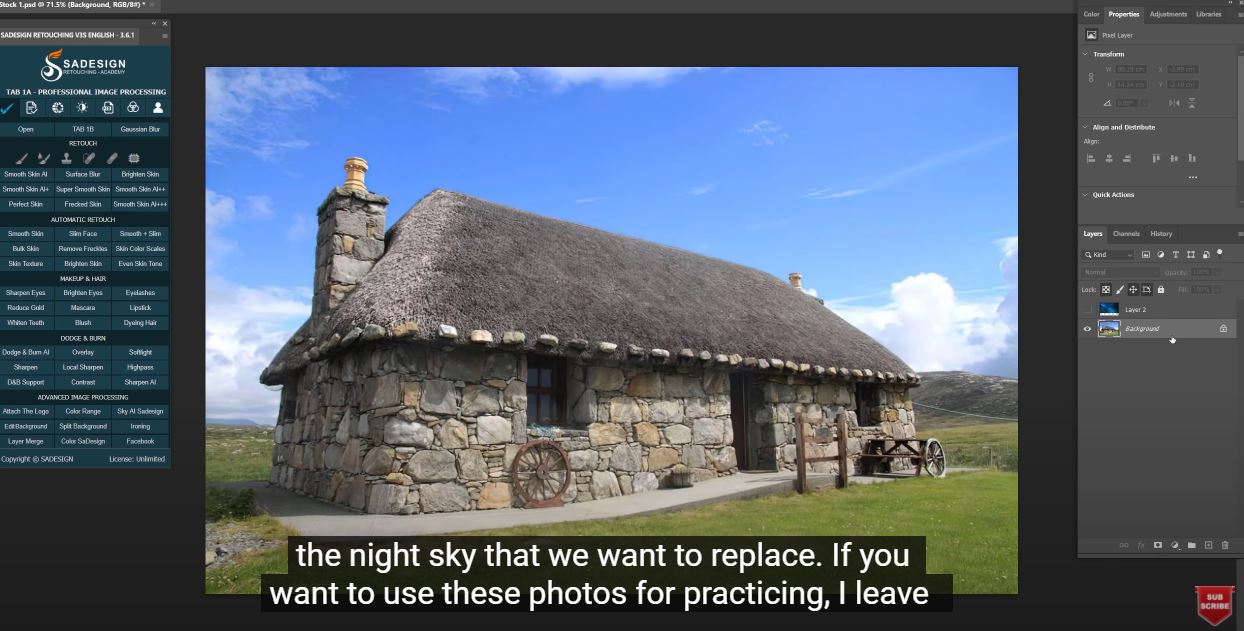
Here, there are two layers, first one is background layer and the layer 2 which is the night sky that we want to replace. If you want to use these photos for practicing, I leave the link to download in the description.
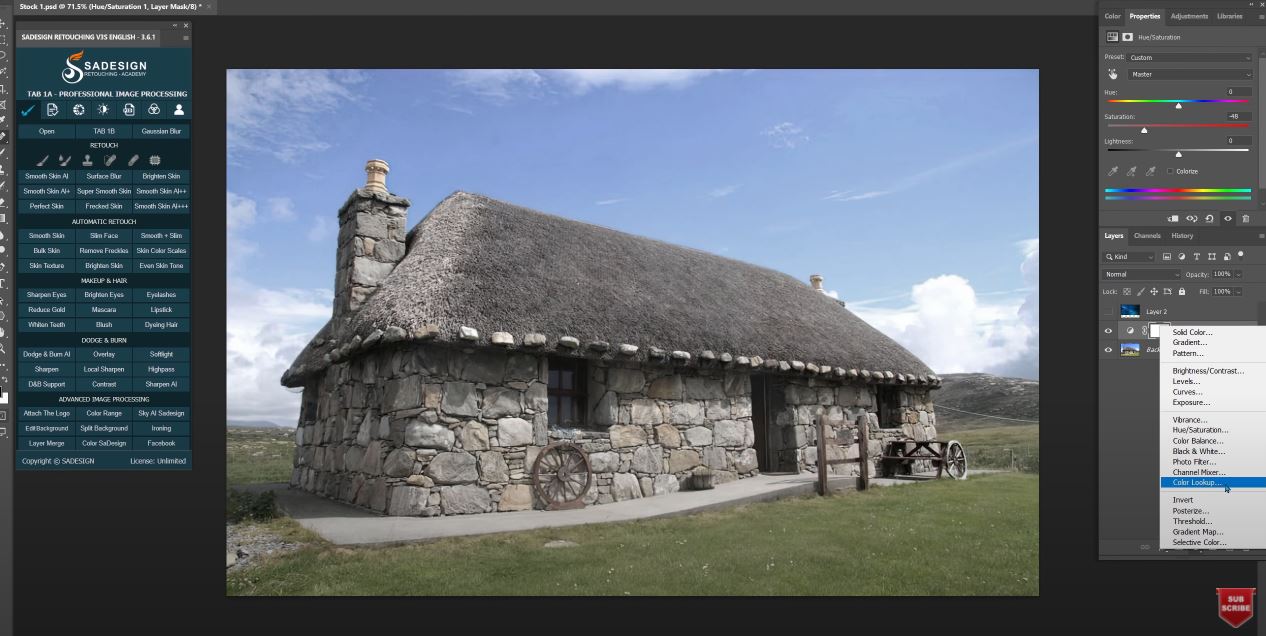
Now, click to the adjustment icon and select “Hue/saturation”. There will be less color in the dark right, so we will decrease saturation to around –50.
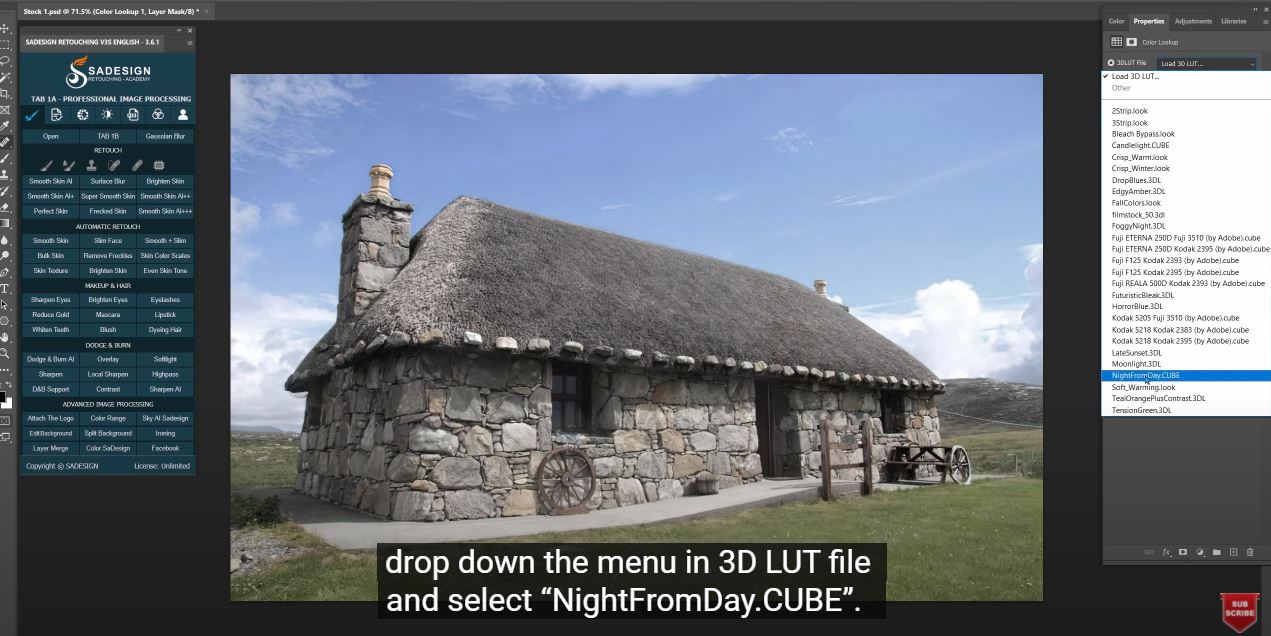
Create a color lookup adjustment layer, drop down the menu in 3D LUT file and select “NightFromDay.CUBE”. There you go, it’s cool right?
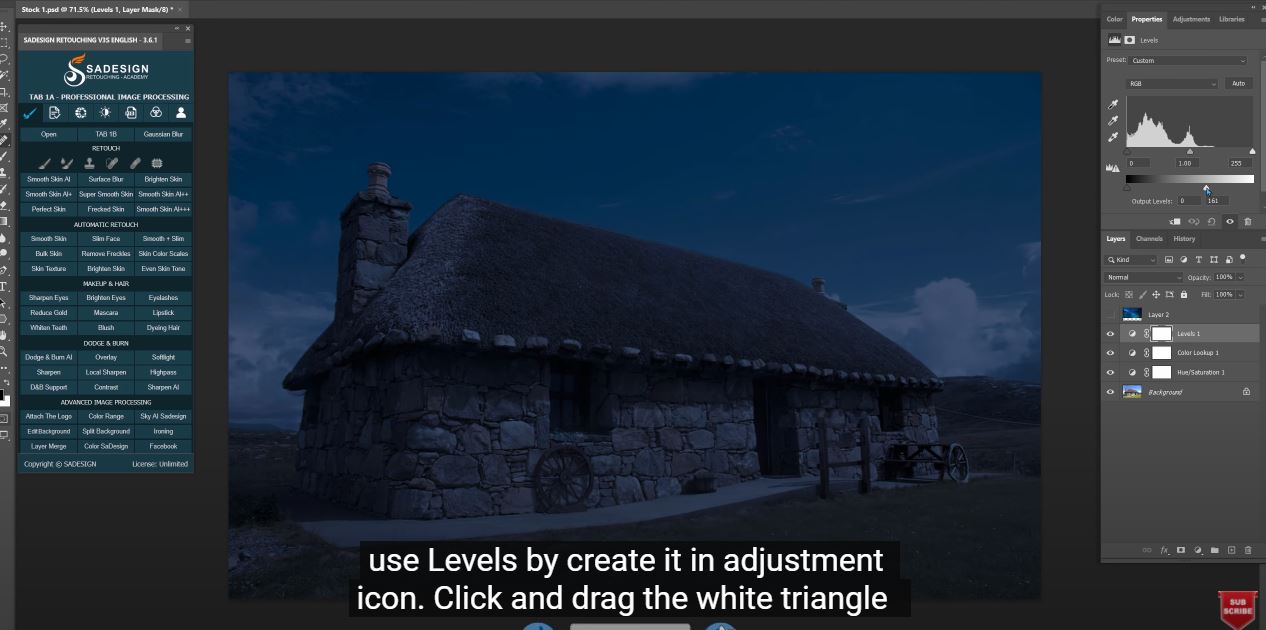
Next, we will darken the photo even more, use Levels by create it in adjustment icon. Click and drag the white triangle to the left to decrease white areas.
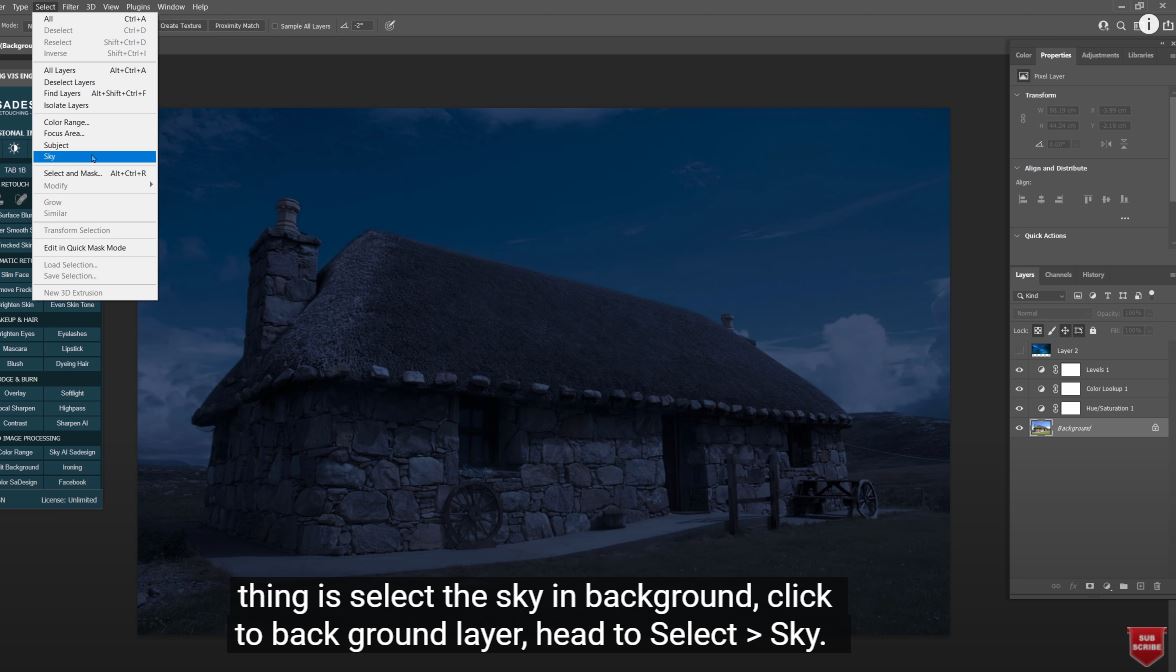
It’s time to do sky replacement. First thing is select the sky in background, click to back ground layer, head to Select > Sky. PTS AI will automatically select the sky for you and it did a great job!
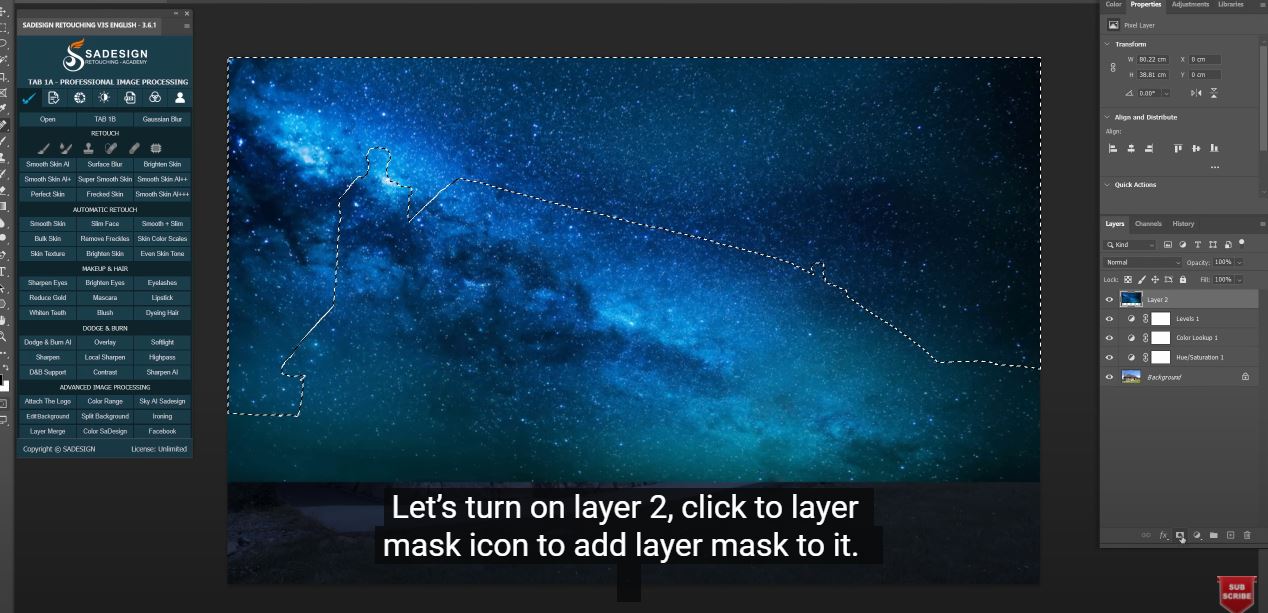
Let’s turn on layer 2, click to layer mask icon to add layer mask to it.
Done! Enjoy your work.
If you like Photoshop and Photograph just like SaDesign and you want to get more and more tips, techniques, experience from us. Make sure to subscribe our channel by simply clicking the subscribe button and you will get tons of free tutorials that SaDesign share about Photoshop technique on a daily basic. See you guys in the following tutorials. Bye Bye!
REGISTER FOR FREE PHOTOSHOP LEARNING
============================
The most powerful Retouch tool processor
DOWNLOAD:
✅ SADESIGN PANEL ENGLISH: https://sadesign.ai/retouching/
✅ SADESIGN PANEL VIETNAM: https://www.retouching.vn/


