Best Selling Products

Upgrade Genuine Office 365
49 USD

Genuine Cheap Canva Pro
39 USD

Capcut Pro 1 Year
39 USD

Copyright Adobe Lightroom Account
59 USD

Adobe Premiere Pro Account
99 USD

MidJourney Account
29 USD

Upgrade genuine Capture One account
120 USD

Windows 10 & 11 Pro Key
36 USD

Upgrade Duolingo Super
29 USD

Adobe Photoshop Copyright - Full App
120 USD

Genuine Adobe Illustrator account
99 USD

Freepik Premium Account
59 USD

Autodesk All App Account Copyright
120 USD

ChatGPT Plus Account (GPT-4)
16 USD

Plugin Retouch4me
69 USD
How to Select Areas in Photoshop Pixel-Perfectly: A Must-Know Skill for Designers
Nội dung
- 1. What is selection in Photoshop?
- 2. Why is making selections necessary?
- 2.1 Local editing
- 2.2 Isolating objects from images
- 2.3 Creating effects
- Every Photoshop effect requires selections to control where it is applied. By using selections, you can adjust the position, intensity, and spread of effects according to the composition. This helps effects appear more subtle and avoids over-editing that could ruin the design balance.
- 2.4 Duplicating and moving objects
- 2.5 Creating Layer Masks
- 3. Basic selection tools in Photoshop and how to use them
- 3.1 Marquee Tool group
- 3.2 Lasso Tool group
- 3.2.2 Polygonal Lasso Tool (Straight-edge selection)
- 3.2.3 Magnetic Lasso Tool (Edge-snapping selection)
- 3.3.2 Magic Wand Tool
- 3.4 Object Selection Tool (Photoshop 2020 and later)
- 4. Conclusion
Knowing how to make selections in Photoshop is essential for both beginners and long-time Photoshop users. Selection is not simply drawing around an area of an image—it is the foundation of nearly every editing process, including compositing, background removal, color correction, retouching, and professional layout design.
1. What is selection in Photoshop?
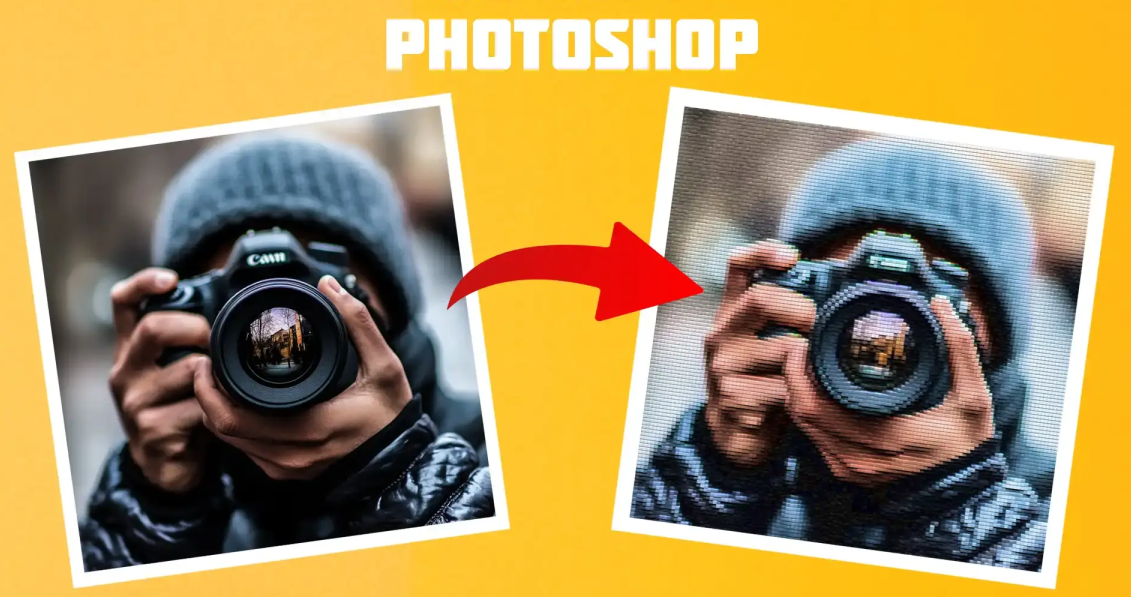
Selection in Photoshop, also called a Selection, is the process of precisely defining a specific area of an image for editing purposes. Once a selection is created, Photoshop will “restrict” all editing actions to that area only, allowing you to control your edits more actively and accurately. This is a fundamental step required for tasks such as image compositing, background removal, color adjustments, and design work.
Simply put, once you have selected an area, every action such as cutting, deleting, recoloring, applying effects, or retouching will only affect the selected portion. Areas outside the selection remain untouched, minimizing accidental edits or damage to the overall composition. This mechanism is what makes Photoshop one of the most flexible and powerful editing tools available today.
Mastering quick selection methods in Photoshop not only saves time but also significantly boosts workflow efficiency. When your selection is accurate from the start, every following step becomes smoother, easier to control, and produces more professional results. For designers, photographers, or Photoshop beginners, selection skills are a key factor for efficient work and high-quality final products.
.jpg)
2. Why is making selections necessary?
2.1 Local editing
One of the most important reasons for making selections in Photoshop is the ability to perform precise local edits. Once an area is selected, you can easily cut, erase, color, blur, brighten, darken, or apply effects without affecting the entire image. This is especially useful when editing only a small detail while preserving the overall design.
On the other hand, if you skip making a selection, your edits can easily spread into unwanted areas, causing imbalance and making the image look less professional. Proper selection from the beginning gives you better control, saves correction time, and improves final output quality.
2.2 Isolating objects from images
Making selections in Photoshop is the foundational step for isolating objects, such as removing backgrounds, compositing images, or replacing backgrounds. When the selection is accurate, the object is extracted cleanly, minimizing edge bleeding, lost details, or unwanted jagged edges. This is a required skill for designers, photographers, and visual content creators.
If you skip this step or make inaccurate selections, object extraction will look unnatural, making the image appear fake and less aesthetically pleasing. Understanding and applying correct selection methods in Photoshop will help you create cleaner, sharper, and more professional edits.
2.3 Creating effects
Every Photoshop effect requires selections to control where it is applied. By using selections, you can adjust the position, intensity, and spread of effects according to the composition. This helps effects appear more subtle and avoids over-editing that could ruin the design balance.
With selections, you can create image depth by blurring backgrounds, highlighting subjects, or adding controlled lighting effects. This is what separates basic edits from professional-level designs with emotion and strong focal points.
2.4 Duplicating and moving objects
When copying or moving objects within an image, the first required step is making a selection. Defining the object accurately allows you to duplicate or rearrange composition elements without affecting surrounding details. This is particularly important in collages, banners, or layout design.
Without careful selection, moving objects may accidentally include unrelated parts, resulting in visible errors and unnatural compositions. Proper selection makes editing cleaner, more flexible, and saves significant processing time.
2.5 Creating Layer Masks
Making selections in Photoshop simplifies and secures the process of creating Layer Masks. Instead of permanently deleting image details, Layer Masks allow you to hide or reveal parts of an image without losing original data. This is especially useful when revising edits or experimenting with multiple design approaches.
By combining selections with Layer Masks, you can easily undo, refine, or redesign without damaging the source file. This is a smart workflow method widely preferred by professional designers for flexibility and efficiency.
3. Basic selection tools in Photoshop and how to use them
To make selections in Photoshop accurately and quickly, users need to become familiar with the built-in basic selection tools. Each tool is suitable for different image types and editing purposes, from simple cropping to detailed design adjustments. Understanding these tools and their usage will save time, reduce mistakes, and significantly improve workflow efficiency. Below are the most common selection tools every Photoshop user should master.
3.1 Marquee Tool group
The Marquee Tool group contains basic geometric selection tools, often used when quickly selecting rectangular, square, circular, or elliptical areas. These tools are especially suitable for cropping, creating layouts, selecting frames, or editing clearly defined regions. You can activate the Marquee Tool by pressing M or selecting it directly from Photoshop’s toolbar.
The two most commonly used tools in this group are Rectangular Marquee Tool and Elliptical Marquee Tool. Each has unique uses but is beginner-friendly.
3.1.1 How to use Rectangular Marquee Tool
Rectangular Marquee Tool allows quick rectangular or square selections. It is commonly used for framed cropping, layouts, or editing areas with straight edges.
First, select Rectangular Marquee Tool by pressing M, then click and drag across the image. A rectangular dashed selection outline will appear. Adjust it until it fits the desired area.
To separate the selected area into a new layer, press Ctrl + J. Photoshop automatically creates a new layer containing the selected content. To create a perfect square, hold Shift while dragging. To deselect, simply press Ctrl + D.
.jpg)
3.1.2 How to use Elliptical Marquee Tool
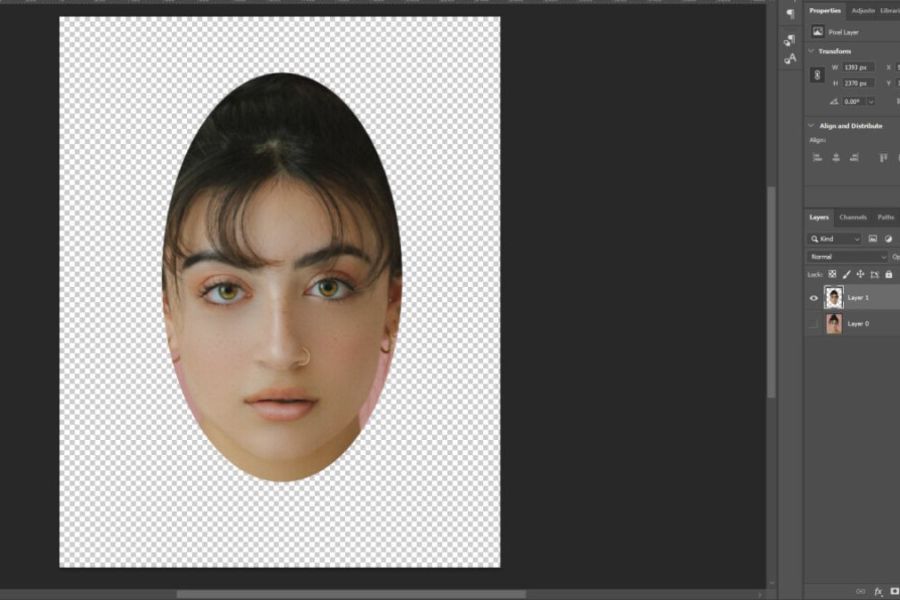
Elliptical Marquee Tool is used for circular or elliptical selections, often applied for portrait cropping, circular frames, or soft rounded details.
Its usage is similar to Rectangular Marquee Tool. After selecting it, click and drag on the image to create an elliptical dashed selection. Adjust its size and position as needed.
Once satisfied, press Ctrl + J to separate it into a new layer. To create a perfect circle, hold Shift while dragging. This is particularly useful for avatars, icons, or circular decorative elements.
3.2 Lasso Tool group
The Lasso Tool group offers flexible freeform selection capabilities, allowing users to trace irregular object shapes instead of being limited to geometric boundaries. It is ideal for details such as hair, clothing, curved objects, or uneven shapes. Activate it by clicking the rope icon or pressing L, then right-click or press Shift + L to switch between modes.
Photoshop provides three main Lasso selection types, each suited to different editing situations.
3.2.1 Lasso Tool (Freeform selection)
Lasso Tool lets you manually draw completely freehand selections. It is ideal for irregular shapes or quick local edits.
After selecting it, click and hold the left mouse button while tracing around the object. Photoshop creates the selection following your cursor path.
Because it depends heavily on hand control, it requires relatively precise movement. It is best for simple shapes or rough local selections.

3.2.2 Polygonal Lasso Tool (Straight-edge selection)
Polygonal Lasso Tool is ideal for selecting straight-edged objects such as buildings, geometric objects, or architectural details. It offers more precision than freeform Lasso.
Click once to create a starting point, move the cursor, and click again to create anchor points. Continue until the object is enclosed. Double-click or connect back to the start point to close the selection.
.jpg)
3.2.3 Magnetic Lasso Tool (Edge-snapping selection)
Magnetic Lasso Tool intelligently snaps to object edges based on color contrast, making it highly effective for object extraction.
Click the starting point, then move the cursor along the edge. Photoshop automatically creates anchor points following the object boundary. If detection fails, press Delete to remove the last point and click manually to correct it.
.jpg)
3.3 Quick Selection Tool & Magic Wand Tool group
Quick Selection Tool and Magic Wand Tool are smart selection tools that identify editable areas quickly with minimal manual effort. They work best on clearly separated objects or simple backgrounds. Choosing the right one significantly improves speed and accuracy.
3.3.1 Quick Selection Tool
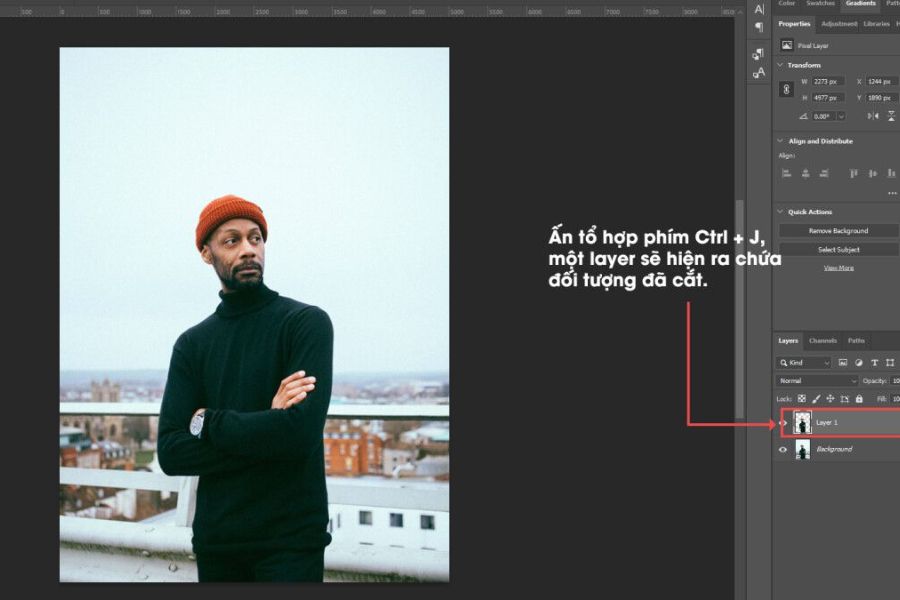
Quick Selection Tool works like a smart brush. As you drag, Photoshop detects and expands the selection based on color, texture, and edges. Brush size can be adjusted in the top options bar.
Simply click and drag over the target object. Photoshop continuously expands the selection. Once complete, press Ctrl + J to isolate it into a new layer. This method is especially effective for portraits, products, or high-contrast subjects.
3.3.2 Magic Wand Tool
Magic Wand Tool selects areas based on similar colors. A single click selects all matching or closely related colors, making it perfect for simple solid-color backgrounds.
Click on the background area, then press Shift + Ctrl + I to invert the selection to the subject. Finally, press Ctrl + J to isolate it into a new layer. Adjust the Tolerance setting to control color similarity for cleaner selections.
3.4 Object Selection Tool (Photoshop 2020 and later)
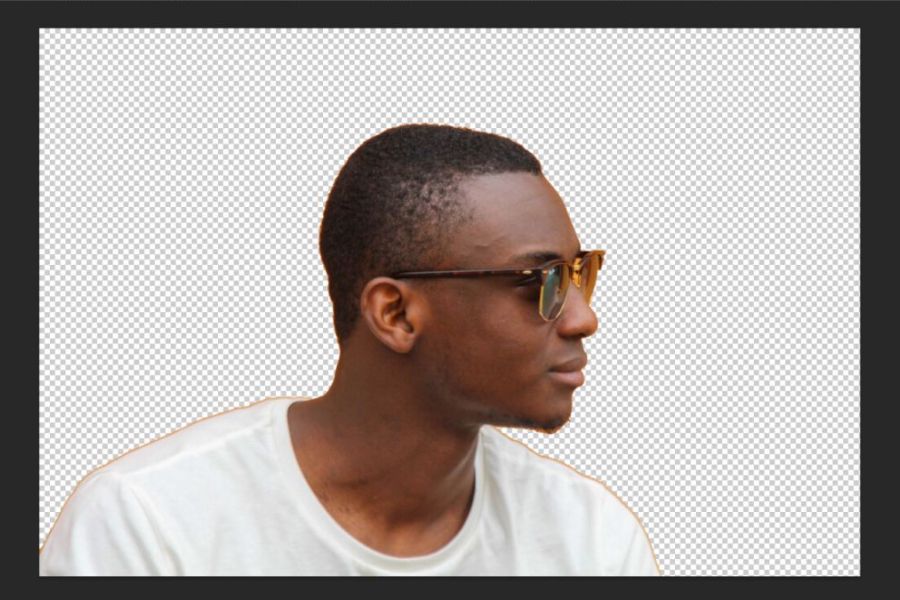
Object Selection Tool is a modern AI-powered selection feature that automatically recognizes and isolates objects with high accuracy. It is extremely useful for quick object extraction without heavy manual work.
Simply click and drag a selection box around the object, then release. Photoshop analyzes and selects the object precisely. Once selected, press Ctrl + J to create a new layer containing the isolated object. Note that Object Selection Tool is only available in Photoshop 2020 and later, so ensure you are using a compatible version.
4. Conclusion
It can be said that making selections in Photoshop is the starting point that greatly determines the quality of the entire editing and design process. When your selection is accurate, every following step becomes easier, more precise, and much faster. On the other hand, if the selection is inaccurate or poorly controlled, even excellent color grading or blending skills will struggle to produce ideal results. That is why investing time in learning and practicing selection techniques—from basic to advanced—is essential for every designer. Whether you are new to Photoshop or already experienced, understanding each selection tool and applying it flexibly in different situations will help you master the software, strengthen your design thinking, and create polished products down to every pixel. Hopefully this article will become a useful reference, helping you work more confidently in Photoshop and no longer feel overwhelmed by complex selections during your creative process.





















VIP Products








Best Selling Products
Upgrade Genuine Office 365
49 USD
Genuine Cheap Canva Pro
39 USD
Capcut Pro 1 Year
39 USD
Copyright Adobe Lightroom Account
59 USD
Adobe Premiere Pro Account
99 USD
MidJourney Account
29 USD
Upgrade genuine Capture One account
120 USD
Windows 10 & 11 Pro Key
36 USD
Upgrade Duolingo Super
29 USD
Adobe Photoshop Copyright - Full App
120 USD
Genuine Adobe Illustrator account
99 USD
Freepik Premium Account
59 USD
Autodesk All App Account Copyright
120 USD
ChatGPT Plus Account (GPT-4)
16 USD
Plugin Retouch4me
69 USD