Best Selling Products

MidJourney Account
29 USD

Windows 10 & 11 Pro Key
36 USD

Copyright Adobe Lightroom Account
59 USD

Adobe Photoshop Copyright - Full App
120 USD

Genuine Adobe Illustrator account
99 USD

Autodesk All App Account Copyright
120 USD

ChatGPT Plus Account (GPT-4)
16 USD

Upgrade Duolingo Super
29 USD

Plugin Retouch4me
69 USD

Upgrade Genuine Office 365
49 USD

Upgrade genuine Capture One account
120 USD

Capcut Pro 1 Year
39 USD

Adobe Premiere Pro Account
99 USD

Freepik Premium Account
59 USD

Genuine Cheap Canva Pro
39 USD
How to Use Clipping Mask in Photoshop Like a Professional Designer — Easy for Everyone
Nội dung
- 1. What is Clipping Mask?
- 2. How Clipping Mask Works
- 3. Comparison Table Between Clipping Mask and Layer Mask in Photoshop
- 4. How to Create a Clipping Mask in Photoshop
- 4.1 How to Create a Clipping Mask in Photoshop Using Marquee Tool
- 4.2 How to Create a Clipping Mask in Photoshop Using Magic Wand Tool
- 5. Practical Applications of Clipping Mask in Photoshop
- 6. Tips for Using Clipping Mask in Photoshop
- 7. Frequently Asked Questions About Clipping Mask in Photoshop
- 7.1 Why Is My Clipping Mask Not Displaying Correctly?
- 7.2 How Do I Remove a Clipping Mask?
- 7.3 Can I Use Clipping Mask on Layer Groups?
- 7.4 Keyboard Shortcuts Related to Clipping Mask
- 7.5 Additional Notes When Using Clipping Mask
- 8. Conclusion
Clipping Mask in Photoshop is one of the most basic yet extremely important techniques that every designer needs to master. With this tool, you can easily place images inside text, frames, or any object to create more creative, clean, and professional designs.
1. What is Clipping Mask?
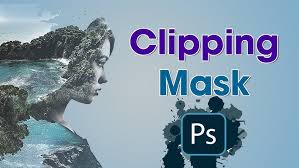
Clipping Mask in Photoshop is a familiar design technique, also known as a clipping mask, that allows you to display the content of one layer based on the shape of the layer beneath it. In other words, the lower layer acts as a “cutting template,” allowing the image or color on the upper layer to appear only within a predefined area, making everything neat and visually intuitive.
Thanks to this working principle, Clipping Mask is commonly used to place images inside text, icons, or shapes to create lively and modern visual effects. Instead of performing complicated cut-and-paste edits, you only need a few simple actions to achieve a harmonious and professional layout without affecting the original design structure.
The greatest strength of Clipping Mask in Photoshop is its flexible editing capability. You can change images, colors, or effects anytime without starting over. This is why the technique is highly favored by designers and is especially suitable for both Photoshop beginners and those who want to optimize their workflow quickly and efficiently.
.jpg)
2. How Clipping Mask Works
The working principle of Clipping Mask in Photoshop is quite simple yet delivers highly effective design results. When applying a clipping mask, you always work with at least two layers, where the bottom layer acts as a “cutting template” that determines the visible shape of all content above it.
The upper layers will only display the parts that fit within the shape or visible area of the lower layer. This means images, colors, or patterns are automatically “trimmed” according to the existing template, making the layout clean without needing to delete or directly edit the original image.
Because of this principle, Clipping Mask in Photoshop is widely used for placing images inside text, creating refined photo collage effects, or designing professional layouts. It is not only easy to use but also allows quick content adjustments while preserving the original design structure.
3. Comparison Table Between Clipping Mask and Layer Mask in Photoshop
 Criteria
Clipping Mask
Layer Mask
Concept
Clipping Mask is a technique that displays the content of the upper layer entirely based on the shape or visible area of the lower layer.
Layer Mask is a tool used to control the visibility of a layer by using black–white–gray color levels.
Working Principle
The lower layer acts as a “clipping frame,” determining which parts of the upper layer are visible.
White reveals, black completely hides, and gray creates partial transparency.
Number of Layers Required
At least 2 layers (the base layer and the clipped layer).
Only 1 layer with an attached mask is needed.
How Visibility Is Controlled
Depends entirely on the existing shape of the lower layer.
Can be painted and adjusted flexibly using Brush, Gradient, or Selection.
Flexibility Level
Simple and quick, suitable for designs with fixed shapes.
Highly flexible, allowing detailed editing and effect fine-tuning as desired.
Common Applications
Embedding images into text, frames, icons, or shapes neatly and with accurate composition.
Removing image backgrounds, creating fade effects, blending images, and advanced editing.
Impact on the Original Layer
Does not alter the original layer content, making it easy to edit later.
Also non-destructive to the original layer, but editing operations are more complex.
Difficulty Level
Easy to learn and remember, suitable for Photoshop beginners.
Requires time to get familiar with, suitable for designers who want detailed control.
Recommended Use Cases
When you need to create quick, clean effects by placing images into existing text or shapes.
When precise editing of small areas is needed to create smooth and natural-looking effects.
4. How to Create a Clipping Mask in Photoshop
Clipping Mask is one of the techniques that makes designs cleaner, more creative, and professional — something every Photoshop learner should know. Whether you want to create text clipping masks or place images inside any selected area, the process is simple once you understand the workflow. In the guide below, Appvip will explain in detail how to create a Clipping Mask in Photoshop using the Marquee Tool, suitable for both beginners and experienced users.
Upgrade Licensed Adobe Photoshop
4.1 How to Create a Clipping Mask in Photoshop Using Marquee Tool
Step 1: Open the Image and Prepare the Layer
First, open the image file you want to edit in Photoshop. If the layer is currently set as Background, double-click the layer name or click the lock icon to convert it into a regular layer. This allows easier editing and effect application, including clipping masks in Photoshop.
.jpg)
Step 2: Create the Shape Layer for the Clipping Mask
Next, hold Ctrl (Windows) or Command (MacOS), then click the New Layer icon in the Layers panel to create a new layer directly beneath the image layer. This layer will act as the “shape template,” determining which parts of the image will appear when applying the clipping mask.
.jpg)
Step 3: Create a Selection Using Marquee Tool
To make editing easier, temporarily hide the image layer by clicking the eye icon beside it. Then select the Marquee Tool (shortcut M) and drag to create either a rectangular or elliptical selection depending on your desired layout. This will be the visible area for your clipping mask.
.jpg)
Step 4: Fill the Selection as the Visible Background
Once the selection is created, right-click inside it and choose Fill, or press Shift + F5. In the Fill dialog box, choose Background Color (or any color you prefer), then click OK to fill it. Finally, press Ctrl + D to deselect. Your clipping mask template layer is now complete.
.jpg)
Step 5: Apply the Clipping Mask to the Image
Turn the image layer back on by clicking the eye icon. Then right-click the image layer and select Create Clipping Mask. Instantly, the image will display neatly inside the shape you created earlier. You can use the Move Tool (shortcut V) to reposition and adjust the image to fit your design layout.
.jpg)
4.2 How to Create a Clipping Mask in Photoshop Using Magic Wand Tool
Besides the Marquee Tool, the Magic Wand Tool is another highly popular way to create clipping masks in Photoshop thanks to its speed and intuitive workflow. This method is especially useful when creating text clipping masks or placing images into clearly defined areas.
Step 1: Arrange Layers in the Correct Order
First, make sure the image layer you want displayed is placed above the text or shape layer. This is an essential rule for Clipping Mask to function properly. If the order is incorrect, the effect will not display correctly even if all other steps are done properly.
.jpg)
Step 2: Select Magic Wand Tool and Create a Selection
Next, choose the Magic Wand Tool (grouped with the Quick Selection Tool) and click the text or object area you want to mask. This tool automatically detects areas with similar color or contrast, saving significant time compared to manual selection.
.jpg)
Step 3: Duplicate the Selection into a New Layer
Once the desired area is selected, press Ctrl + J (Windows) or Command + J (MacOS). This copies the selected area into a separate layer, which will serve as the clipping template.
.jpg)
Step 4: Create the Clipping Mask and Adjust the Image
Finally, right-click the image layer and select Create Clipping Mask, or use the familiar Photoshop clipping mask shortcut. The image will immediately appear neatly inside the selected text or shape. Use the Move Tool (V) to reposition, resize, or scale the image for the most visually pleasing composition.
.jpg)
5. Practical Applications of Clipping Mask in Photoshop
Clipping Mask is a “secret weapon” that helps designers turn creative ideas into reality quickly and visually. Thanks to its ability to place images inside layers while preserving the original layout, it is widely used in projects ranging from simple to professional:
Placing images inside text: Easily insert images or textures into letters to create vivid, colorful effects ideal for posters, banners, and book covers.
Creating creative collage effects: Combine multiple images inside different shapes for unique and eye-catching designs.
Designing standout logos and icons: Add textures, colors, or patterns inside logo shapes to create professional and memorable branding.
Optimizing image editing: Clipping Mask lets you modify effects or colors without affecting the original layer, making experimentation easy.
Thanks to these flexible applications, Clipping Mask is not just a support tool but also a creative “weapon” for all designers.
6. Tips for Using Clipping Mask in Photoshop
To maximize the power of Clipping Mask and create professional results, apply these tips:
Organize layers properly: Clearly naming layers helps with control and saves editing time.
Combine Clipping Mask with Layer Mask: This creates more refined and flexible effects.
Edit and experiment freely: Resize, move, or adjust upper layers without affecting the original structure.
Use shortcuts for speed:
Windows: Ctrl + Alt + G
Mac: Command + Option + G
These tips make your workflow faster, cleaner, and more professional.
Upgrade Licensed Adobe Photoshop
7. Frequently Asked Questions About Clipping Mask in Photoshop
7.1 Why Is My Clipping Mask Not Displaying Correctly?
Usually because the layer order is incorrect. The content layer must always be above the template layer.
Also, the template layer must have a clear visible shape. Photoshop cannot apply clipping masks properly to empty or unclear layers.
7.2 How Do I Remove a Clipping Mask?
You can:
Right-click the masked layer and choose “Release Clipping Mask.”
Hold Alt (Windows) or Option (Mac), hover between the two layers, and click.
Both methods safely remove the mask without deleting content.
7.3 Can I Use Clipping Mask on Layer Groups?
Yes. Applying a clipping mask to a group limits all contents inside that group according to the lower layer’s shape.
Note: This feature is only available in Photoshop CC and later.
7.4 Keyboard Shortcuts Related to Clipping Mask
Windows: Alt + Ctrl + G
Mac: Option + Command + G
This lets you instantly apply or release clipping masks without navigating menus.
7.5 Additional Notes When Using Clipping Mask
Check hidden or locked layers: Hidden or locked layers prevent proper mask behavior.
Check layer size and resolution: Oversized or undersized layers may display incorrectly.
Combine with Layer Mask for more advanced effects and flexibility.
8. Conclusion
As you can see, Clipping Mask is not as complicated as many people think. Once you understand its principle and use it correctly, you can apply it flexibly across many different designs. From creating image-filled text effects to building clean layouts, Clipping Mask saves time while improving visual quality. Hopefully, through this guide, you will feel more confident using Clipping Mask in Photoshop, and don’t forget to follow Appvip for more useful design tips.





















VIP Products








Best Selling Products
MidJourney Account
29 USD
Windows 10 & 11 Pro Key
36 USD
Copyright Adobe Lightroom Account
59 USD
Adobe Photoshop Copyright - Full App
120 USD
Genuine Adobe Illustrator account
99 USD
Autodesk All App Account Copyright
120 USD
ChatGPT Plus Account (GPT-4)
16 USD
Upgrade Duolingo Super
29 USD
Plugin Retouch4me
69 USD
Upgrade Genuine Office 365
49 USD
Upgrade genuine Capture One account
120 USD
Capcut Pro 1 Year
39 USD
Adobe Premiere Pro Account
99 USD
Freepik Premium Account
59 USD
Genuine Cheap Canva Pro
39 USD