Best Selling Products
How to Use Magic Wand Tool in Photoshop Anyone Can Do It
Nội dung
The Magic Wand Tool helps users easily create color-based selections. Although it seems simple, if you know how to use it, this tool can save a lot of time in editing images, from separating the background to creating unique effects. In this article, we will explore how to use the Magic Wand Tool in detail and effectively, regardless of whether you are a newbie or experienced in the field of graphic design. Let's learn with Sadesign how to master this tool to improve your image editing skills!

The Magic Wand Tool helps users easily create color-based selections. Although it seems simple, if you know how to use it, this tool can save a lot of time in editing images, from separating the background to creating unique effects. In this article, we will explore how to use the Magic Wand Tool in detail and effectively, regardless of whether you are a newbie or experienced in the field of graphic design. Let's learn with Sadesign how to master this tool to improve your image editing skills!
1. What is the Magic Wand Tool?
The Magic Wand Tool is one of the most prominent and useful tools in Photoshop, often used to create color-based selections. Unlike other selection tools like the Lasso or Rectangle Marquee, the Magic Wand Tool allows users to select a large area of an image with just one click. The tool works by analyzing the color of the pixel you click on, then selecting all pixels with similar colors within a certain tolerance.
Although many people think that the Magic Wand Tool is not the most powerful tool in Photoshop, if used properly, it can save you a lot of time in the process of editing images. This tool is especially useful when you need to separate the background of an object from a photo.

2. What is the function of Magic Wand Tool?
Magic Wand Tool has several main functions that users need to understand to be able to use it effectively:
New Selection : Creates a new selection. This is the basic feature that most users will use when starting out with the Magic Wand Tool.
Tolerance : This is the function to adjust the color tolerance. When you adjust this value, it will affect the range of colors selected. A low tolerance value (around 0) will select only pixels with similar colors, while a high value (up to 255) will expand the selection to include similar colors.
Subtract from Selection (Alt) : Allows you to remove parts of the current selection, which is useful when you want to refine the selection.
Add to Selection (Shift) : This function allows you to add other areas to the current selection, making it easy to expand the selection.
Anti-Alias : Helps smooth the edges of selections, reducing jagged edges, giving the image a more natural feel.
Intersect with Selection : Creates a selection that only lies within the intersection of two existing selections, useful in more complex situations.
Contiguous : Allows you to select all pixels of the same color in a layer, making it easy to work with images that have uniform color.

3. How to use Magic Wand Tool simply
3.1 Step 1: Select Magic Wand Tool
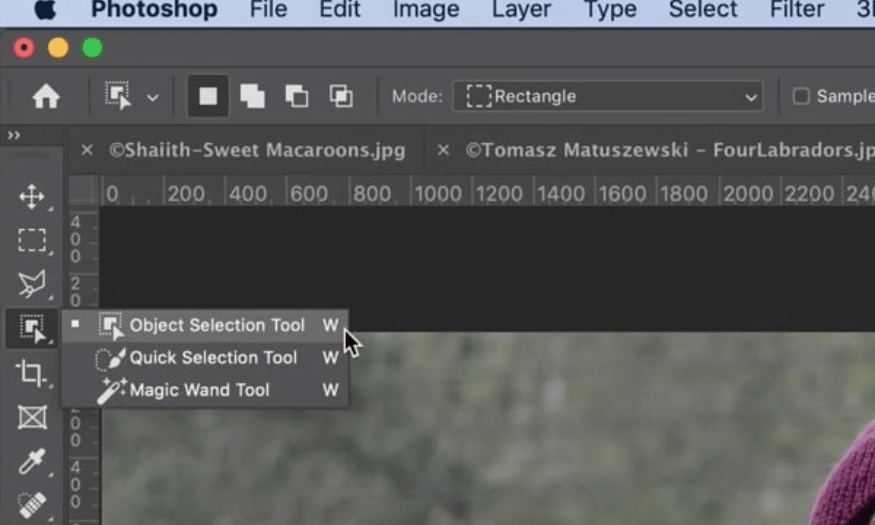
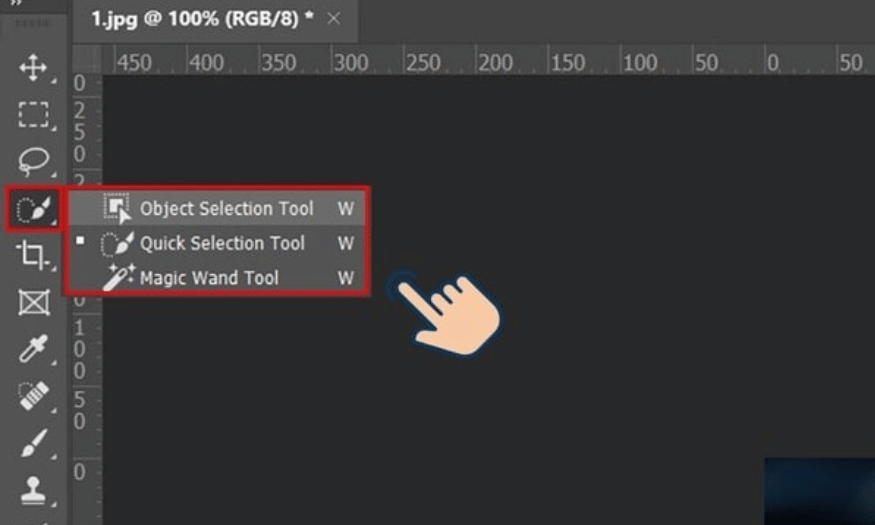
To get started, open the photo you want to edit in Photoshop. In the tool panel on the left side of your screen, find the Magic Wand Tool icon. It looks like a wand. If you don’t see it right away, tap and hold the Lasso Tool icon to bring up a list of related tools, then select the Magic Wand Tool.
In addition to using your mouse to select, you can also save time by using keyboard shortcuts. Press W to select the Magic Wand Tool, or press Shift + W to switch between the Magic Wand Tool and other selection tools. Mastering keyboard shortcuts will help you work faster and more efficiently during your photo editing process.
3.2 Step 2: Tolerance adjustment
Once you have selected the Magic Wand Tool, the next step is to adjust the Tolerance value on the control bar above. Tolerance is an important parameter because it determines how similar the colors the tool will select.
Set Tolerance = 0 : If you set the tolerance to 0, the tool will only select pixels that are exactly the same color as the pixel you clicked on. This is useful when you are working with images that have uniform colors.
Increase Tolerance : As you increase the Tolerance value, from 1 to 255 for example, the tool will select more colors, including both light and dark tones of the color you selected. This can help you create a wider selection, but can also lead to selecting unwanted areas.
Note that the Tolerance feature only works when the Magic Wand Tool is active. You need to adjust it directly on the control bar at the top of the screen to see the effect immediately on the photo.

3.3 Step 3: Create Selection
Once you have adjusted the Tolerance, click on the area in the photo that you want to select. The Magic Wand Tool will automatically select all pixels of similar color within the tolerance you set. If the selection doesn't turn out as expected, you can adjust the Tolerance again and try again.
If you need to select more areas, you can use the Add to Selection feature by holding down the Shift key while clicking on other areas. Conversely, if you want to remove something from the selection, hold down the Alt key (or Option on Mac) and click on the area you want to remove.

3.4 Step 4: Refine the selection
After you make a selection, you may need to fine-tune it to get the best results. To do this, you can use the Refine Edge feature (or Select and Mask in newer versions of Photoshop).
Refine Edge : Right-click on the selection and select “Refine Edge”. A dialog box will appear that allows you to adjust parameters such as Feather, Smooth, and Contrast. Feather softens the edges of the selection, while Smooth reduces the roughness. You can also use the Brush Tool to paint over areas you want to further edit.
3.5 Step 5: Finalize editing
Once you have a selection you are happy with, it’s time to make final edits. If you are separating the background from an object, you can press the Delete key to remove the unwanted background. If you want to keep the object and remove the background, copy the selection to a new layer by pressing Ctrl + J . This will create a new layer containing only the object you selected, making it easy to edit without affecting the original layer.
Finally, review the image and use other tools like the Brush Tool or Clone Stamp to finish the photo. You may need to soften edges or do some additional editing to ensure the final result looks natural and professional.

4. Conclusion
The Magic Wand Tool is a powerful tool in Photoshop that allows you to easily create color-based selections. While some may find it less effective than other tools, if you know how to use it properly, you will find that it can save you a lot of time when editing your images.
Mastering the Magic Wand Tool will give you the confidence to work with your photos, from removing backgrounds to creating unique effects. Experiment with different tolerance values and additional functions to find the style that works best for you.
Hopefully this article will help you better understand how to use the Magic Wand Tool in Photoshop. If you have any questions or need more information, do not hesitate to contact us for the best support.


