Best Selling Products

Upgrade Duolingo Super
29 USD

Genuine Adobe Illustrator account
99 USD

Freepik Premium Account
59 USD

Adobe Premiere Pro Account
99 USD

Upgrade Genuine Office 365
49 USD

Copyright Adobe Lightroom Account
59 USD

MidJourney Account
29 USD

Genuine Cheap Canva Pro
39 USD

Upgrade genuine Capture One account
120 USD

Plugin Retouch4me
69 USD

Adobe Photoshop Copyright - Full App
120 USD

ChatGPT Plus Account (GPT-4)
16 USD

Windows 10 & 11 Pro Key
36 USD

Capcut Pro 1 Year
39 USD

Autodesk All App Account Copyright
120 USD
Image file format, resolution, and size

The image file format, resolution, and size are something that any photo editor and Photoshop user needs to know and understand. To help you better understand these terms, join SaDesign Retouching in detail in the following article.
Image file format
One of the main criteria to differentiate between different file formats is image compression. Significantly smaller archive size, allowing you to send or upload them. Or simply have the higher number of images stored on the memory card or computer.
However, the downside to image compression is the high potential for data loss. Though, lossless compression preserves image information (color, sharpness, and detail) leaving a slightly larger file size. On the other hand, lossy compression reduces the file size even further and removes a lot of image data, so the quality of the final image can suffer a lot.
Image file formatLost data compression involves removing some of the media's data, so that that data is simple enough and stored in the desired disk space The raw format captures most information about the lighting and color, providing greater control during post-production, not particularly related to image compression.
You don't have to worry too much about your white balance settings, or the problem of a little over or under light when you shoot. You can even specify a color profile (sRGB, Adobe RGB or ProPhoto RGB) for the image in the Raw converter (Adobe Lightroom, Camera Raw, etc.).
However, we encourage you to select the correct camera settings before taking a photo. That will always save you time in post. When taking photos at the end of the day, you will have a better chance of getting high image quality without ruining the photo if you shoot in Raw mode.
Raw file formats are extremely popular these days in digital photography. However, different camera manufacturers have created different raw formats. This means that not every raw file can be read by many software applications.
Therefore, when you are using these proprietary raw files as a permanent archiving solution, you run the risk of not being able to open and work with them in the future, if the original raw file format you saved was saved. they become redundant.
The solution to this is Digital Negative (DNG), a publicly available storage format for raw files produced by digital cameras. Hundreds of software manufacturers like Apple and Google have developed support for DNG.
Some reputable camera manufacturers like Leica, Casio, Ricoh, Samsung and Pentax have even introduced cameras that offer direct DNG support.
Usually we convert images to DNG (Digital Negative) format when downloading them from the camera. The DNG format will not become as redundant as proprietary camera formats can.
PSD & PSB (Photoshop documents) are a popular format, they are a reasonable choice when saving and archiving your main files (with layers not merging). This is the most effective format for saving files without losing image quality in any way.
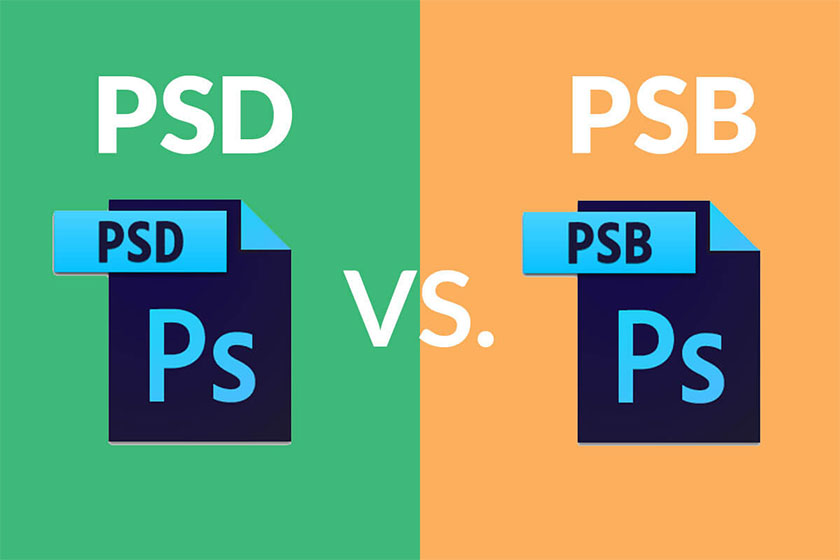 Forrmat PSD and PSB
PSB contains files larger than 2GB in size (video editing, large print designs, etc.)
TIFF is widely used in the publishing industry on both Mac and Windows platforms. It supports layers and layer styles in Photoshop, but is most commonly used to deliver printed images to clients, as it doesn't compress file information like JPEGs.
JPEG or JPG is a lossy compression format, which means you lose quality every time you open and save a JPEG file. It applies additional compression to the image that removes more color / pixel information each time you save it.
JPEG stands for "Joint Photographic Experts Group" and was developed specifically for archiving photographs.
We usually save the last edited photos shared on the web in JPEG format. It is recommended that you provide images to your personal and commercial customers in high-resolution JPEG format, unless otherwise specifically required.
 Image Formats
Summary:
- Shoot in raw format
- Convert your images to DNG when downloading from your camera
- Save your master file in a Photoshop (PSD) document
- Save copies of your edited images in low resolution JPEG for use on the web (read at image resolution below)
Always ask your customers which file format they prefer so that you provide the final image in (JPEG or TIFF) format.
Note: Never give away your PSD (main file).
Resolution
Image resolution is a term that describes the level of detail in an image and refers to its sharpness and clarity. Higher resolution means more detailed images in printed images.
In the case of dot matrix printers and laser printers, the resolution indicates the number of dots per inch.
dpi = dots per inch (for printed image) For graphic displays, screen resolution represents the number of dots (pixels) on the entire screen.
ppi = pixels per inch (for a digital image on the screen).
It is often misunderstood that, the Resolution in the Photoshop Image Size menu represents both the print resolution of the document and the screen resolution of the file. However, the Resolution number only indicates the number of dots / pixels per inch of your image when it is printed.
It's the pixel size actually calculated for an image in any screen-based media (e.g. your website, desktop), its resolution doesn't matter.
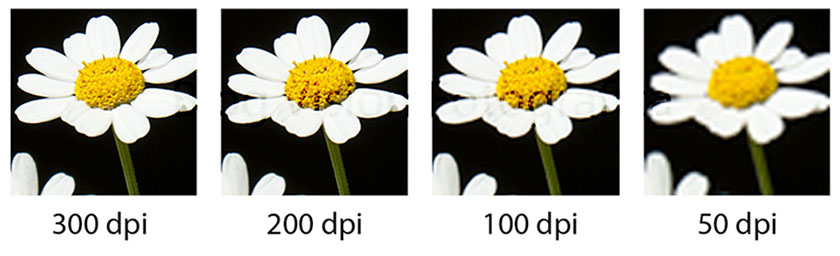 Resolution of image
Resolution has nothing to do with the image on your screen. The 72ppi or 96ppi specs are nothing more than misleading numbers in the past.
You can use a resolution setting of 300ppi or 1 ppi (two ppi) and see exactly the same results on screen. In fact, we can use it to our advantage and share all of our images with 1dpi resolution online, to prevent theft of them for printing.
Summary:
For all your image files that you'll share on the web, set 1 ppi for Resolution. This will not reduce image quality on your screen, furthermore it will prevent unauthorized printing.
- Save your main files (.PSD) and images to print in high resolution. Please set the resolution of the appropriate image.
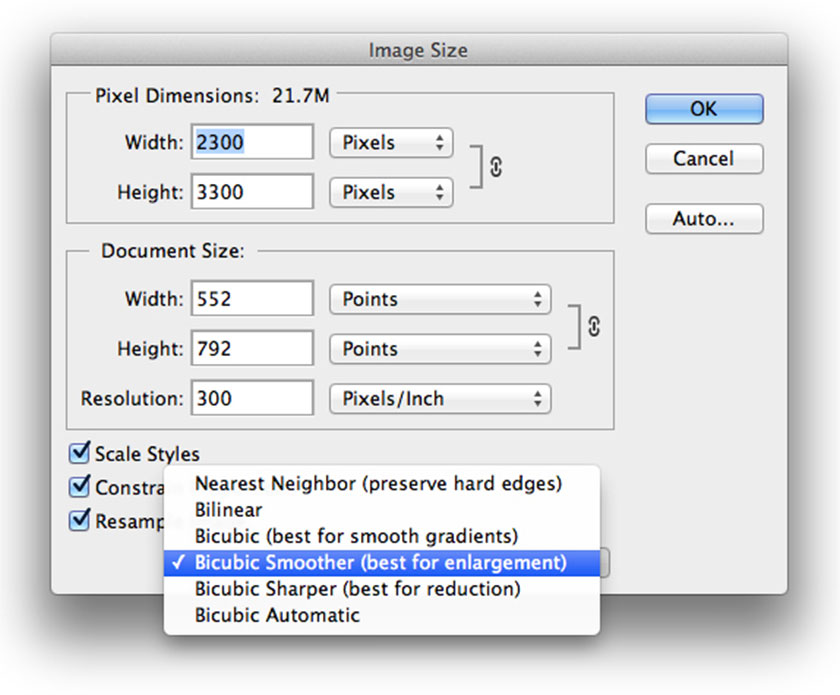
Size photo
The Image Size dialog is divided into two main parts:
- Pixel Size section at the top
- Document Size section below (see illustration below).
The Pixel Size section describes the file size of an image, its width and height in pixels for the images on the screen (images you share on the web).
The Document Size section tells us whether an image will print large or small, based on its resolution.
 Size photo
The Scale Styles option is related to Layer Styles and whether they are affected when selected or deselected when the image is being resized or resized.
A binding ties the width and height of an image together, if you make a change to one of the dimensions of the image, the proportions of the image will remain the same.
Image resampling is changing the amount of data when you change the pixel size or resolution of an image.
When you reduce the size of an image (decrease the number of pixels), the information is removed from it. When you zoom in on the image (increase the number of pixels), new pixels will be added.
Create new pixels and guess their value by referencing surrounding pixels - Bicubic interpolation.
Linearly interpolate new pixels by reading neighboring pixels horizontally and vertically (it's not as accurate as Bicubic).
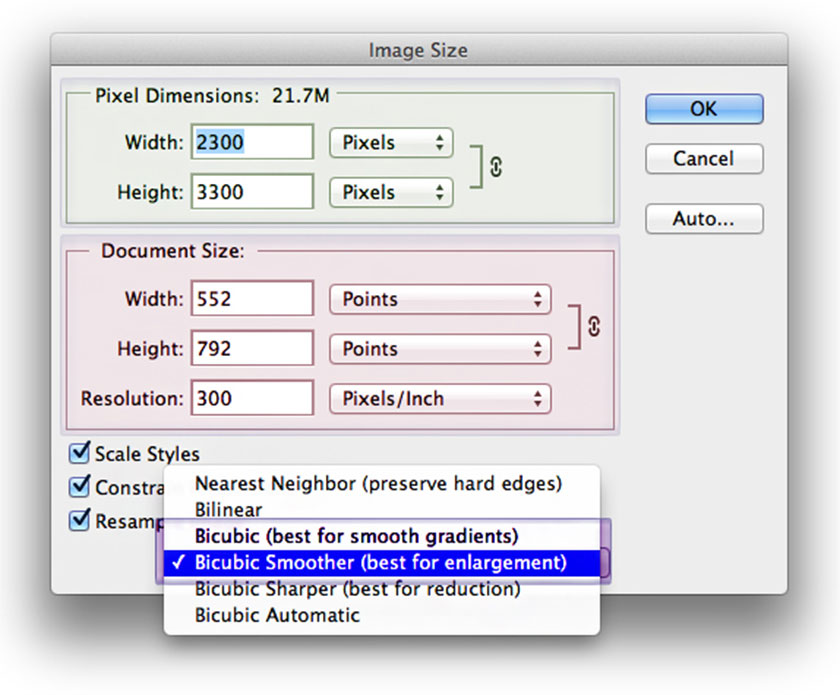 image size dialog box
You can choose the interpolation method to use in the Resample Image drop-down menu at the bottom of the Image Size dialog box (see image above). To specify a default interpolation method you want Photoshop to use whenever it regains image data, go to Preferences -> General -> Image Interpolation.
Bicubic is a more accurate way of resampling, but which Bicubic should you choose? I personally used Bicubic Automatic when upgrading to CS6 (that's when it first appeared in the Resampling dialog) and even though it's sharper than any other, I still apply sharpness It complements specific parts of the image, so I don't bother with Auto sharpening.
If you prefer softer images, check out all types to reduce size:
Bicubic (best for smooth gradations)
- Bicubic Sharper (best for reducing)
- Bicubic Automatic
Let's see which one best suits your preferences to choose from.
Tips for highlighting images
When zooming in an image make sure that all three options are selected and that the Resample Image method is set to Bicubic Smoother.
Enlarge your image to increase the percentage of the image (found in Pixel Size units) in a few rounds, no more than 120% at a time.
Thus, the above sharing by SaDesign Retouching has helped you to better understand the image file format, resolution and size in photoshop. Hope they are really helpful!


VIP Products


Best Selling Products
Upgrade Duolingo Super
29 USD
Genuine Adobe Illustrator account
99 USD
Freepik Premium Account
59 USD
Adobe Premiere Pro Account
99 USD
Upgrade Genuine Office 365
49 USD
Copyright Adobe Lightroom Account
59 USD
MidJourney Account
29 USD
Genuine Cheap Canva Pro
39 USD
Upgrade genuine Capture One account
120 USD
Plugin Retouch4me
69 USD
Adobe Photoshop Copyright - Full App
120 USD
ChatGPT Plus Account (GPT-4)
16 USD
Windows 10 & 11 Pro Key
36 USD
Capcut Pro 1 Year
39 USD
Autodesk All App Account Copyright
120 USD