Best Selling Products
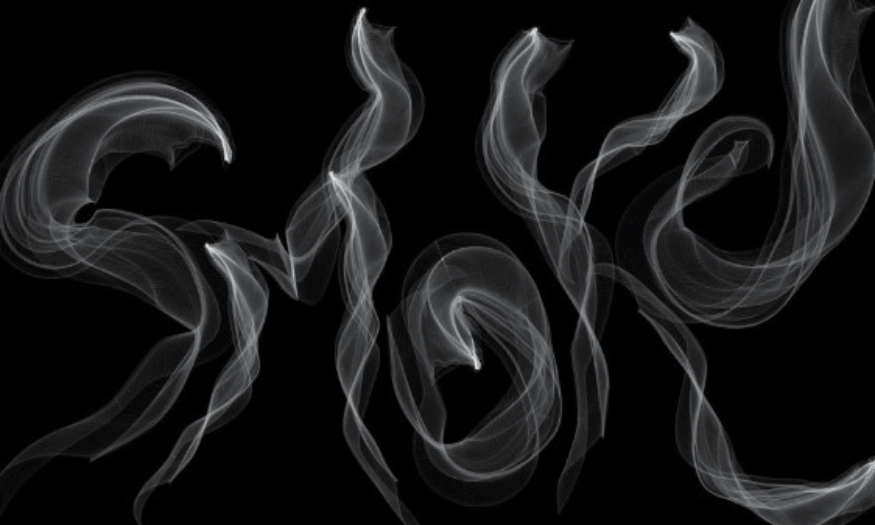
Instructions for creating smoke brushes in Photoshop quickly and easily
Nội dung
- 1. What is a Brush in Photoshop?
- 2. Instructions for creating a new smoke brush in Photoshop
- 3. How to create a smoke brush in Photoshop from an original image
- 4. Secrets to creating beautiful smoke brushes in Photoshop
- 4.1 Choose high quality original images
- 4.2 Correct color correction
- 4.3 Edit brush settings
- 4.4 Try different blending modes
- 4.5 Using layers and masks
- 4.6 Check and edit before saving
- 5. Conclusion
In the field of graphic design, creating attractive and unique effects is what every designer wants. One of the tools that helps you do this is the Brush in Photoshop. The smoke effect created from this tool not only increases the aesthetics of design works but also brings mystery and attraction. Let's explore with Sadesign how to create a simple but effective smoke brush in this article.

In the field of graphic design, creating attractive and unique effects is what every designer wants. One of the tools that helps you do this is the Brush in Photoshop. The smoke effect created from this tool not only increases the aesthetics of design works but also brings mystery and attraction. Let's explore with Sadesign how to create a simple but effective smoke brush in this article.
1. What is a Brush in Photoshop?
A brush in Photoshop is a tool that allows users to draw or paint on the surface of an image. It can be customized in many different ways, from size, shape to transparency. Brushes can simulate many different surfaces and materials, from soft brush strokes of traditional painting to special effects such as smoke, fire or light. Using brushes makes the design process more flexible and creative. You can easily create unique effects just by adjusting the parameters of the brush.
.png)
2. Instructions for creating a new smoke brush in Photoshop
Creating a Smoke Brush in Photoshop not only helps you add creativity to your design works but also brings a mysterious and attractive effect. This method does not require you to have a smoke image available. Instead, you will use the tools available in Photoshop to create a unique Smoke Brush yourself. Here is the step-by-step process:
Step 1: Create a new file
Open Photoshop : Launch the Photoshop software on your computer.
Create a new document : Go to File > New menu. Choose any size you want for your document, such as 800x800 pixels. Set Background Contents to White and press OK .
Step 2: Fill the background color
Select the Paint Bucket Tool (G): Use this tool to fill the background of the layer with black. This will create a dark background, making the smoke stand out more.
Create a new transparent layer : Click the create new layer icon at the bottom of the Layers panel to create a new transparent layer where you will paint the smoke.
Step 3: Draw the smoke shape
Select Brush Tool (B): Choose a basic Brush with large diameter and low hardness.
Choose Gray : To draw smoke, choose gray instead of black.
Outline the smoke shape : Start drawing on a transparent layer. Experiment with different brush sizes to create squiggly and irregular lines, similar to the natural shape of the smoke. If you make a mistake, don't worry, just press Ctrl + Z to go back.
.png)
Step 4: Adjust brightness and darkness
Select the Dodge Tool (O) and Burn Tool (O) : Use the Dodge tool to lighten certain areas and Burn to darken others.
Random Sweep : Apply this tool to the smoke to create natural light and dark areas, making the smoke look more alive.
Step 5: Blur the smoke
Select Filter > Blur > Gaussian Blur : This is an important step to help soften the lines of the smoke.
Adjust Radius Value : Adjust the Radius value to suit the smoke pattern you are creating. Experiment until you are satisfied with the results.
Step 6: Sharpen the smoke
Select Filter > Other > Maximum : After blurring, you can make the smoke more pronounced again.
Adjust Radius : Make the same adjustments as in the previous step to achieve the desired effect.
Step 7: Create the curve
Select Filter > Distort > Wave : This step helps create natural curves for the smoke.
Click the Randomize button : Click until you are satisfied with the effect created.
Step 8: Adjust the opacity
Select Edit > Fade Wave : After creating the wavy effect, adjust the Opacity value to make the smoke look softer and more natural.
Step 9: Save the Smoke Brush
Repeat steps 5 to 8 : Continue adjusting and perfecting until you feel the Smoke Brush is satisfactory.
Save Brush : Finally, go to Edit > Define Brush Preset, name your Smoke Brush and hit OK . Now your Smoke Brush is ready to use!
.png)
3. How to create a smoke brush in Photoshop from an original image
Creating Smoke Brushes from Stock Images is an effective and simple way to add unique smoke effects to your designs. To create the perfect image, you need to have a photo of smoke with high contrast against the background. Here is a step-by-step guide to creating Smoke Brushes from Stock Images.
Step 1: Open the smoke image in Photoshop
Start Photoshop : Open Photoshop software on your computer.
Open Image : Go to File > Open and select the smoke image you have prepared. Make sure the image has high contrast with the background to help the Brush creation process go more smoothly.
Step 2: Convert the image to grayscale
Converting Colors : To create an effective Smoke Brush, you first need to convert your image to grayscale. Go to Image > Adjustments > Desaturate. This will remove the colors and leave only the gray tones, making it easier to adjust the brightness and darkness of your image later.
Step 3: Adjust brightness and darkness
Using Levels : To make the smoke stand out and the background darker, you need to adjust the lightness and darkness. Go to Image > Adjustments > Levels. In the Levels window, you'll see three sliders: one for the shadows, one for the highlights, and one for the midtones.
Slider drag : Drag the left slider (Input Levels) to the right to darken the background, and drag the right slider to the left to lighten the smoke. Adjust until you see the smoke is clear and stands out from the background.
Step 4: Select the smoke part
Select the Rectangular Marquee Tool : Now you need to select the part of the smoke that you want to use to create the Brush. Select the Rectangular Marquee Tool (M) from the toolbar.
Drag to Select : Use this tool to drag to select a rectangular area around the smoke. Make sure the smoke you select is clearly shaped and not too large, as a Brush that is too large can be difficult to use in practice.
Step 5: Save the smoke as a Brush
Save Brush : After selecting the smoke, go to the Edit > Define Brush Preset menu. A dialog box will appear asking you to name your smoke brush. You can name it according to your preference or give it a descriptive name that is easy to remember.
Click OK : After naming, click OK to save the Smoke Brush.
Step 6: Check the Smoke Brush
Select Brush Tool : Switch to the Brush tool by pressing the shortcut key (B) or selecting it from the toolbar.
Select New Brush : In the Brush Presets panel, find the Brush you just created and select it.
Try it out : Create a new layer by clicking the Create New Layer icon at the bottom of the Layers panel. Then, try painting a few strokes with the Smoke Brush on this new layer to test the effect. You can adjust the size or softness of the brush if needed.
Step 7: Fine-tune the Brush (optional)
Further customization : If you want your smoke brush to have more unique characteristics, you can adjust the properties of the brush in the Brush Settings panel. Here, you can adjust the softness, transparency, and many other settings to achieve the desired effect.
.png)
4. Secrets to creating beautiful smoke brushes in Photoshop
Creating smoke brushes in Photoshop also requires meticulous attention to detail to ensure that the final product is of high quality. Below are the important points that you need to keep in mind to be able to create truly impressive and beautiful smoke brushes.
4.1 Choose high quality original images
When using stock images to create smoke brushes, the first and most important thing is to choose a high resolution image. Images with high contrast and low noise will help you create sharp and realistic smoke brushes more easily. You can search for images on free stock photo websites or take your own photos with your camera. A clear photo will create a solid foundation for your smoke brushes.
4.2 Correct color correction
Before you start editing, convert your image to grayscale. This will make it easier to adjust the lightness and darkness of the smoke. The goal is to make the smoke brighter and the background darker to create the best contrast. This will help to highlight the smoke effect, making it more vibrant.
4.3 Edit brush settings
While creating a smoke brush, it is important to adjust the settings of the brush tool. You should experiment with parameters such as size, hardness, and transparency to find the perfect combination for your idea. Don’t hesitate to adjust the blend mode to create the most unique and natural effects for your smoke brush.
4.4 Try different blending modes
When painting your smoke brush on a new layer, experiment with different blending modes. Some popular modes for smoke effects include screen, lighten, color dodge, and overlay. Each blending mode will give your smoke a different feel, so take your time to find the one that best suits your photo. You can change the blending mode through the layer > layer style > blending options menu.
4.5 Using layers and masks
Using layers and masks not only helps you organize your work better, but also allows you to edit and adjust flexibly. Create a separate layer for each smoke brush, this will help you easily move, rotate, or distort the smoke without affecting other parts of the artwork. In addition, masks allow you to hide unwanted parts of the smoke or make the smoke fade away in the distance, creating a more natural and realistic feel.
4.6 Check and edit before saving
Once you’ve finished creating your smoke brush, take the time to review the results. Carefully tweak the little details like hue, brightness, saturation, and contrast. This will help you make sure your smoke brush is up to par. Finally, don’t forget to save your smoke brush as a brush preset so you can reuse it in future projects. Just go to edit > define brush preset and give your brush a name.
(1).png)
5. Conclusion
Creating smoke brushes in Photoshop is not just for those with experience or talent for drawing. With the above notes and instructions, anyone can create unique smoke effects, bringing a magical beauty to their works. Experiment, be creative and enjoy the design and you will see that creating smoke brushes is really simple and fun!


