Best Selling Products

Windows 10 & 11 Pro Key
36 USD

Adobe Premiere Pro Account
99 USD

Freepik Premium Account
59 USD

Genuine Adobe Illustrator account
99 USD

Capcut Pro 1 Year
39 USD

Genuine Cheap Canva Pro
39 USD

Upgrade Duolingo Super
29 USD

Autodesk All App Account Copyright
120 USD

Upgrade Genuine Office 365
49 USD

MidJourney Account
29 USD

Copyright Adobe Lightroom Account
59 USD

Adobe Photoshop Copyright - Full App
120 USD

ChatGPT Plus Account (GPT-4)
16 USD

Plugin Retouch4me
69 USD

Upgrade genuine Capture One account
120 USD
Photography Dictionary: Understanding the Basic Language of Light
Nội dung
- I. Basic terminology in digital photography
- 1. ISO
- 2. Aperture
- 3. Shutter Speed
- 4. White Balance (WB)
- 5. RAW and JPEG image formats
- 6. Resolution
- II. Advanced Concepts for Deep Understanding of Photography
- 1. DOF (Depth of Field)
- 2. Bokeh
- 3. Exposure
- 4. Histogram
- 5. Focal Length
- 6. Crop Factor
- III. Photography genres and specialized terminology
- 1. Portrait photography
- 2. Landscape Photography
- 3. Street photography
- 4. Product photography
- IV. Equipment and accessories in photography
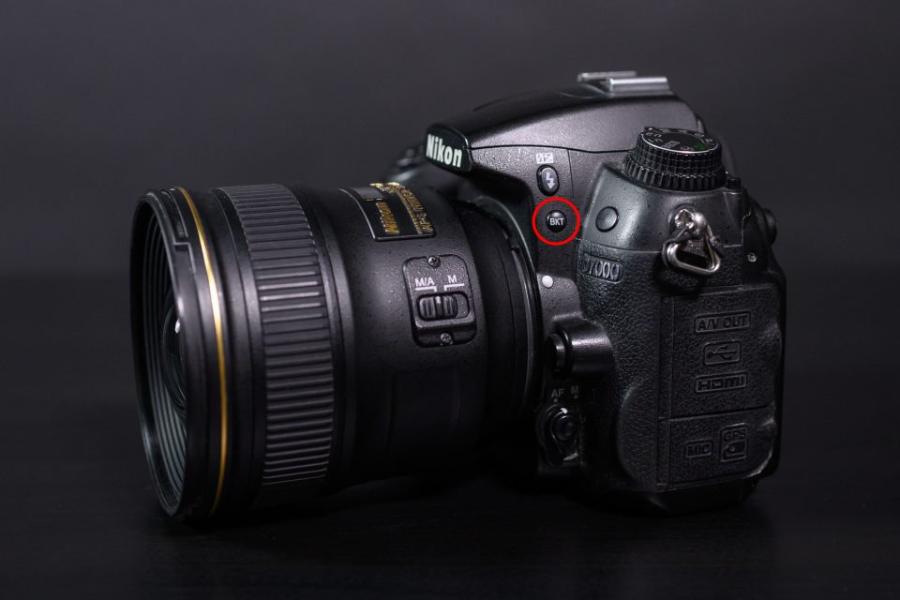
- 1. Camera body
- 2. Lens
- 3. Tripod
- 4. Filter
- 5. Memory card and spare battery
- V. Conclusion
Explore the beginner's photography glossary with over 50 essential terms. Master the fundamentals of light, composition, aperture, ISO, DOF, and more.
Photography is not just about pressing the shutter and capturing the moment. It is the art of light, composition, technique and emotion. For beginners, approaching the world of photography sometimes becomes difficult because of the dense system of terminology. This article sadesign brings a basic photography dictionary, helping you easily understand and master the unique language of this fascinating art.
I. Basic terminology in digital photography
Basic terminology in digital photography is an important foundation to help photography enthusiasts better understand the concepts and techniques involved. Some common terms include
1. ISO
ISO is one of the three most important factors in the "Exposure Triangle", along with aperture and shutter speed. ISO represents the sensitivity of the camera sensor to light . Simply put, ISO tells you how quickly the sensor will react to the available light.
-
Low ISO (e.g. 100, 200, 400) : When you use a low ISO, the sensor is less sensitive to light. This requires more light to produce a well-lit photo. The advantage is that the photo will be sharp, detailed , and almost noise-free . Therefore, low ISO is ideal for shooting in good lighting conditions, such as outdoor daylight, when you want the best photo quality.
-
High ISO (e.g. 800, 1600, 3200 or higher) : As you increase the ISO, the sensor becomes more sensitive to light. This allows you to shoot in low light conditions without requiring a very slow shutter speed or a very large aperture. However, the main drawback of high ISO is that it introduces noise , which reduces the sharpness and detail of your photos. Noise usually appears as colored spots or tiny grains in your photos. The amount of noise depends on the quality of your camera's sensor.
2. Aperture
Aperture is the opening in the lens that allows light to enter the camera sensor. It is denoted by the letter "f" followed by a number (e.g. f/1.8, f/2.8, f/5.6, f/11, f/22). Aperture is the main factor that controls depth of field (DoF) , which is the area of the image that is in sharp focus.
-
Large aperture (small f-number, e.g. f/1.8, f/2.8) : A large aperture means that the opening in the lens is wider, allowing more light to reach the sensor. This is useful in low light conditions. In particular, large apertures create a shallow depth of field (DoF) , meaning that only a small part of the image is in sharp focus, while the background is blurred (bokeh) . This effect is often used in portraiture to highlight the main subject and blur distracting elements behind it.
-
Small aperture (large f-number, e.g. f/8, f/11, f/22) : A small aperture means the opening in the lens is narrower, allowing less light to reach the sensor. This requires more light or a slower shutter speed. A small aperture creates a deep depth of field (DoF) , meaning a larger area of the image will be in sharp focus, from the foreground to the background. This is ideal for landscape or architectural photography, where you want everything in the frame to be in focus.
3. Shutter Speed
Shutter speed is the length of time the camera's shutter is open to let light hit the sensor. It is measured in seconds or fractions of a second (e.g. 1/1000s, 1/125s, 1s, 2s). Shutter speed controls how much light hits the sensor and how motion is represented in the photo .
4. White Balance (WB)
White balance is a setting in your camera that helps ensure that colors in your photos are reproduced as faithfully as possible under different lighting conditions. Different light sources (sunlight, incandescent, fluorescent, etc.) have different “color temperatures,” which can cause white to appear slightly blue, yellow, red, or orange. White balance helps eliminate these unwanted color casts.
-
Auto WB (AWB) Mode : Most cameras have an Auto WB mode, which allows the camera to automatically analyze the scene and adjust the color temperature. This mode is convenient and works well in many situations.
-
Preset Modes : Cameras often have preset white balance modes for specific lighting conditions such as:
-
Daylight/Sunny
-
Cloudy
-
Shade
-
Incandescent/Tungsten
-
Fluorescent lamp
-
Flash
-
-
Manual White Balance (Custom/Preset WB) : This is the best way to ensure absolutely accurate colors. You can take a photo of a white or neutral gray object under current lighting conditions, then use that photo as a reference point for the camera to adjust the white balance. This is especially important in situations where accurate colors are extremely important, such as product photography or fine art photography.
5. RAW and JPEG image formats
When taking digital photos, you can choose to save them in one of two main formats:
-
RAW:
-
As a “digital negative” : RAW images are the raw, unprocessed data from the camera sensor. They contain all the information the sensor captured, including dynamic range, color depth, and other parameters.
-
Highest quality : Because they are unprocessed, RAW images retain the most detail and color information, giving you the highest image quality.
-
Suitable for post-processing : RAW format offers maximum flexibility for post-processing. You can adjust exposure, white balance, contrast, color and other parameters significantly without significantly reducing image quality.
-
Large capacity : The downside is that RAW images are very large, take up a lot of storage space and are slower to process.
-
Specialized software required : To view and edit RAW photos, you need specialized software such as Adobe Lightroom, Photoshop, Capture One, or the software that came with your camera manufacturer.
-
-
JPEG:
-
Processed and compressed : JPEG is an image format that has been processed by the camera (applied settings for white balance, sharpness, saturation, etc.) and compressed to reduce the file size.
-
Convenient and popular : Due to its smaller size and compatibility with most devices and software, JPEG is convenient for sharing directly on social networks, printing or viewing on devices.
-
Lower quality than RAW : Compression and processing lose some data, especially in the shadows and highlights. This limits the ability to edit in post-production without losing quality. If you edit JPEG too much, the image may become grainy or lose detail.
-
Small capacity : The advantage is small file size, saving storage space and faster memory card writing speed.
-
6. Resolution
The resolution of a digital photo is measured in megapixels (MP) . One megapixel is equal to one million pixels. Resolution refers to the number of pixels that make up a photo . For example, a photo with a resolution of 24 MP means that it contains approximately 24 million pixels. The higher the MP number, the more pixels the photo contains, which means the photo is capable of showing more detail and can be printed at larger sizes without becoming pixelated or blurry.
II. Advanced Concepts for Deep Understanding of Photography
Photography is not just about clicking a camera to capture moments, but an art that requires a deep understanding of advanced concepts.

1. DOF (Depth of Field)
Depth of field (DoF) is one of the most important concepts for controlling the sharpness of your photos. It defines the space before and after the main focus point where the image remains acceptably sharp . Understanding and controlling DoF helps you direct the viewer's eye to what's most important in the frame.
-
Shallow DoF : This is when only a small part of the photo is in sharp focus, while the rest, especially the background, is blurred. This effect is useful for highlighting the subject and separating it from a cluttered background, creating a photo with depth and drama. Shallow DoF is usually achieved with a large aperture (small f-number) , a long focal length (telephoto) lens, or when you stand close to the subject.
-
Deep DoF : In contrast, deep DoF means that a large area of the frame is in sharp focus, from the foreground to the background. This is ideal for genres like landscapes, architecture, or group photos where you want everything to be clear. Deep DoF is usually achieved with a small aperture (large f-number) , a wide-angle lens, or when you stand far away from your subject.
2. Bokeh
Bokeh is a Japanese term that describes the quality or “beauty” of the out-of-focus areas of a photograph, especially the blurred background. It’s not simply the blurring of the background, but the way soft, blurred highlights blend together, forming soft circles of light or shapes.
The quality of bokeh depends on many factors:
-
Lenses : Specially designed lenses with good optical quality often produce better bokeh.
-
Aperture : Large aperture (small f-number) is the main factor that creates a distinct bokeh effect. The larger the aperture, the more and smoother the blur area.
-
Aperture Blade Shape : The number and shape of the aperture blades inside the lens affects the shape of the bokeh circles. Rounder aperture blades generally produce smoother bokeh.
-
Distance : The distance between the subject and the background, as well as the distance from the camera to the subject, also affects the amount of bokeh blur.
A beautiful bokeh will subtly highlight the subject, giving the photo a soft and artistic feel.
3. Exposure
Exposure is one of the most basic yet important concepts in photography, as it determines the total amount of light that hits the camera sensor , which in turn affects the brightness of the photo. Correct exposure is the perfect balance so that the photo is neither too dark (underexposed) nor too bright (overexposed), retaining detail in both the dark and bright areas.
Exposure is controlled by the "exposure triangle" which consists of three elements:
-
ISO : Sensor sensitivity to light.
-
Aperture : The size of the lens opening, controls the amount of light entering and the depth of field.
-
Shutter Speed : How long the shutter is open, controlling the amount of light that gets in and the ability to freeze or blur motion.
Changing any one of these three factors will affect the amount of light and therefore the overall exposure. For example, if you increase the shutter speed (to freeze motion), you will need to increase the ISO or open the aperture wider to compensate for the lost light, in order to keep the exposure balanced. The goal is to find the optimal combination of these three factors to achieve the desired brightness and visual effect of the photo.
4. Histogram
Histogram is a graphical graph that shows the distribution of brightness values (from black to white) in a photograph. It is an extremely useful tool for objectively assessing the exposure and dynamic range of a photograph, especially when camera displays can be inaccurate in bright sunlight.
-
X-axis : Represents the tones from darkest (left) to lightest (right). The extreme left is pure black, the extreme right is pure white.
-
Vertical axis (Y-axis) : Represents the number of pixels with that brightness value.
5. Focal Length
The focal length of a lens is the distance from the optical center of the lens to the camera sensor when the lens is focused at infinity. Focal length is measured in millimeters (mm) and is the main factor that determines the angle of view and magnification of the image.
6. Crop Factor
Crop factor is an important concept when you use a lens designed for a Full-frame camera on a camera with a smaller sensor (e.g. APS-C or Micro Four Thirds). The smaller sensor will “crop” part of the image that the Full-frame lens is intended to project, resulting in a smaller frame.
III. Photography genres and specialized terminology
Photography is a diverse art form, encompassing many genres and specialized terminology that enthusiasts and professionals need to master. Some of the most popular genres include:
1. Portrait photography
-
Catchlight : light reflected in the eyes, giving life to the character.
-
Rembrandt lighting : a lighting technique that creates a triangle of light under the eyes.
2. Landscape Photography
-
Golden hour : the period of 1 hour after dawn and 1 hour before dusk, the light is soft and golden.
-
HDR (High Dynamic Range) : take multiple photos with different exposures, combine them to get full detail in bright and dark areas.
3. Street photography
-
Candid : natural, unstaged photography.
-
Decisive moment : golden moment initiated by Henri Cartier-Bresson.
4. Product photography
-
Light tent/box : light box helps product photos to be bright and shadow-free.
-
Flat lay : composition of top-down shots of objects on a flat surface.
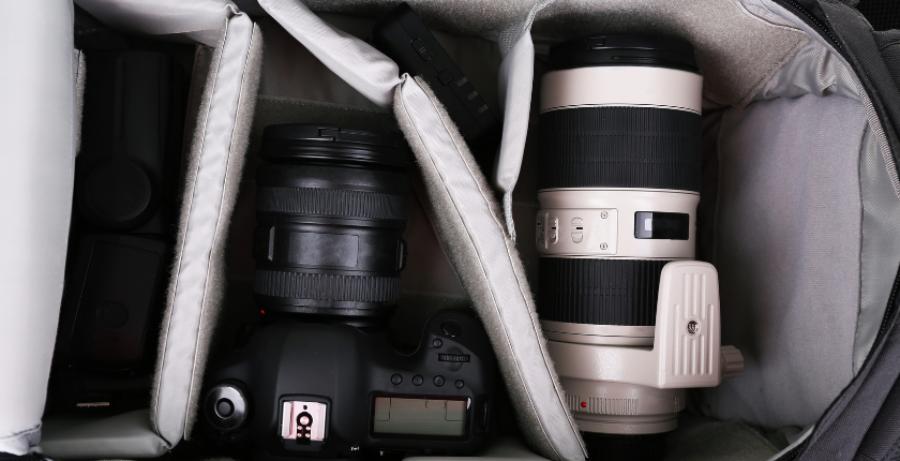
IV. Equipment and accessories in photography
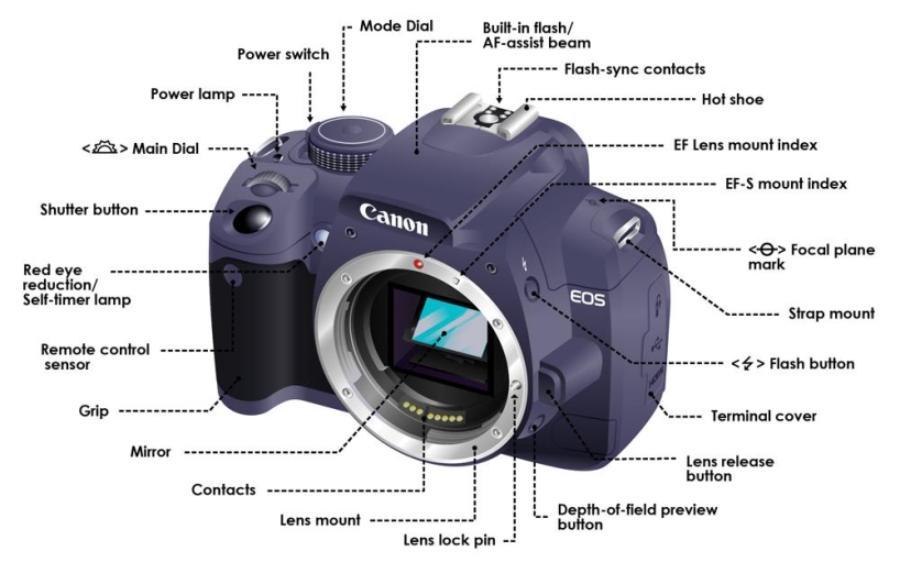
1. Camera body
The part that contains the sensor, shutter and image processing system. Popular lines: DSLR, mirrorless, compact.
2. Lens
Lens determines a lot of the quality of the photo. Classification by focal length: wide angle, standard, telephoto, macro...
3. Tripod
A tool to hold the camera steady, especially useful for long exposures, landscape or product photography.
4. Filter
-
UV filter : protects the lens.
-
ND filter : reduces light for long exposure shooting during the day.
-
Polarizing filter : reduces reflection, increases color saturation.
5. Memory card and spare battery
Always carry enough so you don't miss a moment. Choose a high-speed card if you shoot video or take continuous shots.
V. Conclusion
Getting familiar with the terminology of photography not only helps beginners improve their skills but also opens the door to the world of professional creativity. From ISO, aperture, shutter speed to composition, lighting and post-production techniques, each concept is a building block. Once you understand it, you will no longer see photography as something too complicated but instead, a magical and emotional journey where you become a visual storyteller.


VIP Products


Best Selling Products
Windows 10 & 11 Pro Key
36 USD
Adobe Premiere Pro Account
99 USD
Freepik Premium Account
59 USD
Genuine Adobe Illustrator account
99 USD
Capcut Pro 1 Year
39 USD
Genuine Cheap Canva Pro
39 USD
Upgrade Duolingo Super
29 USD
Autodesk All App Account Copyright
120 USD
Upgrade Genuine Office 365
49 USD
MidJourney Account
29 USD
Copyright Adobe Lightroom Account
59 USD
Adobe Photoshop Copyright - Full App
120 USD
ChatGPT Plus Account (GPT-4)
16 USD
Plugin Retouch4me
69 USD
Upgrade genuine Capture One account
120 USD