Best Selling Products

Adobe Premiere Pro Account
99 USD

Genuine Cheap Canva Pro
39 USD

Genuine Adobe Illustrator account
99 USD

Autodesk All App Account Copyright
120 USD

MidJourney Account
29 USD

Capcut Pro 1 Year
39 USD

Upgrade Genuine Office 365
49 USD

Windows 10 & 11 Pro Key
36 USD

Copyright Adobe Lightroom Account
59 USD

Freepik Premium Account
59 USD

Adobe Photoshop Copyright - Full App
120 USD

Upgrade Duolingo Super
29 USD

Upgrade genuine Capture One account
120 USD

ChatGPT Plus Account (GPT-4)
16 USD

Plugin Retouch4me
69 USD
Premiere Pro CC: Advanced Audio, In-Depth Tips (Part 2)
Nội dung
- 1. Why is audio editing important in Premiere Pro CC?
- 2. Introduction to audio editing tools in Premiere Pro CC
- 2.1. Audio Track Mixer
- 2.2. Essential Sound Panel
- 2.3. Effects Controls
- 3. Advanced audio editing techniques in Premiere Pro CC
- 3.1. Adjust Equalizer (EQ)
- 3.2. Compress audio with Compressor
- 3.3. Remove noise with DeNoise
- 3.4. Add Reverb effect
- 4. Some tips when editing audio in Premiere Pro CC
- 4.1. Using effect presets
- 4.2. Test sound on multiple devices
- 4.3. Using the Audio Limiter tool
- 4.4. Using keyframes to adjust volume
- 4.5 Balance sound with EQ effect
- 4.6. Synchronize audio and video
- 4.7. Add sound effects to increase professionalism
- 4.8. Export file with optimal audio settings
Explore advanced audio editing techniques in Premiere Pro CC. Get detailed instructions on how to use audio editing tools to create professional-quality audio tracks for your videos.
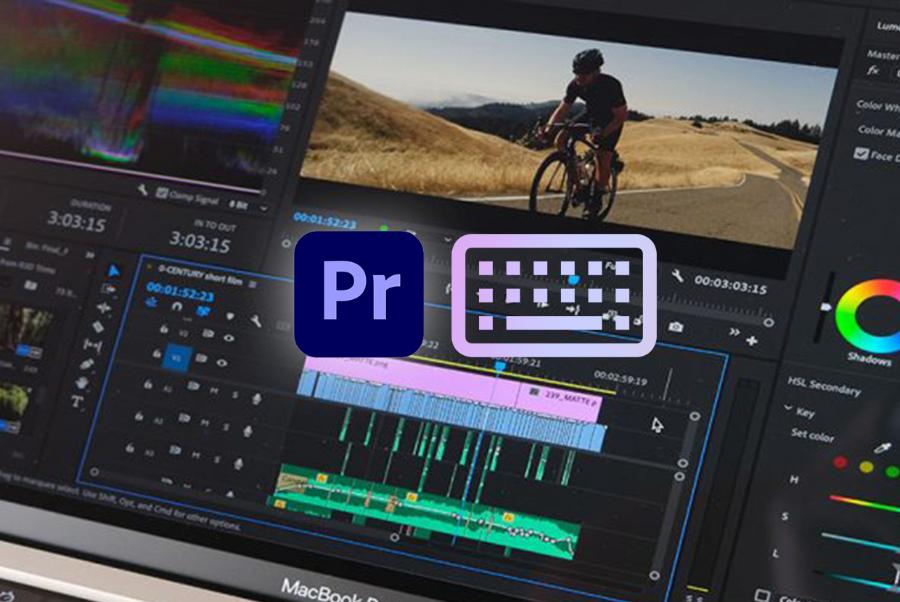
After grasping the basic principles of audio editing in part 1, this part 2 will delve into more advanced techniques in Premiere Pro CC. With the powerful tools available, you will learn how to effectively use features such as adjusting Equalizer, compressing audio, removing noise, and creating perfect sound effects. Along with that, sadesign will introduce audio editing tips to make your videos smoother and more professional.
1. Why is audio editing important in Premiere Pro CC?
Sound plays an indispensable role in every video, whether it is a film product, YouTube video or vlog. A video with beautiful images but lacking quality sound will lose connection with the viewer. Therefore, editing sound in Premiere Pro CC is an important part that cannot be ignored when producing a video.
.jpg)
Premiere Pro CC offers a range of tools to help you fine-tune your audio to perfection. By using these tools correctly, you can remove unwanted noise, improve dialogue quality, and add life to your videos.
Audio editing in Premiere Pro CC is an important step to ensure the overall quality of the video product. Audio not only helps convey the message but also creates emotion, connection and professionalism for the content. A video with beautiful images but unclear audio, too loud, too soft or unbalanced between elements such as voice, background music and sound effects will reduce the viewer's experience. Premiere Pro CC provides many powerful tools such as volume adjustment, noise removal, audio equalization and applying audio effects so that users can optimize the sound quality in the project. Therefore, investing time to fine-tune audio is necessary to create professional and impressive video products.
2. Introduction to audio editing tools in Premiere Pro CC
Before we get into advanced techniques, we need to familiarize ourselves with some important audio editing tools in Premiere Pro CC:
2.1. Audio Track Mixer
Audio Track Mixer is a tool that allows you to adjust audio directly on audio tracks in your project. You can change the volume, add effects, adjust the balance between channels, and monitor the audio levels of each track.
Audio Track Mixer in Premiere Pro CC is a powerful tool that helps users easily manage and edit audio during video editing. With a friendly interface and flexible features, this tool allows you to adjust the volume, add audio effects, balance audio between tracks, and apply professional filters to improve overall audio quality. Audio Track Mixer not only supports detailed audio control but also helps optimize workflow, especially useful for projects that require precision and high quality audio. This is an indispensable tool for professional filmmakers and editors.
2.2. Essential Sound Panel
The Essential Sound Panel is ideal for beginners or anyone who wants to quickly edit audio without having to do too much work. It categorizes audio into categories like Speech, Music, Sound Effects, and Ambience, making it easy to apply editing presets to each type of audio.
This is a powerful tool that supports professional and efficient audio editing. With a friendly interface, this tool allows users to easily categorize audio into groups such as dialogue, background music, sound effects or environment, and then apply appropriate settings with just a few simple steps. Essential Sound Panel provides editing features such as volume balancing, noise reduction, adding sound effects and optimizing overall quality, which greatly improves the audience's listening experience. This is an indispensable tool for professional filmmakers and video editors to create high-quality products.
2.3. Effects Controls
In Premiere Pro CC, Effects Controls is a powerful tool that helps users edit and fine-tune audio in a detailed and professional way. With an intuitive interface, this tool allows you to adjust parameters such as volume, audio balance (panning), and apply various audio effects to create the desired sound quality.
Additionally, you can also use Effects Controls to control the timing and intensity of each effect, giving you maximum flexibility during editing. This is an indispensable part for those who want to improve the sound quality of their video projects.
3. Advanced audio editing techniques in Premiere Pro CC
Premiere Pro CC offers a range of advanced audio editing techniques, helping users optimize the sound quality in their video projects.
.jpg)
3.1. Adjust Equalizer (EQ)
Equalizer (EQ) is an audio frequency editing tool that helps you adjust the bass, mid, and treble to create clear and easy-to-understand sound. Adjusting EQ is an effective way to improve sound quality, especially in clarifying dialogue or highlighting important audio elements.
In Premiere Pro CC, you can use EQ to:
Boost or reduce the bass (Low Frequencies) to keep the sound from being too heavy or lacking.
Adjust the mid frequencies to make the voice clearer.
Brighten or reduce the harshness of the sound by adjusting the high frequencies.
Using EQ skillfully will make the sound in your videos much sharper and easier to listen to.
3.2. Compress audio with Compressor
Compressor is a tool that compresses the dynamic range of your audio, helping you balance between loud and soft sounds. With Compressor, you can make sure that the audio in your video always maintains a stable level, not too loud or too soft.
Important parameters in Compressor include:
Threshold : The sound level at which the Compressor will start to affect.
Ratio : Compression ratio, determines the degree to which the audio will be compressed.
Attack : The time the Compressor starts to act when the sound crosses the threshold.
Release : The time at which the Compressor will end the compression process when the audio drops below the threshold.
Proper audio compression will help your videos stay audible and not lose their rhythm.
3.3. Remove noise with DeNoise
One of the biggest challenges when working with audio is removing unwanted noise, especially background noise when shooting in less than ideal environments. With the DeNoise feature in Premiere Pro CC, you can easily remove these noises and retain important audio.
DeNoise works by identifying and reducing noise in the audio signal, giving you a cleaner recording. You can adjust the level of noise removal to suit each audio clip.
3.4. Add Reverb effect
Reverb is an effect that helps create a sense of space in the sound, making the sound more alive and rich. Applying Reverb helps create a natural sound, as if you were recording in a specific space.
In Premiere Pro CC, you can adjust the level of Reverb to create the soundscape you want. For example, a dialogue scene in a studio might have a soft Reverb, while an outdoor scene might use a stronger Reverb effect to create a spacious sound.
Using techniques like automatic ducking, EQ adjustments, and applying reverb or delay not only improves the listening experience but also adds a professional touch to the final product. For best results, users should combine these tools with the use of high-quality headphones and sound testing on a variety of devices.
4. Some tips when editing audio in Premiere Pro CC
Adobe Premiere Pro CC is not only a powerful video editing tool but also provides many features to support professional audio processing. Audio plays an important role in creating a quality video product, so mastering audio editing tips will help you improve your work efficiency and product quality. Here are some useful tips when working with audio in Premiere Pro CC:
.jpg)
4.1. Using effect presets
For beginners, using the built-in effects presets in Premiere Pro CC is a quick and efficient way to edit audio. These presets are designed to cover basic audio needs, saving you time and getting great results.
4.2. Test sound on multiple devices
Before you finalize your video, you should test the audio on a variety of devices, such as headphones, computer speakers, and professional audio systems. Audio can vary when played on different devices, so testing will help you ensure that your video sounds its best on all platforms.
4.3. Using the Audio Limiter tool
Audio Limiter is a tool that helps you ensure that your audio is not overexposed, avoiding the sound from breaking or distorting when reaching too high a volume. This tool is very useful in protecting your audio quality when producing videos.
4.4. Using keyframes to adjust volume
Keyframes are a useful tool for creating smooth changes in volume throughout a video. You can add keyframes directly in the timeline or in the Effect Controls panel to increase or decrease volume at specific points, such as fading background music during dialogue.
.jpg)
4.5 Balance sound with EQ effect
Equalizer (EQ) is an important tool for balancing the frequency ranges in audio. You can use the Parametric Equalizer or Graphic Equalizer effects in Premiere Pro to enhance vocals, reduce bass, or clarify details in music.
4.6. Synchronize audio and video
When working with video clips that have audio captured from multiple sources, synchronization is essential. Premiere Pro CC offers the "Merge Clips" or "Synchronize" feature to automatically synchronize audio and video based on the sound waveform.
Audio Meters are a tool that helps you monitor audio levels while editing. Make sure that the volume level does not exceed 0 dB to avoid clipping. If necessary, use the Limiter effect to limit the maximum audio level.
4.7. Add sound effects to increase professionalism
To spice up your video, you can add audio effects like reverb, echo, or other creative effects. Premiere Pro CC offers a variety of audio effect options available in the Effects panel.
4.8. Export file with optimal audio settings
When exporting, choose audio settings that are appropriate for the platform you're uploading your video to. For example, if you're exporting your video to YouTube, use AAC format with a bitrate between 192 kbps and 320 kbps to ensure the best audio quality.
miere Pro Account5. Conclusion
Audio editing is an essential part of video production. Premiere Pro CC offers a wide range of powerful tools to help you make basic to advanced audio adjustments, from improving audio quality to removing noise and creating special effects. The techniques and tips we shared in this part 2 will help you improve the quality of your video audio, creating a more professional and impressive product.
With the right combination of in-depth knowledge and the right tools, you'll quickly improve your audio editing skills and create great videos. Keep practicing and exploring more features of Premiere Pro CC to maximize your creativity.


VIP Products


Best Selling Products
Adobe Premiere Pro Account
99 USD
Genuine Cheap Canva Pro
39 USD
Genuine Adobe Illustrator account
99 USD
Autodesk All App Account Copyright
120 USD
MidJourney Account
29 USD
Capcut Pro 1 Year
39 USD
Upgrade Genuine Office 365
49 USD
Windows 10 & 11 Pro Key
36 USD
Copyright Adobe Lightroom Account
59 USD
Freepik Premium Account
59 USD
Adobe Photoshop Copyright - Full App
120 USD
Upgrade Duolingo Super
29 USD
Upgrade genuine Capture One account
120 USD
ChatGPT Plus Account (GPT-4)
16 USD
Plugin Retouch4me
69 USD