Best Selling Products

Upgrade Genuine Office 365
49 USD

Genuine Adobe Illustrator account
99 USD

Windows 10 & 11 Pro Key
36 USD

Autodesk All App Account Copyright
120 USD

Freepik Premium Account
59 USD

Genuine Cheap Canva Pro
39 USD

MidJourney Account
29 USD

Adobe Premiere Pro Account
99 USD

Upgrade genuine Capture One account
120 USD

Adobe Photoshop Copyright - Full App
120 USD

Upgrade Duolingo Super
29 USD

Capcut Pro 1 Year
39 USD

ChatGPT Plus Account (GPT-4)
16 USD

Plugin Retouch4me
69 USD

Copyright Adobe Lightroom Account
59 USD
Quick and effective guide to noise reduction in Photoshop for you
Nội dung
- 1. What is Noise and Why Do We Need Noise Reduction?
- 2. Noise Reduction in Photoshop – Benefits and How to Do It
- 3. Prepare the photo that needs Noise reduction
- 4. Using the Reduce Noise tool in Photoshop
- 5. Use Camera Raw Filter (Advanced Option)
- 6. Further refine details and sharpness
- 7. Check the results and adjust if necessary
- 8. Notes When Reducing Noise
- 9. Conclusion
Detailed instructions on how to remove noise with Photoshop in 1 minute. Simple steps help you create sharp and quality photos with just a few steps.
Removing noise in photos is one of the necessary operations to improve image quality, especially when you work with photos in low light or high ISO. With Adobe Photoshop, removing noise is not difficult. In this article, sadesign will guide you how to remove noise in Photoshop in just one minute, helping you create sharp and beautiful photos immediately.
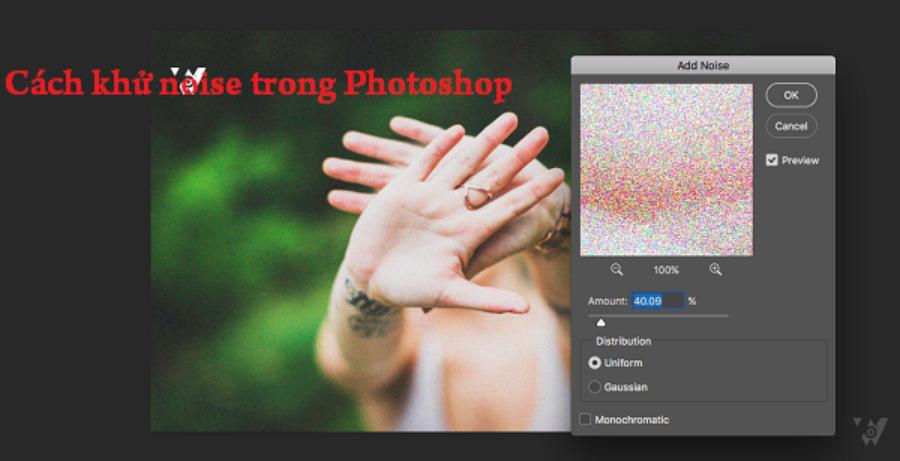
1. What is Noise and Why Do We Need Noise Reduction?
Noise, also known as interference, is unwanted signals or information that appear in data, sound, images or other media. Noise can cause distortion, reduce quality or affect the ability to process and analyze data.
.jpg)
In fields such as signal processing, communications, and artificial intelligence, noise reduction is an important step to improve accuracy, enhance performance, and ensure reliable results. Noise reduction not only optimizes processing but also contributes to improving user experience and product quality in many practical applications. There are two common types of noise:
- Luminance Noise: Causes gray noise particles, affecting the brightness of the image.
- Color Noise: Creates unwanted color spots, reducing the realism of the image.
Noise reduction enhances the sharpness and professionalism of the photo, while improving the viewer's visual experience.
2. Noise Reduction in Photoshop – Benefits and How to Do It
Noise in photography is often the result of shooting in low light conditions or when the camera's ISO is set too high. Noise appears as tiny grains, affecting the clarity and quality of the photo. However, with a powerful tool like Photoshop, removing noise becomes incredibly simple and effective. In the next section, we will show you how to remove noise in just one minute using Photoshop.
Reducing noise in Photoshop is an important step to improve image quality, especially for photos taken in low light conditions or using high ISO. Reducing noise not only makes the image sharper but also adds aesthetics and professionalism to the final product. To do this, you can use the "Reduce Noise" tool in Photoshop by going to the Filter > Noise > Reduce Noise menu and adjusting parameters such as Strength, Preserve Details, Reduce Color Noise, and Sharpen Details to suit your needs. In addition, combining it with techniques such as using Layer Mask to control the area where the effect is applied also helps optimize the results and preserve important details of the image.
3. Prepare the photo that needs Noise reduction
Before you begin, make sure you have your photo open in Adobe Photoshop. If your photo has a lot of noise, especially when shot at a high ISO, be prepared because noise reduction will help to make the photo clearer and reduce unwanted artifacts like grain or light streaks.
.jpg)
Make sure that the photo is not damaged by external factors such as strong light, deep shadows or scratches that reduce the quality of the image. Proper photo preparation will help the processing to be more effective and maintain the integrity of the image content.
4. Using the Reduce Noise tool in Photoshop
The Reduce Noise tool in Photoshop is an effective feature that reduces noise and improves image quality significantly. When used, you can adjust parameters such as the strength of noise reduction, preserving image details, reducing color noise, and sharpening objects. This is especially useful when working with photos taken in low light or of poor quality. To achieve the best results, you should experiment and tweak the settings to suit each specific image, ensuring a balance between reducing noise and preserving the natural details of the photo.
To quickly remove noise, Photoshop provides a very effective tool called Reduce Noise . Here are the detailed steps:
Step 1 : Open the photo in Photoshop.
Step 2 : Select Filter on the menu bar, then select Noise and continue to select Reduce Noise .
Step 3 : In the Reduce Noise window, you'll see a series of sliders that adjust different elements. Adjust the settings as appropriate:
Strength : Adjusts the strength of the noise reduction. Move the slider to find the level that suits your photo.
Preserve Details : Adjust to preserve the details of the photo. Higher will give more detail, but noise may still be present. Experiment to find the balance between noise reduction and detail preservation.
Reduce Color Noise : Removes color noise, a type of noise that can make a photo look cluttered.
Sharpen Details : If the photo is blurry after noise reduction, you can enhance the sharpness by adjusting this bar.
Step 4 : After adjusting the parameters, press OK to apply the changes.
5. Use Camera Raw Filter (Advanced Option)
Camera Raw Filter is a powerful photo editing tool that allows users to fine-tune parameters such as exposure, contrast, white balance, and more with great detail and flexibility. Using this advanced option, you can significantly improve the quality of your images while maintaining the fidelity and sharpness of your photos. For optimal results, take advantage of features such as tone adjustment, noise reduction, and color management to ensure that your final photos reflect your creative vision.
In addition to the default Reduce Noise tool, Photoshop also provides another powerful tool for noise reduction, the Camera Raw Filter . Camera Raw gives you more detailed control, especially when working with RAW files.
Step 1 : Select the photo you want to remove noise from.
Step 2 : Go to Filter > Camera Raw Filter .
Step 3 : In the Camera Raw window, select the Detail tab . You will see sliders for Noise Reduction and Color Noise Reduction .
Luminance : Adjust brightness to reduce light noise.
Color : Reduce color noise.
Detail and Contrast : Adjust detail and contrast after noise reduction.
Step 4 : Apply and press OK .
6. Further refine details and sharpness
To improve image quality, further fine-tuning of details and sharpness is an important step in the processing. This not only enhances sharpness but also highlights important elements, bringing more clarity and realism to the image. Common methods include using sharpening algorithms, enhancing local contrast or applying specialized filters. However, it is important to ensure that the fine-tuning is done in a balanced way, avoiding loss of naturalness or introducing unwanted noise, in order to achieve the best image quality.
(1).jpg)
After denoising, your photo will be clearer, but may lose some detail or become blurry. To fix this, you can use a few other tools to restore detail:
Use the Sharpen Tool : Use the sharpen tool to make the photo clearer after noise reduction. Select Filter > Sharpen > Unsharp Mask and adjust the parameters accordingly.
Using High Pass Filter : This is an advanced technique that enhances sharpness without adding noise. You can apply a High Pass layer on the image and change the blending mode to Overlay or Soft Light .
7. Check the results and adjust if necessary
After doing all the above steps, look at your photo at different zoom levels. Make sure that there is no annoying noise but the detail is still preserved. If you feel that the photo is still a bit blurry, you can try sharpening it a bit more.
Carefully checking the results and making necessary adjustments is an important step in ensuring the quality and accuracy of the work. This not only helps to detect and correct possible errors, but also contributes to improving efficiency and professionalism in the process of performing tasks.
8. Notes When Reducing Noise
When performing noise reduction in Photoshop, there are a few important points to keep in mind to ensure that the image quality is not affected. First, identify the type of noise in the image, such as low light noise or high ISO noise, to choose the appropriate treatment method. Use tools such as "Reduce Noise" or "Camera Raw Filter" sparingly, avoiding overuse as it can cause loss of detail and sharpness in the image.
- Don't Overdo It: Overdoing noise reduction can make the image look “artificial” and lose important details.
- Using Layer Mask: If you only want to apply noise reduction to a specific part of the image, use a layer mask to control the area of the image that is edited.
- Combine With Other Tools: Sometimes, noise reduction needs to be combined with tools like Sharpen or lighting editing to achieve the best results!
Additionally, you should work on a copy of the original layer to preserve the original data, and combine it with other tools like "Sharpen" to balance noise reduction and detail preservation. Finally, test the image at different sizes and resolutions to ensure optimal results.
9. Conclusion
Reducing noise in Photoshop is a simple and effective technique to improve image quality, especially in photos taken in low light conditions or when using high ISO. With powerful tools like Reduce Noise and Camera Raw Filter , you can easily remove noise and create sharp, beautiful photos. Try the simple steps we show you in this article and you will see a clear difference in the quality of your photos.


VIP Products


Best Selling Products
Upgrade Genuine Office 365
49 USD
Genuine Adobe Illustrator account
99 USD
Windows 10 & 11 Pro Key
36 USD
Autodesk All App Account Copyright
120 USD
Freepik Premium Account
59 USD
Genuine Cheap Canva Pro
39 USD
MidJourney Account
29 USD
Adobe Premiere Pro Account
99 USD
Upgrade genuine Capture One account
120 USD
Adobe Photoshop Copyright - Full App
120 USD
Upgrade Duolingo Super
29 USD
Capcut Pro 1 Year
39 USD
ChatGPT Plus Account (GPT-4)
16 USD
Plugin Retouch4me
69 USD
Copyright Adobe Lightroom Account
59 USD