Best Selling Products
Create a road background effect after raining using Photoshop with SaDesign
You can completely turn a dry road into a very unique wet road through Photoshop software. Let's take a look at how to create road background effects after raining using Photoshop through the shares below.
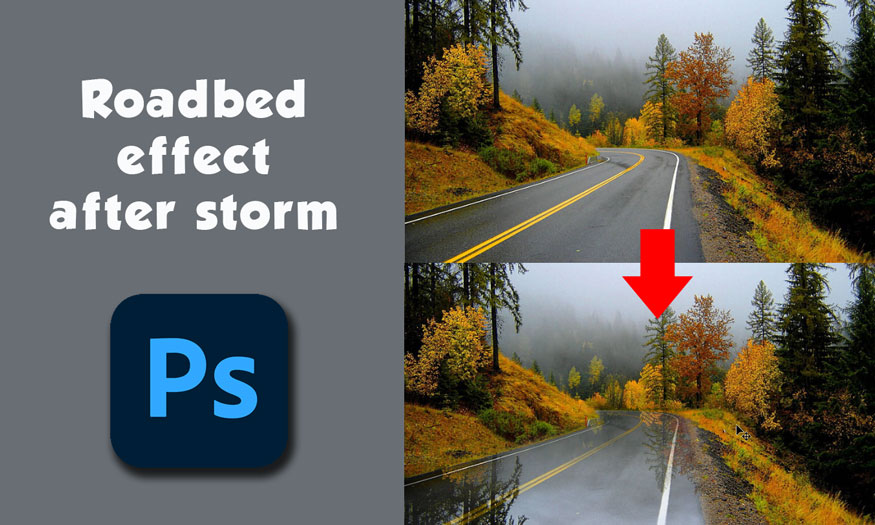
You can completely turn a dry road into a very unique wet road through Photoshop software. Let's take a look at how to create road background effects after raining using Photoshop through the shares below.
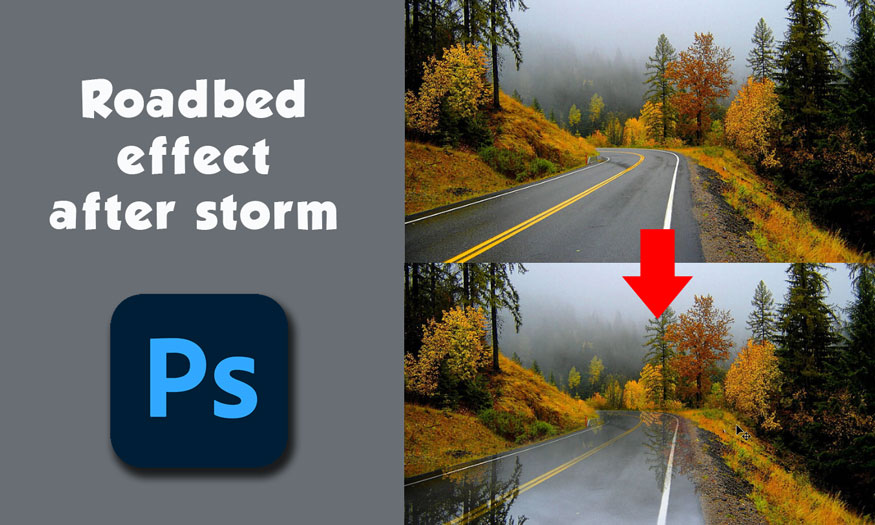
Steps to create a road effect after storm:
After a storm, there will be puddles, reflecting the sky on both sides of the road. To be able to create the road background effect after raining, we need to combine many tools together, specifically how to do it as follows:
Step 1: First we need to open the photo. To open an image, on the menu bar, select File => Open => Select the image to open => OK.
Or you can press the keyboard shortcut Ctrl+O then select the image to open and click OK. Double click on the background layer to unlock it, now we will have layer 0.
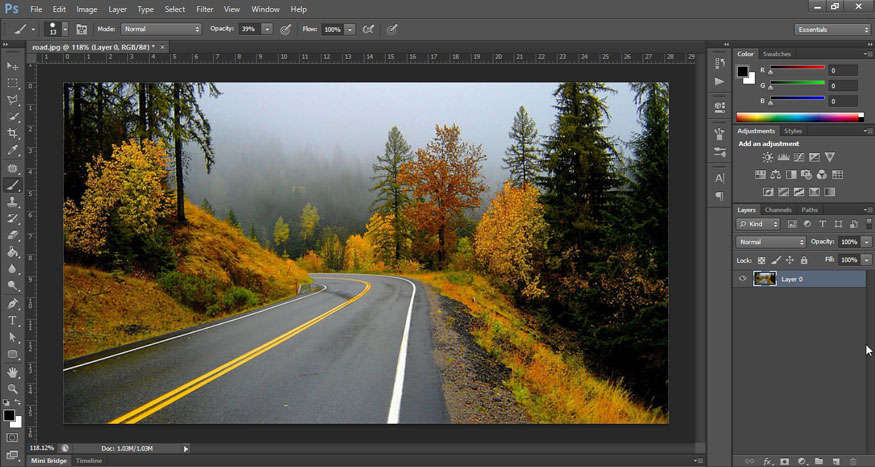
Step 2: We need to duplicate layer 0 by pressing Ctrl+J. Now we have layer 0 copy.
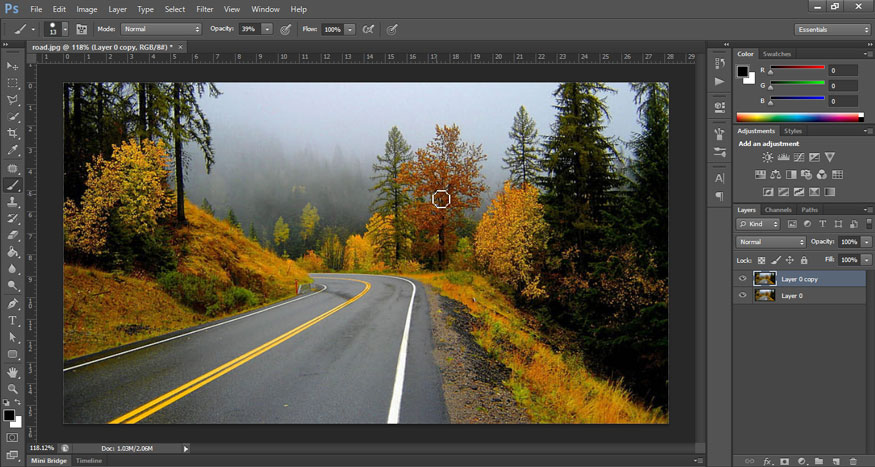
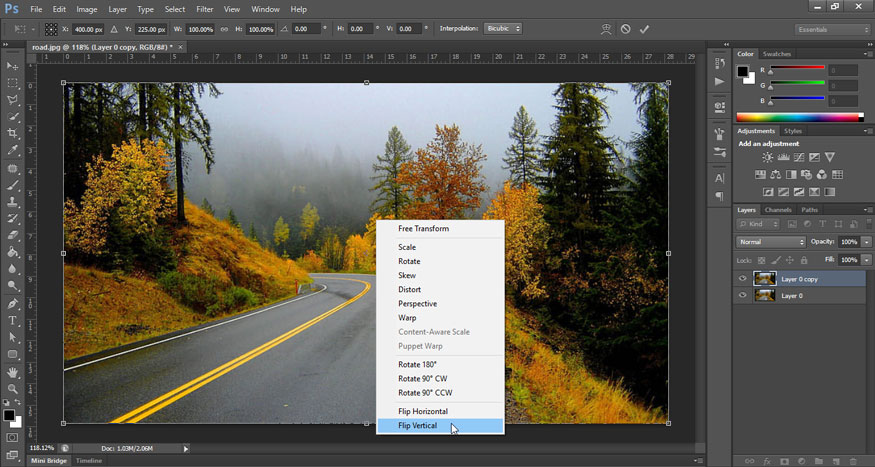
Step 3: At layer 0 copy, press Ctrl+T, then right-click and select Flip Vertical.
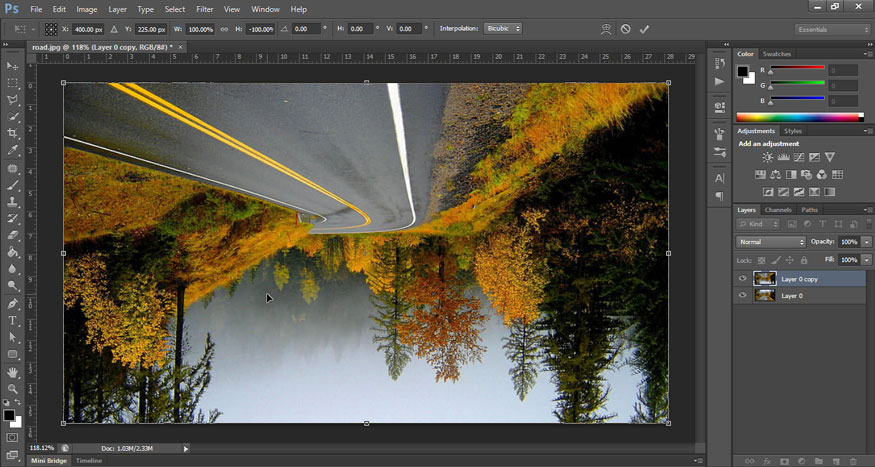
At this point we will get the inverted image as shown below.
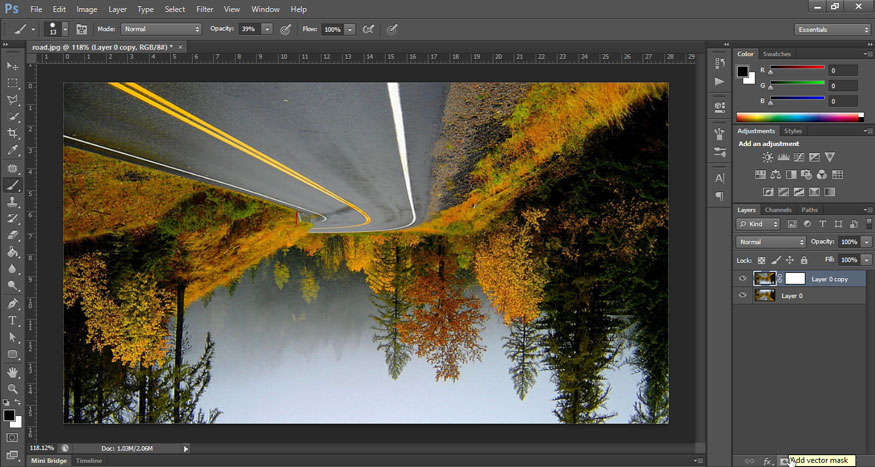
Step 4: Still at layer 0 copy, we will create a mask for it by selecting Add layer mask in the lower right corner of the layer panel.
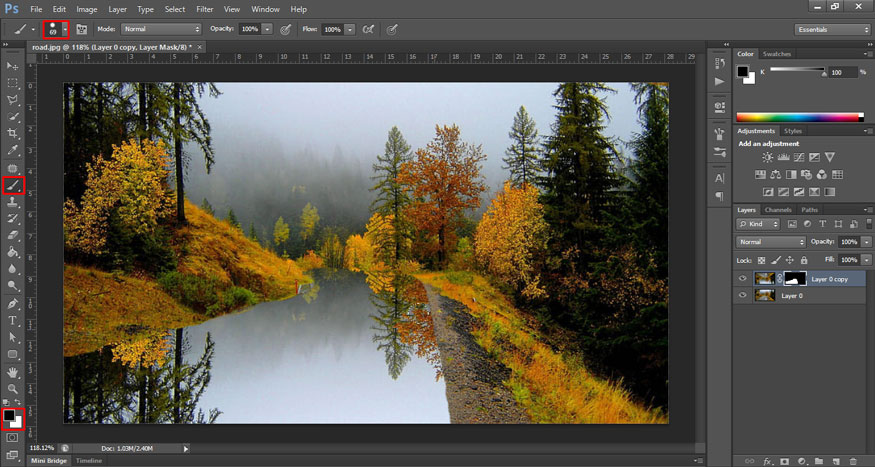
Step 5: Set the Foreground color to black, then use the Brush tool on the toolbar with the appropriate size to paint away unnecessary parts, we only keep the image part on the road surface to create the effect. The road surface after raining has reflections under the water surface.
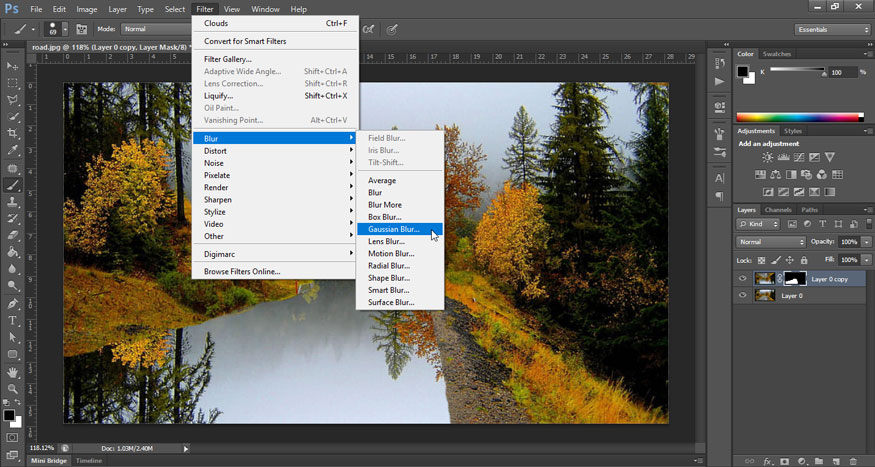
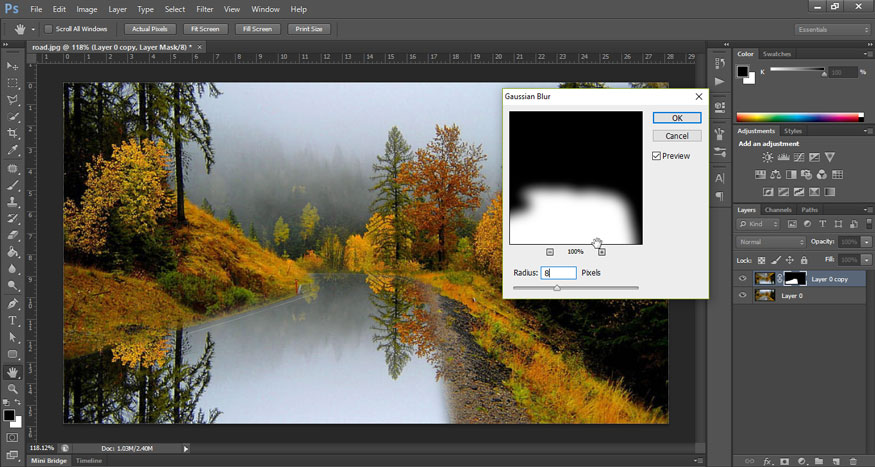
Step 6: On layer mask, on menu, select Filter => Blur => Gaussian Blur.
Adjust the Radius to get the right opacity.
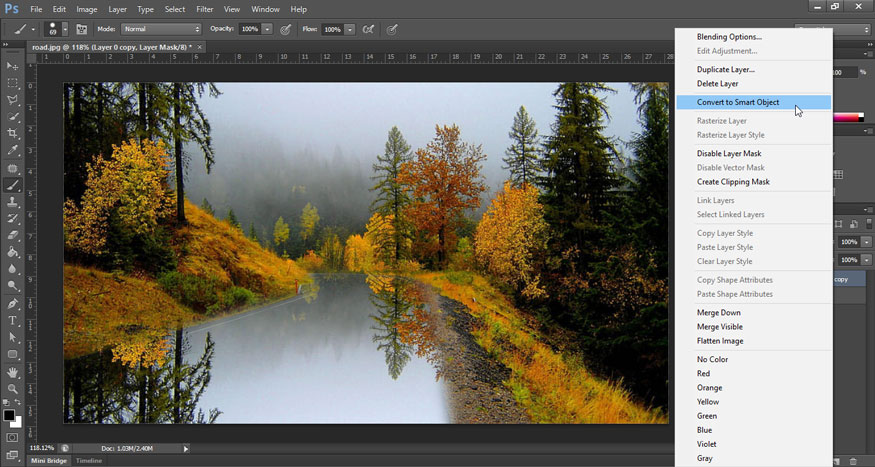
Step 7: Still at this copy layer 0, right-click then select Convert to Smart Object.
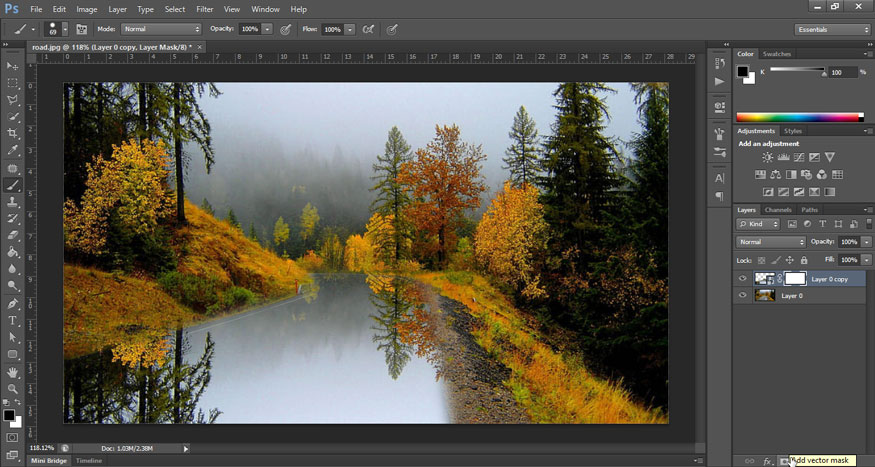
Next, we make a mask one more time for layer 0 copy. Click Add layer mask at the bottom of the layers panel to add a mask.
Step 8: On menu, select Filter => Render => Clouds
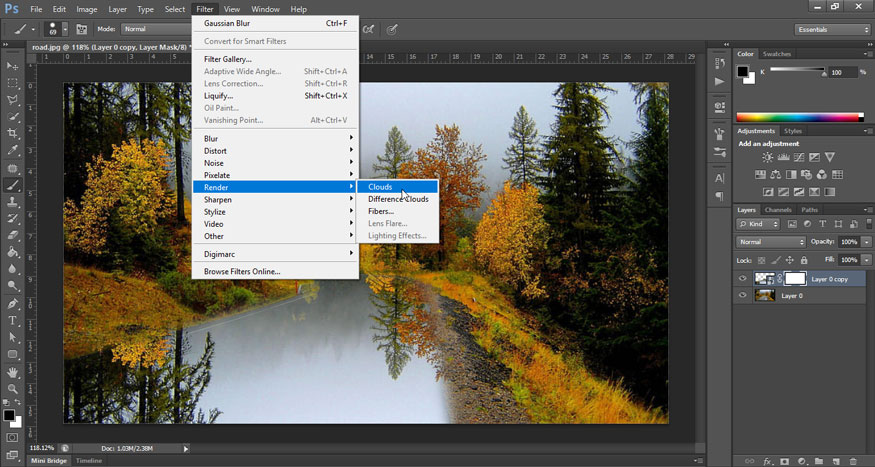
Then remove the link between layer 0 copy and the mask. Click on the link to remove.
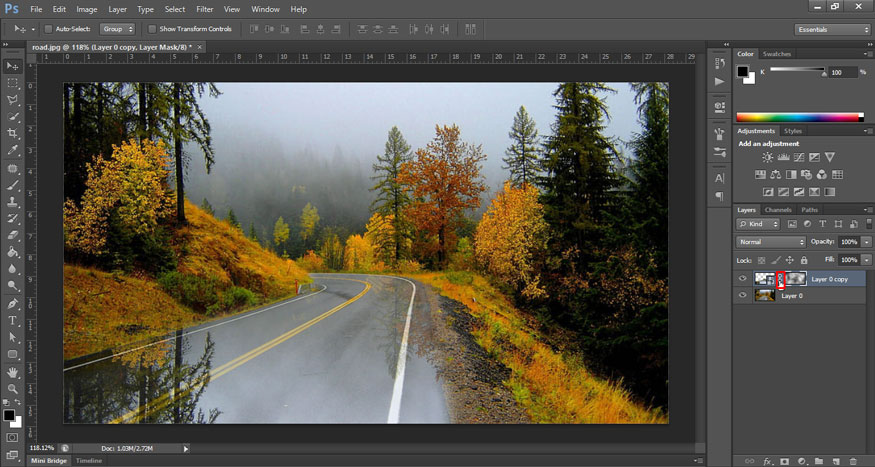
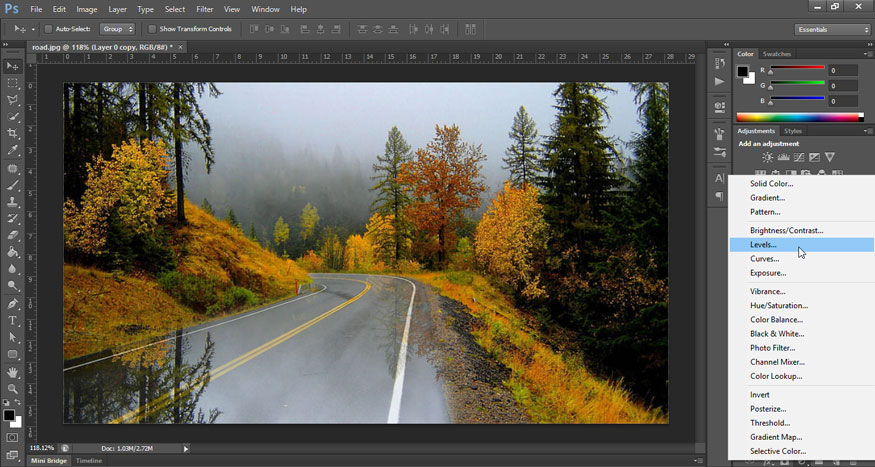
Now we need to slightly increase the brightness of the inverted shadow on the road surface. At the bottom of the Layers panel, select Create a new fill or Adjustment layer (circle icon divided in half). Then select Level.
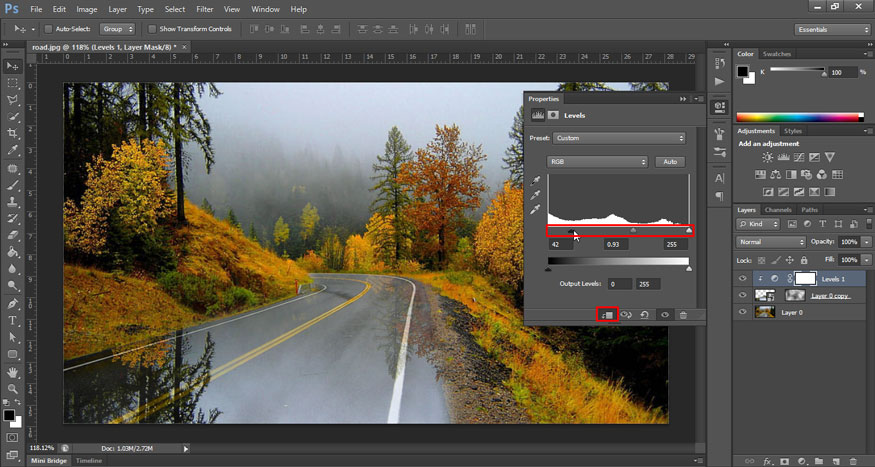
Click the mask section to adjust the brightness there. Adjust points to get the most realistic, consistent brightness.
Step 9: Now select the mask layer. Then press the key combination Ctrl + T, then click on the top anchor point and then hold Shift to drag the mask down to level with the road surface.
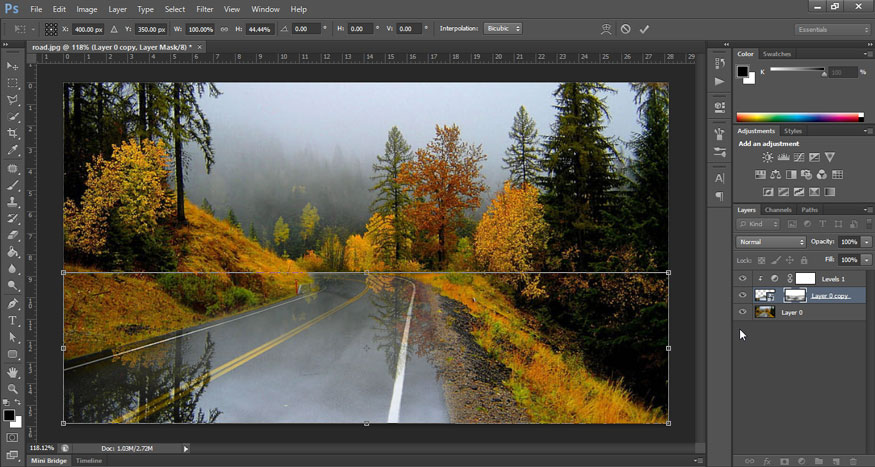
We have the result like this.
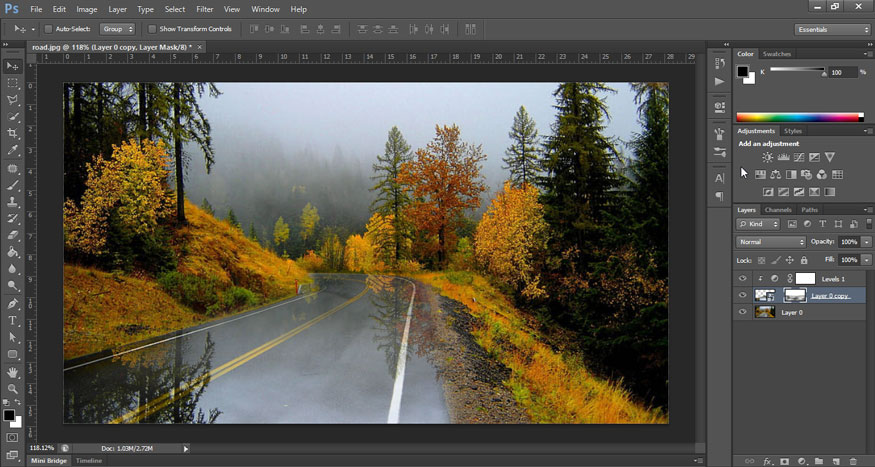
So you have finished creating the roadbed effect after raining. The method is very simple, right? Now the photo of the dry road has become a wet road after the rain with water shadows giving a very beautiful reflection.
Above are detailed instructions on the steps to create road background effects after a storm using Photoshop. By combining many different tools you can create extremely unique photos. Hopefully the above sharing from Sadesign can help you create vivid and attractive photos. Try creating a road background effect after a storm in Photoshop right away.


