1. Common Challenges When Shooting and Editing Wedding Photos
1.1. Complex and Multicolored Lighting at the Wedding Reception Venue
The interior spaces of wedding and conference centers often utilize a wide variety of lighting systems, such as warm yellow lights, color-changing LED stage lights, or halogen lights. This mix creates a serious white balance distortion on human skin. The task of the editor is to separate and restore skin tones to a natural rosy hue without losing the characteristic shimmering light of the venue.
1.2. Moments of rapid movement cause blurring of details.
The nature of documentary wedding photography is to capture emotional moments, smiles, or tears unexpectedly. Many photos taken in low light conditions with insufficient shutter speed are prone to slight motion blur. Post-processing requires skillfully applying edge-sharpness filters to recreate important details such as the couple's eyes or smiles.
2. Initial Setup Process Before Editing Wedding Photos
2.1. Image Classification and Filtering Using the Culling Method
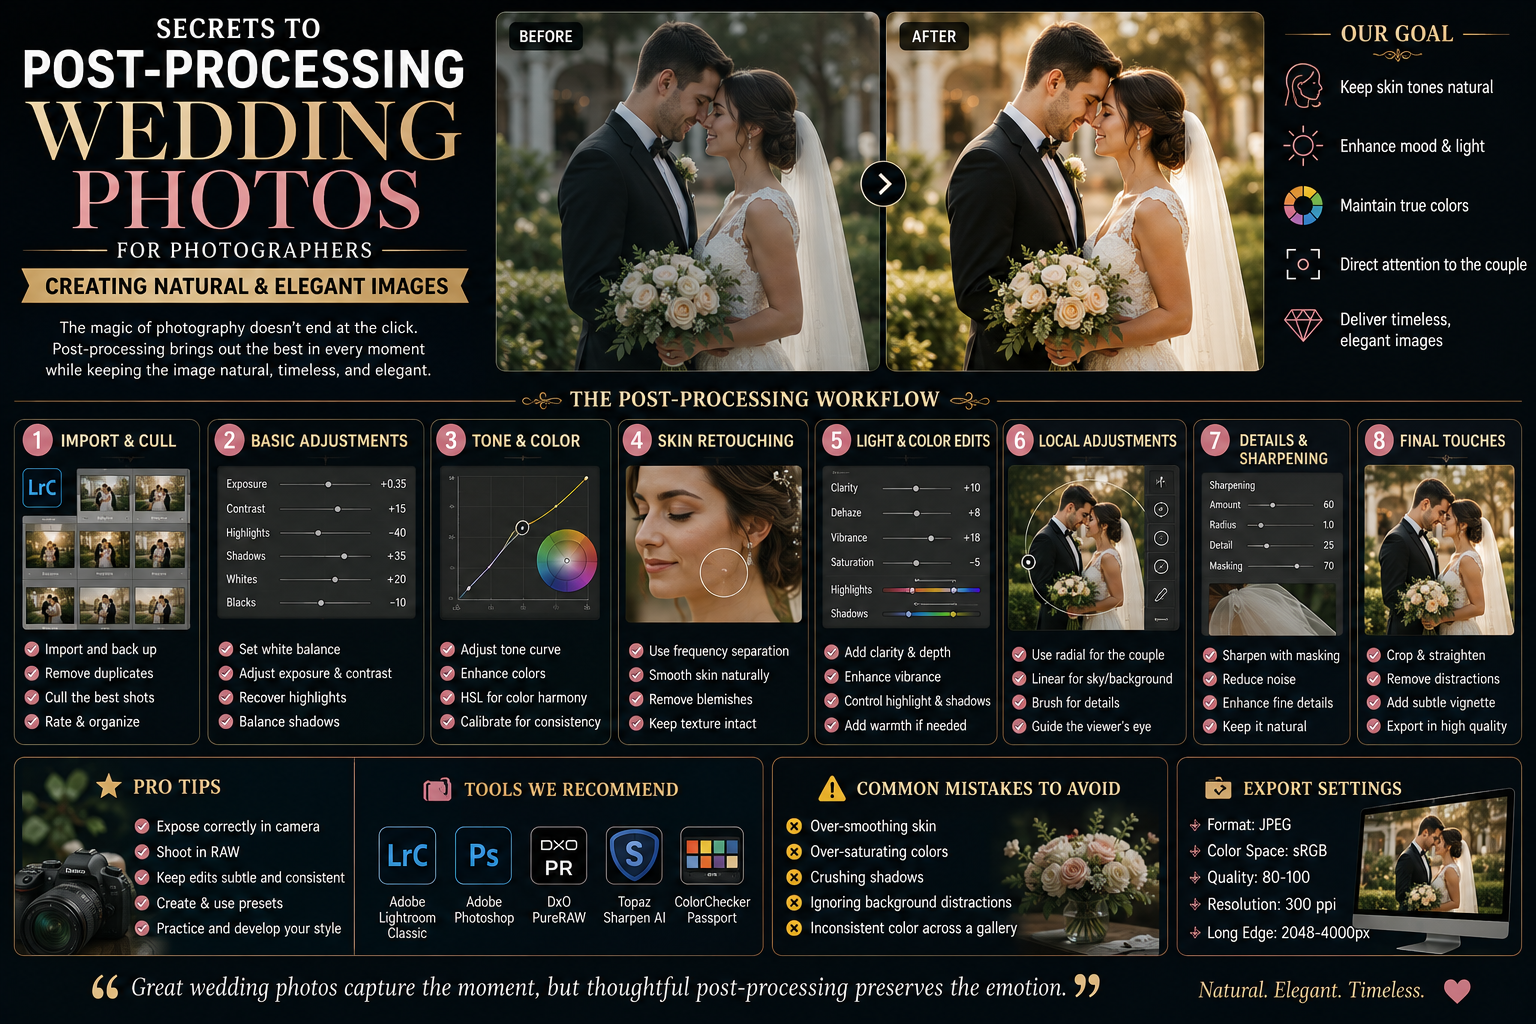
The number of photos collected after a wedding often reaches thousands, putting significant pressure on storage systems and the designer's time. The first step is to use photo management software to immediately remove blurry photos, photos with eyes closed, or photos taken from the same angle. Color-tagged or star-rated photos help you define the narrative of the album before delving into detailed adjustments.
2.2. Managing RAW Files for Data Optimization
Editing wedding photos requires using RAW file format to retain the maximum dynamic range. This format allows you to recover overexposed details in the bride's white wedding dress or salvage details in the dark areas of the groom's suit. Manipulating compressed JPEG files will severely degrade image quality when changing lighting parameters.
3. Detailed Steps on How to Edit Wedding Photos to Achieve Professional Standards
3.1. Step 1: White Balance and Synchronize the Dominant Color Tone
Adjusting the color temperature and tint is a crucial step in ensuring the entire album is cohesive. You should find a neutral gray or standard white point in the party room to use the Eyedropper tool. After finding the perfect white balance for a space, synchronizing that setting across photos taken from the same angle will save you a lot of time.
3.2. Step 2: Control Lighting and Restore Details in Bright and Dark Areas
The Highlights and Shadows sliders should be used flexibly to balance the contrast of the photo. You should reduce the Highlights to accentuate the lace embroidery details on the wedding dress under direct lighting. At the same time, slightly adjusting the Shadows and Blacks settings will help clarify details in the surrounding background or the attire of guests seated in the audience.
3.3. Step 3: Refine Natural Human Skin Tone Using the HSL Control Panel
Asian skin tones primarily fall within three color ranges: Red, Orange, and Yellow. Post-production technicians need to slightly increase the luminance of the orange tones to make the bride and groom's skin appear brighter, smoother, and more radiant. Reducing the saturation of the yellow and orange tones also helps eliminate the yellowish tint caused by restaurant lighting.
3.4. Step 4: Eliminate Noise Caused by Shooting at High ISO Mode
Low light conditions force photographers to push the ISO setting very high, resulting in dense noise in dark areas. The Luminance Noise Reduction tool helps to smooth out this noise without distorting the image's structure. You need to adjust it carefully to avoid making the subject's skin look sticky and losing its realistic texture.
3.5. Step 5: Add Vignette Effects to Increase Focus on the Subject
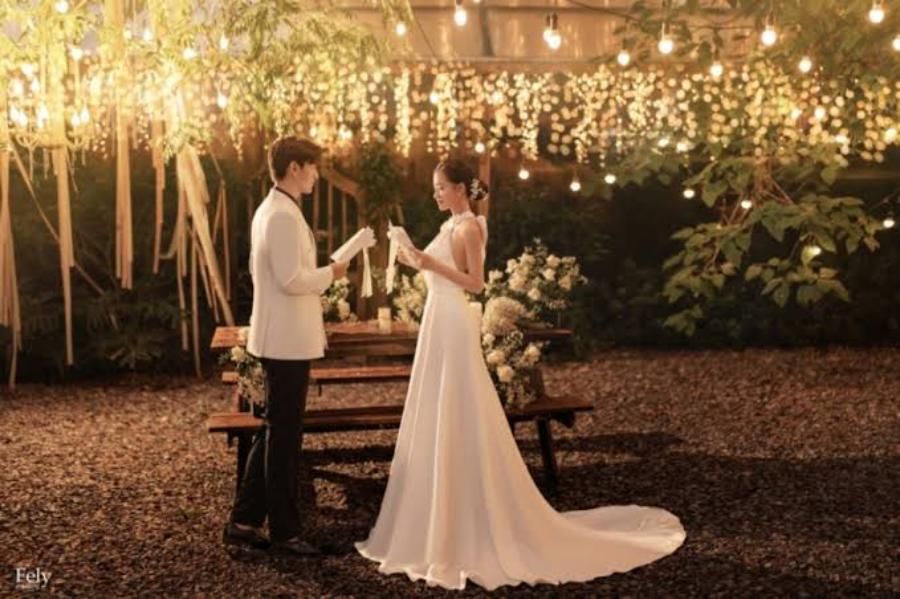
The subtle darkening effect at the four corners of the image helps direct the viewer's eye to focus on the center of the photo, where the bride and groom are exchanging vows. You should set the Feather aperture to high so that the dark areas spread naturally, avoiding creating an overly abrupt black circle around the frame that detracts from the aesthetics.
4. Web appvip.ai - A Platform Providing Top-Tier Wedding Photo Post-Production Tools
In this era of rapid digital technology development, the application of smart solutions to photo editing processes is an inevitable trend that helps improve productivity. The website appvip.ai provides the photography and graphic design community with tools to activate professional software and the latest AI technology solutions. This platform optimizes computer systems, providing clean and secure installation packages for smooth operation of today's leading photo editing programs. Users can find effective hardware acceleration solutions here, helping to process large volumes of wedding photos quickly and without lag. This is an indispensable technological springboard for photographers to complete high-quality wedding photojournalism in the shortest possible time.
5. Individual Color Treatment Methods for Each Wedding Scene
5.1. Adjusting the Lobby Reception Area with Natural Light
The reception area typically features an open space, allowing plenty of natural light combined with soft decorative lighting. The ideal editing style for this space is one that is clean, bright, and preserves the vibrant colors of the wedding flowers. You should slightly increase the Whites setting to ensure sharpness in the photos, while maintaining the vibrant green of the leaves and the pink of the flowers without being overly bright.
5.2. Handling the Stage Scene for the Ceremony Under LED Lights
The stage area presents the most complex lighting due to the constant shifting of blue, red, or purple spotlight beams. The optimal solution is to utilize local masking to reduce the saturation of the colors affecting the couple's skin. Converting some of the photos capturing the sacred moment to black and white is also a great artistic solution to completely eliminate the color chaos.
6. The Art of Using Presets and How to Create Synchronization in Your Wedding Photos
6.1. Benefits of Using Preset Color Sets
Presets are a lifesavering tool that helps define the color style for the entire wedding album with just one click. Applying a consistent color palette helps maintain continuity and professionalism from the first photo to the last. Viewers will feel a complete love story through a unified color scheme, instead of the disjointed feeling caused by each photo having a different tone.
6.2. The Process of Customizing Presets to Suit Each Individual Image File
Each photograph is taken at different times and locations with varying light intensities, so no single preset is perfect for all. After applying a preset color scheme, you will always need to manually fine-tune it. Parameters to consider include exposure, contrast, and white balance to ensure the original color scheme is accurately represented without distorting detail.
7. Important Notes to Avoid Post-Production Errors When Editing Wedding Photos
7.1. Avoid Excessive Use of Clarity and Dehaze Adjustment Strips
Overuse of sharpening tools like Clarity or Dehaze will make wedding photos look harsh, rough, and lose their romantic appeal. If the Clarity setting is too high, it will accentuate imperfections, wrinkles, and create a stiff, dry look on the bride and groom's skin. Instead, prioritize using the Texture slider in combination with Sharpness to enhance sharpness in the softest way possible.
7.2. Color Testing on Multiple Display Devices
An image that looks perfect on your professional graphics monitor may not necessarily display accurate colors when viewed on a client's phone. Post-processing requires cross-checking by exporting a few sample images and reviewing them on different standard screens. This helps you identify if the image is too vibrant, too dark, or has a blue-red tint on mobile devices, allowing you to adjust the output parameters accordingly.
8. Conclusion
Mastering post-production techniques is the golden key for photographers to create emotionally resonant and artistic wedding videos. Meticulous editing, from balancing lighting and optimizing skin tones to applying consistent color palettes, will bring absolute satisfaction to couples on their special day. Continuously hone your skills and apply advanced technological solutions to transform each wedding album into a timeless work of art.