Best Selling Products
Simple and Easy Tips to Remove Wrinkles in Photoshop
Nội dung
- 1. Why do we need to remove wrinkles?
- 2. Simple instructions on how to remove wrinkles
- 2.1 Step 1: Open File in Photoshop
- 2.2 Step 2: Insert the photo to remove wrinkles
- 2.3 Step 3: Create a copy of the Layer
- 2.4 Step 4: Adjust the opacity
- 2.5 Step 5: Select the Healing Brush Tool
- 2.6 Step 6: Select the skin area near the wrinkle
- 2.7 Step 7: Wrinkle removal
- 3. Conclusion
Creating beautiful images is not only a part of life but also plays an important role in building a brand and personal impression. A beautiful, perfect photo not only helps us feel more confident but also attracts attention from viewers. In particular, removing wrinkles is one of the secrets to making the image more attractive and youthful. In this article, Sadesign will introduce simple tips to remove wrinkles in Photoshop, helping you easily perform and create great works of art.
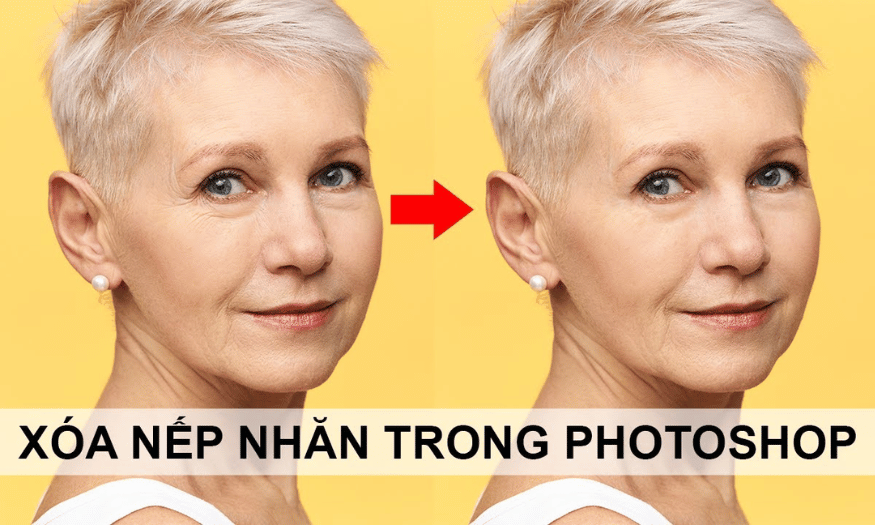
Creating beautiful images is not only a part of life but also plays an important role in building a brand and personal impression. A beautiful, perfect photo not only helps us feel more confident but also attracts attention from viewers. In particular, removing wrinkles is one of the secrets to making the image more attractive and youthful. In this article, Sadesign will introduce simple tips to remove wrinkles in Photoshop, helping you easily perform and create great works of art.
1. Why do we need to remove wrinkles?
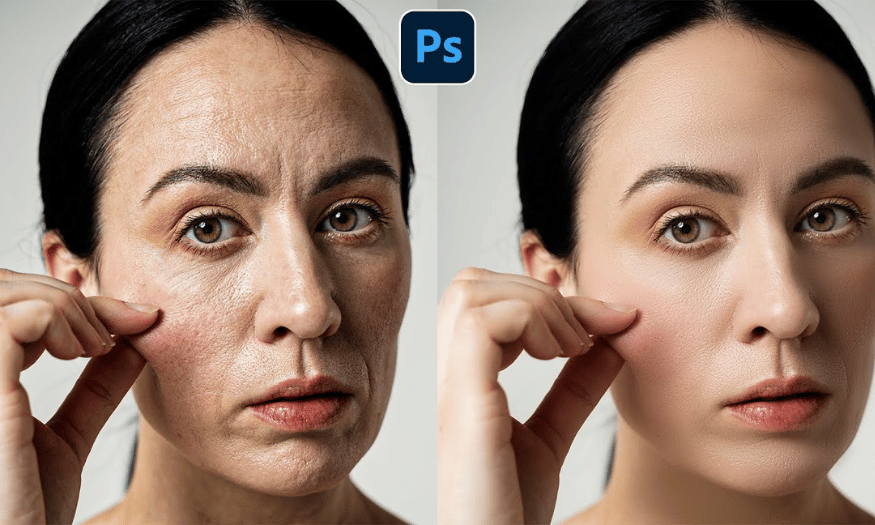
Removing wrinkles in Photoshop is not just a simple photo editing technique but also brings many valuable benefits, especially on platforms such as banners, advertisements, magazines or portraits. Here are the reasons why you should learn how to remove wrinkles:
Improve portraits : Wrinkles can make skin look dull and aged. By removing wrinkles, you can create smoother, more youthful and attractive portraits. This is important for wedding photographers, maternity photographers or models, helping them capture the best moments of their clients.
Enhance your professionalism : Being able to subtly retouch wrinkles shows your knowledge and skill in Photoshop. This not only helps you gain credibility with your clients but also opens up many opportunities for collaboration.
Save time : Compared to traditional methods such as makeup or plastic surgery, removing wrinkles in Photoshop is much faster and more cost-effective. You can create perfect photos without having to invest too much in outside services.
Enhance creativity : Wrinkle removal not only helps you improve your image but also brings creative effects. You can create unique, different photos and express your personal style through each work.
Add a new skill : Mastering the skill of removing wrinkles in Photoshop can help you expand your career opportunities in the fields of photography, photo editing or graphic design. This is one of the important skills that employers look for.
Easy editing : Finally, knowing how to remove wrinkles will help you feel more confident when editing your personal photos. You can create beautiful photos, preserving memorable moments in life.
2. Simple instructions on how to remove wrinkles
How to remove wrinkles in Photoshop is extremely simple, with just a few steps you can successfully do it. Here are detailed instructions for your reference, helping you create smoother and more attractive photos.
2.1 Step 1: Open File in Photoshop
Open a new file in Photoshop by using the shortcut Ctrl + N or go to the toolbar, select File and then select New . A customization panel will appear allowing you to set the size and resolution of the image. Select the parameters that suit your needs and press OK .
2.2 Step 2: Insert the photo to remove wrinkles
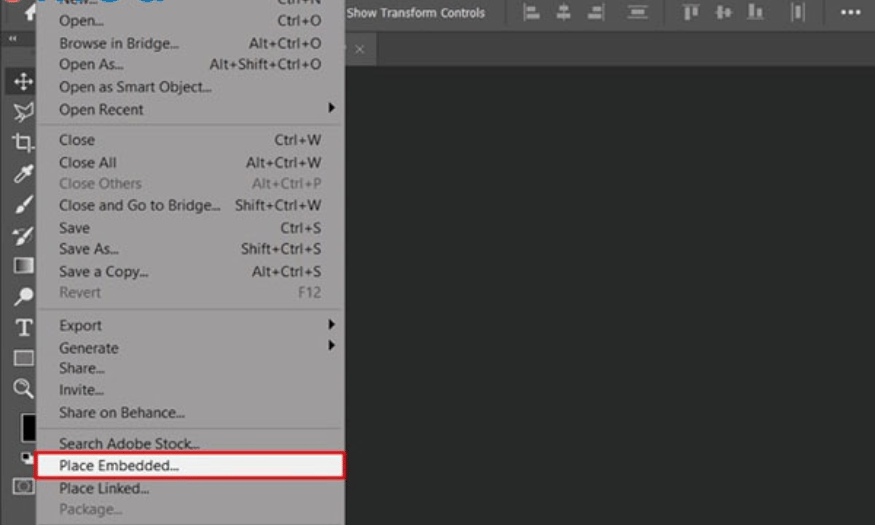
Next, insert the image that needs to be wrinkled into the newly created file. Select the File item on the toolbar, when the customization panel appears, select Place Embedded . Then, select the image that needs to be edited and double-click on the sample image. The image will be automatically inserted into your document.
2.3 Step 3: Create a copy of the Layer
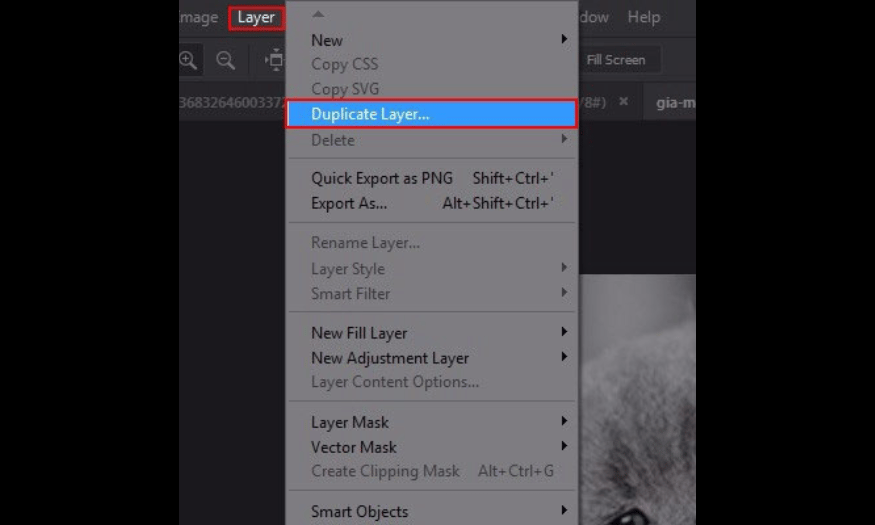
To keep the original image file, make a copy of the layer. This is a good habit to get into when editing images in Photoshop, so you can easily go back if needed. To duplicate a layer, go to Layer , select Duplicate Layer .
Then, name the newly created copy of the Layer in the As section , select the destination in the Document section and click OK . This will help you keep the original image and easily edit without worrying about losing data.
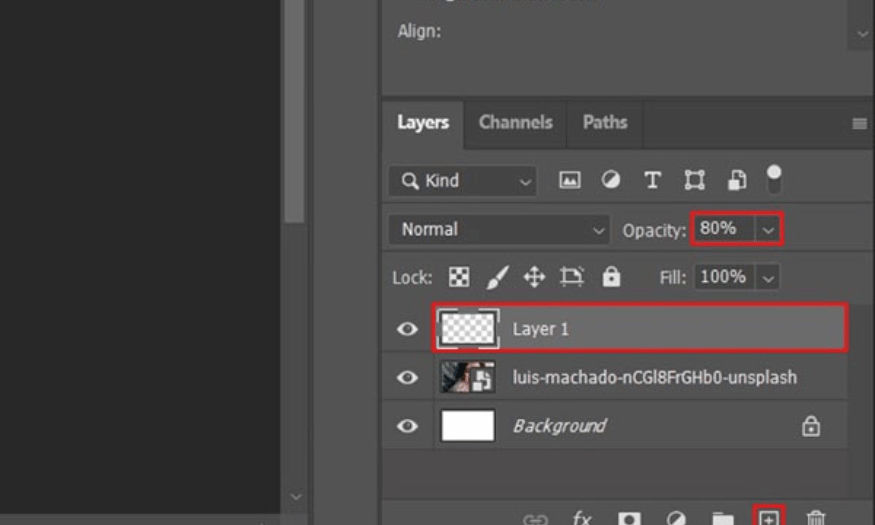
2.4 Step 4: Adjust the opacity
Select the layer you just copied and adjust the Opacity to 80%. This will help you see the wrinkles on your skin more clearly, making it easier to edit.
2.5 Step 5: Select the Healing Brush Tool
Next, go to the toolbar and select the Healing Brush Tool . This is the ideal tool to help you remove wrinkles without losing the natural texture of the skin. After selecting the tool, set the parameters of the Healing Brush Tool as suggested in the illustration.
Note that you need to adjust the Brush size to match the size of the wrinkles you want to remove. The correct size will help you work more easily and effectively.
2.6 Step 6: Select the skin area near the wrinkle
Place your cursor over an area of smooth skin near the wrinkle you want to remove. Hold down the Alt key and left-click. You'll see your cursor change to a plus sign, allowing you to select the sample area to copy.

2.7 Step 7: Wrinkle removal
Once you have selected the smooth area of skin, place your mouse cursor over the wrinkle you want to remove. Hold down the left mouse button and move the mouse along the wrinkle you want to remove. Do this slowly and carefully to ensure that the final result looks natural and harmonious.
After removing wrinkles, you will see that the photo becomes smoother and more youthful. This is one of the easy techniques to perform but highly effective in improving the image.

With these steps, you can confidently edit your own or your clients' photos to create impressive and attractive photos. Try it today to see the difference!
3. Conclusion
Removing wrinkles in Photoshop not only helps you create beautiful photos, but also has many professional and personal benefits. This skill will not only help you become more confident in editing photos, but it is also a powerful tool to enhance your personal or business brand.
Start experimenting with the tips and tutorials above to create perfect, eye-catching photos. With a little patience and practice, you'll be creating unique and impressive works of art in no time.


