Best Selling Products

Plugin Retouch4me
69 USD

Capcut Pro 1 Year
39 USD

Copyright Adobe Lightroom Account
59 USD

Freepik Premium Account
59 USD

ChatGPT Plus Account (GPT-4)
16 USD

Upgrade Duolingo Super
29 USD

Windows 10 & 11 Pro Key
36 USD

Genuine Adobe Illustrator account
99 USD

MidJourney Account
29 USD

Adobe Premiere Pro Account
99 USD

Genuine Cheap Canva Pro
39 USD

Upgrade Genuine Office 365
49 USD

Adobe Photoshop Copyright - Full App
120 USD

Upgrade genuine Capture One account
120 USD

Autodesk All App Account Copyright
120 USD
Starburst effect in photography and 5 creative composition ideas.
Nội dung
- 1. What is the starburst effect and why does it occur?
- 2. Turn the starburst effect into the focal point of the photograph.
- 3. Framing the starburst
- 4. Position the star behind the subject.
- 5. Balance the composition using starburst effects.
- 6. Add starbursts in post-production.
- 7. Common mistakes when photographing astrophysics.
- 8. Conclusion
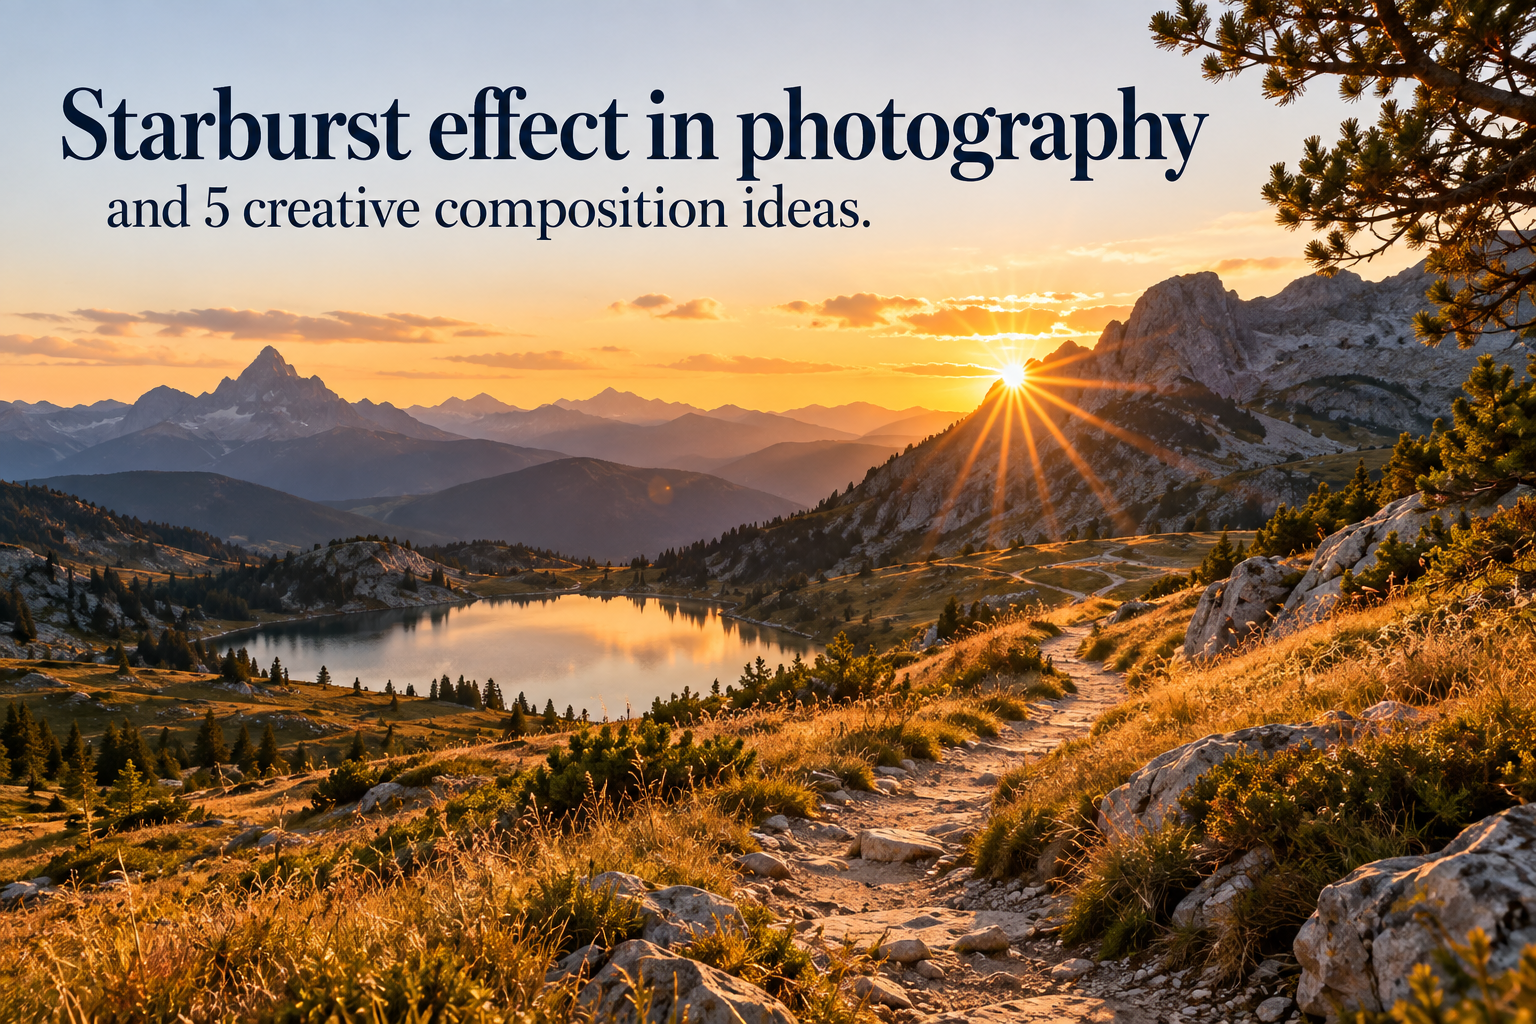
Most of us have been captivated by landscape photographs where the sun bursts forth in a star-like shape as it emerges from behind trees or the outline of a mountain range. They look impressive, but starbursts are not just a visual effect to show off technique. When used intentionally, they become a genuine element of composition, guiding the viewer''s eye, creating balance, highlighting the subject, and adding a layer of emotion to the story the photograph aims to tell.
1. What is the starburst effect and why does it occur?
The starburst effect is a phenomenon where a light source emits multiple distinct beams of light radiating outwards. This is caused by light diffraction. When a small, high-intensity light source, such as the sun, streetlights, or car headlights, is partially obscured or passes through a narrow gap, the light is bent around the edges, creating scattered beams.
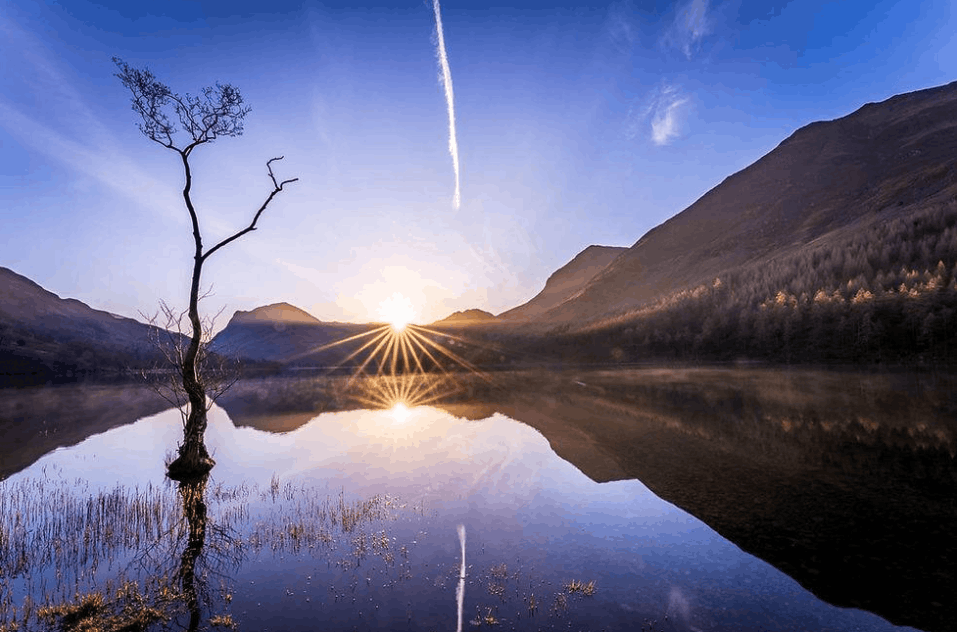
The next determining factor lies in the camera settings. At wide apertures like f/2.8, the light rays are soft and blend together into a halo, making it almost impossible to distinguish individual rays. When you close the aperture to around f/11 or smaller, the aperture blades create a narrow slit with sharp edges, and the distinct rays begin to appear. The number of rays also depends on the lens. With lenses that have an even number of aperture blades, the number of rays is usually equal to the number of blades. With lenses that have an odd number of aperture blades, the number of rays is usually double the number of blades, so these lenses tend to produce thicker and more complex starbursts.
You should also avoid closing the aperture too much. From around f/16 onwards, the image starts to lose sharpness due to diffraction, so the setting range that usually yields the best results is from f/11 to f/16. The light source should be small and partially obscured by branches, mountain peaks, rooftops, or the subject itself. If the light source is partially obscured, the starlight will stand out much more than when the sun is fully exposed in the sky. For sharp images at small apertures, use a tripod, keep the ISO low, and consider shooting in RAW format to retain more detail in the bright areas.
2. Turn the starburst effect into the focal point of the photograph.
The human eye naturally gravitates toward the brightest areas in a frame, and in most photographs featuring starbursts, the light source is almost certainly the brightest point. This is an advantage the photographer can leverage. Instead of viewing the starburst as mere decoration, position it correctly so it becomes the first focal point the viewer sees, or use it as a tool to guide the eye toward the subject.
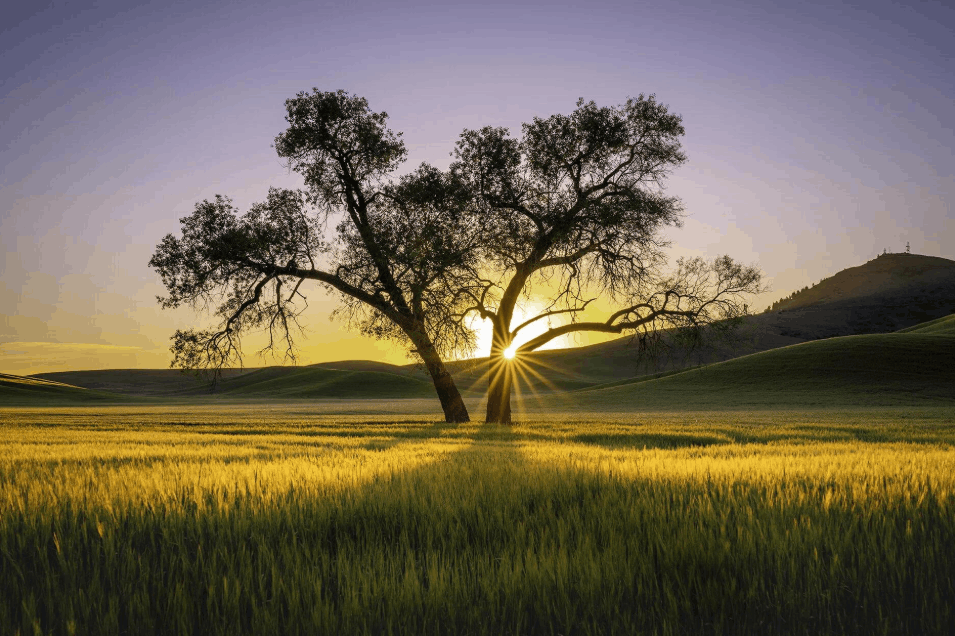
Essentially, the rays of light act like leading lines, a classic compositional technique that often relies on roads, rivers, or fences to guide the viewer's gaze. The difference is that this time you use the light itself, and the effect is usually much more captivating. When applying this technique, consider placing the star rays according to the rule of thirds instead of centering them, as the off-center position creates rhythm in the composition and allows the rays to breathe. Also, check that the rays are directed toward the main subject, as a misplaced star ray can draw attention away from what you really want to tell.
3. Framing the starburst
Another way to elevate the composition is to place the starburst itself within a natural frame. Tree canopies are a familiar example, but opportunities are everywhere. Framing is one of the most powerful compositional techniques, as it draws the eye inward, creates depth, and makes the photograph feel intentionally staged.
Windows are a great option. If the subject is standing in a window with light passing through, the window frame and the starlight will work together to create an eye-catching composition, with both layering and a focal point. A flower arch in a garden is also an ideal backdrop. Position the sun so it's directly inside the arch, partially obscured by the petals and leaves. You'll have beautiful starlight, and the gaze will naturally pass through the arch to the subject or the background. Alternatively, you can look for stone doorways, narrow gaps between buildings, caves, bridges, or arches in ancient architecture.
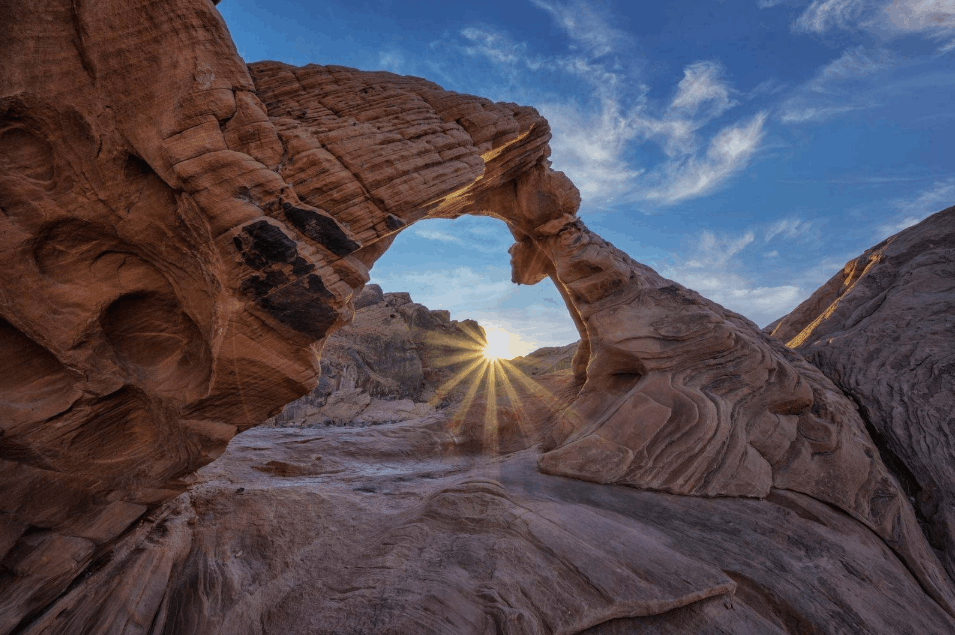
When framing the starburst effect, shift your stance a few steps to the left or right, and simultaneously lower or raise the camera angle. Even a very small change will alter the degree to which the light source is obscured and significantly alter the shape of the starburst. Aim for a position where the starbursts are most visible while maintaining a clean frame.
4. Position the star behind the subject.
Backlighting is a captivating technique. It can create a dramatic, mysterious, and emotionally rich atmosphere, sometimes transforming the subject into a striking dark silhouette against a bright background. When combined with starlight, the effect of this technique is further amplified.
To achieve this, position the light source directly behind the subject, so that it is partially obscured by the subject's outline. This obscuration breaks the light source into small fragments, and when combined with a small aperture, the light rays will appear and immediately draw the viewer's attention. You could position the sun directly behind a person's shoulder, behind the brim of a hat, behind an umbrella, or right at the edge of a rock.
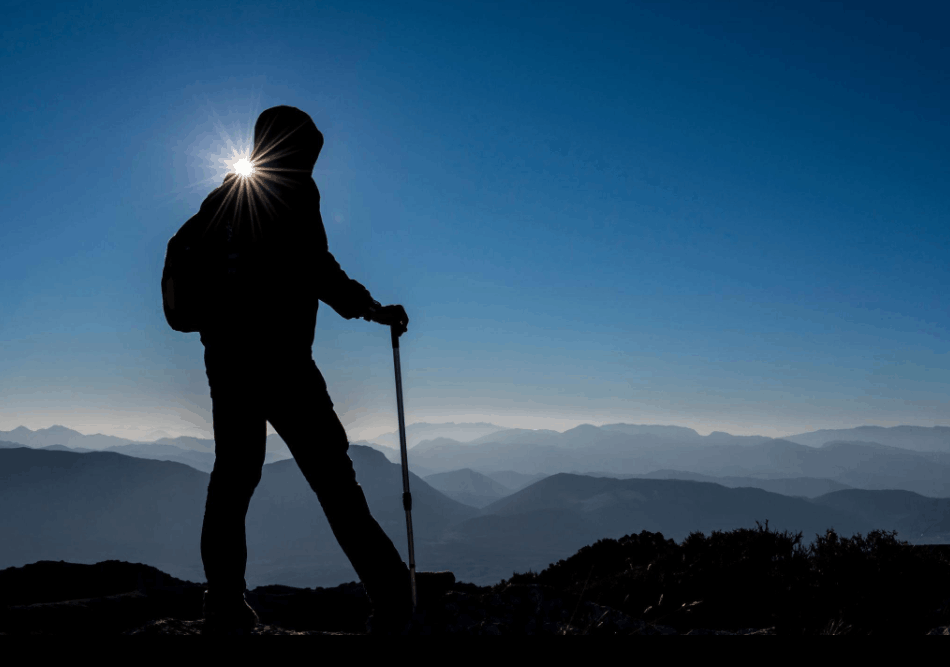
The subject doesn't necessarily have to be a person. It could be a mountain, an ancient tree, or a building. The important thing is to find the angle so that the light source just peeks out from the edge of the subject before you press the shutter. Just a slight shift can cause the starlight to disappear or be obscured by a halo, so be patient and try different positions. Regarding exposure, carefully meter the light in the bright areas to avoid overexposure, and if you want to preserve detail on the subject instead of making it completely black, you can shoot with multiple exposures to blend later. The golden hour, the time just after sunrise and before sunset, is ideal because the light is warm and low, making it easier to align the light source at the edge of the subject.
5. Balance the composition using starburst effects.
A balanced composition doesn't necessarily have to be symmetrical. Informal balance occurs when a large object, such as a mountain or skyscraper, occupies a significant portion of the frame, but the overall image still feels harmonious thanks to how the subject is depicted. Besides color and human faces, lighting is one of the most powerful tools for achieving this.
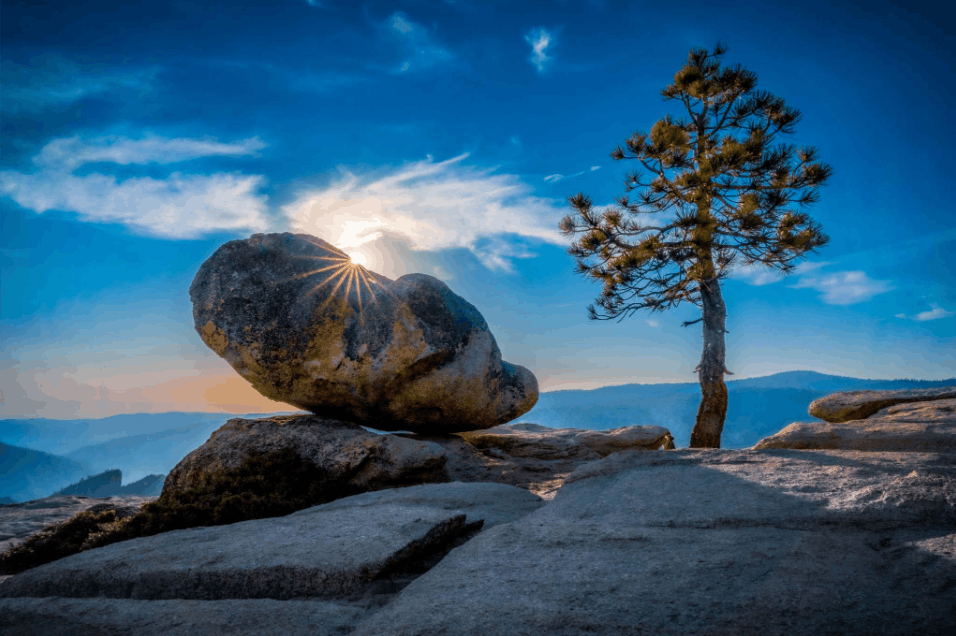
This principle applies to many situations. A small girl beneath a cliff, a solitary house in a wide meadow, or a small boat on a lake can all be enhanced by light. The key is that the starlight ray must be close to or attached to the subject. If it's elsewhere, it might compete for attention instead of complementing it. Also, pay attention to the intensity of the starlight ray, as an overly bright light source will overwhelm the subject, while a moderately bright ray will act as a subtle counterweight.
6. Add starbursts in post-production.
We don't always have the opportunity to capture a starburst on location. Sometimes the idea only comes after the shoot, or you might have photographed the sun but used too large an aperture, so the rays of light aren't visible. In those cases, post-processing is your chance to salvage the image.
Currently, many photo editing software programs allow you to add star effects to existing light sources or create entirely new ones. Popular programs often have light effect tools, ray filters, or lens flare overlays that allow you to customize the intensity, number of rays, length, and sharpness of the star's points. With layer-supported software, you can also create your own effect by building a new layer, drawing thin rays of light with a soft brush or gradient, and then setting the blending mode to Screen or Add to blend the rays naturally into the image. A slight blurring layer and reducing the opacity of the layer will help make the effect less forced.
7. Common mistakes when photographing astrophysics.
Mistake: Placing the sun too high in the frame . When the light source is pushed too close to the top edge, the upper rays are truncated or disappear, and the viewer's gaze is drawn away from the image. Placing the light source closer to the top third line usually results in a much more pleasing composition.
Too wide an aperture: A wide aperture almost eliminates the effect, replacing it with a soft halo. Stop down the lens to around f/11 or smaller if you want sharp rays, but don't stop too far as the overall sharpness will decrease.
Lens flare is a common problem: it's very easy to cause this when shooting directly into a strong light source. A little flare can create atmosphere, but too much will obscure the subject and make the image look dull. Try using a lens hood, removing unnecessary filters (poor quality filters often cause ghosting), and changing the camera angle slightly.
Dirty lens issue: When the aperture is closed, dust and dirt on both the lens and sensor become much more visible. Invisible dirt at wide apertures can become clearly visible at f/16. Wipe the lens before going out and consider cleaning the sensor regularly.
Overexposure error: Because they focus so much on the starburst, many people forget the rest of the scene. Ensure proper exposure, especially in bright areas, to avoid overexposure in the brightest parts of the photo. Monitor the histogram, and if the difference in brightness is too great, take multiple exposures to combine later.
8. Conclusion
Starbursts are more than just a beautiful camera effect. When used creatively, they can guide the viewer's gaze, balance composition, enhance the subject, and create a unique atmosphere for each photograph. From making them the focal point, framing them, placing them behind the subject, to using them to balance large masses, each approach opens up a different storytelling direction. And if you happen to miss the moment on location, post-processing always gives you a second chance.
If you've never actively photographed starbursts before, bring these ideas with you on your next shoot. Close your aperture, find something to block the light source, patiently adjust your position, and observe how the light changes. Have a wonderful shooting experience!





















VIP Products








Best Selling Products
Plugin Retouch4me
69 USD
Capcut Pro 1 Year
39 USD
Copyright Adobe Lightroom Account
59 USD
Freepik Premium Account
59 USD
ChatGPT Plus Account (GPT-4)
16 USD
Upgrade Duolingo Super
29 USD
Windows 10 & 11 Pro Key
36 USD
Genuine Adobe Illustrator account
99 USD
MidJourney Account
29 USD
Adobe Premiere Pro Account
99 USD
Genuine Cheap Canva Pro
39 USD
Upgrade Genuine Office 365
49 USD
Adobe Photoshop Copyright - Full App
120 USD
Upgrade genuine Capture One account
120 USD
Autodesk All App Account Copyright
120 USD