Best Selling Products
Suggestions for 10 most professional photo editing presets on Lightroom
Nội dung
SaDesign will suggest you 10 most beautiful and professional photo editing presets in Lightroom as well as the simplest way to customize in camera raw through the article below.
10 professional photo editing presets for Lightroom
Editing photos and choosing the right color is not as difficult as many people think, especially those who are new to this field. In fact, everyone has their own tips and rules for you to apply. However, this is an artistic field, so you can use these tips or you can also be creative in your own way.
.jpg)
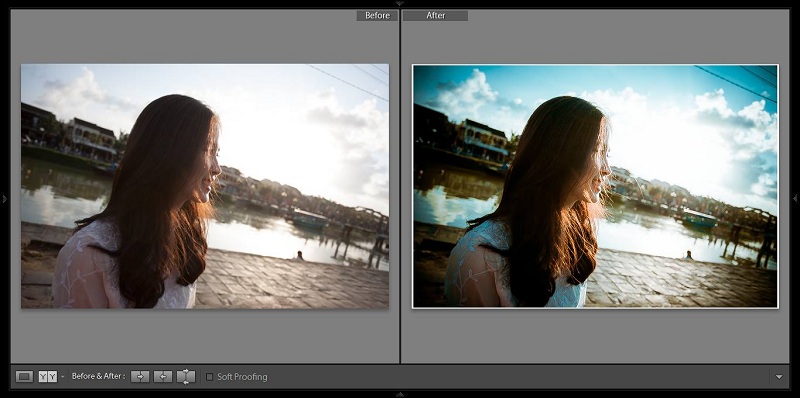
With many years of experience in this field, here are some tips for color correction to create the most professional overall photo that SaDesign has summarized. You can refer to the following 10 photo editing presets in Lightroom.
1. Film color preset: This is a popular color and makes a strong impression if used properly to create a classic style for the overall photo. For spaces with a lot of dark blue landscape or an old classic house, this color tone is the most suitable choice. In addition, with portrait photos depicting sad faces, this blend also shows its strengths very well.
2. Western Classic Color Preset: This style often uses cool blue tones as the main color, creating a gentle, comfortable but profound feeling for the photo. This color blend will be most suitable for landscapes with many houses built with stone or wood. Or landscapes with a peaceful, serene space are also very suitable for this color tone.
3. Korean color preset: For those who love light color tones, a combination of white and light pink, Korean tones will be extremely suitable. In addition, spaces with light, pale colors or cold winter weather are also very suitable for using this blend.
.jpg)
4. Backlit color preset: Beautiful sunny spaces combined with green trees or grass fields will best show off this color blend.
5. Japanese color preset: Japanese color blend is considered to be quite similar to Korean color. In fact, these two colors are often considered to be the same tone by many people, but these are two completely different colors. With Japanese color blend, the colors in the photo will be warmer and not too pale, dreamy like Korean colors. This color tone will also be most suitable for areas with colors such as yellow or blue, and not suitable for scenes with hot colors.
6. Pink and white preset: Pink and white blend will be most suitable for photos of children with smooth white skin or photos of teenagers with blurred backgrounds to create a soft and smooth effect for the photo.
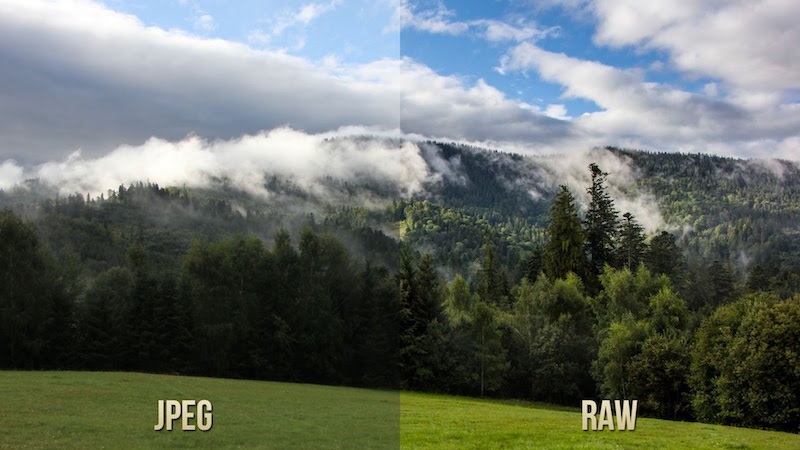
7. Sky Preset: When taking pictures of the sky, the cloudy areas are usually overexposed. Therefore, using this photo editing preset will help fix the overexposed problem and bring a sparkling photo with the original blue cloud color effect.
.jpg)
8. Clear Preset: This is a color scheme that many people love, but not everyone can make the tone stand out properly. Scenes that are taken of green spaces and trees and then taken with a blurred background will be most suitable for this color scheme.
9. Inner photo preset: Photos with spaces with lots of green grass or yellow grass when applying this blend will create brightness and flattering. Therefore, it will also create the highest level of perfection for the photo.
10. Refreshing Preset: This blend is also mainly applied to spaces with lots of trees and landscapes to create a more vibrant photo.
How to customize camera raw and Lightroom presets in Photoshop
The parameters of Lightroom and the raw camera plugin on Photoshop software can be said to be 95% similar. Therefore, you only need to know how to customize one to know how to handle the other. Customization will usually be based on the following 5 steps.
1. The temperature bar will be the most customized parameter. It is common to change from green to yellow, pay attention to adjusting the temperature appropriately and avoid too green like neon lights or too yellow like shooting indoors. Next, adjust the brightness to get the basic overall light, then click Highlight to get the bright areas and Shadows to adjust the dark areas.'
2. In Detail, adjust the sharpness by using the ALT key combination and the mask bar. Then, drag it up or down to suit, avoiding noise.
.jpg)
3. Use HSL/Grayscale to adjust each color separately, this is the most personal part, you can customize it according to your own preferences. For example, in the color scale there will be yellow and blue, if you want the frame to have autumn, drag it to the yellow side. On the contrary, if you want the photo to be brighter and cooler, drag it to the blue side. Next, use the Saturation bar to adjust the saturation, the luminance bar to adjust the brightness of that color. For example, when you want to drag the color from yellow to blue when dragging from saturation or luminance, it will affect the blue color.
4. Next, in Split Toning you will adjust the color cast in the Highlight and shadow areas. This is the step to avoid the photo being cast in color or having a color cast.
5. Finally, the Effect section is to restore the effect of the 4 corners due to dark or bright. The corners of the photo are often ignored when editing, but it will affect the entire photo if the corners are not harmonious and synchronized with the overall photo frame.


