Best Selling Products

Autodesk All App Account Copyright
120 USD

Upgrade genuine Capture One account
120 USD

Copyright Adobe Lightroom Account
59 USD

Plugin Retouch4me
69 USD

MidJourney Account
29 USD

Upgrade Duolingo Super
29 USD

Adobe Premiere Pro Account
99 USD

ChatGPT Plus Account (GPT-4)
16 USD

Genuine Cheap Canva Pro
39 USD

Windows 10 & 11 Pro Key
36 USD

Capcut Pro 1 Year
39 USD

Genuine Adobe Illustrator account
99 USD

Upgrade Genuine Office 365
49 USD

Adobe Photoshop Copyright - Full App
120 USD

Freepik Premium Account
59 USD
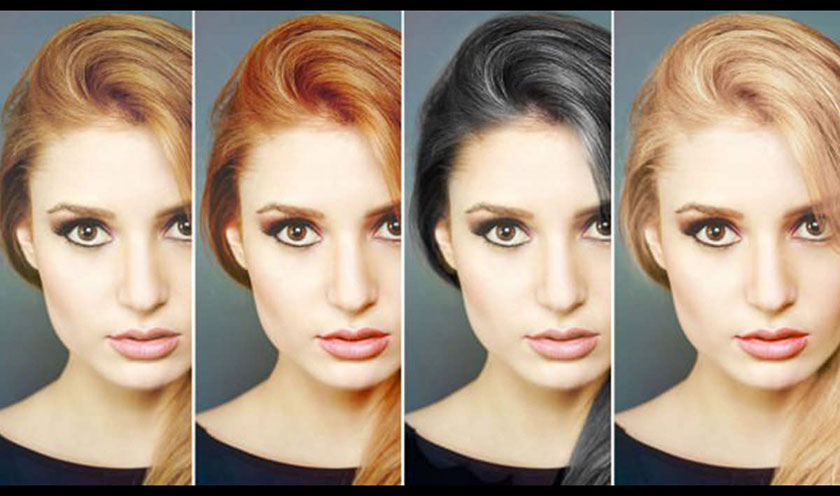
Swap Faces in Photoshop
Nội dung
- Criteria for Face Swap in Photoshop
- Step-by-step editing process
- Step 1: Open the file in Photoshop
- Step 2: Select the face with the Lasso Tool
- Step 3: Copy and paste the face into another face.
- Step 4: Select the image you want to swap
- Step 5: Remove the face you want to replace
- Step 6: Use Blending Option
- Step 7: Edit and retouch to suit the face
- Step 8: Save it
- Conclusion
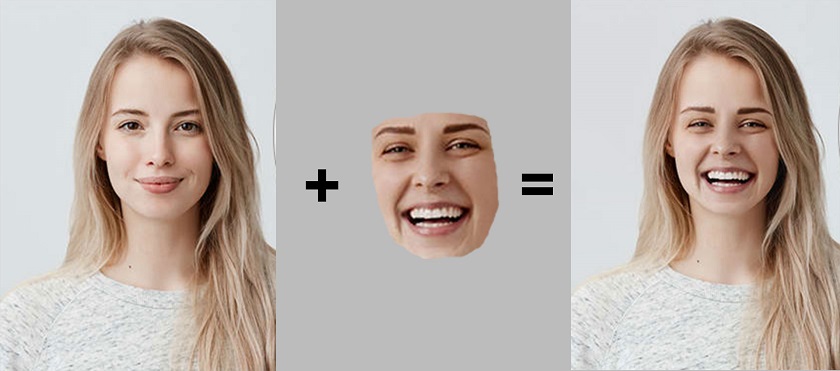 Today we will show you how to swap faces in Photoshop. It was a tough job in previous versions of Photoshop. But in newer versions, it's an easy job that anyone can do with some little practice. If you need advanced face swaps at an affordable price, contact us. So, without further ado, let's see how to do face swap in Photoshop.
 Criteria for Face Swap in Photoshop
There are several conditions you must ensure before performing a face swap. You cannot perfectly swap a black face with a white body. So make sure both images have the same criteria before doing face swap using Photoshop. Here are some conditions that you must maintain.- Select images with similar face angles. Maintaining angular proportions is the first thing you should focus on.
- Choose a similar or closer color depth.
- Make sure the resolution of the images is the same.
- Use a newer version of Photoshop to get an edge.
Step-by-step editing process
To capture the whole process of doing face swap in Photoshop, we have listed the steps below. It will help you do the job perfectly. See the first steps.- Open both files in Photoshop
- Select a face with the Lasso . tool
- Copy and paste a face into another face
- Select the image you want to swap
- Delete the face you want to replace
- Use the blend option
- Edit and Edit to fit the face
- And saving
Step 1: Open the file in Photoshop
First, open both files in Photoshop. But let's compare the similarity of both files first. When you open them side by side, it's easy to compare. Check the criteria from above. If the photos don't match, select different photos to do the face swap in Photoshop. a-tep-in-photoshopStep 2: Select the face with the Lasso Tool
Before choosing a face, make sure that both faces look the same. If there is hair in the front of the face and the other face is not, they are not a perfect match for swapping. After doing everything right, choose the perfect face. There are other ways to make selections. You could use the Photoshop pen tool, a quick selection tool, instead of the lasso tool. Learn how to use the Photoshop Pen Tool. When we want to make a freehand selection, we will use the lasso tool. Make as many selections as possible to replace faces. After drawing the selection, right click inside the path. Then select the option "Make Selection"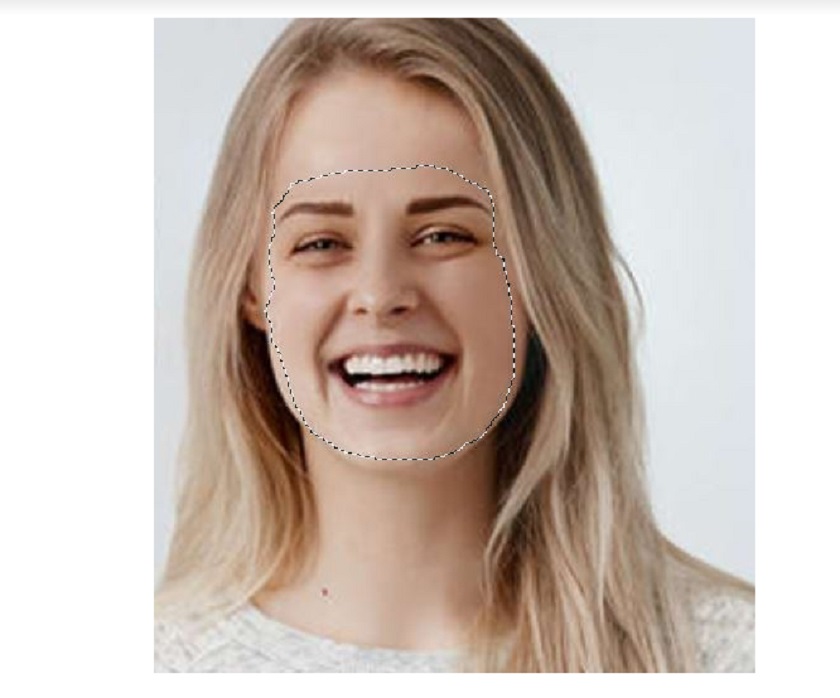
Step 3: Copy and paste the face into another face.
After making the selection, use Ctrl + C to copy the selection. Now go to the other image and press Ctrl + V to paste the face.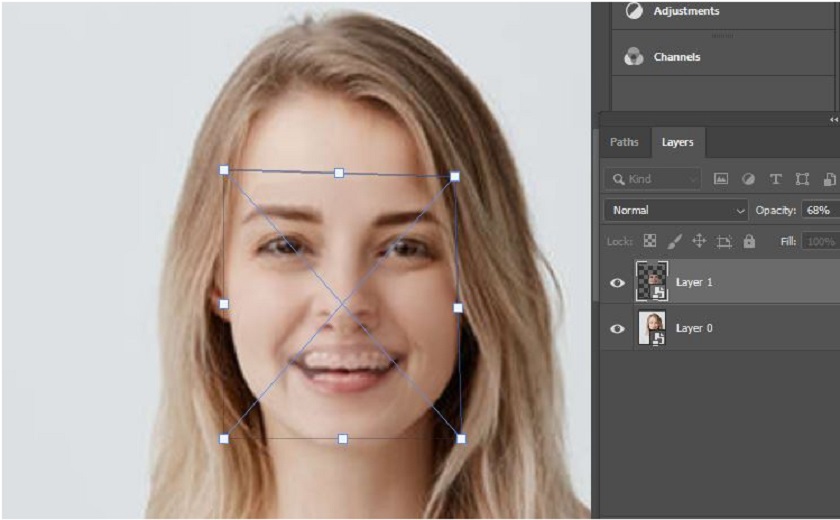
Step 4: Select the image you want to swap
After adjusting, now name the duplicated layer “Face for swap”. Then duplicate the background layer and name it “Face to swap from”.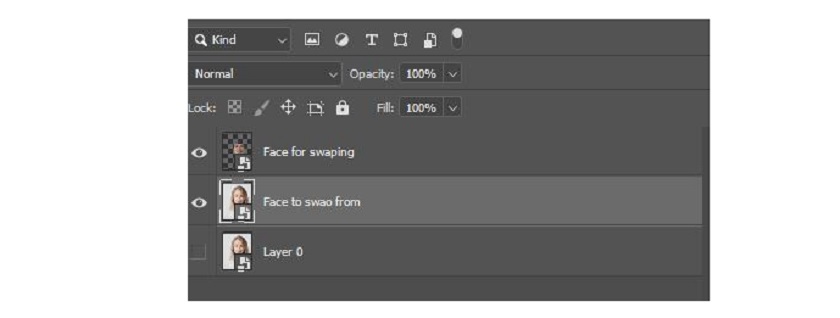 After doing that, now hide the original background layer. Press Ctrl and click 'Face to swap layer'. Now a selection is made.
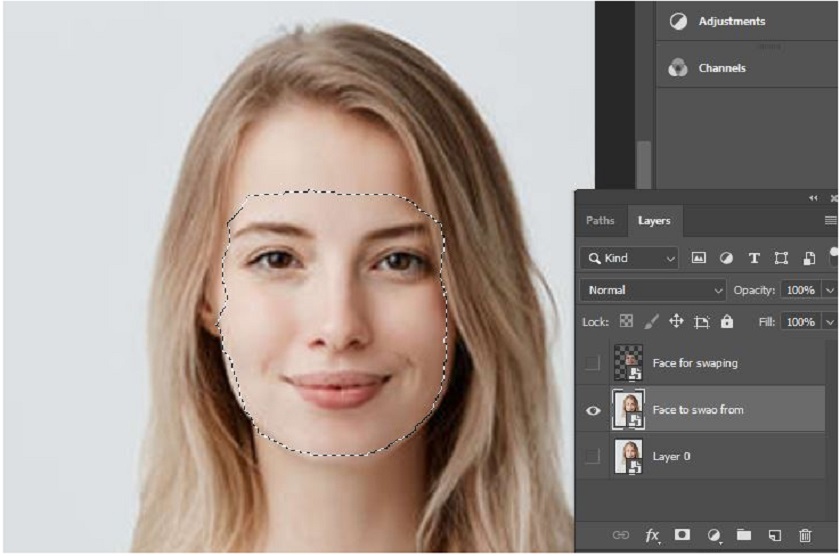
Step 5: Remove the face you want to replace
To remove the face you want to replace, first hide the Face for swaping ' layer. Now go to the menu and select ' Select' then select " Contract" from "Modifi". In the pop-up, provide a pixel value of 10. type Now create a layer mask and press Ctrl + I to invert the mask. Then it will remove the face. Once removed, select the 'Face to Swap' layer. Keep the opacity at 100% then press Ctrl and click on the layer image to make a selection. Then create a layer mask again.Step 6: Use Blending Option
Before using the blend option, select both the 'Face to Swap' and 'Face to Swap' layers. To do that, first select one layer, then press Ctrl and click on the other layer. Now go to the 'Edit' menu, then select 'Auto-Blend layers'.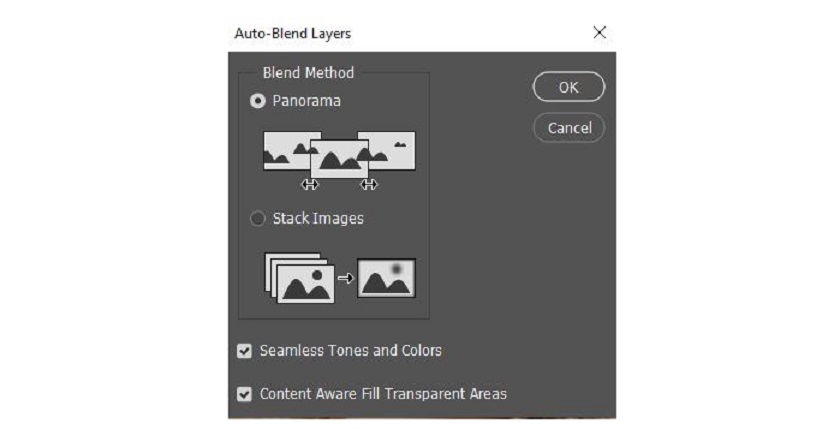 Now tick Panorama, Seamless Tone and Color & Fill-Content-Awareness. Then press 'OK'. Then Photoshop will do some calculations. It will use AI (Artificial Intelligence) technology to merge both layers together. Now edit and retouch the face swap in Photoshop.
 Step 7: Edit and retouch to suit the face
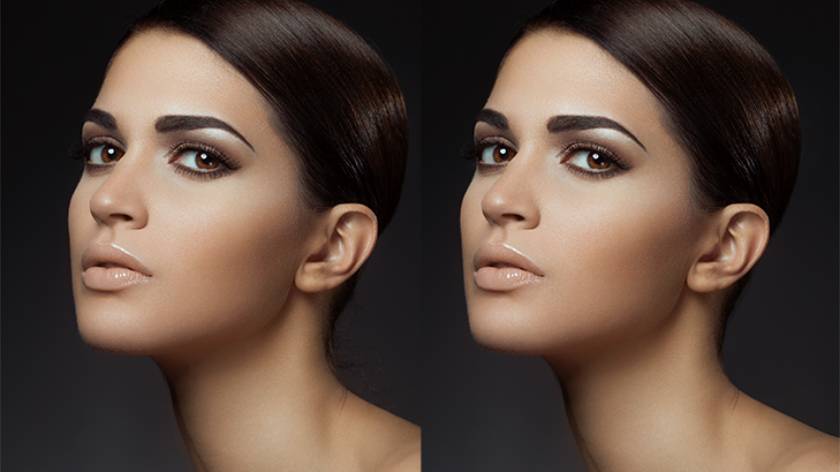
Now, if you zoom in on the image, you'll see that there are some mismatches in the Photoshop face swap. Now re-edit it to fix the mismatch. Take a soft brush tool with 8-10% flow. Then sample from the closest colors and tones to correct the mismatch. Press and hold Alt + Left click from the source area. Brush through the mismatched areas and create the perfect match. Remember not to use the same color in all locations. Also use the 'Blur Tool' in some places for a more complete finish. Now, take a look at the final result below.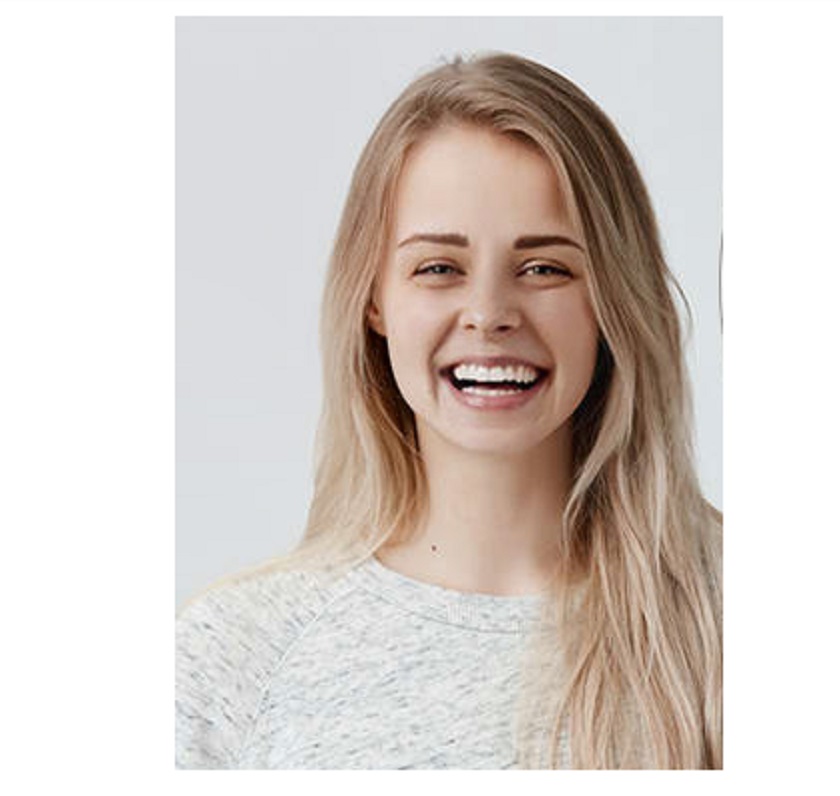
Step 8: Save it
After completing the whole process, now save the file in any format you want.Conclusion
It's an easy process to turn Photoshop into a face swap. However, there are other ways to replace faces in photos. But we think with this simple process it becomes easier to swap faces in Photoshop. And it's also the most convenient process for doing a perfect face swap in Photoshop. You can watch the PhotoshopCafe's Colin Smith's face swap video tutorial at: [embed]https://www.youtube.com/watch?v=JKSxHJTwCNw[/embed] In the video, Colin Smith of PhotoshopCafe shows you two scenarios. In the first example (at 1:15), two images of the same group of women, taken in the same shoot. In this group photo of smiling women, a woman on the left doesn't have the best expression, so Colin replaces her face in this photo with hers from another photo, where her facial expression looks more flattering. He introduced the second example (at 6:33) as “trying on a new hairstyle… When you don’t want the cutlery but you want to see what it looks like”. Colin photographed two different models and swapped their faces to "try on" the second model's short hairstyle. Although Colin is very specific in this case, you can use the same basic steps for a variety of purposes. SOME WAYS TO SAY: Determine the area you need to stitch: this means selecting faces only if both images are the same (like in the group photo example) or using the whole image to give you more pixels to work with , as in the hairstyle example. To select the area around the face, use the Lasso Tool. Then use the Move Tool to drag your selection over to the second image. Holding Shift as you release it will place the selection in the same spot on the second image's canvas. Make sure that the “new face” is on top of the layer and change the opacity of that layer to 50% so you can see the face below and easily place it right over the face you want to replace. If the top layer is jumping around, select View in the Menu Bar and select the Snap function. This will allow for easier positioning of the new face. Since in Colin's video tutorial he only wanted to change the expression of the woman in the group photo, he used her nose as an "anchor". When using the Free Transform tool by pressing CMD / CTRL + T, you can move the Anchor Point to the tip of the nose to align the facial features on both layers. In the second example, Colin uses the Free Transform tool to make the new face slightly smaller to align features, while also "anchoring" the nose. When you're working with two different subjects, make sure the skin tones are consistent so the face and neck match and the final image looks seamless. Once the new face is in place, change the top layer to 100% Opacity. Finally, add a layer mask on top of the layer with the new face, and invert it to black to hide the entire layer and reveal only the new face. Colin also uses the Liquify tool, which isn't always necessary, but facial recognition combined with the sliders in the Face-Aware Liquify property panel can help adjust eyes and mouth after swapping. change.


VIP Products


Best Selling Products
Autodesk All App Account Copyright
120 USD
Upgrade genuine Capture One account
120 USD
Copyright Adobe Lightroom Account
59 USD
Plugin Retouch4me
69 USD
MidJourney Account
29 USD
Upgrade Duolingo Super
29 USD
Adobe Premiere Pro Account
99 USD
ChatGPT Plus Account (GPT-4)
16 USD
Genuine Cheap Canva Pro
39 USD
Windows 10 & 11 Pro Key
36 USD
Capcut Pro 1 Year
39 USD
Genuine Adobe Illustrator account
99 USD
Upgrade Genuine Office 365
49 USD
Adobe Photoshop Copyright - Full App
120 USD
Freepik Premium Account
59 USD