Best Selling Products

Upgrade Genuine Office 365
49 USD

Autodesk All App Account Copyright
120 USD

Adobe Premiere Pro Account
99 USD

Upgrade genuine Capture One account
120 USD

Copyright Adobe Lightroom Account
59 USD

Genuine Adobe Illustrator account
99 USD

Upgrade Duolingo Super
29 USD

Genuine Cheap Canva Pro
39 USD

MidJourney Account
29 USD

ChatGPT Plus Account (GPT-4)
16 USD

Freepik Premium Account
59 USD

Capcut Pro 1 Year
39 USD

Adobe Photoshop Copyright - Full App
120 USD

Plugin Retouch4me
69 USD

Windows 10 & 11 Pro Key
36 USD
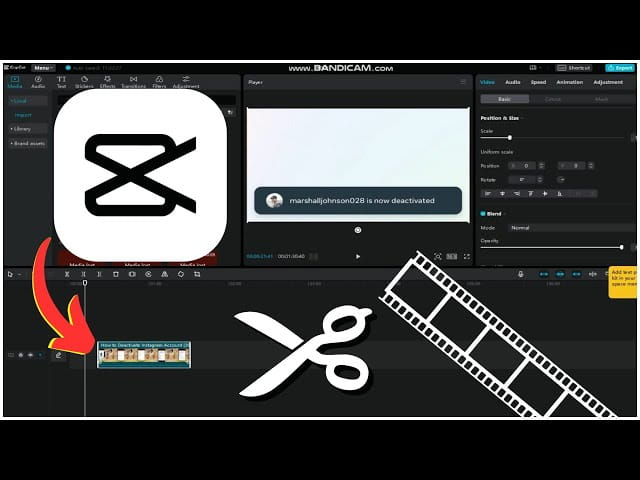
The Ultimate Guide to Cutting Videos in CapCut: Fast, Clean, and Professional
Nội dung
- 1. Why Is Precise Video Cutting Important?
- 2. Introduction to the CapCut Desktop & Mobile Interface
- 3. How to Cut Videos on Desktop
- 3.1 Import Video Into the Timeline
- 3.2 Use the Playhead and Split Tool (Ctrl/Cmd + B)
- 3.3 Use Q/W Keys to Trim the Left or Right Side of a Clip
- 3.4 Enable Auto-Snapping for Precise Alignment
- 3.5 Use Arrow Keys for Frame-by-Frame Precision
- 4. How to Cut Videos on CapCut Mobile (Phone)
- 4.1 Open a Project and Add a Video
- 4.2 Drag the White Handles to Trim the Beginning or End
- 4.3 Use the Split Feature to Remove the Middle Section
- 4.4 Zoom the Timeline for Greater Accuracy
- 5. Tips for Fast and Accurate Video Cutting
- 5.1 Use Keyboard Shortcuts on Desktop
- 5.2 Cut Using Specific Timestamps
- 5.3 Always Preview Before Exporting
- 6. Why You Should Use the Licensed Version of CapCut for the Best Experience
- 6.1 Why Upgrade to CapCut Pro?
- 6.2 Buy Genuine CapCut at a Great Price from Thế Giới Phần Mềm AI
- 7. Conclusion
Have you ever felt overwhelmed when creating creative short-form videos for TikTok or Instagram Reels? Video trimming and editing are not just technical tasks—they are truly an art form that determines the overall impact of your content.
1. Why Is Precise Video Cutting Important?
Video editing is much more than simply trimming footage to make it shorter. In reality, accurately cutting each frame and transition can have a significant impact on the quality and effectiveness of the final video. Below are some important reasons to consider:
- Maintain content flow: A well-trimmed video removes unnecessary sections, helping highlight the main message you want to convey. When viewers watch a video with a clear and coherent narrative, they are more likely to stay engaged.
- Optimize viewer experience: On social media platforms such as TikTok, Instagram, and Facebook, viewer attention spans are extremely short. If your video is not engaging immediately, viewers can quickly move on to something else. Precise editing helps create short yet creative clips that retain audience attention longer.
- Increase advertising effectiveness: Especially in promotional videos, every second matters. Proper cutting makes content easier to understand while emphasizing the message you want to communicate to customers. A concise and compelling advertisement can leave a strong impression and encourage action.
- Simplify adding effects and background music: A neatly trimmed video creates better opportunities for integrating effects, visuals, and music harmoniously. Effects and music not only make videos more dynamic but also enhance emotional impact and viewer engagement.
According to statistics, viewers often skip a video within the first three seconds if it fails to capture their interest. That is why mastering the skill of cutting videos at the right moment is extremely important for modern content creators. Understanding this art not only helps you create high-quality productions but also strengthens your ability to connect with audiences.
%20(1).png)
2. Introduction to the CapCut Desktop & Mobile Interface
CapCut is one of the most popular video editing tools today, available on two main platforms: the Mobile version for iOS and Android, and the Desktop version for Windows and macOS. Each version features a unique interface designed to match different user habits and editing needs.
From this comparison, it is clear that if you need quick edits for TikTok or other social media platforms, CapCut Mobile is more than capable. However, for users who require greater precision or want to work on more professional video projects, CapCut Desktop is the ideal choice, offering a wider range of powerful tools and creative features.
3. How to Cut Videos on Desktop
CapCut Desktop provides a powerful editing experience similar to professional software such as Premiere or Final Cut. Below is a step-by-step guide to help you cut videos quickly and accurately.
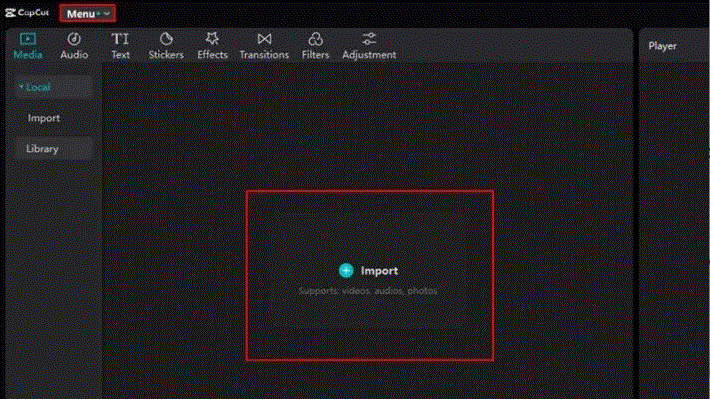
3.1 Import Video Into the Timeline
First, open CapCut and select "New Project". The user-friendly interface makes it easy to get started. You can drag a video file from your computer into the workspace or click the "+" icon to add the video directly to the timeline.
The timeline system helps organize and manage video clips efficiently. If you are new to CapCut, try experimenting with different types of videos to become familiar with the editing process.
3.2 Use the Playhead and Split Tool (Ctrl/Cmd + B)
Once your video is in the timeline, the next step is to use the playhead—the vertical line that indicates the current playback position—to move to the point where you want to cut.
Click the Split button on the top toolbar or use the keyboard shortcut Ctrl + B (Windows) or Cmd + B (Mac).
The Split tool is extremely useful because it allows you to create shorter clips and edit them flexibly. It is an efficient way to cut videos without losing important frames.
.GIF)
3.3 Use Q/W Keys to Trim the Left or Right Side of a Clip
Another useful shortcut for faster editing is the Q and W keys.
Simply move the playhead to the desired cut point:
-
Press Q to remove everything to the left of the playhead.
-
Press W to remove everything to the right of the playhead.
These shortcuts save significant time compared to manually dragging and trimming clips, especially when working with multiple cuts.
3.4 Enable Auto-Snapping for Precise Alignment
CapCut also includes an Auto-snapping mode that automatically aligns clips with the playhead or adjacent clips, preventing frame misalignment during editing.
You can enable this feature by pressing N or clicking the magnet icon on the toolbar.
This mode is extremely convenient and helps create a polished video without small editing mistakes. Take advantage of it to make your editing process easier and more accurate.
3.5 Use Arrow Keys for Frame-by-Frame Precision
When you need frame-level accuracy, use the left and right arrow keys to move the playhead one frame at a time.
Then press Split to cut exactly at the desired frame.
This technique is especially useful for important moments such as beat drops, transitions, or synchronized visual effects.
Combined with timeline zooming, you can inspect individual frames in greater detail. This improves editing precision and gives you better control over the final result.
After every cut, turn on Fullscreen Preview to review the edited section and ensure no important frames have been accidentally removed. This habit will help produce a cleaner and more professional final product.
4. How to Cut Videos on CapCut Mobile (Phone)
With CapCut Mobile, cutting videos becomes easier than ever with just a few taps. Follow the steps below:
4.1 Open a Project and Add a Video
Launch the CapCut app and tap "New Project".
Next, choose the video you want to edit from your phone’s gallery and tap "Add" to insert it into the timeline.
Adding footage is quick and allows you to move directly into editing. You can also manage multiple videos simultaneously and rearrange them as needed.
4.2 Drag the White Handles to Trim the Beginning or End
Once the video appears in the timeline, tap on it to highlight it.
You will see two white handles at the beginning and end of the clip. Tap and drag these handles to shorten the video from either side.
This allows you to remove unwanted sections instantly without using complicated editing tools. The handle-dragging feature provides great flexibility when adjusting clip length.
.GIF)
4.3 Use the Split Feature to Remove the Middle Section
If you want to remove a section from the middle of a video:
- Move the playhead to the start of the section you want to remove.
- Tap "Split".
- Move the playhead to the end of the unwanted section.
- Tap "Split" again.
After dividing the clip, tap the middle section and select "Delete".
This method is highly effective for removing pauses, mistakes, or unnecessary footage without manually trimming each segment.
4.4 Zoom the Timeline for Greater Accuracy
To improve precision while editing, use the timeline zoom feature.
Place two fingers on the screen and spread them apart to zoom in on the timeline.
This provides a clearer view and makes it easier to position the playhead accurately.
Although CapCut Mobile lacks keyboard shortcuts like the desktop version, its touch-based workflow is extremely fast and convenient. This is particularly useful when editing while traveling or when you do not have access to a computer.
By following these steps, you can transform raw footage into professional-looking videos using nothing more than your smartphone. Take advantage of CapCut’s tools to bring your creative ideas to life!
.GIF)
5. Tips for Fast and Accurate Video Cutting
Efficient and precise video trimming not only saves time but also improves content quality. Here are some practical tips to optimize your editing workflow in CapCut.
5.1 Use Keyboard Shortcuts on Desktop
CapCut Desktop includes many useful shortcuts that can dramatically improve productivity:
- Ctrl/Cmd + B: Split a clip at the playhead position.
- Q/W: Remove the left or right side of the clip relative to the playhead.
- N: Enable or disable Auto-snapping.
- mArrow Left/Right: Move the playhead one frame at a time.
Using these shortcuts can make a significant difference in your editing speed and efficiency.
5.2 Cut Using Specific Timestamps
One of the most effective methods for precise editing is cutting based on exact timestamps.
For example, if you know you need to remove footage from 00:01:25 to 00:01:45, position the playhead at those timestamps and use the split tool.
This approach ensures synchronization between audio, visuals, and effects. It is especially useful when editing complex projects such as vlogs or promotional videos.
5.3 Always Preview Before Exporting
Before finalizing and exporting your project, always review the entire video.
Press the "Play" button and watch for:
- Visual jumps
- Audio synchronization issues
- Missing important content
Reviewing your video allows you to catch mistakes before publishing and ensures the final result meets your expectations.
By applying these video-cutting techniques, you can become a faster and more professional editor. Practice regularly to master CapCut and continuously improve the quality of your content.
.GIF)
6. Why You Should Use the Licensed Version of CapCut for the Best Experience
Choosing reliable and effective video editing software is essential if you want to create high-quality content. While CapCut’s free version is already impressive, upgrading to the licensed version provides many additional benefits worth considering.
6.1 Why Upgrade to CapCut Pro?
Although the free version offers powerful features, the licensed Pro version delivers a more complete editing experience:
- No watermarks or advertisements: One of the biggest frustrations in video editing is dealing with watermarks and ads. The licensed version eliminates these distractions entirely.
- Unlock all effects, filters, and licensed audio: Gain access to a vast library of exclusive creative assets that help make your videos unique and professional.
- AI-powered automatic cutting and subtitle generation: Smart AI tools can analyze videos, automate editing tasks, and generate subtitles quickly, saving significant time while improving production quality.
- Advanced color grading and high-quality exports: Access professional-level color correction tools and export videos at higher resolutions without limitations, resulting in near-professional productions.
6.2 Buy Genuine CapCut at a Great Price from Thế Giới Phần Mềm AI
If you are looking for a reliable source for genuine CapCut licenses at competitive prices, Thế Giới Phần Mềm AI is an excellent option. The platform is known for providing authentic software and licensed accounts at some of the most competitive prices in Vietnam.
Instead of purchasing individually at a higher cost, you can join group-buy programs and save up to 60% on expenses. This allows you to enjoy CapCut Pro at a more affordable price while ensuring legal and secure software usage.
Upgrade your video editing experience with a licensed version of CapCut to ensure your projects are not only visually appealing but also more professional. With the advantages and value that the licensed version offers, it is an investment you are unlikely to regret.
7. Conclusion
The journey of video creation has never been easier with CapCut. Through the tips and techniques we have shared, we hope you feel more confident about cutting and editing videos quickly and professionally. Every second of your video carries its own value, and precise editing can elevate your content to a whole new level. Start practicing today to create videos that are not only visually appealing but also reflect your unique personality. Don’t forget to follow us for more useful video editing tips and techniques!


VIP Products


Best Selling Products
Upgrade Genuine Office 365
49 USD
Autodesk All App Account Copyright
120 USD
Adobe Premiere Pro Account
99 USD
Upgrade genuine Capture One account
120 USD
Copyright Adobe Lightroom Account
59 USD
Genuine Adobe Illustrator account
99 USD
Upgrade Duolingo Super
29 USD
Genuine Cheap Canva Pro
39 USD
MidJourney Account
29 USD
ChatGPT Plus Account (GPT-4)
16 USD
Freepik Premium Account
59 USD
Capcut Pro 1 Year
39 USD
Adobe Photoshop Copyright - Full App
120 USD
Plugin Retouch4me
69 USD
Windows 10 & 11 Pro Key
36 USD