Best Selling Products

Windows 10 & 11 Pro Key
36 USD

Freepik Premium Account
59 USD

Plugin Retouch4me
69 USD

Upgrade genuine Capture One account
120 USD

Autodesk All App Account Copyright
120 USD

Genuine Adobe Illustrator account
99 USD

MidJourney Account
29 USD

Adobe Premiere Pro Account
99 USD

Upgrade Genuine Office 365
49 USD

Capcut Pro 1 Year
39 USD

Upgrade Duolingo Super
29 USD

Copyright Adobe Lightroom Account
59 USD

Genuine Cheap Canva Pro
39 USD

Adobe Photoshop Copyright - Full App
120 USD

ChatGPT Plus Account (GPT-4)
16 USD
Turn Photos Into Oil Paintings With Photoshop: Detailed Tutorial
Nội dung
- 1. Reasons to Create Oil Painting Effects with Photoshop
- 1.1 Customize to personal preferences
- 1.2 Save time and money
- 1.3 Diverse applications
- 2. Step-by-step guide to creating oil painting effects with Photoshop
- 2.1. Photoshop software
- 2.2 A high quality photo
- 2.3. Time and concentration
- 3. Step-by-Step Guide to Turning a Photo into an Oil Painting
- 3.1 Step 1: Open Image In Photoshop
- 3.2 Step 2: Optimize brightness and contrast
- 3.3 Step 3: Apply Oil Paint Filter
- 3.4 Step 4: Edit Parameters
- 3.5 Step 5: Add Oil Painting Effects and Drop Shadows
- 4. Small Tips To Make Your Work More Impressive
Learn how to turn a photo into an oil painting with Photoshop in just a few simple steps. This detailed article will help you create beautiful and impressive artistic effects.
1. Reasons to Create Oil Painting Effects with Photoshop
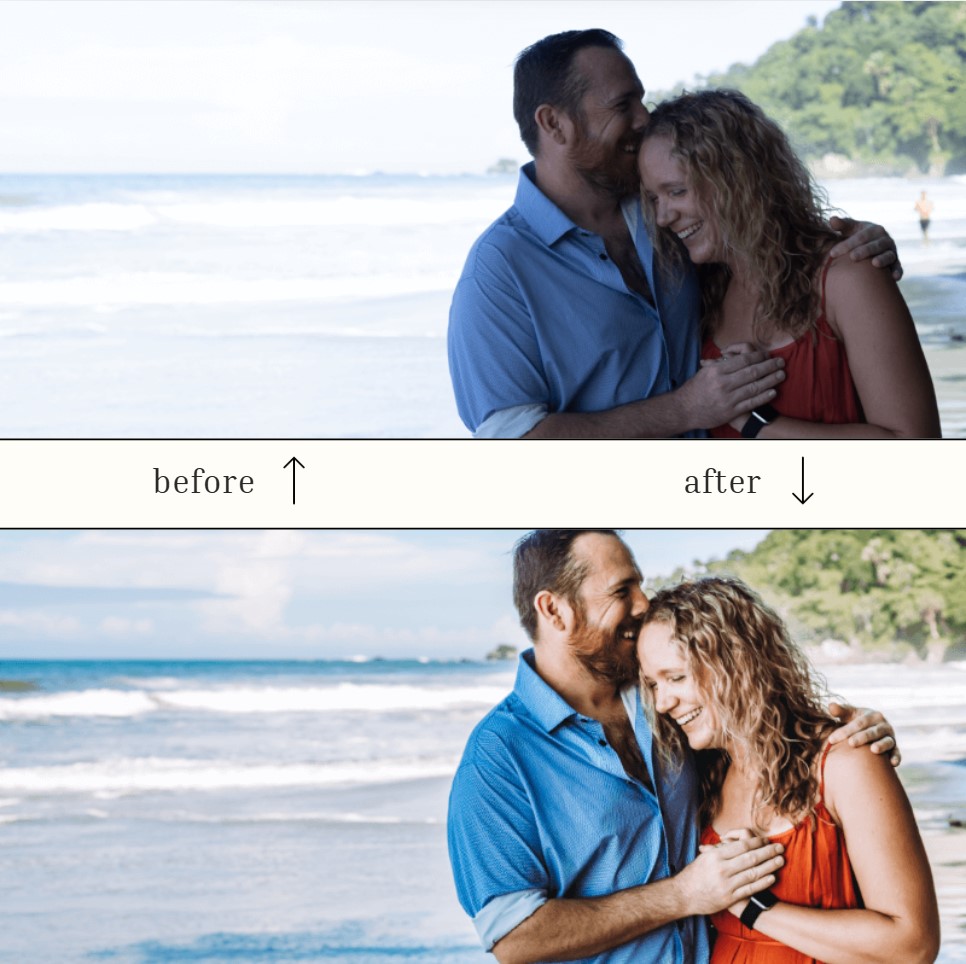
Oil paintings not only bring classic beauty but also create high artistic value. Oil painting effects in Photoshop not only bring unique artistic beauty but also help enhance the aesthetic value of your work.
.jpg)
Adobe Photoshop Cheap License
This is a powerful tool for designers, photographers, or anyone who wants to add a creative touch to their projects. Using Photoshop to create this effect, you can:
1.1 Customize to personal preferences
Adjust the details to suit your own style. The oil painting effect in Photoshop not only brings creativity and uniqueness to the work but also allows users to customize according to personal preferences, creating photos with their own unique mark.
With powerful and flexible tools, Photoshop helps you control elements such as sharpness, color, and texture, thereby faithfully and vividly recreating traditional painting styles. This not only meets artistic needs but also opens up many application opportunities in graphic design, advertising, and digital content creation.
1.2 Save time and money
No need to hire an artist or buy expensive materials. Creating oil painting effects in Photoshop has many significant benefits, especially in terms of saving time and money. Instead of investing in traditional oil painting materials and tools, you can leverage the power of technology to create high-quality works of art quickly and efficiently.
.jpg)
Photoshop offers a wide range of flexible tools and features that allow you to customize every detail as you wish, from color, lighting to surface texture, without having to go through the complicated stages of the hand-drawing process. This not only optimizes resources but also opens up unlimited creative opportunities for digital artists.
1.3 Diverse applications
The oil painting effect in Photoshop not only brings high aesthetic value but also has diverse applications in many different fields. From graphic design, advertising, printing to interior decoration, this effect helps create unique and impressive works of art.
In addition, using Photoshop to create oil painting effects also saves time and costs compared to doing it manually. At the same time, it brings flexibility in editing and customizing as desired. This is a useful and professional tool that any designer should explore and apply.
2. Step-by-step guide to creating oil painting effects with Photoshop
To create a professional oil painting effect in Photoshop, preparation before doing is extremely important. To create an oil painting effect, you need to prepare the following specific elements:
2.1. Photoshop software
Make sure you are using Photoshop CC or higher, as some of the features in this tutorial may not be available in older versions. Make sure your Photoshop software is updated to the latest version to take full advantage of the tools and features. Also, familiarizing yourself with layers, brushes, and filters in Photoshop will make your editing process easier.
2.2 A high quality photo
The original photo needs to be sharp and well-lit for the effect to stand out. Portraits, landscapes, or still life photos often produce the best results! To create an oil painting effect in Photoshop, you first need to prepare a high-quality photo to ensure the best results.
2.3. Time and concentration
While the process isn't complicated, you do need a little patience to get the best results!
.jpg)
Finally, prepare a comfortable and focused workspace to ensure the highest efficiency and quality of your work.
3. Step-by-Step Guide to Turning a Photo into an Oil Painting
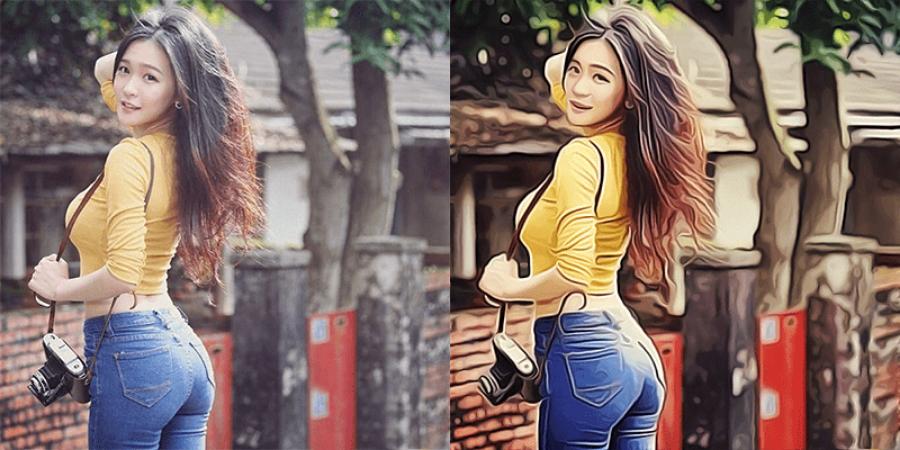
Do you think this is an oil painting created through hours of meticulous work with brushes and colors? In fact, it is the result of a few simple operations in Photoshop. With this tool, you can quickly turn ordinary photos into unique works of art. Specifically, the following steps:
3.1 Step 1: Open Image In Photoshop
Launch Photoshop and open the photo you want to edit by going to File > Open .
3.2 Step 2: Optimize brightness and contrast
To duplicate the Background layer, you can right-click on the Background layer and select the Duplicate Layer command or use the keyboard shortcut Ctrl+J (Cmd+J on MacOS).
Next, enhance the colors using the Hue/Saturation panel. Click on the panel icon as shown or use the keyboard shortcut Ctrl+U (Cmd+U on MacOS). Here, adjust the Saturation slider to 25 or higher depending on personal preference.
.jpg)
Then, to optimize the brightness and contrast, go to Layer > New Adjustment Layer > Brightness/Contrast and adjust the parameters to suit your desired look or style. If the photo is already satisfactory, you can skip this step.
3.3 Step 3: Apply Oil Paint Filter
Next, you need to go to Filter > Artistic > Plastic Wrap. Here, your main job will be to use the tools in the Artistic group. The first tool you need to work with is Plastic Wrap.
3.4 Step 4: Edit Parameters
Don't hit OK just yet, because you'll need to make good use of this tool panel. First, create a new effect layer by clicking on the icon as shown.
Next, on the effect layer you just created, select the Paint Daubs tool and adjust the parameters accordingly to achieve the desired effect. Then, still in this tool panel, create another effect layer and use the Texturizer tool to create subtle veins for the background surface.
Continue doing the same with the Glass tool, but be careful to adjust the settings carefully to avoid distorting or blurring the image.
Once all the parameters have been adjusted properly, you can press OK to finish and admire the result – an impressive work as expected.
3.5 Step 5: Add Oil Painting Effects and Drop Shadows
Next, we will create the oil painting ripple effect and drop shadow for the photo. First, duplicate the original Background layer using Ctrl+J (or Cmd+J on MacOS) and place this layer on top.
Then go to Filter > Stylize > Emboss and set the parameters accordingly (be careful not to over-adjust).
With the parameters optimized, you will get the result as illustrated (the result may vary depending on each photo). Next, change the blending mode of this layer to Vivid Light to create an overlapping effect with the layers below.
Now you have completed the process of creating your own unique oil painting. If you feel unsatisfied, you can create a new layer and continue to tweak the parameters in the Artistic tool to achieve the desired effect.
.jpg)
Finally, use Ctrl+Shift+E (or Cmd+Shift+E on MacOS) to merge all the layers into one. Now you can admire your own work of art – a personal oil painting without spending too much time or having in-depth knowledge of painting.
4. Small Tips To Make Your Work More Impressive
To create an impressive oil painting effect in Photoshop, you need to pay attention to elements such as light, color, and texture. First, choose a high-resolution photo to ensure the best output quality!
Then, use the "Oil Paint" filter in Photoshop, adjusting parameters such as Stylization, Cleanliness, Scale and Bristle Detail to achieve the desired effect. Don't forget to adjust the lighting and shadows to highlight the details, creating a realistic and vivid feeling.
Finally, add color adjustment layers like Gradient Map or Color Balance to complete your work, bringing depth and overall harmony. Regular practice and experimentation with different styles will help you improve your skills and create unique works.
Adobe Photoshop Cheap License
5. Conclusion
Turning photos into oil paintings with Photoshop is not only fun but also helps you create unique works of art. With the detailed instructions and tips shared in this article, you are ready to take action and turn your ideas into reality. Try it today and experience the magic that Photoshop brings!


VIP Products


Best Selling Products
Windows 10 & 11 Pro Key
36 USD
Freepik Premium Account
59 USD
Plugin Retouch4me
69 USD
Upgrade genuine Capture One account
120 USD
Autodesk All App Account Copyright
120 USD
Genuine Adobe Illustrator account
99 USD
MidJourney Account
29 USD
Adobe Premiere Pro Account
99 USD
Upgrade Genuine Office 365
49 USD
Capcut Pro 1 Year
39 USD
Upgrade Duolingo Super
29 USD
Copyright Adobe Lightroom Account
59 USD
Genuine Cheap Canva Pro
39 USD
Adobe Photoshop Copyright - Full App
120 USD
ChatGPT Plus Account (GPT-4)
16 USD