Best Selling Products
Turn RAW Photos into Masterpieces: Discover the Power of Lightroom
Adobe Lightroom is a professional photo editing and management software, trusted by photographers around the world. With a friendly interface, users can fine-tune brightness, color, white balance and many other powerful tools. RAW image processing mode helps preserve image quality, while smart library management and multi-device synchronization provide a convenient and flexible working experience.

1. Why are RAW photos important?
RAW photos are “raw” data captured by your camera without any compression or manipulation. It’s like a “blank canvas” waiting for you to paint a complete picture. With RAW photos, you can:
Detail recovery: Balance between dark and bright areas, without losing important details.
Comfortable color adjustment: Easily adjust color tones, smooth skin, white balance… without fear of reducing photo quality.
2. RAW photo editing process in Lightroom
Step 1: Import your RAW images
To import your images, go to the Library. Click Import in the bottom left corner of your screen
.jpg)
Select Source on the left side, usually the memory card.
.jpg)
Make sure there is a check mark on all the images you want to import.
.jpg)
On the right, select the file you want to import them into. Click Import.
.jpg)
Lightroom will import the images and automatically place them in your current workspace.
Step 2: Add preset values
Presets are a great time-saver in Lightroom. You can save edits that work for multiple photos as presets and apply them all to new photos with just one click. You can use Lightroom's built-in presets, download and install presets, or create your own.
Select your preset from the Presets panel on the left side of your workspace.
.jpg)
From there, you can make final edits to the image.
But for this tutorial, we want to go through all the steps. So let's go ahead.
Step 3: Consider the color
You should always try to get the white balance right in camera. However, shooting in RAW means you don’t have to stick to 100% default. You have a lot of freedom to adjust it later.
Open the Basic panel on the right side of your workspace in the Develop module.
Set the white balance by clicking the eyedropper and clicking something white in the photo. If there isn't any white you can use, you can slide the Temperature and Hue sliders to make your adjustments.
.jpg)
Step 4: Adjust the light
Moving down in the Basic panel, you have options to adjust Exposure, Contrast, Highlights, Shadows….
This is where you start adding dimension to your image. It's all about the contrast between light, midtones and shadows, and where the light hits the image.
.jpg)
You can also influence the light with Lightroom's powerful AI masking tools.
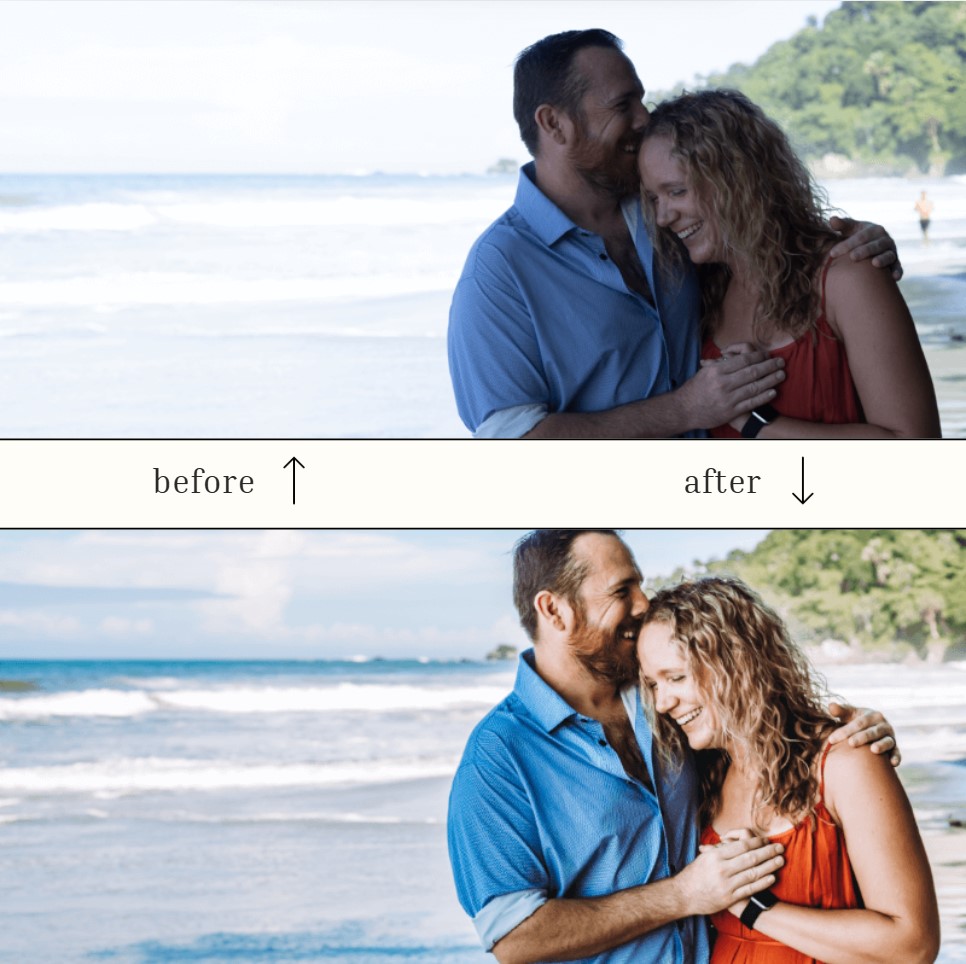
Here we asked Lightroom to Select Subject and I increased the exposure for the couple. We also added a Linear Gradient to darken the bright part on the right.
.jpg)
Step 5: Adjust your presence
There is a set of tools at the bottom of the Basic panel called Presence. These deal with details in the image.
For people, we don't usually use it too much. However, the Texture and Transparency sliders are great for enhancing images of animals, food, or other objects where you want to emphasize detail.
We generally don't want to emphasize wrinkles and the like, although you can use negative clarity to soften the skin. For this image I added Dehaze and turned down the Vibrance and Saturation a bit as I'll have to push them after using the Tone Curve.
Step 6: Make it stand out
Every photographer has their own special trick to make their images unique. For SaDesign it is the Tone Curve. This tool allows you to adjust the Light, Shadows, and Midtones of an image independently of each other.
This is different from the sliders in the Basic panel. Working with the Highlights slider will still affect the Shadows to some extent. But not when you use the Tone Curve.
You can also adjust the Red, Green, and Blue colors in the image independently of each other. SaDesign used this same curve for all three channels.
.jpg)
This is the setting SaDesign used for the Point Curve which you access via the grey circle.
.jpg)
Step 7: Adjust the color
The colors were a bit too dark or off-tone after the adjustments I made. The HSL panel allowed me to fix this easily.
You can adjust the Hue, Saturation and Brightness of each color independently
.jpg)
You can also use Color Grading if you want to add a special highlight at the top.
Step 8: Cut and straighten
Composition is something you should really try to nail down in camera. You can't change the angle or add space to a photo after it's been taken!
However, you can crop the photo tighter or straighten it, and minor edits in these areas are common.
Use the Transform panel for images that require advanced straightening. Typically only use this for real estate images where walls are not aligned.
Step 9: Finishing steps
Zoom in to 100% to check your image for grain or noise and fix the grain in your photo. You can adjust in the Details panel if needed.
.jpg)
In the Effects panel, you can add a dark or light vignette if you want. And that's it!
.jpg)
Turning a RAW photo into a masterpiece is no longer a difficult task when you have Lightroom in hand. This software not only helps you maximize the data recorded by the camera, but also supports organizing, managing, synchronizing and optimizing the workflow. Combined with experience, aesthetic taste and personal creativity, each photo can become a soulful work of art.


