Best Selling Products
Ways to remove background with photoshop
Nội dung
- 1. 3 ways to remove background with Photoshop
- 1.1. How to erase background in Photoshop with Magic Eraser Tool
- 1.2. Remove the background in Photoshop using Magic Wand Tool
- 1.3. Remove Background with Subject
- 2. How to remove background with Photoshop online
- 3. Remove the background with Photoshop CS6
Background removal with Photoshop is a technique used to help highlight the main subject, creating a clear separation between the subject and the background. Let's explore the professional background removal methods with Photoshop shared by Sadesign below to apply to your photos!

1. 3 ways to remove background with Photoshop
1.1. How to erase background in Photoshop with Magic Eraser Tool
The steps to remove background in Photoshop using Magic Eraser Tool are as follows:
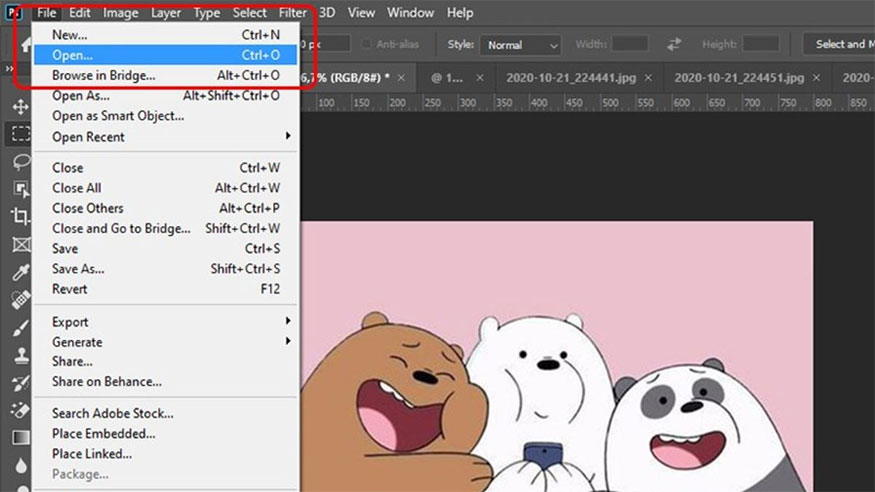
Step 1: You need to open the photo you want to remove the background from in Photoshop by selecting File => Open => Select the photo file from your computer.
Note: Before you start editing, make a copy of the original image layer to work on, this is to ensure the original image is safe. To do this, right-click on the layer name in the Layers panel and select Duplicate Layer or drag the image layer down to the New Layer icon at the bottom of the Layers panel.
Step 2: Select Magic Eraser Tool => Select Magic Eraser Tool from the list of tools.

Step 3: Configure the settings of the Magic Eraser Tool in the Options bar at the top of the screen. The main settings are Tolerance and Opacity. Depending on the resolution and complexity of the background of the photo you are editing, you will have to set the appropriate settings. You can adjust the Tolerance value to erase similar colored parts of the background of the photo.

Step 4: Use the Magic Eraser Tool to erase the background by moving your mouse over the background of the photo. Then click to erase, the tool will immediately erase the pixels with the same color as the pixel you clicked based on the Tolerance value you set in the previous photo.

Finally, you just need to check the result after removing the background and make edits if necessary. After completing the background removal, save the new photo or continue editing the remaining parts of the photo.

1.2. Remove the background in Photoshop using Magic Wand Tool
This method is especially suitable for those who want to cut and paste icons and logos with a lot of text with the following steps:
Step 1: Open the image or logo that needs the background removed by selecting File => Open => Select the image.
Step 2: Select the Magic Wand Tool and adjust the Tolerance of the selection to 50.
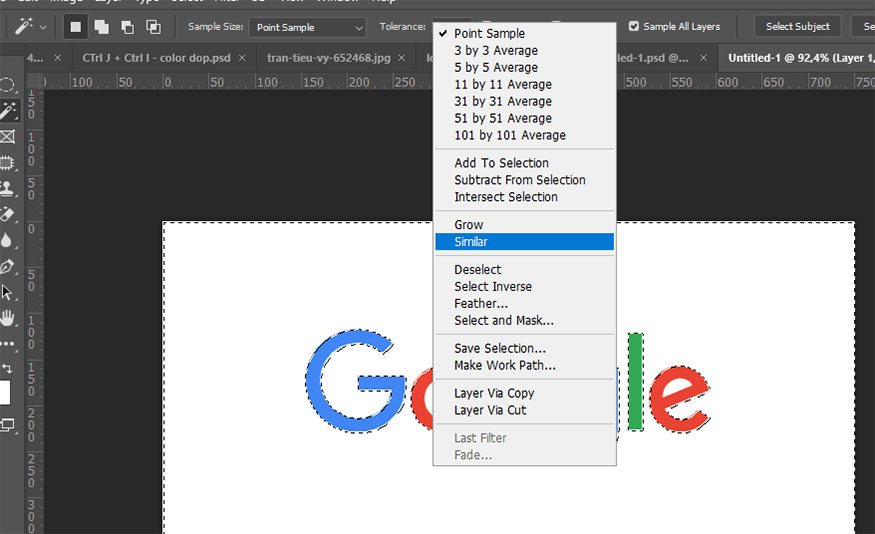
Step 3: Click on the area you want to select, the selected area is only the outer area. To select the entire area, you need to right-click on the screen and select Similar. Then the white areas on the screen will be selected.

Step 4: Press Delete on the keyboard to delete the background
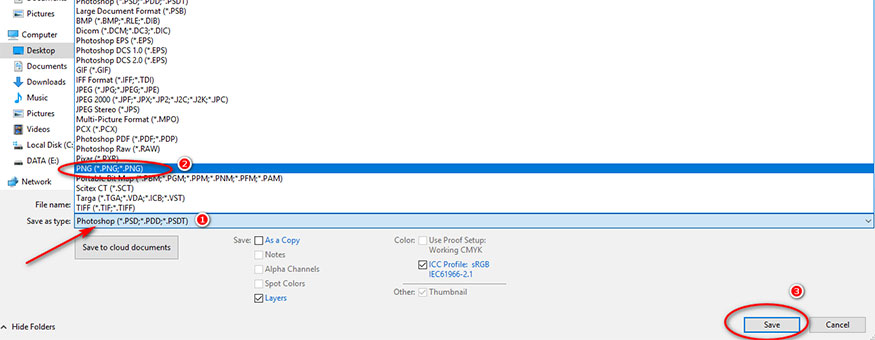
Step 5: Merge the image you just made into a new background by opening the new background, then drag and drop the layer containing the image you just made into the new background. Or you can save the new image by going to File => Save as => Select to save the image with the PNG extension => press Save.
1.3. Remove Background with Subject
This method is considered suitable for cutting and pasting people and objects. The implementation is carried out with the following steps:
Step 1: Open the image or logo that needs the background removed by selecting File => Open then select the image.
Step 2: Go to Select => Subject, then the software will automatically select the subject area quickly.
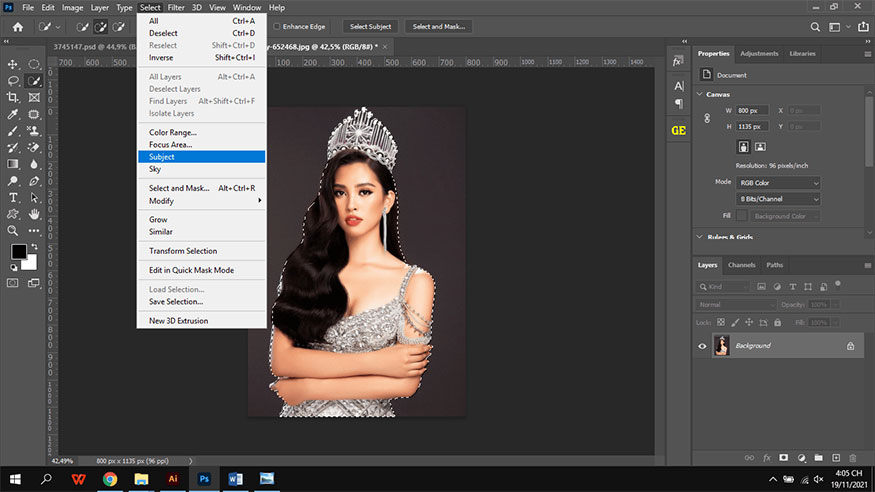
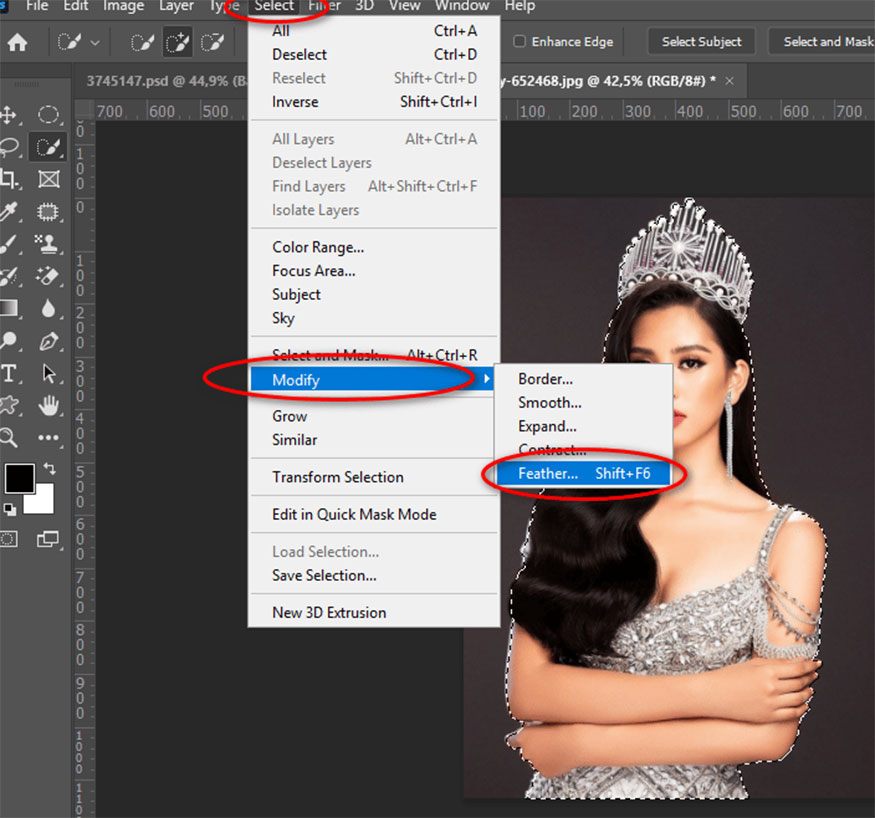
Step 3: When the selection area appears, go to Select => Modify => Feather Selection (Shift F6) to create a soft border for the image so that the cut is softer.
When the Feather Selection table appears, enter the value 2 in Feather Radius then click OK.
Step 4: Select Add a mask below the Layers panel (rectangle icon with a black circle in the middle).
Step 5: Now only the character image remains after removing the background.
Step 6: You can merge the photo you just made into a new background by opening the new background, dragging and dropping the layer containing the photo you just made into the new background.
And here is the result we get:

2. How to remove background with Photoshop online
The steps to remove background with Photoshop online are as follows:
Step 1: First, you need to open the photo you want to remove the background from in Photoshop by selecting File => Open => Select the photo file from your computer.
Note: It is recommended to create a duplicate before editing to ensure the safety of the original image by right-clicking on the layer name in the Layers panel, then selecting Duplicate Layer or dragging the image layer down to the New Layer icon at the bottom of the Layers panel.
Step 2: Select the Lasso Tool in the Tool Bar => Lasso Tool from the list of tools.
Step 3: Draw a cut line around the background you want to erase using the Lasso Tool. You can adjust the shape of the cut line by changing the curve of the line or you can create multiple consecutive lines to help complete the area of the background you want to erase.
Step 4: Proceed to delete the background, after completing the cut area around the background, right-click in the selected area => select Select Inverse to select the background in reverse. Right-click in the selected background area => select Delete to delete it.
Check the results after removing the background to adjust if necessary. After completing the background removal with photoshop as desired, save the new photo or continue editing the remaining parts of the photo.
3. Remove the background with Photoshop CS6
To remove the background in Photoshop CS6, you can use the Magic Wand Tool or the Quick Selection Tool and do the following:
Step 1: Open the photo you want to remove the background from in Photoshop CS6 by selecting File => Open => Select the photo file from your computer.
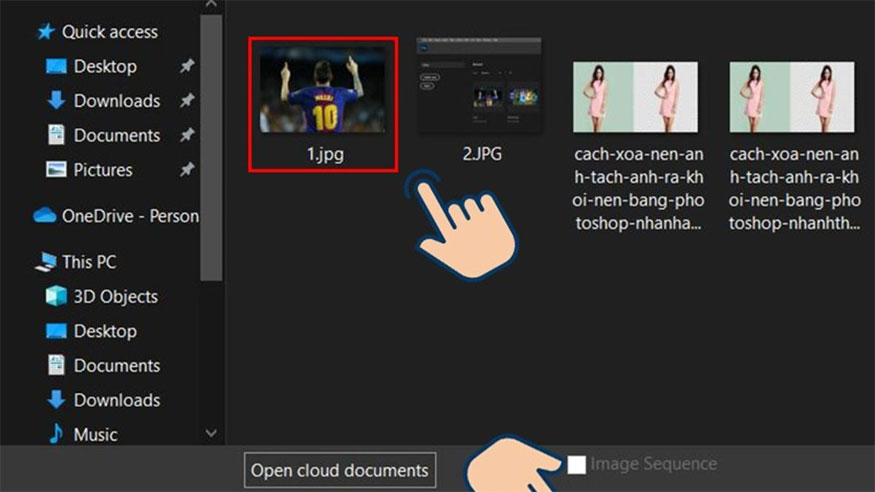
Step 2: Create a copy to work with to ensure the safety of the original image. You do this by right-clicking on the layer name in the Layers panel => select Duplicate Layer or drag the image layer down to the New Layer icon at the bottom of the Layers panel.
Step 3: Select the Magic Wand Tool or Quick Selection Tool by: On the Tool Bar => select Magic Wand Tool or Quick Selection Too from the list of tools.
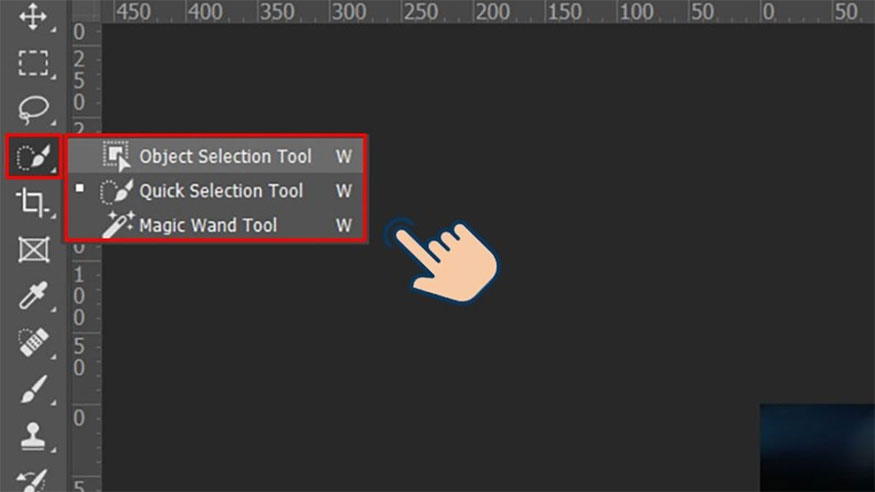
Step 4: Select the background by clicking on the background area in the image. The tool will automatically select areas with similar colors according to the previous settings you set. After you have selected the background, right-click in the selected area => select Delete to delete it.

Step 5: Adjust the parameters for the selected tool in the Options bar at the top of the screen. You can adjust the Tolerance of the Magic Wand Tool or the Size and Hardness of the Quick Selection Tool to suit your photo.
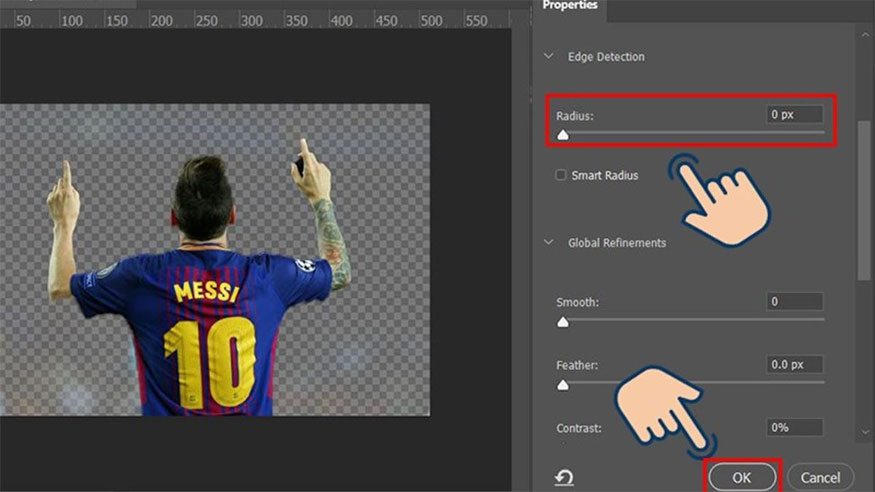
With the above methods of background removal in Photoshop, you can use them to adjust the overall composition of the photo to create a harmonious photo, ensuring balance between the subject and the background. Thereby helping to improve the aesthetics, as well as contributing to the harmony of the photo.
There are many different ways to remove the background. Above are the basic, easy-to-do and most widely used methods that will help you succeed right from the first time.
Hopefully, the instructions on how to remove backgrounds using Photoshop above will be useful for those of you who are learning photo editing or want to learn how to remove backgrounds on Photoshop. Don't forget to share this article if you find it useful.
For those who need professional photo editing or want to install copyrighted Photoshop, please contact Sadesign for the fastest consultation and support at a guaranteed reasonable cost.
---------------------------
Installation and support contact information:
🏡 SADESIGN Software Company Limited
📨 Email: phamvansa@gmail.com
🌍 Website: https://sadesign.ai


