Best Selling Products

Upgrade genuine Capture One account
120 USD

Capcut Pro 1 Year
39 USD

Genuine Cheap Canva Pro
39 USD

Copyright Adobe Lightroom Account
59 USD

Freepik Premium Account
59 USD

MidJourney Account
29 USD

Upgrade Duolingo Super
29 USD

Autodesk All App Account Copyright
120 USD

Genuine Adobe Illustrator account
99 USD

Plugin Retouch4me
69 USD

ChatGPT Plus Account (GPT-4)
16 USD

Adobe Premiere Pro Account
99 USD

Adobe Photoshop Copyright - Full App
120 USD

Upgrade Genuine Office 365
49 USD

Windows 10 & 11 Pro Key
36 USD
What is Hyperlapse? Discover the "Super Cool" Motion Video Recording Technique That Everyone Loves!
Nội dung
- 1. Basic Concepts of Hyperlapse
- 2. How is Hyperlapse different from Timelapse?
- 3. When to use Hyperlapse and Timelapse
- 4. How to shoot Hyperlapse in photography
- 5. Some tips to make Hyperlapse more impressive
- 5.1. Prioritize subjects with clear structures
- 5.2. Avoid changing the light too much
- 6. Applications of Hyperlapse in photography and media
- 7. Related questions
Join SaDesign to learn how Hyperlapse combines motion and time to create vivid videos, completely different from traditional Time-lapse.
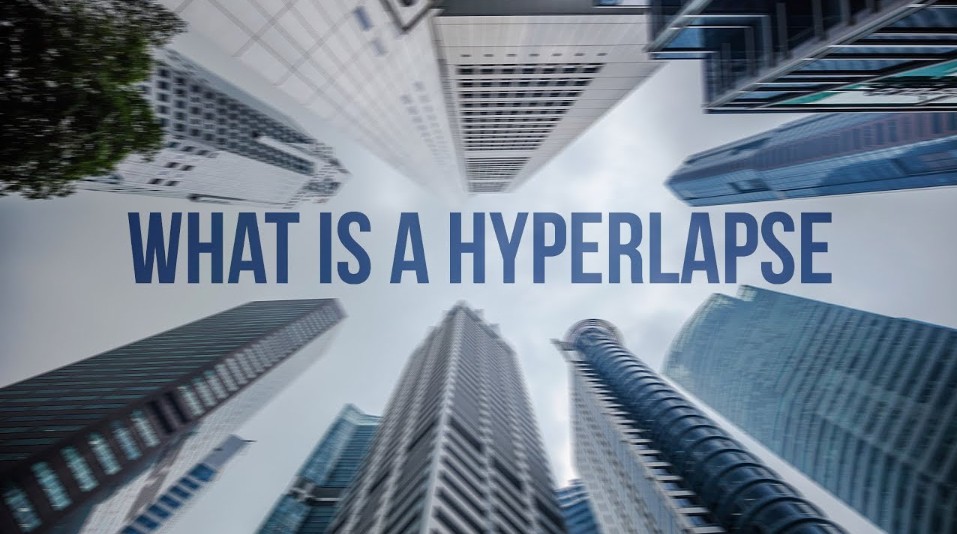
Have you ever watched videos where the surrounding scenery moves quickly, the camera angle continuously moves from one location to another, creating the feeling of flying through the city or across spectacular landscapes? That is Hyperlapse - an advanced form of the familiar Timelapse technique but "upgraded" by moving the camera position. In this article, let's explore with SaDesign in detail what Hyperlapse is, how it differs from regular Timelapse and how to shoot smoothly so that your Hyperlapse video becomes more professional and eye-catching than ever.
1. Basic Concepts of Hyperlapse
Hyperlapse is a video recording technique in which the camera moves over a certain distance while recording frames at regular intervals. These frames are then stitched together to create a video with a smooth, fast-motion effect, showing changes in space and time at the same time.
Simply put, if Timelapse is "capturing time" at a fixed point, then Hyperlapse is "capturing time + space" when the camera moves intentionally.
.png)
2. How is Hyperlapse different from Timelapse?
Both of these techniques are a form of fast-forwarding that helps viewers see movements that are difficult to see with the naked eye. Examples include the process of a tree growing, a driving vlog, a vlog about a day of studying, going out, or the movement of the Earth, etc.
Before diving into how to shoot Hyperlapse, it's important to clarify the difference between these two seemingly similar techniques to avoid confusion.
Element
Timelapse
Hyperlapse
Camera position
Permanent
Move
Target
Record changes over time
Recording changes over space + time
Technique
Simpler, easier to do
Requires more alignment and post-production
Device
Can be done with a tripod or fixed device
Requires a flexible tripod, slider, gimbal, or steady hand
.png)
Timelapse is often used to film sunrises, sunsets, people moving on the street, clouds drifting,... at a stationary point. Meanwhile, Hyperlapse is often used in scenes moving across the city, crossing the streets, or approaching architectural works in an impressive way.
3. When to use Hyperlapse and Timelapse
If you need to record the evolution and changes, choose timelapse mode, and if you need the camera to move, choose hyperlapse mode. Also, if you need to record over a long period of time, timelapse will be a more effective choice. This is because all cameras have limited memory and a certain recording time.
Technology is increasingly developing, many types of cameras have built-in hyperlapse features or have supporting and editing applications. In addition, there are many third-party applications that develop and provide this feature on phones and computers. Typical examples include Samsung Galaxy devices or Instagram's Hyperlapse software,... Now you can easily create your own Hyperlapse videos.
.png)
4. How to shoot Hyperlapse in photography
To create unique and in-depth Hyperlapse videos, you can refer to some of the steps below to create the most impressive videos:
Choose a location with plenty of space
Because the nature of Hyperlapse filming is to move around quite a lot. So to produce the best footage, you need to choose a filming location in a wide, open and flat place to easily move and change the camera angle. A small note when choosing a filming location is to limit crowded places, to avoid the video not having a fixed subject.
Choose how to move the lens
For those who are new to Hyperlapse, to avoid making the video confusing, you should choose to move in one way first, then you can combine the movements together. Currently, there are three most popular ways to move:
Move away from the selected subject
Move towards the selected subject
Move around the selected subject
Shoot in manual mode and in RAW format
Shooting in manual mode gives you full control over your camera to suit your needs. This ensures that all your shots are consistent and even. In RAW format, image data is preserved and post-processing is easier. However, saving images in RAW format will take up more memory card space than JPEG images.
.png)
Select and fix focus
The key to Hyperlapse is focus, which keeps your frame steady and stable, so that the resulting shots are consistent. If the subject in the frame has no focus or moves around a lot, it will be difficult to create a smooth and deep Hyperlapse film. To avoid this problem, you need to find a focal point to focus on, usually the edge of a roof or anything really prominent.
Determine and fix the focus of the video
In addition to using the camera to record and produce Hyperlapse videos, you can use third-party applications to easily do it. One example is the Hyperlapse software from Instagram, using this software is extremely easy through 4 simple steps, specifically as follows:
Step 1: Open the Hyperlapse app from Instagram, identify the object you want to film and choose the appropriate direction to film
Step 2: At the same time, press and hold the video recording button to record and when you want to end, just release it.
Step 3: Select the video speed on the slider, just press the tick to confirm and the video is complete.
Step 4: Click the Share button to share the video or save the video to your device.
.png)
5. Some tips to make Hyperlapse more impressive
To make your Hyperlapse truly stand out and look professional, it requires not only shooting techniques but also sophistication in choosing the scene, shooting time and patience during the process. Here are some useful tips to help you create more beautiful and impressive Hyperlapse products:
5.1. Prioritize subjects with clear structures
When creating a Hyperlapse, one of the key elements is frame consistency. Objects with clear shapes like buildings, structures, or roads with defined lines create a very appealing visual effect. These elements not only help to highlight the subject but also create a connection between frames, making the video smooth and easy to follow.
5.2. Avoid changing the light too much
Lighting directly affects the quality of the image and the emotion that Hyperlapse conveys. When the light changes continuously between frames, viewers can easily perceive inconsistency, losing the smoothness and continuity of the video. This is especially important when stitching frames together, when inappropriate changes in color and brightness can cause unwanted "jumping" points in the final video.
.png)
Hyperlapse is not a job for the hurried. Every little step in the process of moving and capturing images requires meticulousness and patience. A small mistake in one frame can cause an unwanted effect when stitching the entire sequence of images. Therefore, patience and attention to detail are the keys to a quality final product.
6. Applications of Hyperlapse in photography and media
Hyperlapse is not only an artistic video making technique but also widely applied in:
Tourism promotion: Vividly showing the beauty of the city and scenic spots.
Brand Video: Create impressive visual highlights in communication campaigns.
Social media: Hyperlapse content can easily go viral if it is combined with catchy music and an engaging layout.
Architecture & Construction: Shows how buildings change over time.
7. Related questions
If you are new to Hyperlapse or are considering using it in your creative work, you may have some questions like the ones below. Let’s find out!
Does Hyperlapse require expensive equipment?
Not necessarily! You can absolutely shoot Hyperlapse with your smartphone, as long as you prepare carefully and use image stabilization software. However, for more professional quality, you should use a camera with manual controls, combined with a tripod or gimbal to keep the smoothness.
.png)
Is it difficult to make a Hyperlapse video?
It may take a little time at first if you are just starting out, but once you get used to it, the process will be fun.
Some easy-to-use Hyperlapse video editing tools include:
Adobe Premiere Pro
Adobe After Effects
LRTimelapse (for pros)
Or mobile apps like Microsoft Hyperlapse, Hyperlapse from Instagram…
Is Hyperlapse suitable for social media content?
Very suitable!
Hyperlapses have the ability to make a strong impression in the first few seconds – which is extremely important on platforms like TikTok, Reels or Shorts. When combined with catchy music and beautiful colors, Hyperlapse videos can easily go viral.
Hyperlapse is a challenging and interesting technique in modern photography. Although it requires careful preparation and patience, the results are vivid, inspiring and powerful footage. If you are a photographer, content creator, or simply a lover of beauty - Hyperlapse is definitely a technique you should try at least once. And who knows, those patient steps may open up a new journey for you in image creation.


VIP Products


Best Selling Products
Upgrade genuine Capture One account
120 USD
Capcut Pro 1 Year
39 USD
Genuine Cheap Canva Pro
39 USD
Copyright Adobe Lightroom Account
59 USD
Freepik Premium Account
59 USD
MidJourney Account
29 USD
Upgrade Duolingo Super
29 USD
Autodesk All App Account Copyright
120 USD
Genuine Adobe Illustrator account
99 USD
Plugin Retouch4me
69 USD
ChatGPT Plus Account (GPT-4)
16 USD
Adobe Premiere Pro Account
99 USD
Adobe Photoshop Copyright - Full App
120 USD
Upgrade Genuine Office 365
49 USD
Windows 10 & 11 Pro Key
36 USD